Freak Fortress 2
| “ | The world will thank me for this, you monster!
Click to listen
— The Spy on fighting freaks
|
” |
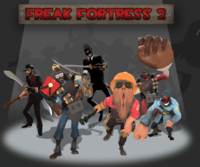
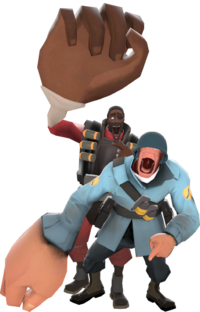
Freak Fortress 2 is a modification that extends the concept of VS Saxton Hale Mode. Like the original Saxton Hale mod, the mod changes the rules of Arena maps, making all players fight against a single, but very powerful boss.
Bosses are based on Community fads. Each has different abilities, but they share similar concepts and rules. All of them have relatively large amounts of health points, which varies, depending on the amount of opposing players. They are restricted to using melee attacks, though they deal a large amount of damage -- 210±10 points per hit -- enough to kill most classes in a single hit.
Bosses can also have forms of advanced movement, such as super-jump. They can also build "Rage" when damaged. When their rage meter is full, they can unleash a powerful attack, which causes an effect that varies depending on the boss they are playing as.
Contents
Gameplay demonstration
Strategy
Strategies against FF2 bosses are almost the same as strategies in VS Saxton Hale Mode.
Balance
Similar to VSH mode, Freak Fortress 2 has some weapon attributes changed.
All classes
- All melee weapons, excluding Spy's knives, are permanently crit buffed to make up for the risk of getting within melee range of the boss.
- Even if players wear the Saxton Hale Mask or the Horseless Headless Horsemann's Head, they will be affected by the "Boo" taunt that the Horseless Headless Horsemann used to stun players (as in Halloween).
 Scout
Scout
- The Shortstop's slower reload speed attribute is removed.
- Drinking the Crit-a-Cola will grant guaranteed full crits instead of mini-crits.
- Fan O'War decreases the Boss's rage meter by 5% on each hit instead of marking him for death.
- Candy Cane drops a small health pack on every hit, instead of every kill.
- All pistols deal mini-crits.
- The Baby Face's Blaster will fill the Boost meter normally, but when it reaches 100 percent, it will drain and you will get mini-crits.
- The Wrap Assassin has a second bauble.
 Soldier
- Battalion's Backup receives full rage when hit by the Boss. It lowers the Boss's damage when active.
- Rocket Jumper is not allowed in the mod and is replaced with the stock Rocket Launcher.
- Air Strike gets its clip size increased every 200 damage.
- Half-Zatoichi heals 35 health points per hit and may overheal 25 hp. Honorbound restriction is removed after a single hit, instead of each kill.
- Gunboats decreases 90% of fall damage in addition to reducing self-damage.
- Mantreads increase the height of rocket jumps, and also reduces fall damage in place of its normal stats.
- All primary and secondary weapons (excluding Dr. Grordbort's Victory Pack and the Direct Hit) deal mini-crits to airborne enemies.
- Direct Hit deals full crits on airborne targets.
- Reserve Shooter has slightly increased damage and weapon switching speed. It still deals mini-crits to airborne targets.
 Pyro
Pyro
- Both the Axtinguisher and Postal Pummeler are not allowed and are replaced with the stock Fire Axe.
- Both the Flare Gun and Detonator are replaced by the "Mega-Detonator" — a Detonator with significantly higher blast force, allowing the player to Flare jump much higher or further than usual.
- You are invincible when activating the Mmmph from the Phlogistinator.
- Reserve Shooter has slightly increased damage and weapon switching speed. It still deals mini-crits to airborne targets.
 Demoman
- The Chargin' Targe, Splendid Screen, and Tide Turner prevent the first hit from the boss each round instead of their normal attributes. The shield is destroyed by the hit and cannot be used again during the round.
- Equipping any shield will cause the player's primary weapon to be crit boosted.
- The Tide Turner recharges after each hit, instead of each kill.
- Sticky Jumper isn't allowed and is replaced with the stock Stickybomb Launcher.
- Half-Zatoichi heals 35 health points per hit and may overheal 25 hp. Honorbound restriction is removed after a single hit, instead of each kill.
- The Eyelander, Horseless Headless Horsemann's Headtaker, and Nessie's Nine Iron collect a head from each hit, instead of each kill.
 Heavy
Heavy
- Natascha isn't allowed and is replaced with the stock Minigun.
- Fists of Steel aren't allowed and are replaced with the stock Fists.
- Both the Killing Gloves of Boxing and Gloves of Running Urgently increase speed by 50%, but deal 7 points of damage when drawn, instead of their normal attributes.
 Engineer
- Metal from pickups is limited, as all maps only have small ammo pickups.
- Frontier Justice grants revenge crits when the Sentry Gun is either aiming at or shooting the Boss, instead of when the Sentry is destroyed.
- All pistols deal mini-crits.
- The Short Circuit's beam will temporarily stun the boss.
- Eureka Effect isn't allowed and is replaced with the stock Wrench.
 Medic
Medic
- All mediguns are replaced with a custom Kritzkrieg with an increased charge rate and the following changes:
- ÜberCharge grants both invulnerability and crit-buff for Medic and his patient.
- ÜberCharge lasts 50% longer than usual.
- The Medic begins every round with 40% Übercharge and receives 40% back after the end of an ÜberCharge.
- All syringe guns are replaced with Custom Syringe Gun, which grants +5% ÜberCharge on hit.
- The Crusader's Crossbow is crit buffed, has damage is increased by 50%, and grants +10% ÜberCharge on a successful hit.
 Sniper
- All passive secondary weapons are replaced with the SMG.
- Jarate lowers the the boss' rage meter by 10% on hit, but does not grant mini-crits.
- All of Sniper's weapons do 2.9x damage.
- The Bazaar Bargain isn't allowed and is replaced with the stock Sniper Rifle.
- A hit from a Sniper Rifle marks the boss, causing him to be visible through walls to the entire team for several seconds. The duration of this effect depends on the power of the shot.
- The Huntsman's damage is increased by 50%.
- The Hitman's Heatmaker will gain focus on each hit, and focus gained varies on the charge of the shot.
- The Sydney Sleeper does 2.4x damage against the boss when the boss's rage is less than 90 percent. When it goes over 90 percent, it does 2.9x damage.
- The Cozy Camper gives you a submachine gun with no Crits and reduced damage, in addition to its attributes.
 Spy
Spy
- A successful backstab will deal about 10% of the Boss's health.
- All players, including the boss, are informed when a Spy successfully backstabs the boss.
- The knife cannot be used for 2 seconds after a successful backstab.
- The Dead Ringer is also unusable for 2 seconds after a successful backstab.
- A successful backstab with the Your Eternal Reward disguises the Spy as a random teammate.
- A successful backstab with The Conniver's Kunai heals the Spy 60 health points, allowing the Spy to overheal himself up to 250 points.
- All Revolvers deal mini-crits.
- The Cloak and Dagger isn't allowed and is replaced with the Enthusiast's Timepiece.
- The Dead Ringer will only block the first hit and feign death. After you feign death and stay invisible, you will not be able to survive a hit, and colliding with the boss will make you partially visible.
- The Invisibility Watch will block a hit from the boss while you stay cloaked. You will also stay invisible if you collide with the boss.
Bosses
Bosses have several advantages over regular players, assisting them with taking on entire teams. Some abilities are specific to certain bosses, but they all have the following:
- Super Jump: To use the super jump, hold down the right mouse button while looking upwards and then release it. The Super Jump is a very high jump, giving similar height to a rocket jump. This allows the boss to reach certain areas, or to surprise players by attacking from an unexpected angle. The longer the button is held down, the higher the jump will be. This also allows the boss to escape pits that would normally kill a player. When in such a hazard, the jump becomes much stronger, and is called a Super Duper Jump.
- Weighdown: To use this ability, crouch and look down while in mid-air. Causes the boss to fall much faster than normal players. This makes it much harder to juggle the boss.
- Speed up: Most bosses have a similar ability to The Escape Plan, causing them to speed up as they are injured. By default, bosses begin the round with the movement rate of a Medic (107%), which increases to that of a Scout (133%) when severely injured.
- Rage: Bosses have a rage meter, which builds when they take damage. When the rage meter is full, the boss can execute a taunt with a devastating effect. The effect is different for each boss, but all taunts will scare players within a certain radius. Rage requires 1900 damage by default to build a full charge.
- Health: Bosses have a massive amount of health, which increases with the number of players. The basic health formula is:
[(460+n)×n]1.075 where n is the number of players.
Certain bosses may have more or less health than the default. For example, the Ninja Spy has a third of the health of other bosses, using the formula: [(460+n)×n]1.075/3
Christian Brutal Sniper
| “ | It's like Christmas morning...
Click to listen
— Christian Brutal Sniper on the hunt.
|
” |
- Health formula: [(460+n)×n]1.075
- Super Jump & Weighdown
- Rage: The Sniper gets a Huntsman and 9 arrows.
- Scare radius — ~9 meters.
- 1900 damage to activate.
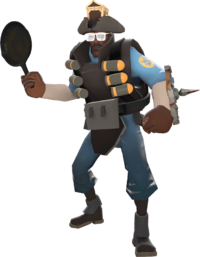
Demopan
| “ | Stout Shako for two refined!
Click to listen
— Demopan on effective trading.
|
” |
- Health formula: [(460+n)×n]1.075
- Super Jump & Weighdown
- Rage: The Demopan's rage fills every opponent's screen temporarily with fake trade requests, blocking their screen.
- Scare radius — 15 meters.
- 1900 damage to activate.
- Charge: The Demopan charges. This is the same as the ability of the Chargin Targe. This is used by reloading as the RMB is already bound to the rage taunt. This ability drains rage and is only possible if the Demopan has between 10% and 90% rage.
- Unlike other bosses, the Demopan has the move speed of a regular Demoman (93%).
- An enemy killed by the Demopan turns into a Stout Shako.
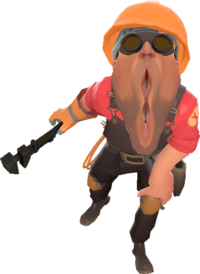
Vagineer
| “ | Grrrrr...!
Click to listen
— Vagineer on everything.
|
” |
- Health formula: [(460+n)×n]1.075
- Super Jump & Weighdown
- Rage: The Vagineer is Übercharged for 10 seconds.
- Scare radius — 10 meters.
- 1900 damage to activate.
- Enemies killed by the Vagineer are vaporized - the same death effect as the Cow Mangler 5000's.
Seeman and Seeldier
| “ | See?
Click to listen
— Seeman asking Seeldier about all the dead bodies around
|
” |
- Seeman and Seeldier appear together, played by different players. They are individually weaker than the other bosses, but they make up for this by working together.
- Health formula: [(460+n)×n]1.075/2.8 : Seeman and Seeldier each have a little more than a third of the health of another boss.
- Super Jump & Weighdown
- Rage (Seeman): Seeman stuns nearby players and then kills them in a large series of explosions. The boss cannot move, and, visually, the Seeman's limbs spin rapidly out of control for the duration of the rage.
- Scare/Blast radius — 13 meters.
- 1900 damage to activate.
- Rage (Seeldier): All players who have been previously killed are resurrected as clones of the Seeman, but with much less health and no special abilities. If Seeldier dies, all these minions die.
- Scare radius — 15 meters
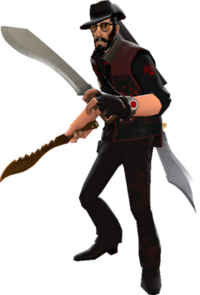
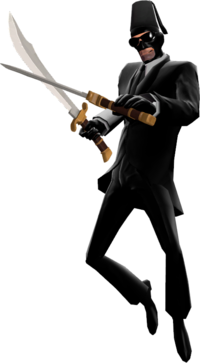
Ninja Spy
| “ | I'm Ninja Spy... and you SUCK!
Click to listen
— Ninja Spy on your skill.
|
” |
- Health formula: [(460+n)×n]1.075/3 : Ninja Spy has a third of the health of other bosses, but makes up for it with his 3 lives.
- Super Jump & Weighdown
- Rage: Ninja Spy's rage only scares players, but has a longer range than most other bosses. It also builds slower; a full charge takes 2500 damage instead of 1900.
- Scare radius — 18 meters.
- 1900 damage to activate.
- 3 lives: The Spy has three lives. When he would be killed on his first and second, he is restored to full health and time slows down for 10 seconds. During this time, he can teleport to players.
VS Saxton Hale Mode bosses
Saxton Hale
| “ | The name's Saxton Hale! Australian, C.E.O. of MANN Co. and the man who's gonna burn this place to the ground!
Click to listen
— Saxton Hale
|
” |
- Health formula: [(460+n)×n]1.075
- Super Jump & Weighdown
- Rage: Nearby Enemies are scared.
- Scare radius — 20 meters
- Hale has the largest scare radius of any default boss.
- 1900 damage to activate.
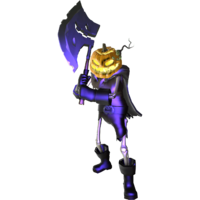
Headless Horseless Horsemann Jr.
- Health formula: [(460+n)×n]1.075
- Super Jump & Weighdown
- Rage: Nearby Enemies are scared
- Scare radius — 17 meters.
- 1900 damage to activate.
- Teleportation: Instead of a superjump, the Horsemann can teleport to the last person that damaged him. The teleport requires a much longer time to recharge, which scales with use. The Horsemann is temporarily stunned after teleporting.
The Easter Bunny
| “ | It's on! It's on like... huh? Wha-?
Click to listen
— The Easter Bunny
|
” |
- Health formula: [(460+n)xn]1.075
- Super Jump & Weighdown
- Rage: Nearby Enemies are scared, and the Easter Bunny projects around him several explosive eggs (Loose Cannon grenades) that do the same amount of damage as a Demoman's crit grenade.
- Scare radius — ~10 meters.
- 1900 damage to activate.
- The Easter Bunny is affected by Sentry Gun bullets' projection, whereas the other Hales can stand in front of them.
Community bosses
Freak Fortress 2 was created to make the possibility of creating your own bosses easier, allowing server administration to add content inside the mod without ruining the system itself. Instructions on how to add bosses can be found here
GentleSpy
- Health formula: [(760+n)×n]1.04
- Weighdown
- No Super Jump
- Rage: Nearby Enemies are changed to other team for about 5 seconds. Ubercharge for 5 seconds. Instant teleportation to the random enemy. Ambassador with 3 bullets.
- Scare radius — 12 meters.
- 2500 damage to activate.
Bugs
- Bosses will drop the corpse of a "real" class after death.
- The items Schadenfreude, Director's Vision, High Five!, and Shred Alert can be used by the bosses but lack facial animations when used.
- Demopan's Trade Spam ability may conflict with other server plugins using the in-game command r_screenoverlay. If this is the case, it may display incorrectly.
- If by the time Seeldier performs rage Seeman is dead, he will respawn with 1 hp.
- On exceedingly rare occasions the boss will appear to have a negative amount of health.
Trivia
- This mod was created by RainBolt Dash in April 2012, based on VS Saxton Hale Mode's 1.38 version, which he also created. Versus Saxton mode is now under development by FlaminSarge.
- All of the default bosses are based on community fads, excluding Saxton Hale and Headless Horseless Horsemann Jr.
See also
External links
- Freak Fortress 2 mod on AlliedMods
- Updated Freak Fortress 2 mod on AlliedMods
- VSH mod on AlliedMods
- Random Fortress forum, the birthplace of the VSH and FF2 mods.
- Official VSH and FF2 Steam group
| |||||
