Haarp
 | “I built that.” This page contains information about a custom map that is not an officially released Team Fortress 2 map. All released Valve and Community-made TF2 maps can be found on the list of maps. |
| Haarp | |
|---|---|
| |
| Basic Information | |
| Developer(s): | {{{map-developer}}} |
| Map Photos | |
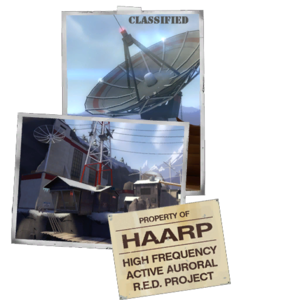
| “ | In the snowy Alaskan wilderness, they've built antenna arrays and a gigantic satellite dish. But what you don't know is it's really a DOOMSDAY DEVICE that could potentially END THE WORLD AS WE KNOW IT. Blue must infiltrate the base and deliver the shutdown override codes before DEATH AND DESTRUCTION RAINS DOWN ON THE WORLD (or something).
— HAARP promotional text
|
” |
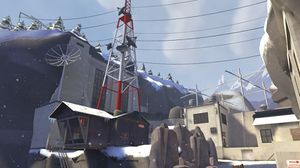
HAARP is an Attack/Defend Capture the Flag map created as an entry for the TF2Maps.net A/D CTF and Payload Race Contest. It won first place in the Attack/Defend CTF category.
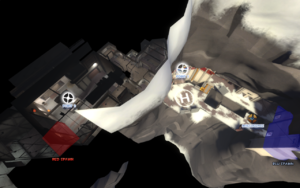
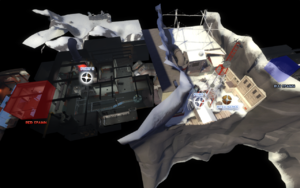
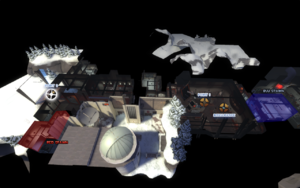
The map is divided into three stages; in each stage, BLU must deliver their intelligence to two control points while RED defends. The intelligence spawns outside of BLU spawn, where it can be picked up.
Locations
Stage A, Capture Point 1
The capture point is just inside RED's base, accessible either by going straight out of BLU spawn outdoors, or heading to the right into enclosed hallways. The area itself is a mix of interior rooms and a platform on the side of a high cliff.
Stage A, Capture Point 2
Capture Point 2 is just outside RED's spawn deep inside RED's base. The point itself is inside of a small room with a windowed wall facing out into a large, warehouse-like structure.
Stage B, Capture Point 1
Stage B's first capture point is located in a small wooden shack underneath a radio antenna. Both structures, along with another small shack, are located atop a rocky plateau that BLU must reach.
Stage B, Capture Point 2
Stage B's second capture point sits at the end of a long, trench-like path inside of a building. The actual point sits underneath a large glass structure; the path is surrounded on either side by platforms. RED's spawn is located just up a set of stairs from the point.
Stage C, Capture Point 1
Stage C's first capture point is located inside a small, roofless area overlooking BLU's spawn and made to resemble a security or control room. On one side, stairs lead up to a narrow path that leads to the capture point. On the other side, a wide path leads to a similar spot.
Stage C, Capture Point 2
HAARP's final capture point is located at a desk in an office at the far end of a large open room. RED spawns are located on either side of the point and a lone wall offers the only cover in the open area. There are two entrances for BLU to enter, one directly across from the capture point room and the other directly to the side of the first entrance.
Strategy
Stage A, Capture Point 1
- The first capture point for BLU is to the right of the entrance furthest from spawn. Do not take the stairs on the left to try and reach it, a mistake commonly made by those unfamiliar with the map.
- BLU Soldiers and Demomen can reach the window adjacent to the first capture point with a well-timed rocket jump or sticky jump. This makes them, along with Scouts, ideal for carrying the Intelligence to the first capture point.
- RED Engineers should place Sentry Guns on the small raised platform near the capture point or near the stairs to Capture Point 2 for maximum defensive efficiency. While building a Sentry Gun in the first capture point's window is possible, it also completely exposes the Sentry Gun to long-range fire from Snipers, Soldiers and Engineers using the Wrangler.
- One of the stairways in Stage A has a landing in the middle where a well placed Sentry Gun can almost entirely block one entryway into RED's base.
Stage A, Capture Point 2
- RED Engineers should build a Sentry Gun along the wall nearest to their spawn for Stage 1. A path to the capture point is exposed on that side, as well as the point itself, leaving RED possibly vulnerable to sneak captures.
- Likewise, on offense, if BLU notices no Sentry Gun on the side nearest to RED's spawn, they can send a Scout with the Intelligence up the side and quickly double jump into the capture point for an easy victory. However, this should be avoided if enemies can be spotted on the capture point itself, as their presence will prevent any capture while they are there.
- Demomen equipped with Stickybomb Launchers or the Scottish Resistance should guard the upper entrance to Capture Point 2 with the door. The other upper entrance can be guarded by Pyros, who can make good use of the blind corner.
- BLU Engineers can build a Teleporter, Dispenser and Sentry Gun in the small room with the door, as RED cannot attack there easily while the door is closed.
Stage B, Capture Point 1
- RED should take advantage of the plateau's height to kill BLU as they exit spawn near the Intelligence. However, they should note that a wall in front of the Intelligence spawn point will prevent them from easily killing or camping the Intelligence if BLU ducks behind it. Soldiers using the Rocket Launcher or Black Box, or Demomen with the Stickybomb Launcher or Scottish Resistance, may still be able to deal damage, however.
- Pyros should make use of the open edge on the path leading underneath the capture point, as their compression blast can push enemies off.
Stage B, Capture Point 2
- BLU should always be wary of attacks from above when inside the trench. The platforms extending out over the trench offer Pyros and other classes excellent opportunities to ambush from above.
- The corridor leading into the main room offers BLU Medics a staging area to build a charge; BLU Engineers can build Teleporters here if they wish, though due to the proximity of BLU spawn, they may not be necessary.
- Since the capture zone has only one entrance, RED can station a Heavy and Medic on the point to prevent captures by BLU.
Stage C, Capture Point 1
- BLU Soldiers and Demomen carrying the Intelligence can reach the capture point directly with a well-timed rocket jump or sticky jump. RED should keep this in mind when setting up their defenses to prevent a quick capture.
- It is possible for Heavies to get on top of the glass surrounding the capture point, thus allowing them to shoot down at BLU as they try to grab the Intelligence.
Stage C, Capture Point 2
- Because both entrances to the final capture point are in the same room and on the same wall, this part of the map is incredibly prone to being a chokepoint. RED Engineers have multiple places to build Sentry Guns that can target BLU at both entrances. Those on BLU will likely need to build up 1-2 ÜberCharges to break through RED's defense should they have Sentry Guns waiting.
- Additionally, RED Engineers can build Sentry Guns right outside of their spawns on either side of the capture area to deter BLU.
- It is also possible to build on the area surrounding the final capture point, especially along one of the walls, which has a tiny outward overhang. This can prevent BLU Intelligence carriers from being able to progress up into the room itself.
- The long corridor also provides Snipers with an opportunity to kill multiple attackers using the default Sniper Rifle.
- In any case, BLU should not blindly charge the final capture point, but should instead push as a large, collective group to battle through RED's defenses. Multiple Medics may be needed alongside Heavies, Pyros and Demomen, depending on the number of Sentry Guns in place.
Update history
Gameplay Changes:
- Raised blue spawn time in stage 2 a bit to help blue respawn with teammates
Layout changes:
- new path into the area near CP 1-2
- Removed detail blocking part of the main path leading to CP 2-2
- New window overlooking CP 2-2
- Changed the right side-path leading up to CP 3-1
- Changed the right side-path leading to the final CP to give blue a balcony
- Added a new particle effect for the reactor over CP 2-2
- Improved the skybox
- Various detail improvements all-around
ctf_haarp_b2
Gameplay Changes:
- Rebalanced to help Red out.
Layout changes:
- Huge boost in framerate.
- Removed all custom particles, since that custom particle glitch still hasn't been patched.
- Tweaking of geometry here and there for balancing, and for ease of movement.
ctf_haarp_b1
Gameplay Changes:
- Overtime removed
- Red's spawn times are slightly increased.
Layout changes:
- Added skybox, snow, models, and other wonderous things.
- All capture points have new computer models that are uniform throughout the map.
- Added a small wall to nerf a sentry spot at CP 1-2
- Added a side path near CP 2-2, and edited the area under the AC unit to be a new path for Blue, rather than a sentry spot for Red.
- Changed around some health and ammo locations leading up to CP 3-2.
Trivia
- According to the map's development thread on TF2Maps, HAARP is named after the real-life Template:W (HAARP), a United States-run ionospheric research program located in Alaska that is popular among conspiracy theorists. It is also named after the Muse live album Template:W, whose name is taken from the same program.
Screenshots
| ||||||||||||||||||||||||||||||||||||||||||||||||
