Community Offblast strategy
| “Sun Tzu's got nothing on us!” This article is a Community strategy stub. As such, it is not complete. You can help the Team Fortress Wiki Community Strategy Project by expanding it. Notes: Expand the "General Strategy" section to cover map locations in more detail. Potentially look at the class-specific strategies as well. |
| Offblast | |
|---|---|

| |
| Basic Information | |
| Map type: | Arena |
| File name: | arena_offblast_final
|
| Released: | August 13, 2009 Patch (Classless Update) |
| Developer(s): | Magnar "insta" Jenssen |
| Map Info | |
| Environment: | Desert |
| Setting: | Daylight, sunny |
| Hazards: | Pitfall |
| Map Items | |
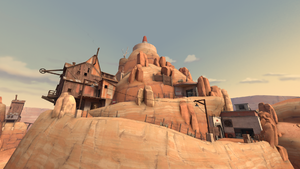
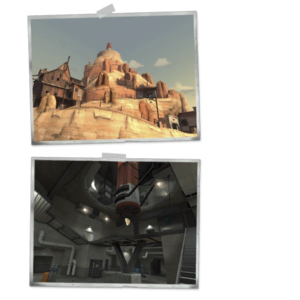
| Map Photos | |
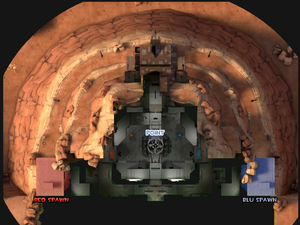
| Map Overview | |
This article is about Community Offblast strategy.
Note: It is recommended to read the main Offblast article first to become familiar with the names of key map locations used in this article.
General strategy
- Classes with high knock back potential will benefit most from the long drop that accompanies being pushed off the ledges on the sides of the map.
- The pipes which sit against the wall above the lower entrances to the main room are solid and can be stood on. This is an excellent perch position for a Scout to have the element of surprise on incoming enemies.
- The various light posts on the outer pathways outside the spawn rooms can be stood on and used by Soldiers, Demomen and Scouts as high positions to both observe the battlefield and have an out-of-sight drop on isolated enemies. Be advised, this position is highly susceptible to classes that have a knock back ability, and should only be used in specific circumstances.
- The trucks in both teams' spawn rooms can be jumped inside, and provide excellent cover under darkness for any class attempting to hide or heal. These are ideal spots for a Sniper to hide and await an oncoming rush, or to pick off unsuspecting stragglers.
Class-specific strategy
 Scout
Scout
- Scouts work very well with this map, as their double jump ability allows them to jump off the cliff, then back on to avoid damage. However, this is a very risky move, as they can be knocked off the cliff while trying to dodge fire, or can simply mistime their jump.
- Using the Force-A-Nature can be a double-edged sword on this map, as the knockback can effectively push enemies off of the cliff. But if miscalculated, the knock-back can send you down as well.
- Either attack from high ground or setup an ambush to narrow the odds of this fatal drawback.
- Using the Sandman can be very useful as you can launch a baseball through the support beams in the lower capture point area to get a maximum stun on an unwitting enemy walking through the tunnels.
- The Shortstop provides a health bonus from healing sources, but take care around the cliff, the extra knockback can put more distance between you and the ground - and not down the mountain!
 Soldier
- Soldiers can easily defend the middle capture point due to the high level of elevation which provides easy shots of rockets down to the lower elevations.
- If your team has no Medics or Engineers, the Black Box is highly recommended, as there is only one small health pack on this map.
- You can also hold down more areas with the health on hit to stray from the small health pack!
 Pyro
Pyro
- The compression blast is your friend on this map. Use it to push enemies off the edges of the map to their death.
- One of the better places to do this is at the pathway just under the house.
- Take your time when ambushing the enemy team, afterburn is a serious boon in Offblast, as it can make the enemy much more predictable on where they will go. That said, wait around corners and for possible distractions from your team; that's your time to shine.
 Demoman
- A Demoman may be useful inside the House as you can place Stickies by the stairs as a trap.
- Try to use the knock back from Stickybombs to knock people off the cliff.
- The Persian Persuader can help the need for extra health! Be careful, however, you are now limited on ammo until the round ends.
- If you do not want to use a Demoknight set with this melee, consider using the Loch-n-Load, as it strays from spam techniques, and preserves ammo.
- The Iron Bomber can be used to temporarily deny safe areas away from a cliff or strategic position (such as the health kit room). You can coordinate with your team to attack the new 'chokepoint' for easy damage.
- If your team has a Medic, consider using the B.A.S.E. Jumper and blast jumping across the cliff area. Although risky, you will be able to massively damage anybody taking this path. Strafe back before losing too much altitude to ensure a safe landing on friendly ground.
 Heavy
Heavy
- By jumping off some of the higher level areas with your Minigun revved, you can ambush enemies below.
- Be careful spinning your gun around the cliff, one Pyro can blast you off the mountain before you can cry 'Sandvich'. Use the Shotgun to stay mobile around the cliff.
- If you have the Sandvich or Buffalo Steak Sandvich equipped, you can "transform" the small health pack on this map into a medium-sized one for your allies! Just make sure you have full health, or this will not work!
- The Dalokohs Bar can be used as a much more opportune source of health over other food items, especially when sharing for everyone. Keep in mind that the chocolate for your teammates will only recover minor wounds and might not make them quite battle ready yet.
 Engineer
- Engineers are difficult to use with the default Wrench on Offblast, as there are many good perches where a Demoman or Soldier can sit and take out a Sentry Gun or Dispenser from outside its range.
- Using a Mini-Sentry an Engineer could push forward and place the Mini-Sentry in a favorable position covering the health-pack.
- Offblast can be an intimidating map to play without a backup plan if all goes south. Inform your team where you are setting up and to protect your nest.
- Scouts will generally not have the chance to ambush early in the round if you set up on the cliff side. At this point, your only threat should be the Spy. Equip the Southern Hospitality for early defense; your Sentry will protect you, and your Wrench will punish Spies.
 Medic
Medic
- Since there is only one small health pack , Medics are highly valued, but since a Medic's Syringe Gun is difficult to effectively use and a Medic can't attack while using their Medi Gun, they are a prime target for enemies.
- If you are using the Kritzkrieg, remember that you can do the Oktoberfest taunt to heal yourself!
- The capture area can be a difficult area to push in, as you can be seen before you reach the objective. Your only advantage is where your team will push from. The Kritzkrieg best suits this surprise style, use it if you are unsure about holding the point.
 Sniper
- Snipers are difficult to use on Offblast due to the close range confines of the map. Despite this, players have been known to dominate the map by taking out people from around corners using the Huntsman, Jarate, and the Bushwacka to eliminate those unprepared for the assault.
- Below the cliff house, shoot a Huntsman arrow through the alley to headshot flankers and gain a First Blood boost.
- Use the First Blood crits with your SMG to deal significant damage and letting your team pick off the opposing team.
- Below the cliff house, shoot a Huntsman arrow through the alley to headshot flankers and gain a First Blood boost.
- You are more useful going to the point rather than flanking through the cliff side. Go through the center building with teammates, it's the safest way for you to deal damage and be protected.
 Spy
Spy
- Spies are difficult to effectively use, as this map usually sports an abundance of Pyro players, attempting to use their Compression blast on enemies that are unlucky enough to wander too close to the edge. However, if used effectively, a Spy can be a devastating opponent, as there are many small (not to mention dark and secluded) corners on this map.
- Staying near to the medkit could let the Spy pick off already weak opponents heading for a heal.
- Offblast has little room to get out of bad situations, regardless of class. If you are spotted either making a kill or simply blowing your cover, the Dead Ringer or Big Earner can give you a swift escape! If you're not confident in your Spy play, use the Dead Ringer, and the latter if you can make use of the speed without sacrificing invisibility.

