Demoman
| Demoman | |
|---|---|
https://wiki.teamfortress.com/w/images/e/ec/Demoman_RED_3D.jpg?1701879328.7142653640,276,280,1,0,277,57,126,275,69,255,272,69,397,268,69,546,267,69,708,269,73,890,270,81,1079,269,92,1263,268,106,1428,267,106,1581,264,101,1720,261,97,1840,258,96,1949,254,86,2069,250,74,2201,248,64,2343,249,57,2489,254,49,2636,259,29,2795,265,13,2958,270,2,3123,274,0,3295,277,7,3464,278,27https://wiki.teamfortress.com/w/images/9/9d/Demoman_BLU_3D.jpg?1701879407.3076783640,276,280,1,0,277,57,126,275,69,255,272,69,397,268,69,546,267,69,708,269,73,890,270,81,1079,269,92,1263,268,106,1428,267,106,1581,264,101,1720,261,97,1840,258,96,1949,254,86,2069,250,74,2201,248,64,2343,249,57,2489,254,49,2636,259,29,2795,265,13,2958,270,2,3123,274,0,3295,277,7,3464,278,27https://wiki.teamfortress.com/w/images/1/19/Demoman_%C3%9CberCharged_RED_3D.jpg?1701879498.5408563640,276,280,1,0,277,57,126,275,69,255,272,69,397,268,69,546,267,69,708,269,73,890,270,81,1079,269,92,1263,268,106,1428,267,106,1581,264,101,1720,261,97,1840,258,96,1949,254,86,2069,250,74,2201,248,64,2343,249,57,2489,254,49,2636,259,29,2795,265,13,2958,270,2,3123,274,0,3295,277,7,3464,278,27https://wiki.teamfortress.com/w/images/d/dc/Demoman_%C3%9CberCharged_BLU_3D.jpg?1701879655.225733640,276,280,1,0,277,57,126,275,69,255,272,69,397,268,69,546,267,69,708,269,73,890,270,81,1079,269,92,1263,268,106,1428,267,106,1581,264,101,1720,261,97,1840,258,96,1949,254,86,2069,250,74,2201,248,64,2343,249,57,2489,254,49,2636,259,29,2795,265,13,2958,270,2,3123,274,0,3295,277,7,3464,278,27
| |
| Basic Information | |
| Icon: | 40px |
| Type: | Defensive |
| Health: | 175 / 260 150 / 225 with the Eyelander or HHHH equipped 210 / 315 with the Eyelander or HHHH fully charged 160 / 240 with the Claidheamh Mòr equipped |
| Speed: | 93% 79% with the Scotsman's Skullcutter equipped 123% with the Eyelander or HHHH fully charged |
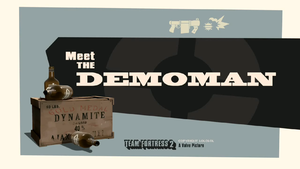
| Meet the Demoman | |
| |
| “ | One crossed wire, one wayward pinch of potassium chlorate, one errant twitch...and kablooie!
Click to listen
— The Demoman
|
” |
A scrumpy-swilling drunken demolitions expert from the Scottish highlands, the Demoman (real name Tavish DeGroot) is one of the more versatile members of the team. Though his weapons lack pinpoint long-range accuracy, the Demoman is a powerful (if unpredictable) asset, and can hold his own in just about any situation. He is a master of explosives, excelling at indirect, mid-range combat. Armed with his Grenade Launcher and Sticky bombs, the Demoman uses his only good eye and knowledge of the surrounding environment for well-timed detonations that send enemies skyward.
The Demoman excels at swift disassembly; he can bounce his grenades in creative angles to wreak havoc on enemy Sentry Gun emplacements while remaining safely out of sight. His sticky bombs are a perfect tool for area denial, and are effective in keeping opponents away from any carts, control points and Intelligence cases he deems off-limits.
The Demoman is voiced by Gary Schwartz.
Contents
Bio
|
Basic Strategy
Weapons
Note: Weapon damage is approximate and listed at base value. See individual weapon pages for additional figures.
Primary
| Weapon | Kill Icon | Ammo Loaded |
Ammo Carried |
Damage Range | Notes / Special Abilities |
|---|---|---|---|---|---|
Stock Grenade Launcher |
4 | 16 | On direct hit:
After bounce:
|
| |
Craft / Drop The Loch-n-Load |
2 | 16 | On direct hit:
|
|
Secondary
| Weapon | Kill Icon | Ammo Loaded |
Ammo Carried |
Damage Range | Notes / Special Abilities |
|---|---|---|---|---|---|
Stock Stickybomb Launcher |
8 | 24 | Directly underneath:
|
| |
Unlock / Craft / Drop / Uncrate Chargin' Targe |
N/A | N/A | Full charge:
|
| |
Unlock / Craft / Drop / Uncrate Scottish Resistance |
8 | 36 | Directly underneath:
|
| |
Craft Sticky Jumper |
8 | 72 | Directly underneath:
|
|
Melee
| Weapon | Kill Icon | Ammo Loaded |
Ammo Carried |
Damage Range | Notes / Special Abilities |
|---|---|---|---|---|---|
Stock Bottle |
N/A | N/A | Base: 65
Crit: 195 |
| |
Unlock / Craft / Drop Eyelander |
N/A | N/A | Base: 65
Crit: 195 |
| |
Craft / Drop / Uncrate Pain Train |
N/A | N/A | Base: 65
Crit: 195 |
| |
Craft / Drop Scotsman's Skullcutter |
N/A | N/A | Base: 78
Crit: 234 |
| |
Promotional Frying Pan |
N/A | N/A | Base: 65
Crit: 195 |
Promotional item from Left 4 Dead 2: The Sacrifice. | |
Craft Horseless Headless Horsemann's Headtaker |
N/A | N/A | Base: 65
Crit: 195 |
Halloween item. | |
Craft / Drop / Uncrate Claidheamh Mòr |
N/A | N/A | Base: 65
Crit: 195 |
| |
Craft / Drop Ullapool Caber |
N/A | N/A | Base: 35 (149) 1
Crit: 105 (300) 1 |
|
1 Explosion damage is determined by the distance from the explosion.
Taunt attack
 |
Associated item | Description | Kill Icon |
|---|---|---|---|
See also: Decapitation
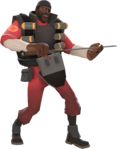
The Demoman swings his sword around, slashes in front of him, then cleans the blade with his hand. |
Item sets
| The Expert's Ordnance | |
|---|---|

|
|
| Effect |
No effect |
- Wearing the Chargin' Targe with The Expert's Ordnance will only give the Demoman 55% Fire Damage Resistance instead of 60% because 50% of 100 is 50% (Chargin' Targe) and 10% of the remaining 50% is 5% (The Expert's Ordnance), which will add up to 55%.
- Wearing the Sticky Jumper with The Expert's Ordnace will only give the Demoman 80% Fire Damage Vulnerability instead of 90% because 100% plus 100% (Sticky Jumper) is 200% and 10% of the resulting 200% is 20% (The Expert's Ordnance), which will add up to 180% Fire Damage = +80%.
Hats
| |||||||||||||||||||||||||||||||||||||||||||||||||||||||||||||||||||||||||||||||||||||||||||||||||||||||||
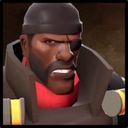
Official class avatars
| Official class avatars | ||
|---|---|---|
| Original set | RED ÜberCharged set | BLU ÜberCharged set |
|

|

|
| Get TF2 avatars on Steam: Original | ||
Achievements
Main article: Demoman achievements
|
Trivia
- The Heavy and the Demoman are both voiced by Gary Schwartz.
- The beta prototype of the Demoman was supposed to have a stereotypically Scottish appearance, consisting of pale skin, red hair and a beard. It was later dropped for the actual black Scottish style both because the former lacked originality and because the latter was easier to differentiate from the other classes.
- The HUD icon of the Demoman is inverted horizontally, as he is depicted as left-handed. The Demoman's eye patch is also on the wrong eye.
- The WAR!: The Demoman lost the seven-day War waged between him and the Soldier, thus losing out on his chance to obtain the Gunboats.
- He was a part of the KritzKast contest as well, in which contestants submitted what they thought the Demoman says in the censored portion of the Meet the Demoman.
- The emblem on the Demoman's arm was originally a bomb, then later changed to a stick of dynamite, and is currently a sticky bomb, as of November 19, 2010.
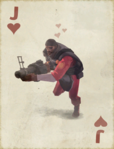
- In Template:W, an image of the RED Demoman makes a cameo as the Jack card for the red suits (hearts and diamonds) in the "TF2" card deck.
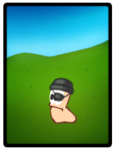
- The Demoman's eyepatch and beanie make an appearance in Template:W as one of the hats selectable hat for the player's worms.
Related Merchandise
Reference
- ↑ a b Team Fortress 2 Trailer 2, released in September 2006.
See also
- Meet the Demoman
- Demoman match-ups
- Demoman taunts
- Demoman marketing poses
- Demoman responses
- Demoman voice commands
- Sticky jump
- Juggling
- Basic Demoman strategy
- Community Demoman strategy
- List of references (Demoman)
- Demoman (Classic)
- Merchandise
External links
- WAR! Update
- WAR! Update - The Demoman Update
- The Demoman comic
- TF2 Official Blog - A Grim Bloody Fable!
- TF2 Official Blog - Attention Employees...
- TF2 Official Blog - The War Update!
- TF2 Official Blog - It's a Bloodbath!
- TF2 Official Blog - War, Day 2
- TF2 Official Blog - Casualties of War!
| |||||
| ||||||||||||||||||||||||||||||||||||||||


