Granary (Control Point)
| このページの内容は日本語へ翻訳中です。 もしあなたが日本語話者で編集して頂ける場合は、トークページにその旨を記していただくか(編集履歴のページを参照して)このページを過去に編集した人たちと話してください。 |
| Granary (Control Point) | |
|---|---|

| |
| インフォメーション | |
| Variants: | アリーナ |
| 製作者 | {{{map-developer}}} |
| マップ情報 | |
| 環境 | Farmland |
| 時間帯・天気: | Daylight, sunny |
| マップ画像 | |
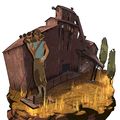
| マップ俯瞰図 | |
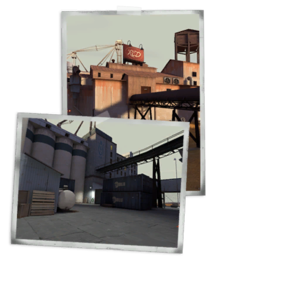
Granary は標準のコントロールポイントマップです。各チームの目的は、ラウンドを制するために5つすべてのコントロールポイントをキャプチャーすることです。両チームはすでに自陣よりの2つのCPをキャプチャーしてあり、中央に中立でロックされていないポイントを奪い合うところから始まります。
Like all other five-point Control Point maps, such as Well, only the two control points nearest to each other can be captured by the enemy side. All other control points have a lock symbol on them in the HUD and cannot be taken by either side.
目次
Introduction video
Locations
Control Point 1 & 5
At the ends of each map are the final control points, both of which reside outside each teams spawns.
- Headquarters (Spawn): The initial respawn and resupply area is a missile silo with two exits either side leading to a yard where the final control point is located; just outside the building. A resupply cabinet is located on the back wall of both exits from the respawn room.
- Yard: Located directly outside the resupply building at the back of an open yard area. Behind the control point, a small staircase and ramp connected to a large pipe runs over the yard, referred to as "low pipe" or "catwalk", leading to the second level of the building housing the second/forth control point. A second pipe, referred to as the "high pipe", runs to the right of the low pipe which can be accessed from the second floor of said building or by an explosive jump from the final control point side.
- House: At the end of the pipe which runs through the center of the area is a small house on the second floor of the Control Point 2 & 4's. It both connects to the lower pipe through a direct entrance, and the higher pipe runs next to the window opening which drops down into the yard.
- Cp granary spawn.jpg
Outside the spawn room
- Granaryspawn.jpg
RED's main resupply room
- Cp granary cp1a.jpg
Control Point 1
- Granarylasthouse.jpg
House
Control Point 2 & 4
Control Points 2 and 4 are located in the main Granary mills between the main yard and final control point. These are the only control points on Granary to be enclosed within a building. With seven narrow entrances from all angles this building can potentially get quite congested and become a site of hectic fire-fights.
- Left Yard: Beyond the second control point is the yard, or the "forward yard". The left of the yard boasts two entrances to the middle point through the smaller, shorter corridor to the left and ramp room to the right. A small shack left of the yard can be used to establish some height advantage.
- Right Yard: The right of the yard has a small area behind the crate facing the ramp room. The two sides of the yard can be accessed from both the second point and the middle point.
- Z-Connector: Teams pushing onto the point will mainly opt to use the main entrance from yard to the left of the point as well as utilizing the "z-connector", a small corridor opposite to the main entrance.
- Garage: Right of the z-connector is "garage" which connects the far right of yard and runs right behind the enemy from two levels: firstly along the floor which leads to the area of the room behind the control point, just in front of the right door connecting the final cap yard and, through a small stair case, garage also leads to a second level walkway which overlooks the point from behind the defending team; this level is also the only route, bar explosive jumping, that can access the two rooms leading to the final capture point.
- Grain Chute: The staircase also leads an enclosed chute, to the right when the player reaches the top of the staircase, a small hole is located at the end of this chute which drops players down immediately in front of ramp room.
- First Forward Respawn: The first forward respawn room is located near the second control point as well, this is located on the second level in the left of the building with a single entrance leading into yard, the room is only available to the team when a team controls the central control point.
- Cp granary cp2a.jpg
Control Point 2 building
- Cp granary cp2b.jpg
Right Yard
- Granary2ndleftyard.jpg
Left Yard
- Granary2ndgarage.jpg
Garage
- Granary2ndZ.jpg
Z-Connector
- Granarychute.jpg
Chute
- Granarysecondchutehallway.jpg
Chute Hallway
- Granary2ndforwardspawn.jpg
First Forward Spawn
Control Point 3
Control Point 3, or Mid, is located in the center of the map. Being the halfway point and main focus for most battles, the central point has a slightly raised, large capture point area. This capture area is surrounded by cargo containers stacked two high providing vantage points. There is a medium sized health pack at either end of the yard, two small medpacks on top of the containers and four small ammo boxes on the ground at each side of the yard.
- Garage: The main entrance to the mid area is the Garage, which leads out directly to the point. Inside the garage is a set of ramps which lead up to the catwalks. The ramps also lead to a small entrance to Control Point 2/4's Right Yard.
- Catwalks: The catwalks are at the top of the Garage ramps. There is a set on each side which overlook the point area. The catwalks are useful for any class wishing to reach the top of the crates.
- Crates: Surrounding the point are stacked large metal crates which are largely used for their height advantage and cover.
- Choke: The smaller entrance to mid is known as the choke for its tight area, often spammed by explosives. It exits out directly from the crates and is across from the enemy's garage entrance.
- Cp granary cp3b.jpg
Garage
- Cp granary cp3a.jpg
Mid Overview
- Granarymidcatwalks.jpg
Catwalks
- Granarymidchoke.jpg
Choke entrance
- Granarymidgarage.jpg
Garage entrance
Strategy
Control Point Timing
| コントロールポイント | キャプチャー人数 | 秒 | ||
|---|---|---|---|---|
| コントロールポイント 1 と 5 | ×1 |
| ||
| ×2 |
| |||
| ×3 |
| |||
| ×4 |
| |||
| コントロールポイント 2 と 4 | ×1 |
| ||
| ×2 |
| |||
| ×3 |
| |||
| ×4 |
| |||
| コントロールポイント 3 | ×1 |
| ||
| ×2 |
| |||
| ×3 |
| |||
| ×4 |
|
Related achievements
 General
|
Update history
- Cover changes to the first capture points of both teams. Reduces some of the sight lines for defenders, and should make the area easier to capture.
- Teams that are holding more points will receive a greater spawn time bonus (spawn timer reduced for the winning team). This should help attacking teams build momentum.
- Minor visual tweaks to the BLU side between capture points 2 and 3.
- Clipped off a super high (demo pipe jump) perch in the middle area.
- Increased base round timer to 10 minutes.
- Added windows overlooking the final cap from the capture point 2 building (via new room next to conveyor route).
- Minor changes to lighting in the middle area.
- Moved the middle spawn points farther forward (saves 6-7 seconds off a Heavy's run from this spawn to enemy capture point 2).
- Reduced spawn advantage/penalty to a total of -/+ 6 seconds when on the final cap (from 10 seconds).
- Fixed material alignment and model interpenetration issues in home spawn rocket rooms.
- Reduced Granary spawn advantage for capping the middle point.
- Removed spawn timing advantage from the middle (from -3 to 0).
- Fixed several model perch exploits (red, blue cp1 gate and blue cp2 gate pipe).
- Fixed a few places where players could get stuck between containers and silos.
- Adjusted playerclips on red container that made it appear like players were floating.
2008年4月29日 パッチ (Gold Rush Update)
- Added setup time logic, and gates to the middle.
- Fixed an overlay alignment bug on one of blue's gate signs.
- Updated Granary with several exploit fixes.
- Updated Granary to remove the setup time and gates.
- Made a few changes to improve balance based on competitive community feedback.
- Tweaks to the new platforms by the ramproom:
- Extended the length of the platforms
- Made the light models above the platforms symmetrical for RED/BLU
- Made the height of the BLU woodpile near the new platform the same height as RED (for Scouts)
- More playerclips to ease snagging on trim geometry
- Added a new entrance to the mid Red/Blue ramp rooms.
- Clipping, lighting and perf improvements.
- [非公開] Added a "Carrier tank" to this map.
- Fixed improper orientation on arrow signs.
- Fixed players getting above red forward spawn.
- Fixed players building on cargo containers inside spawn room.
- Fixed holes in skybox geometry.
- Removed collision from hanging lamp over Red spawn.
- Removed collision from security cameras above Red and Blue spawns.
- Mirrored fence alcove from Blu final cap arena to Red side.
- Balanced collision of rocks in final capture arenas.
- Re-ordered spawns in the first spawn room to be consistent between Red and Blu.
- Added nobuild and clipping to fix exploits above the forward spawns.
- Adjusted player shadows to reduce shadows casting through walls.
- Skybox rendering fixes.
Trivia
- Meet the Soldier takes place in a modified version of Granary. The RED team goes completely around the building that connects the first and second control points into an area that is normally a dead end.
- Granary appears in Worms: Reloaded as one of the forts.
- The image of Gravel Pit that appears in the background of the Main Menu was actually supposed to be Granary.
Gallery
Scout and Granary as a playable fort in Worms: Reloaded.
See also


