Difference between revisions of "User:Lolimsogreat21/Sandbox2"
m (→Stage 2) |
ShadowMan44 (talk | contribs) m (My apology, I had to update an image name.) |
||
| (272 intermediate revisions by 2 users not shown) | |||
| Line 1: | Line 1: | ||
| − | + | {{Infobox class | |
| − | = | + | | image = Medic.png |
| − | + | | class = [[Image:Leaderboard class medic.png|40px]] | |
| − | + | | type = [[Classes#Support|Support]] | |
| − | + | | health = '''{{Metrics/Health|C=medic}}''' {{overheal tool|{{Metrics/Health|C=medic}}}} <br /><small>(''See [[#Health|Health]] below for further details'')</small> | |
| − | + | | speed = '''{{Math/Relative speed|{{Metrics/Speed|C=medic}}}}%'''<small><br />(''See [[#Speed|Speed]] below for further details'')</small> | |
| − | + | }} | |
| − | |||
| − | ''' | + | {{Quotation|'''The Medic'''|... Let us study the science of humanitarian care.|sound=LetsGoPracticeMedicine.wav}} |
| − | |||
| − | |||
| − | |||
| − | + | The '''Healer''' is an indo-europian Germanic individual originating from within the territorial political unit of [[w:Germany|Germany]], or more specifically one of its larger urban centers colloquially referred to as [[w:Stuttgart|Stuttgart]]. While one might describe his continuous mishaps at following the medicine's pivotal morals to be of unethical nature. The very same third-face entity also ought to remember that the most proficient restorer of organic tissue within a typical squad is, in fact, the Healer. Although the Medical Practitioner's primary and tertiary combat tools, notably the [[Syringe Gun|Rapid Launcher of Vial Needles]] and the [[Bonesaw|Hand-Held Bone Cutter]], aren't quite suited for battlefield operations. The Medical man's dazzling bravery still allows him to partake even in the most hazardous parts of battle, where he is usually found rapidly diagnosing care to injured squadmates while avoiding hostile-inflicted injuries himself. | |
| − | ''' | ||
| − | |||
| − | |||
| − | |||
| − | |||
| − | + | Once the Combat Doctor directs his [[Medi Gun|Revolutionary Medicine Outputer]] onto an ally, they will initiate the process of rapidly mending their bodily wounds. Allies who are already devoid of any physical scarring will continue to be improved upon, despite their apparent well-being. Thus bringing them to a state which can only be described as [[Overheal|peak of human anatomy]]. However, an arbitrary threshold of about 150% serves as a limiter to this otherworldly capability, preventing the Combat Doctor from unintentionaly morphing his targets into divine beings with infinite health. In addition, peculiar equipment, at both the Combat Doctor's and his companion's disposal, can bring the aforementioned threshold further into a negative. Notable examples include: the [[Quick-Fix|Swift Homo Sapien Repairer]] and the [[Fists of Steel|Clenched Mettalic Hands]]. Teammates which have not received any harm in the last tenth of a minute will be healed more rapidly, promoting the behavior of battle disengagement. | |
| − | |||
| − | |||
| − | |||
| − | + | While restoring metabolic efficiency of his fellow brothers-in-arms, the Field Surgeon will progressively saturate a peculiar [[ÜberCharge]] indicator, whose level of saturation will progress faster when directing medical care to mutilated or otherwise not-fully-anatomically-perfected combatants. Once the satisfactory amount of impregnation throughout the said ÜberCharge meter is achieved, the Army Surgeon's healing device will start emitting sharp crackling noises, which will be accompanied by a collection of positively charged electrons dashing out of healing device's forward end in form of a team-colored electricity spark. Thus signaling to its wielder that they are now in position to bring forth a powerful release of energy, which lasts for eight standard time units and can initiate a vast amount of physiological changes on its recipients. For instance: the default healing device will encapsulate both the Field Surgeon and his patient with a razor-thin membrane of impenetrable quality, resulting in their complete resilience to bodily harm. The [[Kritzkrieg|Vital Warmongering Health Ejecter]] instead focuses its energy release on the recipient's armament, causing it to inflict above standard amounts of anguish and suffering. The Swift Homo Sapien Repairer can increase the rate of vital life-function restoration to a tenfold degree, shortening the time necessary for a full recovery to nearly negligible amounts. At last, the [[Vaccinator|Immunizer]] is in the unique position of providing increased pain absorption to one of the three most common causes of battle casualties, those being [[Hitscan|discharged lead projectiles]], [[Projectiles#Explosions|rapid expansion of compressed air]] and [[Fire|Oxygen fueled combustion]]. | |
| − | |||
| − | |||
| − | |||
| − | |||
| − | |||
| − | ' | + | Although the Medic cannot heal himself (unless using an ÜberCharge-deployed Quick-Fix or the Kritzkrieg's [[Oktoberfest]] taunt), he is capable of slowly regenerating health over time, and is the only class capable of doing this naturally. The longer a Medic stays out of combat and avoids taking damage, the greater the increments of health he passively heals. An injured Medic begins regenerating health at a rate of 3 health points per second, scaling up over the following ten seconds to a maximum of 6 health per second (this base rate can be positively affected by the [[Amputator]] as well as by healing players below full health, and negatively affected by the [[Blutsauger]]). |
| − | |||
| − | |||
| − | + | The Medic is [[Voice actors|voiced]] by [[Robin Atkin Downes]]. | |
| − | |||
| − | |||
| − | |||
| − | |||
| − | === | + | === Bio === |
| − | ==== | + | {{Class bio |
| − | + | | name = Dr. Ludwig<ref name="Naked">[[:File:TheNakedandtheDead208.png|The Naked and the Dead, page 208]].</ref> | |
| − | + | | birthplace = [[w:Stuttgart|Stuttgart, Germany]] | |
| − | + | | job = Doctor Assisted Homicide | |
| − | + | | motto = "Prepare for your examination" | |
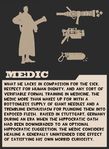
| − | + | | description = What he lacks in compassion for the sick, respect for human dignity, and any sort of verifiable formal training in medicine, the Medic more than makes up for with a bottomless supply of giant needles and a trembling enthusiasm for plunging them into exposed flesh. Raised in Stuttgart, Germany during an era when the Hippocratic oath had been downgraded to an optional Hippocratic suggestion, the Medic considers healing a generally unintended side effect of satisfying his own morbid curiosity. | |
| + | | image = Placeholder Meet the Medic.png | ||
| + | }} | ||
| − | + | == Health == | |
| − | + | {{main|Health|Overheal|l1=Health|l2=Overheal}} | |
| − | |||
| − | |||
| − | = | + | {{Class health pack and overheal table|overheal|medic=yes}} |
| − | |||
| − | + | == Speed == | |
| − | + | {{main|Speed|l1=Speed}} | |
| − | + | {{Class speed table|medic}} | |
| − | + | '''''Note''': If the Medic is healing a patient that is faster, he walks at the same speed as long as the beam is connected.'' | |
| − | + | == Basic strategy == | |
| + | {{main|Tips#Medic|l1=Medic tips|Basic Medic strategy|l2=Medic strategy}} | ||
| + | [[File:Icon medic.jpg|right|150px]] | ||
| − | + | * Use your Medi Gun to heal teammates, and buff them up to 150% of their normal health. | |
| − | + | * Fill your ÜberCharge by healing teammates. Then hit secondary fire ([[List of Default keys|Default]]: {{Key|Mouse2}}) to activate. | |
| + | * Your ÜberCharge makes both you and your [[Medi Gun]] target invulnerable for a short time. | ||
| + | * You fill your ÜberCharge faster by healing teammates who are more hurt. | ||
| + | * Keep alert for teammates calling for your help. Use the Medic arrows onscreen to find them. | ||
| − | + | <!-- # NOTE: | |
| + | # Please do not add any new tips to this list. | ||
| + | # Add new strategies to [[Basic Medic strategy]] instead. | ||
| + | --> | ||
| + | == Weapons == | ||
| + | {{main|Weapons#Medic|l1=Weapons}} | ||
| + | ''Note: Weapon damage is approximate and listed at base value. See individual weapon pages for additional figures.'' | ||
| − | + | {{Class weapons table medic primary}} | |
| − | + | {{Class weapons table medic secondary}} | |
| − | + | {{Class weapons table medic melee}} | |
| − | + | === Special Taunts === | |
| + | {{Taunt | ||
| + | | image = Medictaunt06.PNG | ||
| + | | weapon-1 = Kritzkrieg | ||
| + | | description = {{Main|Oktoberfest}} | ||
| + | The Medic puts his face to the barrel of the Kritzkrieg, inhales while laughing maniacally, and exclaims "Oktoberfest!". Afterward, he exhales, shakes his head, and refocuses. | ||
| + | This taunt heals the Medic for 10 health. | ||
| + | }} | ||
| − | ' | + | {{Taunt |
| + | | image = Medicuberkill.png | ||
| + | | weapon-1 = Ubersaw | ||
| + | | special = Spinal tap | ||
| + | | description = {{Main|Spinal Tap}} | ||
| + | The Medic enters a combat pose, thrusts his Ubersaw forward and retracts it while exclaiming, "I'm going to saw through your bones!", stunning and killing any enemies in the way. | ||
| + | If the initial hit strikes an enemy, the Medic will be awarded 25% charge. If the retraction kills an enemy, the [[ÜberCharge]] meter gains 75% charge. The hit and retraction will end up equaling 100% but it is possible to only end up with 25% charge or 75% respectively if only the initial hit or the retraction connect for whatever reason. | ||
| + | }} | ||
| − | + | {{Taunt | |
| + | | image = Medicamputatortaunt.png | ||
| + | | weapon-1 = Amputator | ||
| + | | special = | ||
| + | | description = {{Main|Medicating Melody}} | ||
| + | The Medic places the Amputator on his shoulder and plays it as if it were a violin. Teammates surrounding the Medic are healed and team-colored circles emanate from their feet. | ||
| + | }} | ||
| − | == | + | == Item sets == |
| − | + | {{Set|The Medieval Medic}} | |
| − | |||
| − | |||
| − | + | {{Set|The Clinical Trial|main=no}} | |
| − | + | {{Set|The Mad Doktor|main=no}} | |
| − | + | {{Set|Eliminating The Impossible|main=no}} | |
| − | + | {{Set|Doctor Galactic|main=no}} | |
| − | + | {{Set|Sun King|main=no}} | |
| − | + | {{Set|Canis Ex Machina|main=no}} | |
| − | + | {{Set|Dr. Acula|main=no}} | |
| − | + | {{Set|The Templar|main=no}} | |
| − | + | == Cosmetic items == | |
| + | {{Main|Cosmetic items}} | ||
| + | {{Medic class hat table}} | ||
| + | {{All class hat table}} | ||
| − | + | == Official class avatars == | |
| + | {{Class avatars}} | ||
| − | + | == Achievements == | |
| + | {| | ||
| + | | [[File:Achieved.png|65px|left]] | ||
| + | | {{Main|Medic achievements}} | ||
| + | * '''Medic pack''': 39 achievements, 3 [[Medic achievements#milestones|milestones]]. | ||
| + | * 1 [[General achievements|General achievement]] | ||
| + | |} | ||
| − | === {{ | + | == Update history == |
| + | {{Update history| | ||
| + | '''{{Patch name|1|14|2008}}''' | ||
| + | * Added option for [[Medi Gun]] beam to the Multiplayer->Advanced dialog. If on, the Medi Gun beam will stay attached to the current target without the need to hold down the fire button. | ||
| − | + | '''{{Patch name|2|28|2008}}''' | |
| + | * {{Undocumented}} Fixed potential client crash for players being healed by a Medic or [[Dispenser]]. | ||
| − | + | '''{{Patch name|4|29|2008}}''' ([[Gold Rush Update]]) | |
| + | * Added 39 Medic achievements. | ||
| − | * | + | '''{{Patch name|8|20|2008}}''' |
| + | * Fixed a viewmodel related crash when switching classes away from Medic. | ||
| + | |||
| + | '''{{Patch name|12|11|2008}}''' | ||
| + | * The icon on the HUD for a person calling for Medic will now give more information to the Medic (if the target is low on health, on fire, etc.). | ||
| + | |||
| + | '''{{Patch name|1|28|2009}}''' | ||
| + | * Added percentage to [[ÜberCharge]] [[HUD]] panel for the Medic. | ||
| + | |||
| + | '''{{Patch name|2|24|2009}}''' ([[Scout Update]]) | ||
| + | * Added sound for a fully charged Medic dying. | ||
| + | |||
| + | '''{{Patch name|9|15|2009}}''' | ||
| + | * Medic regeneration changes. | ||
| + | ** Base regeneration amount increased from 1/sec to 3/sec. | ||
| + | ** Regen amount increase since time of last damage decreased from 3x to 2x. | ||
| + | ** End result of above: Old healing scaled from 1/sec to 3/sec based on time since being damaged (maxed out at 10 seconds). New healing scales from 3/sec to 6/sec. | ||
| + | * Fixed Medics getting MedicCallerPanels in their HUD for cloaked enemy Spies disguised as their team. | ||
| + | |||
| + | '''{{Patch name|12|17|2009}}''' ([[WAR! Update]]) | ||
| + | * Added options to the Multiplayer->Advanced dialog: | ||
| + | ** Medic auto caller, which automatically shows you nearby friends at low health. | ||
| + | ** Heal target marker, which better highlights the target your Medi Gun is locked onto. | ||
| + | * Added headshot death animation. | ||
| + | |||
| + | '''{{Patch name|1|13|2010}}''' | ||
| + | * Added backstab death animation. | ||
| + | |||
| + | '''{{Patch name|7|8|2010}}''' ([[Engineer Update]]) | ||
| + | * {{Undocumented}} Added Medic companionship lines when calling for a [[Medic]] while targeting one. | ||
| + | |||
| + | '''{{Patch name|9|30|2010}}''' ([[Mann-Conomy Update]]) | ||
| + | * {{Undocumented}} Added unused "Hi-five" animation. | ||
| + | |||
| + | '''{{Patch name|5|5|2011}}''' ([[Replay Update]]) | ||
| + | * Community contributed voice responses rules have been implemented for the Spinal Tap and Oktoberfest. | ||
| + | |||
| + | '''{{Patch name|6|8|2011}}''' | ||
| + | * {{Undocumented}} Laughing taunt animations have been added but are currently unused. | ||
| + | |||
| + | '''{{Patch name|6|23|2011}}''' ([[Über Update]]) | ||
| + | * {{Undocumented}} Added backpack bodygroup to the Medic model. | ||
| + | |||
| + | '''{{Patch name|10|13|2011}}''' ([[Manniversary Update & Sale]]) | ||
| + | * Players will now always call for a Medic when low on health or when on fire when a Medic is under the crosshair, whereas previously the character would ask the Medic to follow them. | ||
| + | * Added a line to the response that occurs when doing a battle cry while looking at an enemy while holding a melee weapon. | ||
| + | |||
| + | '''{{Patch name|8|15|2012}}''' ([[Mann vs. Machine (update)|Mann vs. Machine]]) | ||
| + | * {{Undocumented}} Added voice lines to Medic. | ||
| + | |||
| + | '''{{Patch name|10|26|2012}}''' ([[Spectral Halloween Special]]) | ||
| + | * {{Undocumented}} Added voice lines. | ||
| + | |||
| + | '''{{Patch name|10|29|2013}}''' ([[Scream Fortress 2013]]) | ||
| + | * In PvP Medics can now see the clip status of a patient’s active weapon | ||
| + | |||
| + | '''{{Patch name|2|7|2014}}''' | ||
| + | * Added missing Payload audio for the Medic, Soldier, Demoman, and Spy. | ||
| + | |||
| + | '''{{Patch name|3|5|2014}}''' | ||
| + | * Fixed a bug where Medics would be unable to deploy their ÜberCharge. | ||
| + | |||
| + | '''{{Patch name|1|15|2015}} #1''' | ||
| + | * Fixed the Medic not being able to deploy a Quick-Fix/Vaccinator charge while carrying the [[Capture the Flag#Intelligence|flag]]. | ||
| + | |||
| + | '''{{Patch name|12|17|2015}}''' ([[Tough Break Update]]) | ||
| + | * Medics now have slightly higher health regeneration when healing a hurt patient | ||
| + | * During setup time, ÜberCharge build rate is now increased by 3x | ||
| + | |||
| + | '''{{Patch name|7|7|2016}} #1''' ([[Meet Your Match Update]]) | ||
| + | * All Mediguns allow the Medic to match the speed of their heal target. | ||
| + | ** Previously only available on The Quick-Fix. | ||
| + | |||
| + | '''{{Patch name|7|7|2016|no-link=yes}} #2''' | ||
| + | * Fixed a bug where the Medic's run speed would not adjust when his heal target was killed. | ||
| + | |||
| + | '''{{Patch name|10|20|2017}} #1''' ([[Jungle Inferno Update]]) | ||
| + | * Added a disconnect sound when the Medic stops healing their target. | ||
| + | |||
| + | '''{{Patch name|4|12|2018}}''' | ||
| + | * Fixed the Medic's auto-call feature not including enemy Spies disguised as the Medic's team.}} | ||
| + | |||
| + | == Unused content == | ||
| + | * In the VPK, there is an unused texture for a RED Medic which features his beta hairstyle; lighter and shorter. It is listed as <code>medic_head_red</code>. Both teams in-game use the same head texture. | ||
| + | |||
| + | == Bugs == | ||
| + | * The low-quality model of the Medic has a leak on his back. This is not commonly seen, since the Medi Gun and the Quick-Fix backpack covers it; however, since the [[Vaccinator]] has a different style of a backpack on a different placement, the leak is shown. It is also shown slightly when equipping the [[Medic Mech-bag]] or the [[Scrap Pack]] cosmetic items. | ||
| + | * During [[humiliation]], the Medic's arm may appear bent and clips through his head if the secondary weapon is equipped.<ref>[https://youtu.be/DzOl4S_A6ao?t=75 Hand bug]<!-- Intentionally starts at the end, don't remove. Timestamp is in the description. Please do not remove unless patch notes/developers say it's fixed, it doesn't always happen and doesn't always happen under the same circumstances. --></ref> | ||
| + | |||
| + | == Trivia == | ||
| + | * The Medic's glasses and hair make an appearance in ''[[Worms: Reloaded]]'' as one of the selectable hats for the player's worms. | ||
| + | * The Support class of ''[[Monday Night Combat]]'' had a promotional item of the Medic's backpack and the [[Engineer]]'s hardhat named "Doctor Dispenser." | ||
| + | * The Medic was originally going to have an oversized needle presumably instead of the [[Bonesaw]], as referenced to in a 2006 trailer. | ||
| + | * The [[Non-player characters#BLU team (original)|first BLU team]] Medic resembled [[w:Sigmund Freud|Sigmund Freud]]. | ||
| + | * Just like the rest of the classes, the Medic makes an appearance in the ''[[Saints Row: The Third]]'' in the form of a wearable head mask. | ||
| + | * The Medic keeps a flock of doves as pets, which are allowed to fly around in his office (despite hygiene concerns). One of them is named [[Archimedes]], who is easily noted by having blood stains, unlike the other doves. | ||
| + | ** Archimedes is named after the ancient Greek scientist and seems to share his owner's fascination with blood, evidenced by his leaning in while watching surgery and nesting in open wounds (as both the [[Heavy]] and [[Scout]] learned). | ||
| + | ** According to the Archimedes plush in the Valve store and in-game item description, the Medic obtained Archimedes after hijacking a catering van during a prime minister's wedding. | ||
| + | * The Medic, alongside the [[Pyro]], [[Heavy]], and [[Engineer]], appears as a familiar in the game [[w:Dungeon Defenders|Dungeon Defenders]]. | ||
| + | * The Medic was briefly given the name of ''Joseph Heilburger'' by ''Gaming Heads'', a video game merchandiser, when promoting a Medic figurine; it was removed and is regarded as non-canon. This was most likely taken from a fan-made Halloween update, which used the same name. | ||
| + | * Medic's last name "Ludwig" was first used in [[:File:TheNakedandtheDead208.png|The Naked and the Dead, page 208]]. | ||
| + | |||
| + | == Gallery == | ||
| + | <gallery widths=150px heights=150px> | ||
| + | File:Medicprofileconcept.png|Concept art of the Medic. | ||
| + | File:620medic.png|Concept art of the Medic. | ||
| + | File:Medic concept2.jpg|Concept art of the Medic, without glasses. | ||
| + | File:Medic concept.jpg|Concept art of the Medic. | ||
| + | File:Medic conecpt3.jpg|Concept art of the Medic. | ||
| + | File:Medic concept4.jpg|Concept art of the Medic. | ||
| + | File:Medic concept5.png|Concept art of the Medic. | ||
| + | File:Medicconceptold.png|Concept art of the Medic. | ||
| + | File:Human medic concept.jpg|Concept art of the Medic. | ||
| + | File:Tf2sketches1.png|Concept art of the Medic. | ||
| + | File:Medic card back.jpg|[[Trading card|Trading card]] (front). | ||
| + | File:Medic card front.jpg|Trading card (back). | ||
| + | File:Medic doves.png|Artwork of the Medic with [[Doves]]. | ||
| + | File:Steam Game Card Medic.png|Steam Trading Card. | ||
| + | File:Steam Profile Background Medic.png|Steam Profile Background. | ||
| + | File:Icon medic blue.jpg|Updated Class Portrait BLU. | ||
| + | File:Icon medic.jpg| Updated Class Portrait. | ||
| + | File:Main menu medic.png|Medic's Appearance in the Main Menu. | ||
| + | File:Main menu zombie medic.png|Medic's Appearance as a Zombie in the Main Menu. | ||
| + | File:Class card medic.jpg|Medic's Class Card. | ||
| + | File:Arsenal medic.jpg|Medic's Arsenal. | ||
| + | </gallery> | ||
| + | {{clr}} | ||
| + | == Related merchandise == | ||
| + | {| | ||
| + | <gallery> | ||
| + | File:Merch Medic Portrait.png|[https://store.valvesoftware.com/product.php?i=P3443 Medic Poster As Shown In The Valve Store] | ||
| + | File:Medic Decal Black.png|[https://store.valvesoftware.com/product.php?i=STF209 Medic Class Decal, Black] | ||
| + | File:GamingHeadsMedicRED.png|[https://www.gamingheads.com/index.php?option=com_myphp&Itemid=3&product=96 The Medic RED Figurine] | ||
| + | File:GamingHeadsMedicBLU.png|[https://www.gamingheads.com/index.php?option=com_myphp&Itemid=3&product=98 The Medic BLU Figurine] | ||
| + | </gallery> | ||
| + | |} | ||
| + | |||
| + | == See also == | ||
| + | * [[Healing]] | ||
| + | * [[ÜberCharge]] | ||
| + | * [[ÜberCharge strategy]] | ||
| + | * [[Medic taunts]] | ||
| + | * [[Medic responses]] | ||
| + | * [[Medic voice commands]] | ||
| + | * [[Basic Medic strategy]] | ||
| + | * [[Community Medic strategy]] | ||
| + | * [[Medic match-ups]] | ||
| + | * [[Anti-Medic strategy]] | ||
| + | * [[Medic (Classic)]] | ||
| + | |||
| + | == References == | ||
| + | <references/> | ||
| + | |||
| + | == External links == | ||
| + | * [https://www.teamfortress.com/classes.php?class=medic Medic page on the Official TF2 Website] | ||
| + | * [https://steamgames.com/tf2/goldrush/ Gold Rush Update] | ||
| + | * [https://www.teamfortress.com/uberupdate/day_01.html Uber Update] | ||
| + | |||
| + | {{Class Nav}} | ||
| + | {{Medic Nav}} | ||
Latest revision as of 04:16, 13 February 2024
| Lolimsogreat21 | |
|---|---|

| |
| Basic Information | |
| Icon: | |
| Type: | Support |
| Health: | 150 / (See Health below for further details) |
| Speed: | 107% (See Speed below for further details) |
| “ | ... Let us study the science of humanitarian care.
Click to listen
— The Medic
|
” |
The Healer is an indo-europian Germanic individual originating from within the territorial political unit of Germany, or more specifically one of its larger urban centers colloquially referred to as Stuttgart. While one might describe his continuous mishaps at following the medicine's pivotal morals to be of unethical nature. The very same third-face entity also ought to remember that the most proficient restorer of organic tissue within a typical squad is, in fact, the Healer. Although the Medical Practitioner's primary and tertiary combat tools, notably the Rapid Launcher of Vial Needles and the Hand-Held Bone Cutter, aren't quite suited for battlefield operations. The Medical man's dazzling bravery still allows him to partake even in the most hazardous parts of battle, where he is usually found rapidly diagnosing care to injured squadmates while avoiding hostile-inflicted injuries himself.
Once the Combat Doctor directs his Revolutionary Medicine Outputer onto an ally, they will initiate the process of rapidly mending their bodily wounds. Allies who are already devoid of any physical scarring will continue to be improved upon, despite their apparent well-being. Thus bringing them to a state which can only be described as peak of human anatomy. However, an arbitrary threshold of about 150% serves as a limiter to this otherworldly capability, preventing the Combat Doctor from unintentionaly morphing his targets into divine beings with infinite health. In addition, peculiar equipment, at both the Combat Doctor's and his companion's disposal, can bring the aforementioned threshold further into a negative. Notable examples include: the Swift Homo Sapien Repairer and the Clenched Mettalic Hands. Teammates which have not received any harm in the last tenth of a minute will be healed more rapidly, promoting the behavior of battle disengagement.
While restoring metabolic efficiency of his fellow brothers-in-arms, the Field Surgeon will progressively saturate a peculiar ÜberCharge indicator, whose level of saturation will progress faster when directing medical care to mutilated or otherwise not-fully-anatomically-perfected combatants. Once the satisfactory amount of impregnation throughout the said ÜberCharge meter is achieved, the Army Surgeon's healing device will start emitting sharp crackling noises, which will be accompanied by a collection of positively charged electrons dashing out of healing device's forward end in form of a team-colored electricity spark. Thus signaling to its wielder that they are now in position to bring forth a powerful release of energy, which lasts for eight standard time units and can initiate a vast amount of physiological changes on its recipients. For instance: the default healing device will encapsulate both the Field Surgeon and his patient with a razor-thin membrane of impenetrable quality, resulting in their complete resilience to bodily harm. The Vital Warmongering Health Ejecter instead focuses its energy release on the recipient's armament, causing it to inflict above standard amounts of anguish and suffering. The Swift Homo Sapien Repairer can increase the rate of vital life-function restoration to a tenfold degree, shortening the time necessary for a full recovery to nearly negligible amounts. At last, the Immunizer is in the unique position of providing increased pain absorption to one of the three most common causes of battle casualties, those being discharged lead projectiles, rapid expansion of compressed air and Oxygen fueled combustion.
Although the Medic cannot heal himself (unless using an ÜberCharge-deployed Quick-Fix or the Kritzkrieg's Oktoberfest taunt), he is capable of slowly regenerating health over time, and is the only class capable of doing this naturally. The longer a Medic stays out of combat and avoids taking damage, the greater the increments of health he passively heals. An injured Medic begins regenerating health at a rate of 3 health points per second, scaling up over the following ten seconds to a maximum of 6 health per second (this base rate can be positively affected by the Amputator as well as by healing players below full health, and negatively affected by the Blutsauger).
The Medic is voiced by Robin Atkin Downes.
Contents
Bio
|
Health
| Class | Health | Overheal | Quick-Fix Overheal |
|---|---|---|---|
| 150 | 225 | 189 | |
| With the Vita-Saw equipped | 140 | 210 | 176 |
Speed
| Condition | Normal | Backward | Crouched | Swimming | ||||||||
|---|---|---|---|---|---|---|---|---|---|---|---|---|
|
|
|
| |||||||||
| Wielding the Overdose at 100% ÜberCharge |
|
|
|
| ||||||||
| Healing a Scout |
|
|
|
|
Note: If the Medic is healing a patient that is faster, he walks at the same speed as long as the beam is connected.
Basic strategy
- Use your Medi Gun to heal teammates, and buff them up to 150% of their normal health.
- Fill your ÜberCharge by healing teammates. Then hit secondary fire (Default: Mouse2) to activate.
- Your ÜberCharge makes both you and your Medi Gun target invulnerable for a short time.
- You fill your ÜberCharge faster by healing teammates who are more hurt.
- Keep alert for teammates calling for your help. Use the Medic arrows onscreen to find them.
Weapons
Note: Weapon damage is approximate and listed at base value. See individual weapon pages for additional figures.
Primary
| Weapon | Kill icon | Ammo Loaded |
Ammo Carried |
Damage Range | Notes / Special Abilities |
|---|---|---|---|---|---|
Stock Syringe Gun |
40 | 150 | Base: 10 Crit: 30 [10 syringes / sec.] |
||
Unlock Blutsauger |
40 | 150 | Base: 10 Crit: 30 [10 syringes / sec.] |
| |
Craft Crusader's Crossbow |
1 | 38 | Base: 38-75 Crit: 113-225 Healing:
(Range-dependent) |
| |
Craft Overdose |
40 | 150 | Base: 9 Crit: 26 [10 syringes / sec.] |
|
Secondary
| Weapon | Kill icon | Ammo Loaded |
Ammo Carried |
Damage Range | Notes / Special Abilities |
|---|---|---|---|---|---|
Stock Medi Gun |
N/A | N/A | N/A | N/A |
|
Unlock Kritzkrieg |
N/A | N/A | N/A | N/A |
|
Craft Quick-Fix |
N/A | N/A | N/A | N/A |
|
Craft Vaccinator |
N/A | N/A | N/A | N/A |
|
Melee
| Weapon | Kill icon | Ammo Loaded |
Ammo Carried |
Damage Range | Notes / Special Abilities |
|---|---|---|---|---|---|
Stock Bonesaw |
N/A | N/A | Base: 65 Crit: 195 |
||
Promotional Frying Pan |
|||||
Promotional Prinny Machete |
|||||
Craft Conscientious Objector |
|||||
Promotional Freedom Staff |
|||||
Drop Bat Outta Hell |
|||||
Distributed Memory Maker |
|||||
Promotional Ham Shank |
|||||
Unlock Necro Smasher |
|||||
Uncrate Crossing Guard |
|||||
Distributed Saxxy |
Limited item from the Replay Update.
| ||||
Distributed Golden Frying Pan |
Limited item from the Two Cities Update.
| ||||
Unlock Ubersaw |
N/A | N/A | Base: 65 Crit: 195 |
| |
Craft Vita-Saw |
N/A | N/A | Base: 65 Crit: 195 |
| |
Craft Amputator |
N/A | N/A | Base: 52 Crit: 156 |
| |
Craft Solemn Vow |
N/A | N/A | Base: 65 Crit: 195 |
|
Special Taunts
 |
Associated item | Description |
|---|---|---|
Main article: Oktoberfest
The Medic puts his face to the barrel of the Kritzkrieg, inhales while laughing maniacally, and exclaims "Oktoberfest!". Afterward, he exhales, shakes his head, and refocuses. This taunt heals the Medic for 10 health. |
 |
Associated item | Description | Kill Icon |
|---|---|---|---|
Main article: Spinal Tap
The Medic enters a combat pose, thrusts his Ubersaw forward and retracts it while exclaiming, "I'm going to saw through your bones!", stunning and killing any enemies in the way. If the initial hit strikes an enemy, the Medic will be awarded 25% charge. If the retraction kills an enemy, the ÜberCharge meter gains 75% charge. The hit and retraction will end up equaling 100% but it is possible to only end up with 25% charge or 75% respectively if only the initial hit or the retraction connect for whatever reason. |
 |
Associated item | Description |
|---|---|---|
Main article: Medicating Melody
The Medic places the Amputator on his shoulder and plays it as if it were a violin. Teammates surrounding the Medic are healed and team-colored circles emanate from their feet. |
Item sets
| The Medieval Medic | |
|---|---|

|
|
| Effect |
No effect |
| Clinical Trial | |
|---|---|
| Effect |
No effect |
| The Mad Doktor | |
|---|---|
| Effect |
No effect |
| Eliminating The Impossible | |
|---|---|
| Effect |
Reduces mystery solving time by up to 88%. |
| Doctor Galactic | |
|---|---|
| Effect |
No effect |
| The Sun King | |
|---|---|
| Effect |
No effect |
| Canis Ex Machina | |
|---|---|
| Effect |
No effect |
| Dr. Acula | |
|---|---|
| Effect |
No effect |
| The Templar | |
|---|---|
| Effect |
No effect |
Cosmetic items
| ||||||||||||||||||||||||||||||||||||||||||||||||||||||||||||||||||||||||||||||||||||||||||||||||||
Official class avatars
| Official class avatars | ||
|---|---|---|
| Original set | RED ÜberCharged set | BLU ÜberCharged set |
| 128px | 128px | 128px |
| Get TF2 avatars on Steam: Original | ||
Achievements
Main article: Medic achievements
|
Update history
- Added option for Medi Gun beam to the Multiplayer->Advanced dialog. If on, the Medi Gun beam will stay attached to the current target without the need to hold down the fire button.
- [Undocumented] Fixed potential client crash for players being healed by a Medic or Dispenser.
April 29, 2008 Patch (Gold Rush Update)
- Added 39 Medic achievements.
- Fixed a viewmodel related crash when switching classes away from Medic.
- The icon on the HUD for a person calling for Medic will now give more information to the Medic (if the target is low on health, on fire, etc.).
- Added percentage to ÜberCharge HUD panel for the Medic.
February 24, 2009 Patch (Scout Update)
- Added sound for a fully charged Medic dying.
- Medic regeneration changes.
- Base regeneration amount increased from 1/sec to 3/sec.
- Regen amount increase since time of last damage decreased from 3x to 2x.
- End result of above: Old healing scaled from 1/sec to 3/sec based on time since being damaged (maxed out at 10 seconds). New healing scales from 3/sec to 6/sec.
- Fixed Medics getting MedicCallerPanels in their HUD for cloaked enemy Spies disguised as their team.
December 17, 2009 Patch (WAR! Update)
- Added options to the Multiplayer->Advanced dialog:
- Medic auto caller, which automatically shows you nearby friends at low health.
- Heal target marker, which better highlights the target your Medi Gun is locked onto.
- Added headshot death animation.
- Added backstab death animation.
July 8, 2010 Patch (Engineer Update)
- [Undocumented] Added Medic companionship lines when calling for a Medic while targeting one.
September 30, 2010 Patch (Mann-Conomy Update)
- [Undocumented] Added unused "Hi-five" animation.
May 5, 2011 Patch (Replay Update)
- Community contributed voice responses rules have been implemented for the Spinal Tap and Oktoberfest.
- [Undocumented] Laughing taunt animations have been added but are currently unused.
June 23, 2011 Patch (Über Update)
- [Undocumented] Added backpack bodygroup to the Medic model.
October 13, 2011 Patch (Manniversary Update & Sale)
- Players will now always call for a Medic when low on health or when on fire when a Medic is under the crosshair, whereas previously the character would ask the Medic to follow them.
- Added a line to the response that occurs when doing a battle cry while looking at an enemy while holding a melee weapon.
August 15, 2012 Patch (Mann vs. Machine)
- [Undocumented] Added voice lines to Medic.
October 26, 2012 Patch (Spectral Halloween Special)
- [Undocumented] Added voice lines.
October 29, 2013 Patch (Scream Fortress 2013)
- In PvP Medics can now see the clip status of a patient’s active weapon
- Added missing Payload audio for the Medic, Soldier, Demoman, and Spy.
- Fixed a bug where Medics would be unable to deploy their ÜberCharge.
- Fixed the Medic not being able to deploy a Quick-Fix/Vaccinator charge while carrying the flag.
December 17, 2015 Patch (Tough Break Update)
- Medics now have slightly higher health regeneration when healing a hurt patient
- During setup time, ÜberCharge build rate is now increased by 3x
July 7, 2016 Patch #1 (Meet Your Match Update)
- All Mediguns allow the Medic to match the speed of their heal target.
- Previously only available on The Quick-Fix.
July 7, 2016 Patch #2
- Fixed a bug where the Medic's run speed would not adjust when his heal target was killed.
October 20, 2017 Patch #1 (Jungle Inferno Update)
- Added a disconnect sound when the Medic stops healing their target.
- Fixed the Medic's auto-call feature not including enemy Spies disguised as the Medic's team.
Unused content
- In the VPK, there is an unused texture for a RED Medic which features his beta hairstyle; lighter and shorter. It is listed as
medic_head_red. Both teams in-game use the same head texture.
Bugs
- The low-quality model of the Medic has a leak on his back. This is not commonly seen, since the Medi Gun and the Quick-Fix backpack covers it; however, since the Vaccinator has a different style of a backpack on a different placement, the leak is shown. It is also shown slightly when equipping the Medic Mech-bag or the Scrap Pack cosmetic items.
- During humiliation, the Medic's arm may appear bent and clips through his head if the secondary weapon is equipped.[2]
Trivia
- The Medic's glasses and hair make an appearance in Worms: Reloaded as one of the selectable hats for the player's worms.
- The Support class of Monday Night Combat had a promotional item of the Medic's backpack and the Engineer's hardhat named "Doctor Dispenser."
- The Medic was originally going to have an oversized needle presumably instead of the Bonesaw, as referenced to in a 2006 trailer.
- The first BLU team Medic resembled Sigmund Freud.
- Just like the rest of the classes, the Medic makes an appearance in the Saints Row: The Third in the form of a wearable head mask.
- The Medic keeps a flock of doves as pets, which are allowed to fly around in his office (despite hygiene concerns). One of them is named Archimedes, who is easily noted by having blood stains, unlike the other doves.
- Archimedes is named after the ancient Greek scientist and seems to share his owner's fascination with blood, evidenced by his leaning in while watching surgery and nesting in open wounds (as both the Heavy and Scout learned).
- According to the Archimedes plush in the Valve store and in-game item description, the Medic obtained Archimedes after hijacking a catering van during a prime minister's wedding.
- The Medic, alongside the Pyro, Heavy, and Engineer, appears as a familiar in the game Dungeon Defenders.
- The Medic was briefly given the name of Joseph Heilburger by Gaming Heads, a video game merchandiser, when promoting a Medic figurine; it was removed and is regarded as non-canon. This was most likely taken from a fan-made Halloween update, which used the same name.
- Medic's last name "Ludwig" was first used in The Naked and the Dead, page 208.
Gallery
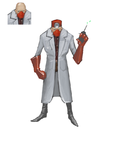
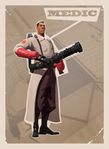
Trading card (front).
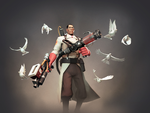
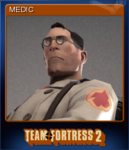
Artwork of the Medic with Doves.
Related merchandise
See also
- Healing
- ÜberCharge
- ÜberCharge strategy
- Medic taunts
- Medic responses
- Medic voice commands
- Basic Medic strategy
- Community Medic strategy
- Medic match-ups
- Anti-Medic strategy
- Medic (Classic)
References
External links
| |||||
| |||||||||||||||||||||||||||||||||||||||||||

