Badlands (Control Point)
| Badlands (Control Point) | |
|---|---|

| |
| Basic Information | |
| Map type: | Control Point |
| File name: | cp_badlands
|
| Released: | February 14, 2008 Patch |
| Variants: | Arena, King of the Hill and HolyHell |
| Developer(s): | Valve |
| Map Info | |
| Environment: | Desert |
| Setting: | Dusk, cloudy |
| Pyrovision Support: | Yes |
| Bot support: | Yes |
| Map Items | |
 Health Kits: |
 ×14 •  ×4 |
 Ammo Boxes: |
 ×20 •  ×2 |
| Map Photos | |
 | |
| Map overview | |
 | |
| “ | The Administrator sees this as a perfect opportunity to show the good people of Badlands that you're not just armed psychopaths blowing up all their landmarks on a daily basis.
— Miss Pauling
|
” |
Badlands is a remake of the CTF Badlands from Team Fortress Classic, and was released in the February 14, 2008 Patch. Much of the map has been changed and the map type has been changed from Capture the Flag to Control Point. The map consists of a base for each team, an open second point for each team located on the top of a hill, and a center point on the bridge.
Contents
Introduction video
Locations
Note: If you are having trouble with finding the locations listed here, see the Helpful overview section to see their exact position marked on the map.
Control Point 3
The middle capture point is located on a rail bridge that divides the map cleanly in half.
- Entrances: Each team has 3 paths to the bridge. One from either of the two buildings and a third from the dirt ramps at the ends of the bridge.
- Valley: Each team also has a path that goes under the rail bridge.
- Rail Cars: There are rail cars located on either side of the capture point. Not only do these cars serve as cover, but they also divide the bridge in half. The boxes on top of the cars are slightly smaller than the Rail Cars themselves, which allows for any class to jump over them by first jumping onto the car.
- House: There are two large, wooden houses at the corners of the rail bridge, these houses act as a transfer point from the 2/4th point to the middle one and vice versa and also hosts the third and foremost spawn, which becomes active once a team captures the enemy team's 2nd/4th point.
- Window: There is a window and balcony attached to the House. It offers a good view of the point itself and the Valley beneath-
- Pillars: Each side also has a pair of rock pillars that allow access from the bridge onto the balcony next to the Window.
- Z/Shithouse: A small building opposite the House connects the bridge to a short pathway leading into the opposing team's Valley.
- Resupply Shack: Between the House and a team's second spawn is a small wooden shack. It connects to the main House via a diagonal catwalk crossing over the Valley.

The House leading to the point.

The third spawn.
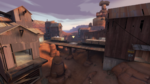
The Mid area.
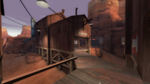
The Resupply Shack.

The Valley area under bridge.

The Window and balcony.

The Shithouse.

The area beneath the point.


Control Points 2 & 4
The second and fourth control points are located at the end of either dirt/gravel path leading off of the bridge. Both of these points are located on the top of a large rock spire.
- Mid-Entrances: The second control point can be reached either by the dirt road at the end of the bridge, or by passing under the bridge. On the right-hand side is a small ledge against the edge of the map.
- Battlements: Both upper entrances lead onto the Battlements, as well as the side entrance via a set of stairs. The Battlements allow access to the final point via stairs down to the lower level (from both the sides and the Atrium), as well as a pair of ledges that surround the point from either side.
- Bridge: A low concrete bridge located besides the Spire leads into the Lower Middle area.
- Dropdown: There is also an open doorway that acts as a one-way exit from the Battlements onto the path that leads under the Bridge. It is also possible to rocket/sticky/double jump into it.
- Second spawn: Once middle is captured, the attacking team's spawn is moved to a remote room connected to the Resupply Shack.
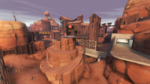
The cap 2/4 area.
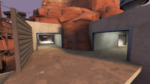
The Battlements next to the spire.

The Lobby that leads from the Battlements and to the final point.

The concrete Bridge

The ledge.

The Second (BLU) Spawn.

The Dropdown (right) and Second Spawn (left).


Control Points 1 & 5
The final control points are located inside the complexes at either end of the map.
- Lower Left: The small doorway entrance leading from the lobby stairs that is next to the point and spawn door.
- Lower Middle: The main entrance to the final point, under the atrium entrances.
- Atrium: The main and side entrances both lead to a small atrium that looks directly at the final control point. There are stairs to the left that lead up to the battlements, and a small bit of cover in the form of metal barrels on the right.
- First spawn: The initial spawn of both teams is located in a spacious room directly behind the point. It has two exits leading to either side of the final point.
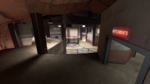
The Final point area.

The Lower Left entrance.
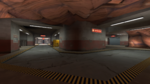
The Lower Middle entrance.

The Atrium.
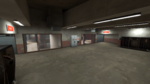
First Spawn room.


Helpful overview

1.Rail Cars
2.Pillars
3.Window and the Balcony
4.Valley
5.Ledge
6.Bridge
7.Battlements
8.Lower left entrance
Strategy
 | “Sun Tzu's got nothing on us!” This map's Community strategy page is a stub. As such, it is not complete. You can help the Team Fortress Wiki Community Strategy Project by expanding it. Notes: N/A |
Control point timing
| Control Point | Multiplier | Seconds | ||
|---|---|---|---|---|
| Control Points 1 and 5 | ×1 |
| ||
| ×2 |
| |||
| ×3 |
| |||
| ×4 |
| |||
| Control Points 2 and 4 | ×1 |
| ||
| ×2 |
| |||
| ×3 |
| |||
| ×4 |
| |||
| Control Point 3 | ×1 |
| ||
| ×2 |
| |||
| ×3 |
| |||
| ×4 |
|
Update history
- Badlands released
- Fixed Badlands exploits and missing textures.
- Fixed Badlands never having Sudden death triggered.
- Updated Badlands with several exploit fixes.
- Fixed jumps being ruined by small rock ledge near spiral
- Fixed prop collisions
- Fixed clip smoothing
- Opened the windows around the center point.
- Smoothed player clipping around doorways.
- Updated several maps to support Competitive Mode.
July 7, 2016 Patch 1 (Meet Your Match Update)
- Final cap point capture time increased to 2 seconds (from 1 second).
- Clips and blockbullets added to stairs.
October 21, 2016 Patch (Scream Fortress VIII)
- Removed
cp_badlandsfrom the Competitive maps list.
- Disabled collision on a bunch of props (mainly lights/lamps).
- Reduced attackers' spawn advantage by 1 second when working on final control point.
- Upgraded the small ammo pack to medium in the yard (on the porch).
Early Development
Trivia
- According to the Map of Mann's Land, this map is just one area of a large mass of Badlands that contains Pipeline, 2Fort, Badwater Basin, Thunder Mountain, Gravel Pit, and Well.

- The term 'Badlands' refers to an area of dry terrain where rock has been eroded by wind and water or by extensive mining.
- According to the WAR! comics, Badlands is located in New Mexico.
- In the WAR! comics, one of the photos shows the Demoman with a glove saying "Badland Brawlers". The Badland Brawlers logo again appears on the Scout's Whoopee Cap.
- The bird call you can hear in the map is that of the Northern Goshawk.
- Underneath RED's final control point, a yen symbol (¥) can be found. This is a reference to the map's creator, Iikka Keränen. It can also be found on Hydro, and a similar symbol can be found on Canals, a map he designed for Counter-Strike: Global Offensive.
Gallery

A dove that could be seen near the RED team's second/fourth control point after the June 8, 2011 Patch.

A dove that could be seen near the central rail bridge.

A dove that could be seen near the BLU team's concrete Bridge.

The Soldier statue that appears every 12th–14th of April.


