User:Lolimsogreat21/Sandbox2/Scout
Contents
- 1 Payload
- 1.1 Badwater
- 1.2 Barnblitz
- 1.3 Bloodwater
- 1.4 Borneo
- 1.5 Brimstone
- 1.6 Goldrush
- 1.7 Gravestone
- 1.8 Hellstone
- 1.9 Pier
- 1.10 Precipice
- 1.11 Snowycoast
- 1.12 Swiftwater
- 1.13 Upward
- 1.14 Hassle Castle
- 1.15 Wutville
- 1.16 Terror
- 1.17 Chilly
- 1.18 Bread Space
- 1.19 Camber
- 1.20 Cashworks
- 1.21 Corruption
- 1.22 Embargo
- 1.23 Emerge
- 1.24 Enclosure
- 1.25 Frontier
- 1.26 Frostcliff
- 1.27 Ghoulpit
- 1.28 Hoodoo
- 1.29 Odyssey
- 1.30 Phoenix
- 1.31 Polar
- 1.32 Rumford
- 1.33 Spineyard
- 1.34 Thunder Mountain
- 1.35 Venice
- 1.36 Citadel
- 1.37 Aquarius
- 1.38 Patagonia
- 2 Payload Race
- 3 Attack'n'Defend
- 3.1 DeGroot Keep
- 3.2 Burghausen
- 3.3 Sandcastle
- 3.4 Dustbowl
- 3.5 Egypt
- 3.6 Erebus
- 3.7 Gorge
- 3.8 Gorge Event
- 3.9 Gravel Pit
- 3.10 Junction
- 3.11 Mercenary Park
- 3.12 Mossrock
- 3.13 Mountain Lab
- 3.14 Mann Manor
- 3.15 Snowplow
- 3.16 Steel
- 3.17 Altitude
- 3.18 Brew
- 3.19 Carrier
- 3.20 Coal Pit
- 3.21 Frostwatch
- 3.22 Haarp
- 3.23 Hadal
- 3.24 Hardwood
- 3.25 Lava Pit
- 3.26 Spookeyridge
- 3.27 Sulfur
- 3.28 Overgrown
- 3.29 Fortezza
- 3.30 Cargo
- 3.31 Conifer
- 3.32 Fulgur
- 4 Control Points
- 5 King of the Hill
- 5.1 Badlands
- 5.2 Boardwalk
- 5.3 Blowout
- 5.4 Brazil
- 5.5 Cauldron
- 5.6 Demolition
- 5.7 Harvest
- 5.8 Harvest Event
- 5.9 Highpass
- 5.10 Kong King
- 5.11 Lakeside
- 5.12 Ghost Fort
- 5.13 Laughter
- 5.14 Lazarus
- 5.15 Maple Ridge Event
- 5.16 Megalo
- 5.17 Moldergrove
- 5.18 Moonshine Event
- 5.19 Nucleus (King of the Hill)
- 5.20 Probed
- 5.21 Sawmill (King of the Hill)
- 5.22 Slasher
- 5.23 Suijin
- 5.24 Viaduct
- 5.25 Sinthetic
- 5.26 Los Muertos
- 5.27 Cachoeira
- 5.28 Cascade
- 5.29 Eyeaduct
- 5.30 Krampus
- 5.31 Megaton
- 5.32 Rotunda
- 5.33 Sharkbay
- 5.34 Slime
- 5.35 Snowtower
- 5.36 Soul-Mill
- 5.37 Circus
- 5.38 Toxic
- 5.39 Overcast
- 5.40 Mannhole
- 6 Capture the Flag
- 7 Player Destruction
- 8 Arena
- 9 Tug of War
- 10 Mannpower
- 11 Pass Time
- 12 Special Delivery
- 13 Robot Destruction
- 14 Territorial Control
- 15 Versus Saxton Hale
- 16 Zombie Infection
- 17 Mann versus Machine
Payload
Badwater
| Badwater - overview indicators |
|---|
|
Mouseover the markers to see the name of the location
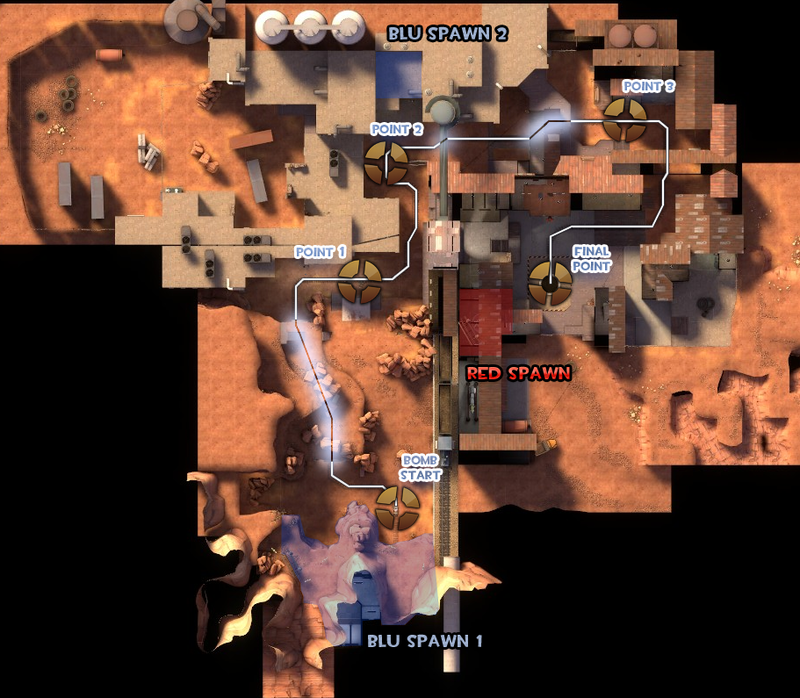
1 Side path 2 Cliffs 3 Rocks 4 Bunker 5 Back Roof 6 Back Yard 7 Back Steps 8 Roof 9 Front Steps 10 Alcove 11 Side Room 12 Bridge 13 Map Room 14 Attic 15 Alley/Chokepoint 16 Chicken-Wire Room 17 Sniper Hut 18 Courtyard 19 Spiral Staircase 20 Pit
|
Barnblitz
| Barnblitz - overview indicators |
|---|
|
Mouseover the markers to see the name of the location

1 Attacker's Yard 2 Approach 3 Left Shed 4 Cliff 5 Defender's Yard 6 Entrance 7 Dropdown 8 Upper Level 9 House Entrance 10 Second Story 11 Third Story 12 Roof 13 Hill 14 Main Entrance 15 Left Entrance Staircase 16 Platform 17 Cubby 18 Spawn Deck 19 Locker Room 20 Right Entrance Staircase A BLU first spawn B BLU second spawn C RED first spawn D RED second spawn E RED final spawn (right) Cart start Checkpoint A Checkpoint B Checkpoint C Checkpoint D/Final Checkpoint
|
Bloodwater
| Bloodwater - overview indicators |
|---|
|
Mouseover the markers to see the name of the location

1 Side Path 2 Cliffs 3 Rocks 4 Bunker 5 Back Roof 6 Back Yard 7 Back Steps 8 Roof/Lobby 9 Front Steps 10 Alcove 11 Side Room 12 Bridge 13 Map Room 14 Attic 15 Window Room 16 Alley/Chokepoint 17 Sniper Hut 18 Courtyard 19 Spiral Staircase 20 Pit A BLU first spawn B BLU second spawn C RED spawn Cart start Checkpoint A Checkpoint B Checkpoint C Checkpoint D/Final point
|
Borneo
| Borneo - overview indicators |
|---|
|
Mouseover the markers to see the name of the location
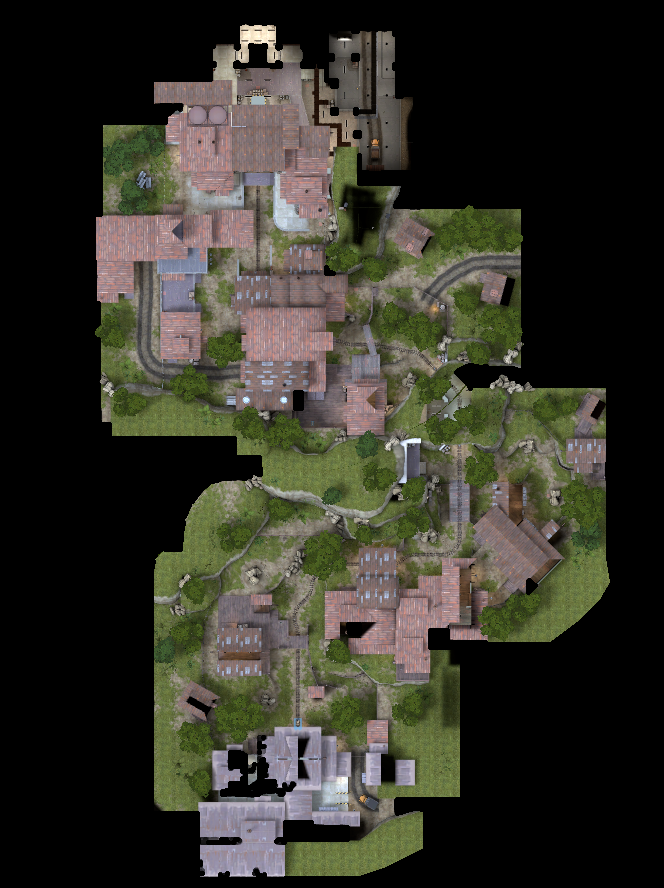
1 Shed 2 Small House 3 Maintenance Building 4 Grey Structure 5 Bridge/Ditch 6 Hill Interior 7 Tunnel 8 Giant Garage 9 Roadside Garage 10 Hut 11 Casali Building 12 Left Entrance 13 Main Entrance 14 Right Entrance 15 RED Base A BLU first spawn B BLU second spawn C BLU third spawn D RED first spawn E RED second spawn Cart start Checkpoint A Checkpoint B Checkpoint C Checkpoint D/Final Checkpoint
|
Brimstone
| Brimstone - overview indicators |
|---|
|
Mouseover the markers to see the name of the location
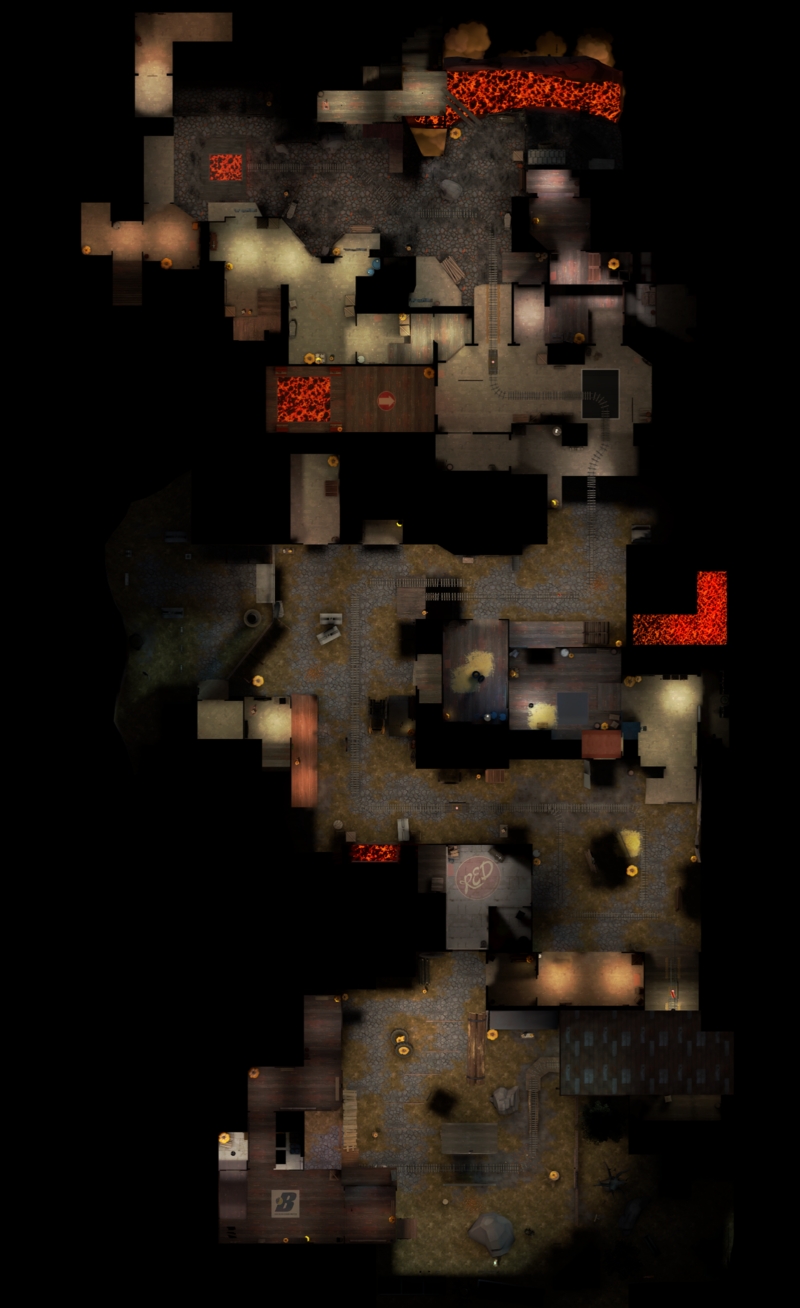
1 Lumber Mill 2 Garage 3 Shortcut to B 4 Wet Paint! 5 Dropdown 6 Dump Truck 7 Library 8 Loading Dock 9 Brick Building 10 Warehouse 11 Balcony 12 Salt Rock 13 Cliffside Shed 14 RED Deck A BLU first spawn B BLU second spawn C RED first spawn D RED second spawn E RED third spawn Cart start Checkpoint A/Tumidium Checkpoint B/Gratanter Checkpoint C/Audere Checkpoint D/Congeriae Checkpoint E/Veteris
|
Goldrush
Stage 1
| Goldrush, stage 1 - overview indicators |
|---|
|
Mouseover the markers to see the name of the location

1 Cliffs 2 Elevated tracks 3 Side Cliffs 4 Hut 5 Tunnel 6 Imperial building 7 Red deck 8 Ditch 9 Attic 10 Staircase to Attic 11 Mineshaft A BLU spawn B Red spawn Cart start Checkpoint A Checkpoint B/Stage 1 end
|
Stage 2
| Goldrush, stage 2 - overview indicators |
|---|
|
Mouseover the markers to see the name of the location
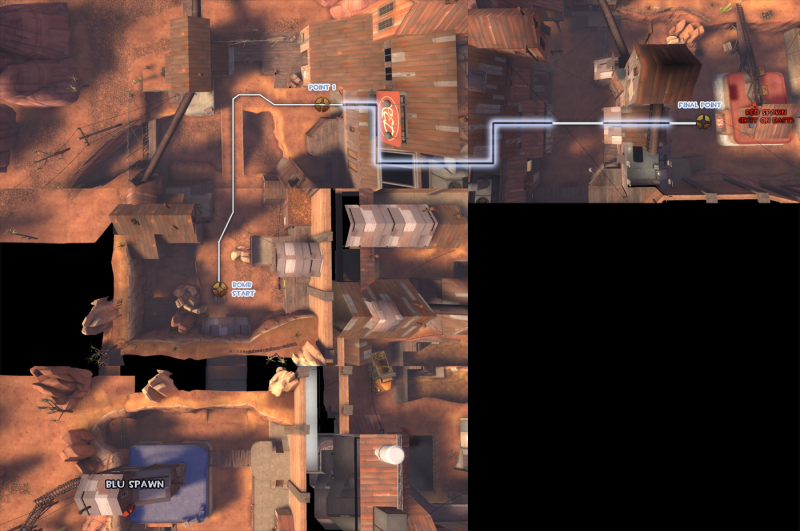
1 Watchtower 2 House 3 Bridge 4 Sniper's ledge 5 Tunnel 6 Window 7 Battlements 8 Choke Area 9 Main Buildings 10 Sentry-deck 11 Alcove 12 Left Flank A BLU spawn B RED spawn Cart start Checkpoint A Checkpoint B/Stage 2 End
|
Stage 3
| Goldrush, stage 3 - overview indicators |
|---|
|
Mouseover the markers to see the name of the location

1 Exit Tunnel 2 Truck House 3 Basin 4 Platform 5 Shortcut 6 Concrete Foundation 7 Main Hallway 8 Flank Hallway 9 Sentry deck#1 10 Sentry deck#2 11 Dropwdown 12 Bunker 13 House 14 Chokepoint 15 Narrow Building 16 Valley 17 Sniper's Deck 18 Battlements 19 Garage A BLU spawn B RED spawn C Alternative RED spawn Cart start Checkpoint A Checkpoint B Checkpoint C/Final Checkpoint
|
Gravestone
| Gravestone - overview indicators |
|---|
|
Mouseover the markers to see the name of the location
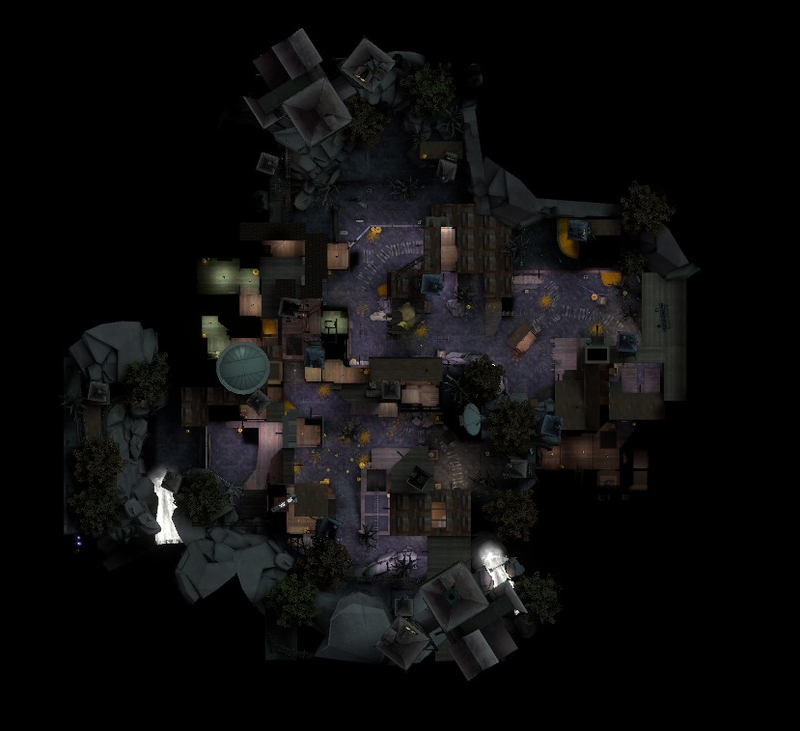
1 Shack 2 Jimi Jam 3 Red Barn 4 Shortcut 5 Kitchen 6 Binksi Logging Sawmill 7 Loading Dock 8 Death Pit 9 Pumpkin Patch 10 Backyard 11 Cauldron A BLU first spawn B BLU second spawn C RED spawn Cart start Checkpoint A Checkpoint B Checkpoint C Checkpoint D/Final Checkpoint
|
Hellstone
| Hellstone - overview indicators |
|---|
|
Mouseover the markers to see the name of the location
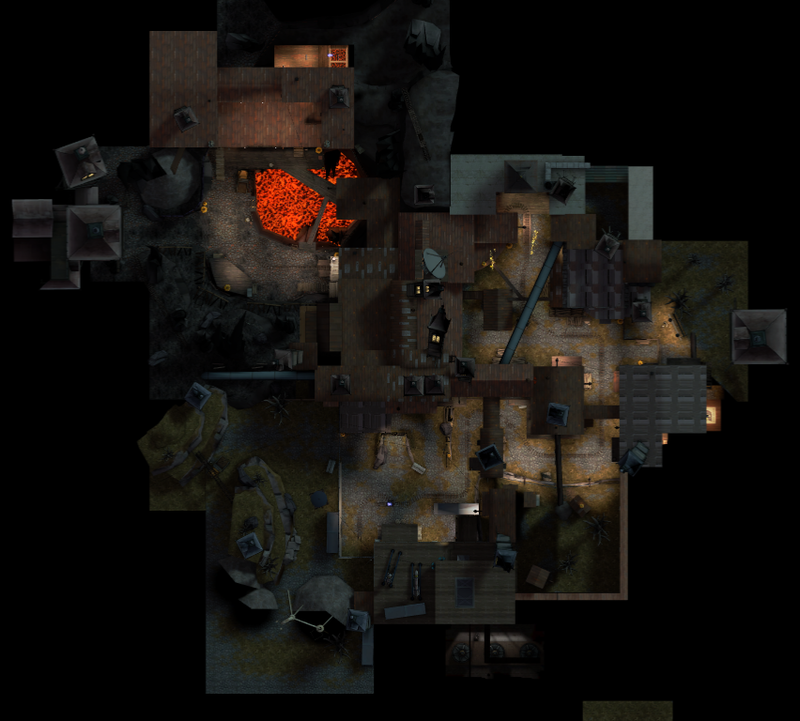
1 Cubby Hole 2 Mine Shack 3 Freight House 4 Yard 5 Horsemann's House 6 Foyer 7 Hells Bells 8 Monoculusmos Monsterinus 9 Caved-in-Tunnel 10 Shack 11 Hell Pit 12 Wet Paint! 13 Roof A BLU first spawn B BLU second spawn C BLU third spawn D RED first spawn E RED second spawn Cart start Checkpoint A Checkpoint B Checkpoint C Checkpoint D Checkpoint E/Final Checkpoint
|
Pier
| Pier - location indicators |
|---|
|
Mouseover the markers to see the name of the location
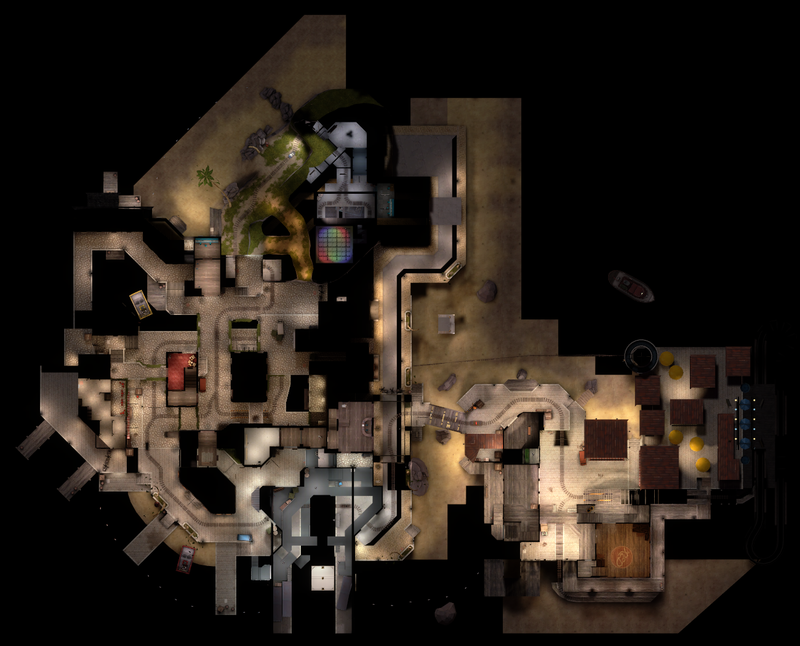
1 Coast 2 Caverns 3 Cliff 4 Hidden Room 5 Minivan Parking Space 6 Bridge 7 Red Carpet Apartments 8 Wine Cellar 9 Dropdwon Shortcut 10 Docks 11 Stone Pier 12 Loading Dock 13 Kitchen 14 Barn Bridge 15 Sandy Beach 16 Small Barn 17 Warehouse 18 Gift Shop 19 Target Range A BLU first spawn B BLU second spawn C RED first spawn / BLU third spawn D RED final spawn Cart start Checkpoint A Checkpoint B Checkpoint C Checkpoint D Checkpoint E/Final point
|
Precipice
| Precipice - overview indicators |
|---|
|
Mouseover the markers to see the name of the location
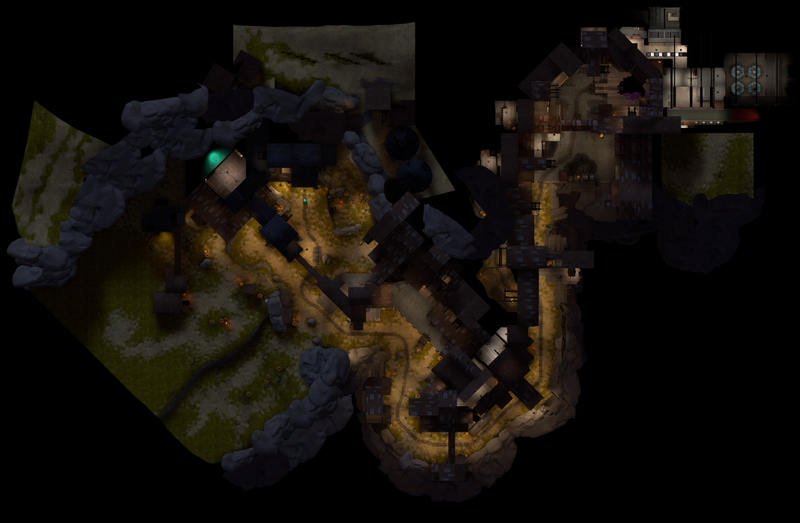
1 Courtyard 2 Buildings 3 Loading zone 4 Lean-to-Shack 5 Hollow Building 6 Three-Walled-Shack 7 Hanging Platform 8 Tunnel 9 Flank 10 Shipping Yard 11 Hidden Room 12 Hallways A BLU first spawn B BLU second spawn C RED first spawn/BLU third spawn D RED final spawn Cart start Checkpoint A Checkpoint B Checkpoint C Checkpoint D/Final Checkpoint
|
Snowycoast
| Snowycoast - overview indicators |
|---|
|
Mouseover the markers to see the name of the location
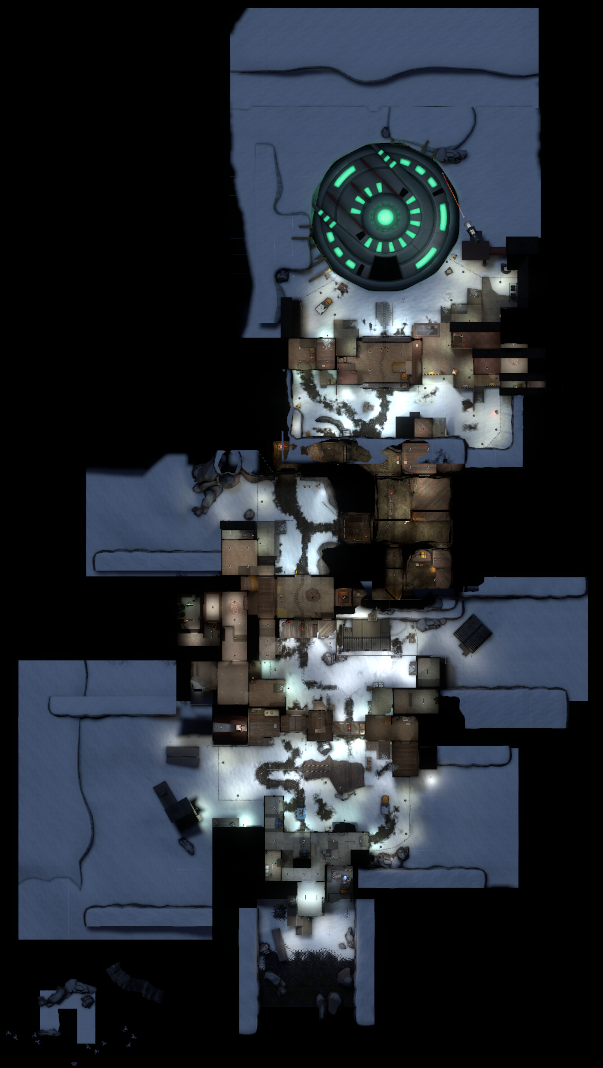
1 Incline 2 Underground Entrance 3 Side Structure 4 Cubby 5 Battlements 6 Quonset Hut 7 Kennels 8 Hallway 9 Flank 10 Mines 11 Platform 12 Mound 13 Shutter Gate 14 Red High-Ground 15 Excavation Site 16 Dump Truck Flank A BLU first spawn B BLU second spawn C BLU third spawn D RED first spawn E RED third spawn Cart start Checkpoint A Checkpoint B Checkpoint C Checkpoint D/Final Checkpoint
|
Swiftwater
| Swiftwater - overview indicators |
|---|
|
Mouseover the markers to see the name of the location

1 Basement 2 Main House 3 Front Yard 4 Ditch 5 Shack 6 Tunnel 7 Sawmill 8 Catwalks 9 Barn 10 Silos 11 Perches 12 Garage 13 Railway Courtyard 14 Corner House 15 Steep Descend 16 Battlements 17 Cliff A BLU first spawn B BLU second spawn C RED spawn Cart start Checkpoint A Checkpoint B Checkpoint C Checkpoint D Checkpoint E/Final Checkpoint
|
Upward
| Upward - overview indicators |
|---|
|
Mouseover the markers to see the name of the location

1 Roof 2 Behind the Roof 3 Slope 4 House 5 Cliff 6 Hill (Tunnel below) 7 Rocks 8 Flanking Cliff 9 B Hut 10 Apartments 11 Platform 12 Shortcut 13 Balcony 14 Spiraling Bridge 15 Under the Bridge 16 C Hut 17 Valley 18 Stairwell 19 Defender's Terrace 20 Tiles Building A BLU first spawn B BLU second spawn C RED first spawn/ BLU third spawn D RED second spawn Cart start Checkpoint A Checkpoint B Checkpoint C Checkpoint D/Final Checkpoint
|
Hassle Castle
| Hassle Castle - overview indicators |
|---|
|
Mouseover the markers to see the name of the location
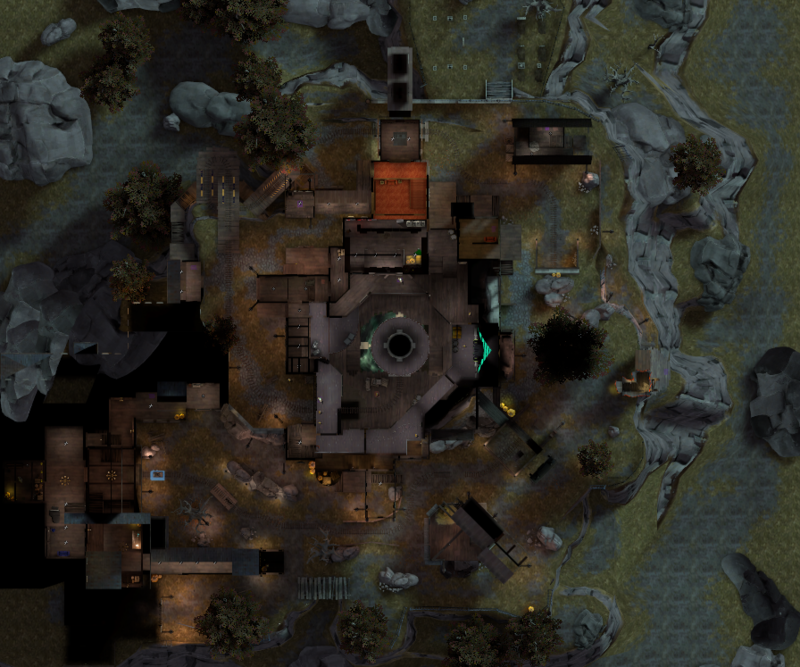
1 Roof 2 Behind Roof 3 Slope 4 House 5 Cliff 6 Hill 7 Giant Tree 8 Cliffside 9 B Hut 10 Apartments 11 Platform 12 Balcony 13 Spiraling Bridge 14 Under the Bridge 15 C Hut 16 Valley 17 Stairwell 18 Defender's Terrace and Shortcut 19 Ringed Tower (Castle) 20 Tiles Building A BLU first spawn B BLU second spawn C RED first spawn/ BLU third spawn D RED second spawn Cart start Checkpoint A Checkpoint B Checkpoint C Checkpoint D/Final Checkpoint
|
Wutville
| Wutville - overview indicators |
|---|
|
Mouseover the markers to see the name of the location
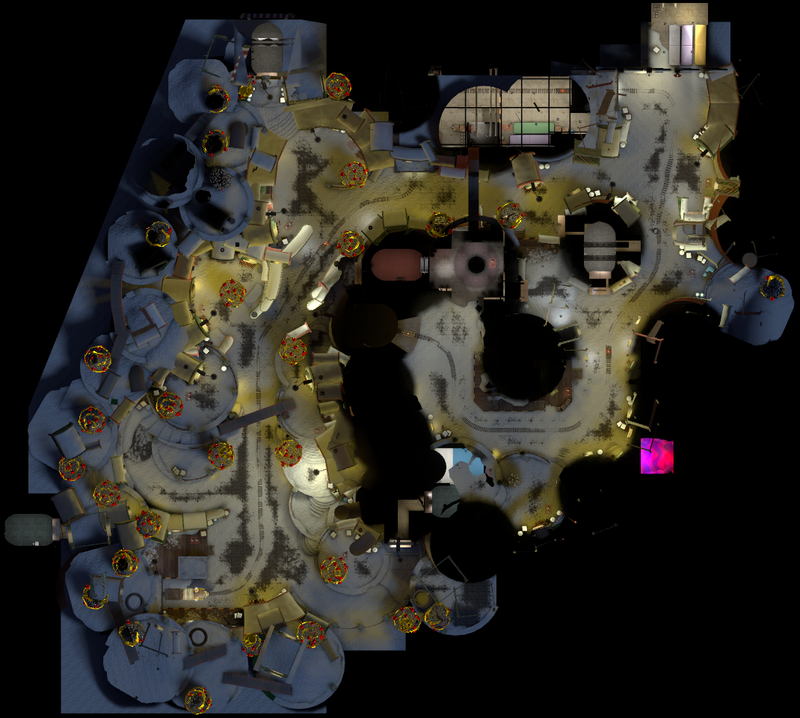
1 RÜDY's Station 2 Arch 3 Plaza 4 Alleyway 5 Wooden Path 6 Side Path A BLU first spawn B BLU second spawn/RED first spawn C BLU third spawn/RED second spawn D RED third spawn Cart start Checkpoint A Checkpoint B Checkpoint C Checkpoint D/Finale Checkpoint
|
Terror
| Terror - overview indicators |
|---|
|
Mouseover the markers to see the name of the location
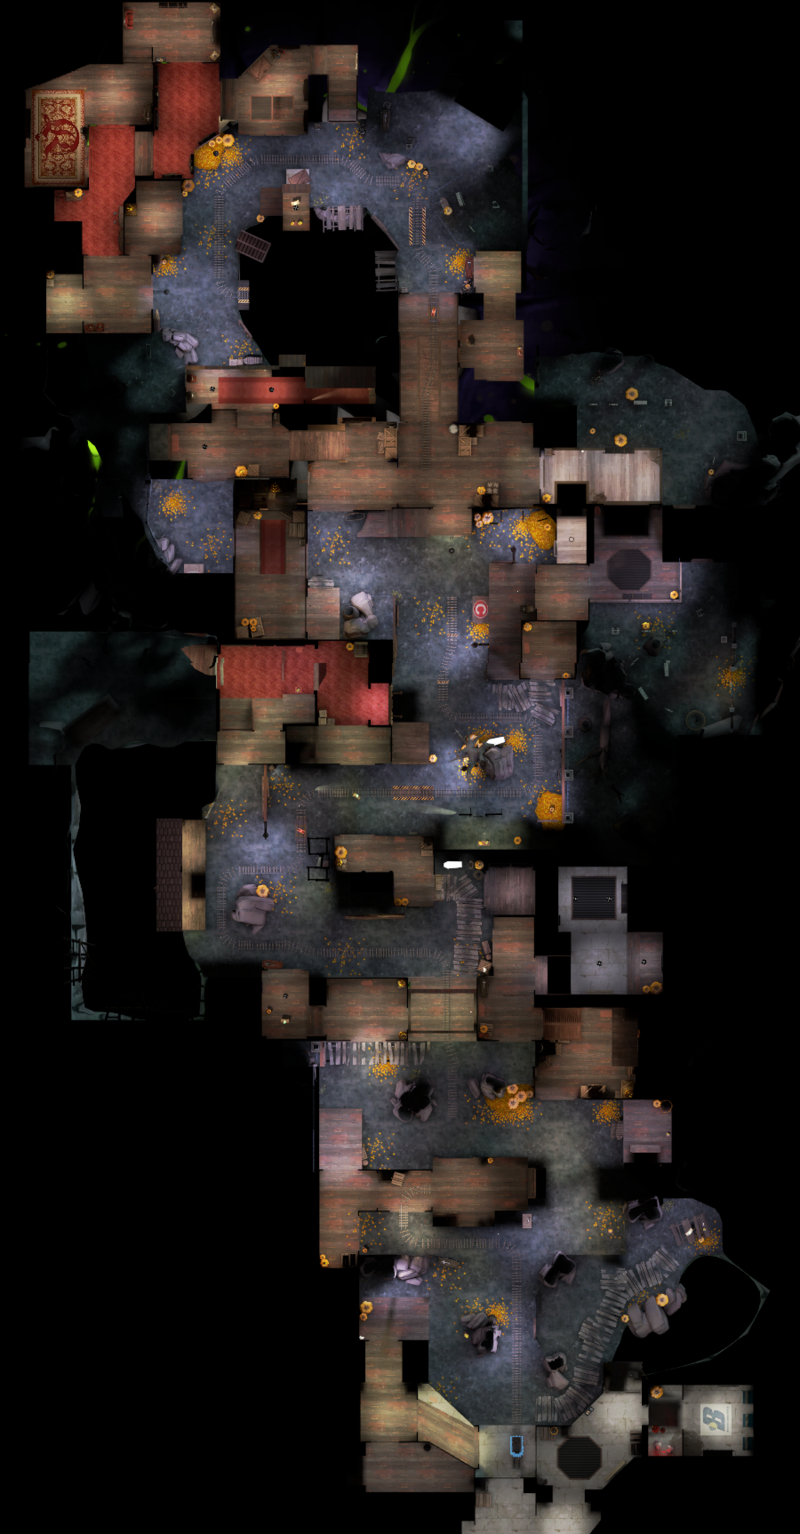
1 Front Yard 2 Low Hanging Roof 3 Left Cart Path 4 RED Shed 5 Right Cart Path 6 Rocks 7 Crossing 8 Shortcut 9 Slope 10 Old Geeser 11 Cliffside Shed 12 Bridge 13 Tree 14 Manor 15 Casali Shafting 16 Flank House 17 Pit 18 Overlooking Platform 19 Outhouse 20 Quick Exit A BLU first spawn B BLU second spawn C RED first spawn D RED second spawn E RED third spawn Cart start Checkpoint A Checkpoint B Checkpoint C Checkpoint D Checkpoint E/Final Checkpoint
|
Chilly
| Chilly - overview indicators |
|---|
|
Mouseover the markers to see the name of the location
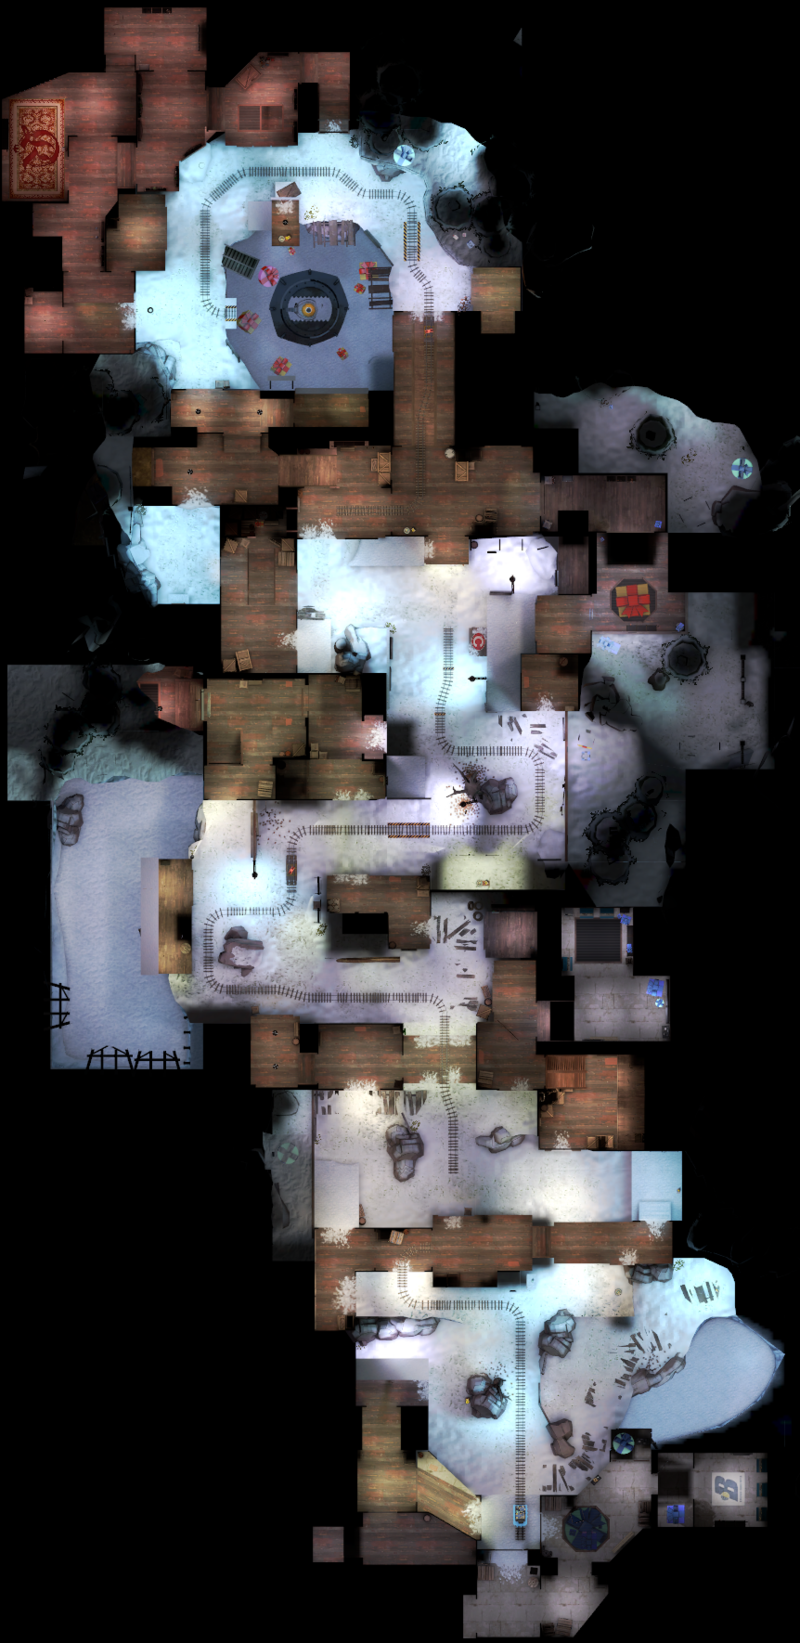
1 Front Yard 2 Low-Hanging Roof 3 Left-most cart path 4 RED Shed 5 Right-most cart path 6 Rocks 7 Crossing 8 Shortcut 9 Slope 10 Old Geeser 11 Cliffside Shed 12 Bridge 13 Tree 14 Woodland Mansion 15 Casali Shafting 16 Flank House 17 Pit 18 Overlooking Platform 19 Outhouse 20 Quick Exit A BLU first spawn B BLU second spawn C RED first spawn D RED second spawn E RED third spawn Cart start Checkpoint A Checkpoint B Checkpoint C Checkpoint D Checkpoint E/Final Checkpoint
|
Bread Space
| Bread Space - overview indicators |
|---|
|
Mouseover the markers to see the name of the location

1 Front Yard 2 Observation Post 3 Collapsed Room 4 Side Path 5 Tycho Corp 6 Elevators 7 Slope 8 Overrun Room 9 Cave Flank 10 Dropdown 11 Cliff 12 Pipe Room 13 Granite Dugout 14 Cart Airlock 15 Open Pipe 16 Alternate Doors 17 Blast Doors 18 Computer Room 19 Ventilation Duct 20 Bread Pit A BLU first spawn B BLU second spawn C RED first spawn/ BLU third spawn D RED second spawn Cart start Checkpoint A Checkpoint B Checkpoint C Checkpoint D/Finale Checkpoint
|
Camber
| Camber - overview indicators |
|---|
|
Mouseover the markers to see the name of the location
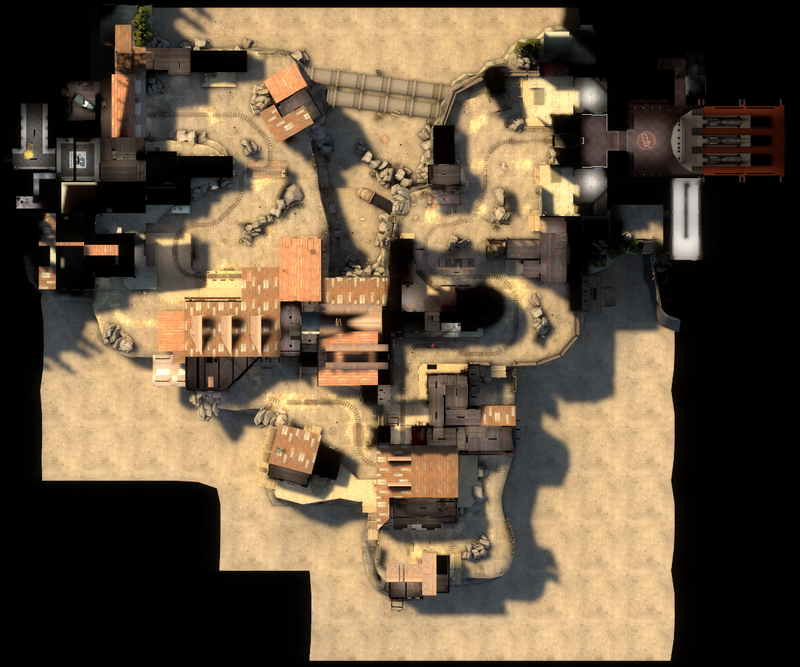
1 Cliff House A 2 Rock Wall 3 The Annex 4 Ramp 5 Bottom Floor 6 First Floor (First Building) 7 Second Floor 8 Third Floor 9 Cliff House B 10 Garage 11 Cliff 12 Upper Corridor 13 Cliff Flank 14 Drop 15 Curve 16 Rocks 17 Flank Building 18 Cliff House D 19 Maintenance Shed A BLU first spawn B BLU second spawn C RED first spawn/ BLU third spawn D RED second spawn Cart start Checkpoint A Checkpoint B Checkpoint C Checkpoint D/Finale Checkpoint
|
Cashworks
| Cashworks - overview indicators |
|---|
|
Mouseover the markers to see the name of the location

1 Crossing/Ravine 2 Overlooking Barn 3 Loading Dock 4 Overpass 5 Shortcut 6 Serpentine Decent 7 Tunnel Dugout 8 Tall Silo 9 Sawmill Conveyor Belt 10 Hallway to point B 11 Central Hub 12 Hallway to Workshop/Workshop 13 Hallway to point C 14 Grain Deposits 15 Transformers 16 Water Powerplant 17 Main Bridge (Gorge below) 18 Truck Garage 19 Foot Bridge 20 Chicken Wire Platform A BLU first spawn B BLU second spawn C RED first spawn D RED second spawn E RED third spawn Cart start Checkpoint A Checkpoint B Checkpoint C Checkpoint D/Final Checkpoint
|
Corruption
| Corruption - overview indicators |
|---|
|
Mouseover the markers to see the name of the location
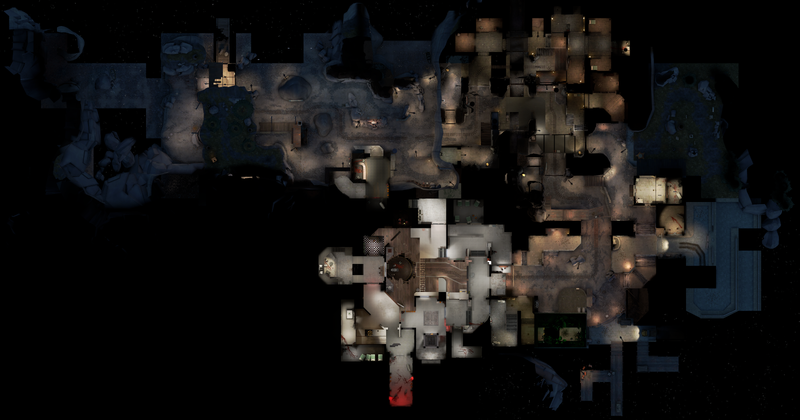
1 Water 2 Shack 3 Building 4 Brick Walls 5 Cart's Entrance 6 Prison Cells 7 Water Corridor 8 Perch 9 Metal Catwalk/Drop 10 Stairs Corridor 11 Arched Building/Wooden Catwalk 12 Fountain 13 Botanical Gardens 14 Morgue 15 Entry Gate 16 Windows Corridor 17 Staircase 18 Reception/Great Catwalk 19 Elevator 20 Patient Rooms/Maintenance Room below A BLU first spawn B BLU second spawn C RED first spawn/ BLU third spawn (Security Room) D RED second spawn E RED third spawn (Medical Facilities) Cart start Checkpoint A Checkpoint B Checkpoint C Checkpoint D/Finale Checkpoint
|
Embargo
| Embargo - overview indicators |
|---|
|
Mouseover the markers to see the name of the location

1 Helipad 2 Cave 3 Meta Lurgica 4 Rope Vieja 5 Main Street 6 Flag Tower 7 Peixuxa 8 Pedway 9 Barricades 10 Casino Entrance 11 Casino Reception 12 Flank Hallway 13 Chandelier/Central Lobby 14 Escalator 15 Hot Tub 16 Balcony 17 Lava Plant 18 Servers 19 Office Lounge 20 Observation Post A BLU first spawn B BLU second spawn C BLU third spawn D RED first spawn E RED final spawn Cart start Checkpoint A/BLU trailer truck Checkpoint B/Casino Entrance Checkpoint C/Loading Zone Checkpoint D/Finale Checkpoint
|
Emerge
| Emerge - overview indicators |
|---|
|
Mouseover the markers to see the name of the location
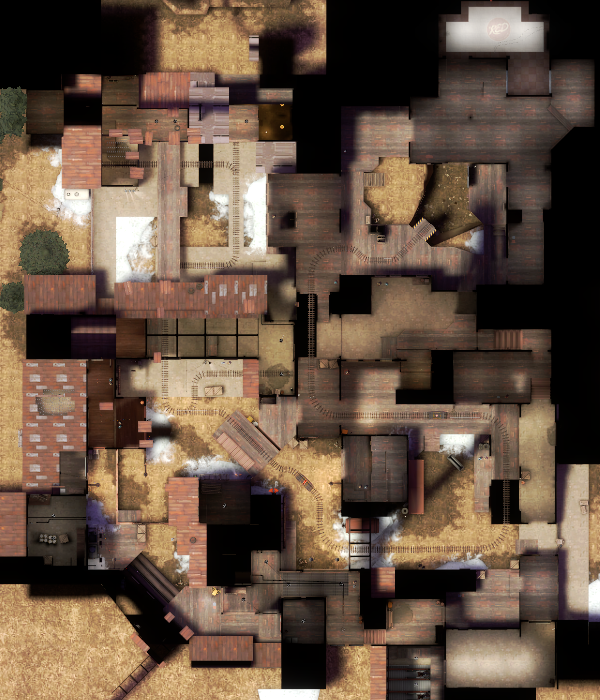
1 First Yard 2 Choke Building 3 Second Floor 4 Second Yard 5 Pipe Flank 6 Ramp 7 Shortcut 8 Grate Room 9 Arch 10 Stairs Room 11 Third Yard 12 Railway Building 13 Observation Deck 14 Stair Flank 15 Warehouse 16 Entry Yard 17 Cart's Corridor 18 Final Yard 19 Plank Bridge/Pit 20 Veranda A BLU first spawn B BLU second spawn C BLU third spawn D RED spawn Cart start Checkpoint A Checkpoint B Checkpoint C/Final Checkpoint
|
Enclosure
Stage 1
| Ensclosure, stage 1 - overview indicators |
|---|
|
Mouseover the markers to see the name of the location

1 Chasm 2 Chasm Crossing 3 Ramps 4 Front Door 5 Service Hall 6 Back Stairs 7 High Hide/One-way 8 Alcove 9 Observation Room 10 Balcony 11 Pipes 12 Restricted Area 13 Catwalks 14 Sorting Shed A BLU spawn B RED spawn Cart Start Checkpoint A Checkpoint B (Stage one end)
|
Stage 2
| Enclosure, stage 2 - overview indicators |
|---|
|
Mouseover the markers to see the name of the location

1 Trail 2 Stream 3 Dugout 4 Security Station 5 Control Room 6 One-way Flank 7 Cargo Shack 8 Wood Deck 9 Pipeline 10 Radio Shack 11 Goldbloom Room 12 Attic/Cubby 13 Boathouse 14 Airboat Flank A BLU spawn B RED spawn Cart start Checkpoint A/Security Station Checkpoint B/Stage two end
|
Stage 3
| Enclosure, stage 3 - overview indicators |
|---|
|
Mouseover the markers to see the name of the location

1 Boardwalk 2 Boulders 3 Raptor Enclosure 4 Towers 5 Bunker 6 Left Portal 7 Perimeter Gate 8 Right Portal 9 Elevator 08 10 Vent 11 Loading Area 12 Overpass 13 Transformer Station 14 Shipping and Receiving 15 Drop Down 16 Observation Post 17 Tyrannosaurus rex Enclosure A BLU first spawn B BLU second spawn C RED spawn Cart start Checkpoint A Checkpoint B Checkpoint C/Final Checkpoint
|
Frontier
| Frontier - overview indicators |
|---|
|
Mouseover the markers to see the name of the location

1 Shack 2 Cave 3 Tower 4 Dwellings 5 Cliffs 6 Canyon 7 House 8 First Incline 9 Rock Wall 10 Warehouse 11 Spiraling Ramp 12 Maintenance Shed 13 One-way Gate 14 Hollow Building 15 Rock Plateau 16 Balcony Building 17 Antenna Building 18 RED Catwalk and the Below Flank A BLU first spawn B RED first spawn/BLU second spawn C BLU third spawn D RED second spawn/BLU fourth spawn E RED third spawn Cart start Checkpoint A Checkpoint B Checkpoint C Checkpoint D/Finale Checkpoint
|
Frostcliff
| Frostcliff - overview indicators |
|---|
|
Mouseover the markers to see the name of the location
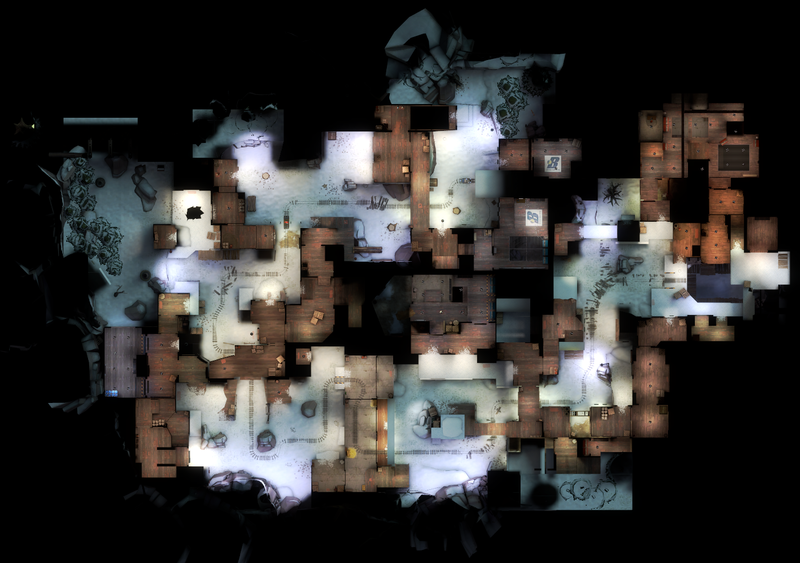
1 Captain Dan's Wood Pulp 2 Pinkerpaw Packaging 3 Valley 4 Husky Acres 5 Alcove 6 Jenkin Passage/Underpass 7 The Rock 8 Snowy Fields 9 Red Barn 10 Overlooking Balcony 11 Dilapidated Shack 12 Mine Flank 13 Coldbreeze Building 14 RED Bread Shed 15 RED Bread Hill 16 Loading Dock 17 Wooden Catwalk 18 Battlements A BLU first spawn B BLU second spawn C RED first spawn D BLU third spawn E RED second spawn Cart start Checkpoint A Checkpoint B Checkpoint C Checkpoint D Checkpoint E/Final Checkpoint
|
Ghoulpit
| Ghoulpit - overview indicators |
|---|
|
Mouseover the markers to see the name of the location
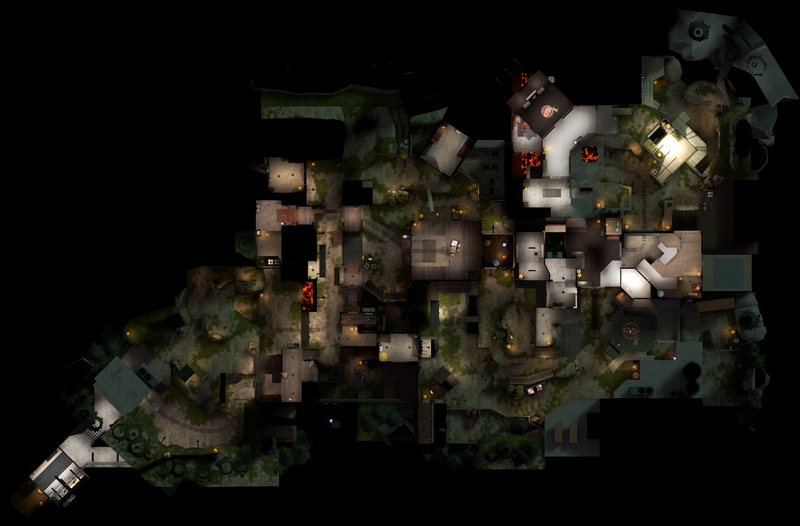
1 Plateau 2 Funnel 3 Corridor 4 Field 5 Mid Barn 6 Bend 7 Helipad 8 Underpass 9 Balcony 10 Greenhouse A BLU first spawn B BLU second spawn C RED first spawn D RED second spawn Cart start Checkpoint A Checkpoint B Checkpoint C Checkpoint D/Finale Checkpoint
|
Hoodoo
Stage 1
| Hoodoo, stage 1 - overview indicators |
|---|
|
Mouseover the markers to see the name of the location

1 Hoodoos 2 Cliff Flank 3 Sealed Mineshaft 4 Clearing 5 Lower Path 6 Grain Chute 7 Upper Path 8 Tunnels 9 Wooden Perch 10 Choke 11 Wooden Dropdown 12 Windows 13 Ravine 14 Balcony A BLU spawn B RED spawn Cart start Checkpoint A Checkpoint B/Stage 1 end
|
Stage 2
| Hoodoo, stage 2 - overview indicators |
|---|
|
Mouseover the markers to see the name of the location

1 Stealthy Dropdown 2 Mining Building 3 Hoodoos 4 Roof 5 Flank Hallway 6 Chokepoint 7 Tunnel 8 Upper Tunnel 9 Valley 10 Concrete 11 Minecart Mineshaft A BLU spawn B RED spawn Cart start Checkpoint A Checkpoint B/Stage 2 end
|
Stage 3
| Hoodoo, stage 3- overview indicators |
|---|
|
Mouseover the markers to see the name of the location

1 Brown Nuggets Shed 2 Upper Deck 3 Catwalk 4 Hidden Nook 5 Mining Camp 6 Dropdown 7 Bend 8 Battlements 9 Explosives Shed 10 Checkpoint Building A BLU spawn B RED spawn Cart start Checkpoint A Checkpoint B/Final Point
|
Odyssey
| Odyssey - overview indicators |
|---|
|
Mouseover the markers to see the name of the location

1 Acropolis Ruins 2 Steps 3 Vitruvian vase Temple 4 Cliff Flank #1 5 Shipping House 6 Mossy Perch 7 Serpentine Descent 8 Observation Platform 9 Scaffolded Temple 10 Cliff Flank #2 11 Stone Depository 12 Overpass 13 Odessa Mining Corp HQ 14 Workers Barracks 15 Hollowed-out Hill 16 Final Building 17 Wooden Platform 18 RED Battlements (Cavern below) 19 RED Shed 20 Quarry Flank A BLU first spawn B BLU second spawn C RED first spawn D BLU third spawn E RED second spawn Cart start Checkpoint A/Temple Checkpoint B/Steps Checkpoint C/Quarry Checkpoint D/Final Checkpoint
|
Phoenix
| Phoenix - overview indicators |
|---|
|
Mouseover the markers to see the name of the location
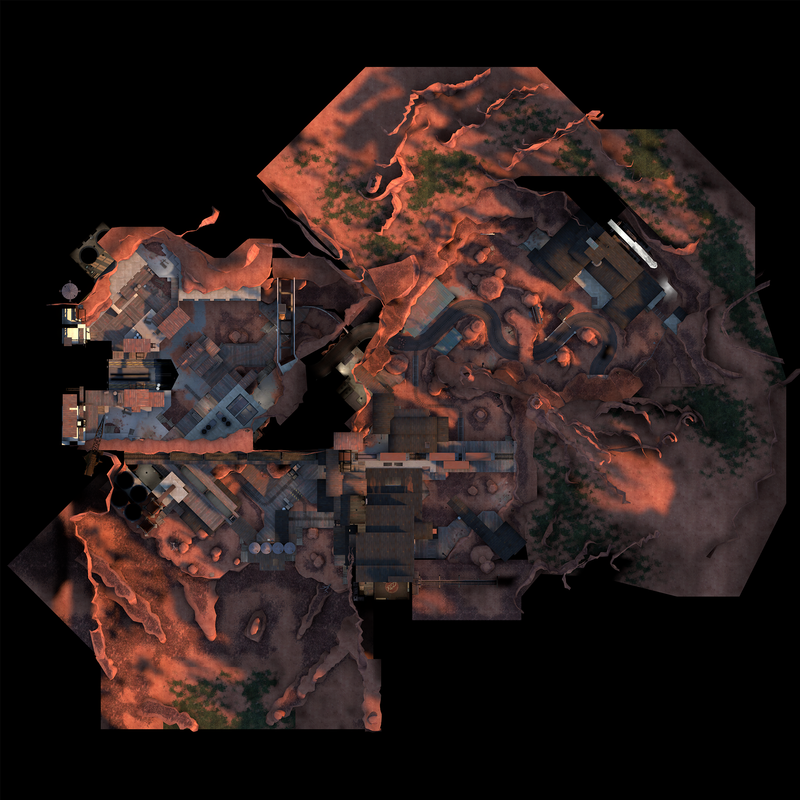
1 Stream 2 Arch 3 Pond 4 Restrooms 5 Road Tunnel 6 Tunnel Gate 7 Wagon Building 8 Rail Trestle 9 Pulley House 10 Loading Zone 11 ABC's Gate 12 Rollback 13 Silos 14 Cliffside 15 Concrete Plant entrance 16 Concrete Plant Balcony 17 BLU Battlements 18 Lift 19 RED Battlements 20 Machinery Shed A BLU first spawn (Watermill) B BLU second spawn C RED first spawn D BLU third spawn E RED second spawn Cart start Checkpoint A (Canyon) Checkpoint B (Depot) Checkpoint C (Concrete Plant) Checkpoint D/Finale Checkpoint (Hydroelectric Plant)
|
Polar
| Polar - overview indicators |
|---|
|
Mouseover the markers to see the name of the location
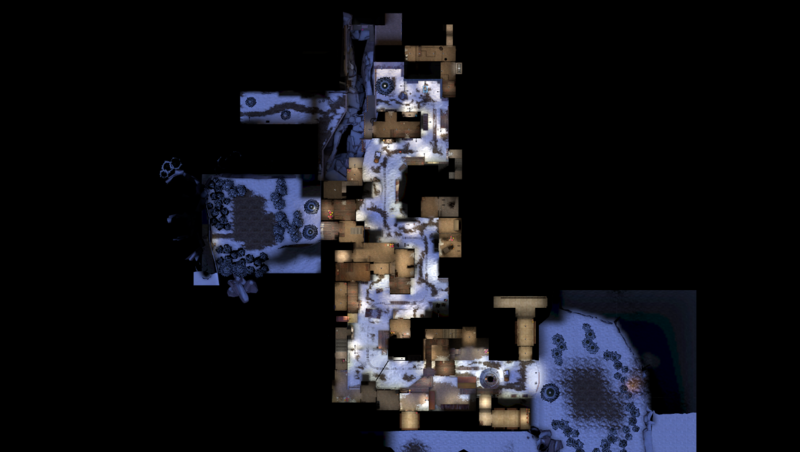
1 Christmas Tree 2 Brick Building 3 Ammo Deck 4 Chute 5 A-point Building 6 Shortcut 7 Jenkin Coal Co. 8 Staircase Shack 9 Concrete Platform 10 Sniper's Hut 11 Dropdown 12 Valley 13 Gates 14 Gate Flank 15 Cubby 16 Clearing 17 Factory 18 Factory Balcony 19 Shipping Crates 20 Parked Truck A BLU first spawn B BLU second spawn C RED first spawn D RED second spawn E RED third spawn Cart start Checkpoint A Checkpoint B Checkpoint C Checkpoint D/Final Checkpoint (Delivery Pod)
|
Rumford
| Rumford - overview indicators |
|---|
|
Mouseover the markers to see the name of the location
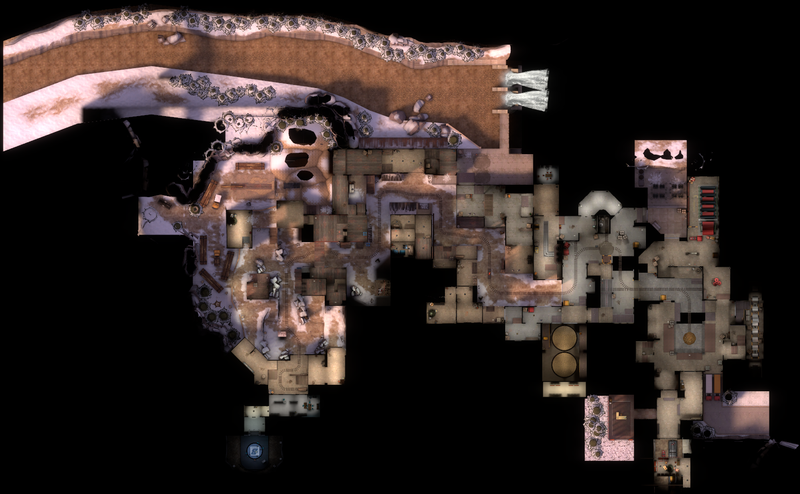
1 Flank 2 BLU Building 3 Bridge 4 RED Barn 5 Wood Chipper Path 6 Windows 7 Conveyor Building 8 Bayou Shipping 9 Rumford Paper Co. 10 Chicken Wire Shed 11 Wood Chirp Storage 12 Entranceway 13 Turntable 14 Transformers 15 Wrapping Paper Foil Room 16 RED Battlements A BLU first spawn B BLU second spawn C BLU third spawn D RED first spawn E RED final spawn Cart start Checkpoint A Checkpoint B Checkpoint C/Finale Checkpoint
|
Spineyard
| Spineyard - overview indicators |
|---|
|
Mouseover the markers to see the name of the location
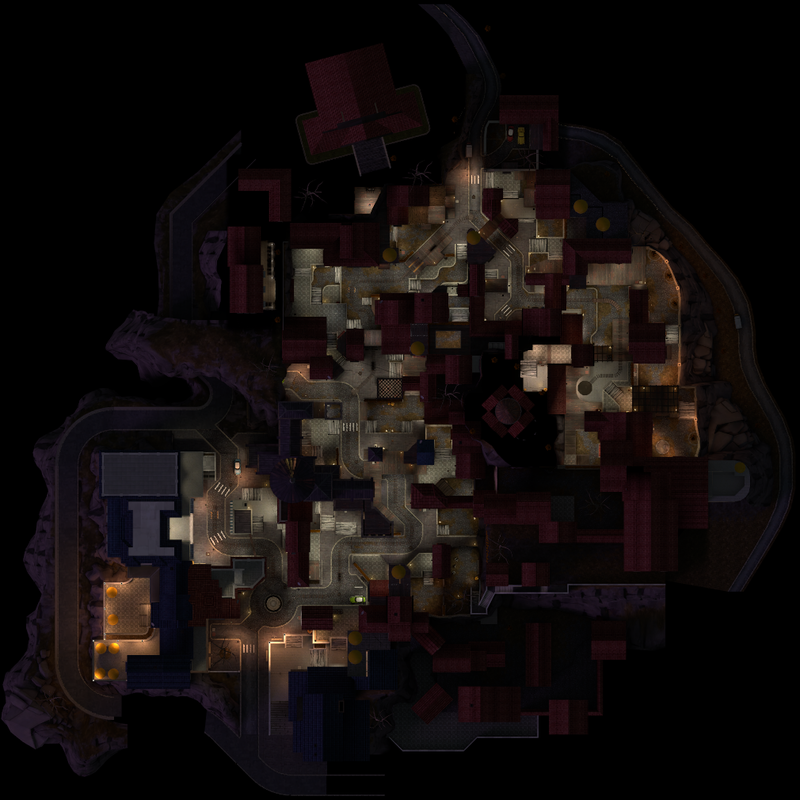
1 Vino Dalla Vigna 2 Three Connected Buildings 3 Two-Storey Building 4 Fountain 5 Alley 6 Hotel 7 Castle Stairs 8 One-way Gate 9 Tunnel 10 Second Alleyway 11 The Lone Gravestone 12 Gates 13 The Lone Coffin 14 Villa 15 Steep Incline 16 Wooden Catwalk 17 Building Overpass 18 Second-to-last Yard 19 Cliffside Flank 20 Oasis A BLU first spawn B BLU third spawn C RED first spawn D RED third spawn E RED fourth spawn Cart start Checkpoint A Checkpoint B Checkpoint C Checkpoint D/Finale Checkpoint (Winery Yard)
|
Thunder Mountain
Stage 1
| Thunder Mountain, stage 1 - overview indicators |
|---|
|
Mouseover the markers to see the name of the location

1 Plateau 2 Shed 3 Courtyard 4 Log House 5 Multi-story Villa 6 Right Stable 7 First Ramp 8 Left Stable 9 Raised Bridge 10 Ravine 11 Wooden Catwalk 12 Basement 13 Barn 14 Second Ramp 15 Red Balcony 16 RED spawn exit 17 Chicken-Wire Shed A BLU spawn B RED spawn Cart start Checkpoint A Checkpoint B/Stage 1 End
|
Stage 2
| Thunder Mountain, stage 2 - overview indicators |
|---|
|
Mouseover the markers to see the name of the location
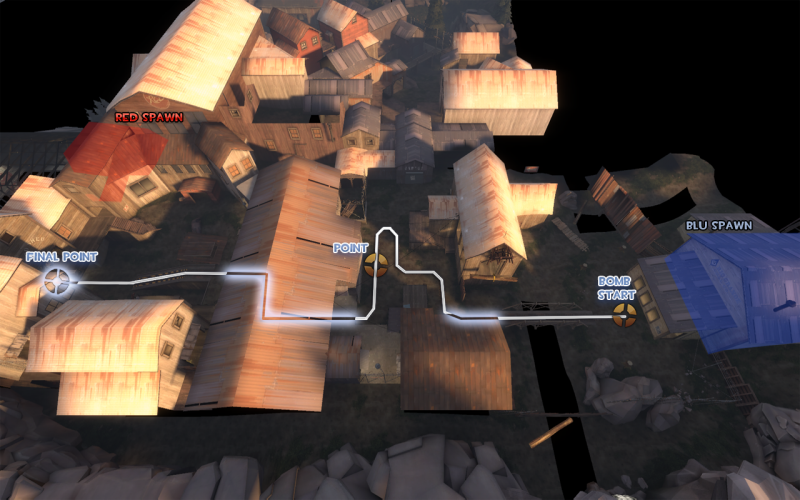
1 Rocky Flank 2 Sawmill 3 River 4 Truss Bridge 5 Choke 6 Elevated Shed 7 U-Bend 8 Tunnel Entrance 9 Metal Platform 10 Lobby/Tunnel House 11 Dropdown 12 Large Balcony/Tunnel Exit 13 Cubby Hole 14 Hay Buildings 15 Fourth Floor 16 RED Battlements A BLU spawn B RED spawn Cart start Checkpoint A Checkpoint B/Stage two end
|
Stage 3
| Thunder Mountain, stage 3 - overview indicators |
|---|
|
Mouseover the markers to see the name of the location

1 Warehouse Staircase 2 Wooden Catwalk/Warehouse 3 BLU Warehouse Shortcut 4 Terrace 5 RED Warehouse Shortcut 6 RED Courtyard 7 Valley 8 Spiral 9 Apse 10 BLU Binksi Logging Shortcut 11 Connecting Platform 12 RED Binksi Logging Shortcut 13 Binski Logging Staircase 14 Deck 15 Foyer/Binski Logging 16 Storage Room A BLU spawn B RED spawn Cart start Checkpoint A/Warehouse Checkpoint B/Binksi Logging Checkpoint C/Final Checkpoint
|
Venice
| Venice - overview indicators |
|---|
|
Mouseover the markers to see the name of the location
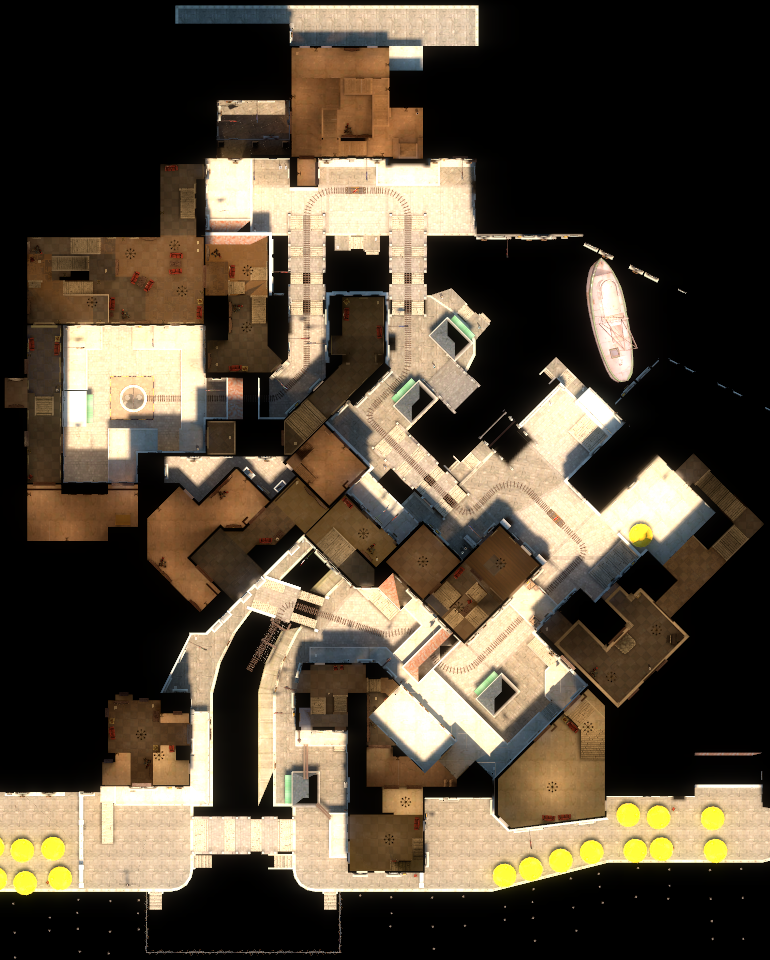
1 Canal 2 Apartments 3 Cart Bridge 4 Skybridge 5 Courtyard 6 Piano Lounge 7 Staircase 8 Terrace 9 Small Balcony 10 Reading Room 11 First Shortcut 12 Second Shortcut 13 Second Cart Bridge 14 Raised Bridge 15 Green Tapestry Shortcut 16 Third Cart Bridge 17 Embassy 18 Fourth Cart Bridge 19 Palace Lobby 20 Palace Interior A BLU first spawn B BLU second spawn C RED first spawn D RED second spawn E RED third spawn Cart start Checkpoint A Checkpoint B Checkpoint C Checkpoint D/Final Checkpoint
|
Citadel
| Citadel - overview indicators |
|---|
|
Mouseover the markers to see the name of the location
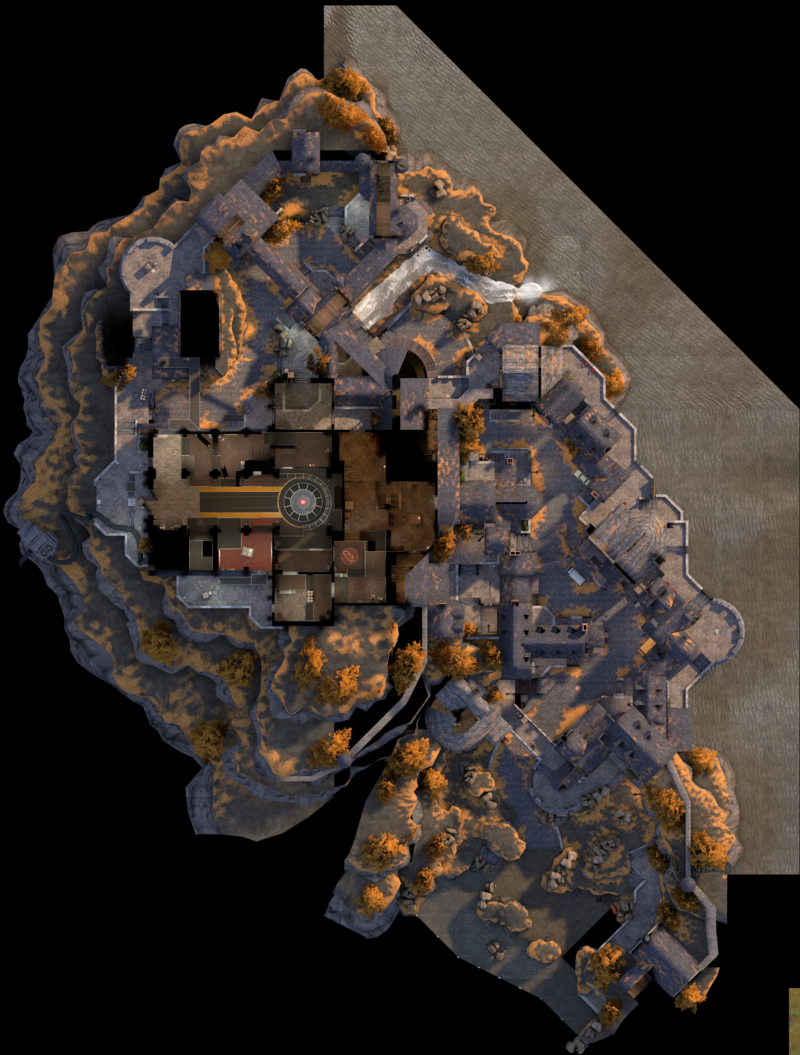
1 Muddy Beach 2 First Shortcut 3 Arch 4 Spiral Staircase 5 Inn 6 Humboldt's Pharmacy 7 Alchemist 8 Gable House 9 Bell Tower 10 Second Shortcut 11 Tunnel 12 Giant Lantern 13 Drawbridge 14 Cliffside Flank 15 Pedway 16 North Transept Arm 17 Flying Buttress 18 Main Entrance 19 Apse Catwalk 20 South Transept Arm A BLU first spawn B BLU second spawn C BLU third spawn D RED spawn Cart start Checkpoint A Checkpoint B Checkpoint C Checkpoint D (Side Entrance) Checkpoint E/Final Checkpoint
|
Aquarius
| Aquarius - overview indicators |
|---|
|
Mouseover the markers to see the name of the location
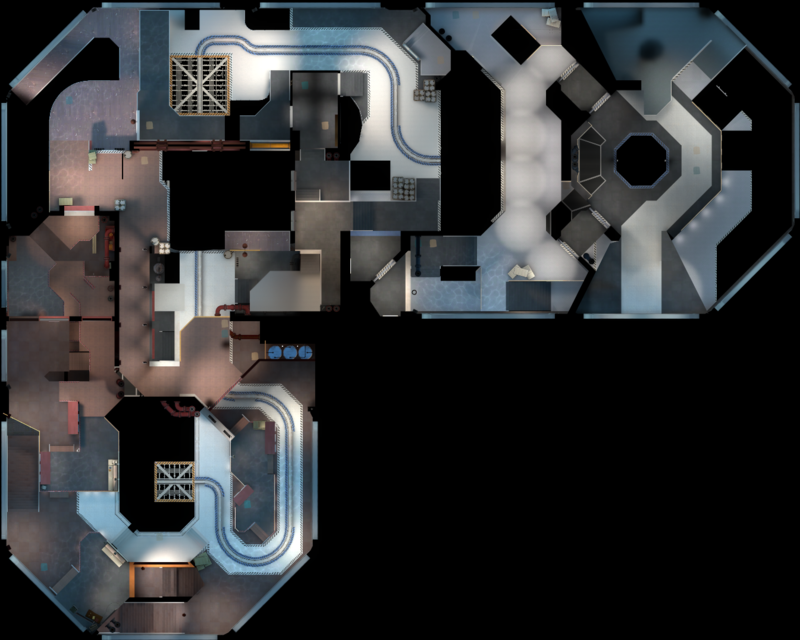
1 First Moon Pool Walkway 2 First Moon Pool 3 Checkpoint B Lift 4 Storage Tank Building 5 Checkpoint C Lift 6 Second Moon Pool Walkway 7 Second Moon Pool 8 Checkpoint C Flank 9 Yellow Platform 10 Flank Hallways A BLU spawn C RED spawn Cart start Checkpoint A Checkpoint B Checkpoint C Checkpoint D/Finale Checkpoint
|
Patagonia
Stage 1
| Patagonia, stage 1 - overview indicators |
|---|
|
Mouseover the markers to see the name of the location

1 Ridge 2 Gardening Shed 3 Cliffside 4 Shortcut 5 Mineshaft Entry 6 Canyon 7 Ore Depository 8 Damaged House 9 Cliffside Shed 10 Argentum Stash 11 Second Cliffside 12 Elevator Control Building 13 Elevator A BLU spawn B RED spawn Cart start Checkpoint A Checkpoint B/Stage 1 end
|
Stage 2
| Patagonia, stage 2 - overview indicators |
|---|
|
Mouseover the markers to see the name of the location

1 Waterfall 2 Rapids 3 Cavern 4 Ore Refinery 5 Shortcut 6 Railway Bridge Underpass 7 Cliffside Warehouse 8 Rock 9 Main Entrance 10 Dropdown 11 Patagonia State Main Yard 12 Side Entrance 13 Auxiliary Entrance 14 Double Gates 15 Fuse Box Shed A BLU first spawn B BLU second spawn C RED second spawn D RED first spawn/BLU third spawn Cart start Checkpoint A Checkpoint B Checkpoint C Checkpoint D/Stage 2 end
|
Stage 3
| Patagonia, stage 3 - overview indicators |
|---|
|
Mouseover the markers to see the name of the location

1 Stream 2 Row Boat House 3 Garage 4 Shortcut 5 Wooden Arch 6 White Mansion 7 Courtyard 8 Final Cliffside Shed 9 Glacier Viewpoint 10 Scientific Research Station 11 Slide A BLU spawn B RED spawn Cart start Checkpoint A Checkpoint B/Final Checkpoint
|
Payload Race
Banana Bay
| Banana Bay - overview indicators |
|---|
|
Mouseover the markers to see the name of the location
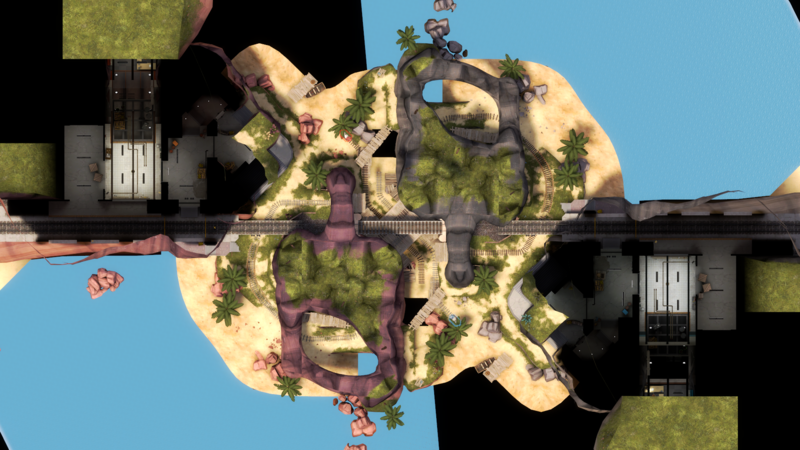
1 Sally Port 2 Deck 3 BLU Bay 4 Highline (Low Bridge and Subway below) 5 Syphon 6 Incline 7 Platform A RED spawn B BLU spawn RED cart start RED cart finish BLU cart start BLU cart finish
|
Helltower
| Helltower - overview indicators |
|---|
|
Mouseover the markers to see the name of the location
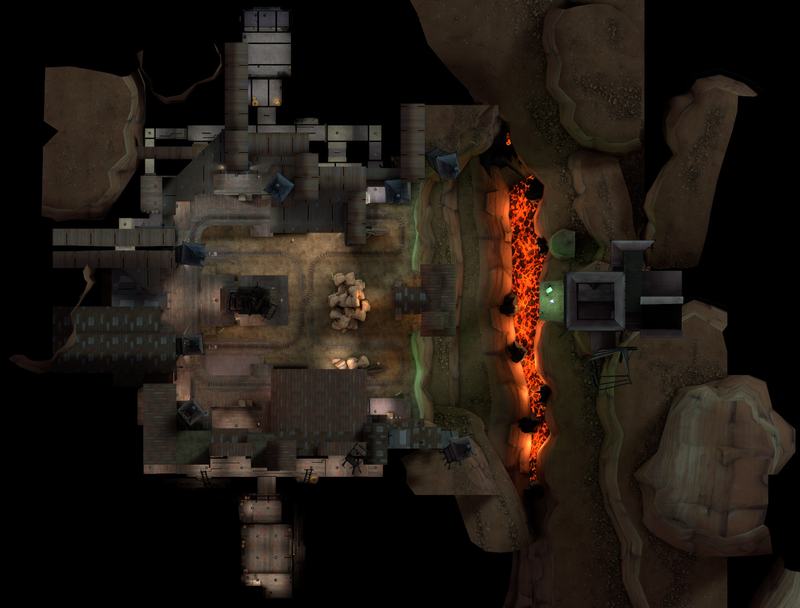
1 Tower Corridor 2 Sniper Balcony 3 Small Puddle Room 4 Central Tower 5 Crossing 6 The Ramp 7 Cliff House 8 Bridge 9 Clocktower A RED spawn B BLU spawn RED cart start RED cart finish BLU cart start BLU cart finish
|
Bonesaw
| Bonesaw - overview indicators |
|---|
|
Mouseover the markers to see the name of the location

1 Lobby 2 Garage 3 Cliff Side 4 First Crossing 5 Giant Pine 6 Barn 7 Cliffside House 8 Second Crossing 9 Two Graves and the pit A BLU spawn B RED spawn RED cart start RED cart finish BLU cart start BLU cart finish
|
Hacksaw
| Hacksaw - overview indicators |
|---|
|
Mouseover the markers to see the name of the location
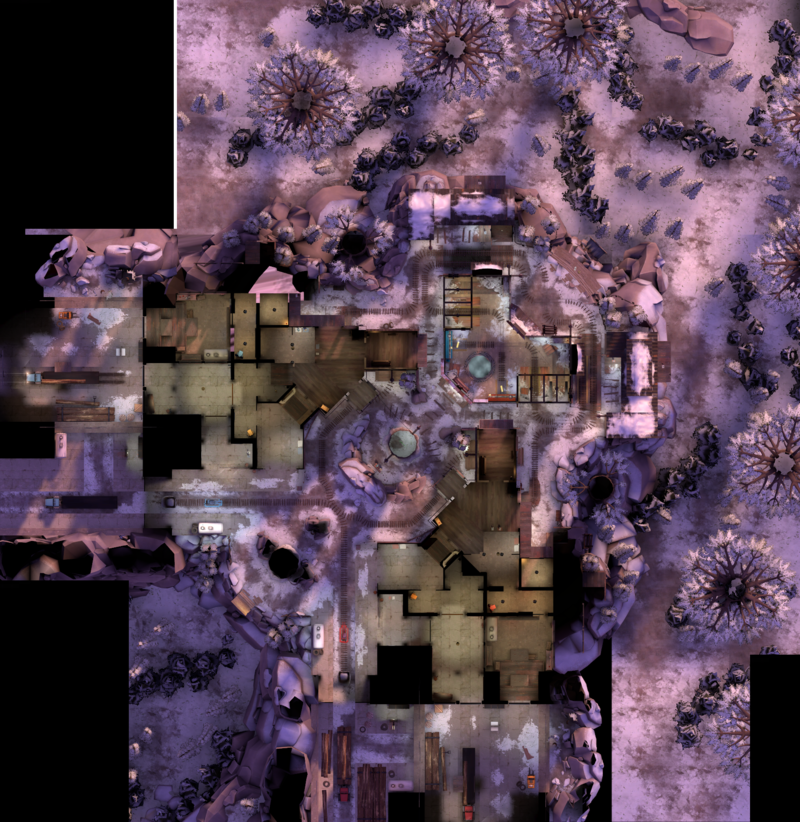
1 Lobby 2 Garage 3 Cliff Side 4 First Crossing 5 Giant Pine 6 Barn 7 Cliffside House 8 Second Crossing 9 Two Graves and the pit A BLU spawn B RED spawn RED cart start RED cart finish BLU cart start BLU cart finish
|
Hightower
| Hightower - overview indicators |
|---|
|
Mouseover the markers to see the name of the location

1 Tower Corridor 2 Sniper Balcony 3 Central Tower 4 Crossing 5 Ramp 6 Cliff House A RED spawn B BLU spawn RED cart start RED cart finish BLU cart start BLU cart finish
|
Nightfall
Stage 1
| Nightfall, stage 1 - overview indicators |
|---|
|
Mouseover the markers to see the name of the location

1 Courtyard 2 Australium Stash 3 Chicken-Wire Room 4 Overpass 5 Central Shed 6 Crossing 7 Connecting Corridor 8 Storage Room A BLU spawn B RED spawn RED cart start RED cart finish BLU cart start BLU cart finish
|
Stage 2
| Nightfall, stage 2 - overview indicators |
|---|
|
Mouseover the markers to see the name of the location

1 Dump Truck Courtyard 2 Cave 3 Crossing 4 Ramp 5 Dropdown 6 Slope 7 Barn A BLU spawn B RED spawn RED cart start BLU cart start (2) RED cart finish BLU cart start BLU cart finish
|
Stage 3
| Nightfall, stage 3 - overview indicators |
|---|
|
Mouseover the markers to see the name of the location

1 Kitchen 2 Storage Tank Room 3 Sewer 4 Crossing 5 Pool 6 Slide 7 Pedway 8 Trench A BLU spawn B RED spawn RED cart start RED cart finish BLU cart start BLU cart start (2) BLU cart start (3) BLU cart finish
|
Pipeline
Stage 1
| Pipeline, stage 1 - overview indicators |
|---|
|
Mouseover the markers to see the name of the location

1 Side Flank 2 Docking Bay 3 Storage Room 4 Platform 5 Central Flank 6 Gate 7 Window A BLU spawn B RED spawn RED cart start RED cart finish BLU cart start BLU cart finish
|
Stage 2
| Pipeline, stage 2 - overview indicators |
|---|
|
Mouseover the markers to see the name of the location

1 Maintenance Room 2 Catwalk 3 Observation Room 4 Emergency Staircase 5 Transformers 6 Train Tunnel 7 Battlements A BLU spawn B RED spawn RED cart start RED cart finish BLU cart start RED cart start (2) BLU cart finish
|
Stage 3
| Pipeline, stage 3 - overview indicators |
|---|
|
Mouseover the markers to see the name of the location

1 Rock Wall 2 Basin 3 Ramp 4 Balcony 5 Long Corridor 6 Central Stairs 7 Top A BLU spawn B RED spawn RED cart start RED cart finish BLU cart start RED cart start (2) RED cart start (3) BLU cart finish
|
Cutter
| Cutter - overview indicators |
|---|
|
Mouseover the markers to see the name of the location
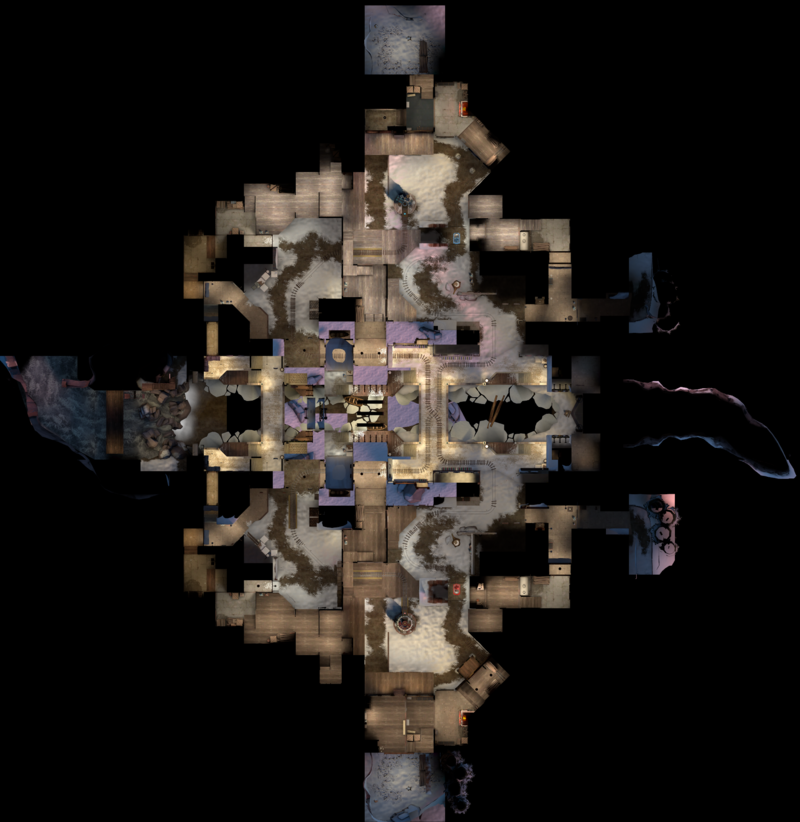
1 Christmas Tree 2 Industrious Shed 3 Alleyway 4 Descent 5 Cart Bridge 6 Rowboats and the Canal 7 Foot Bridge 8 Sniper Deck 9 Wine Cellar 10 Storage Section 11 Battlements 12 Processing and Loading Dock A RED spawn B BLU spawn RED cart start RED cart finish BLU cart start BLU cart finish
|
Attack'n'Defend
DeGroot Keep
| DeGroot Keep - overview indicators |
|---|
|
Mouseover the markers to see the name of the location
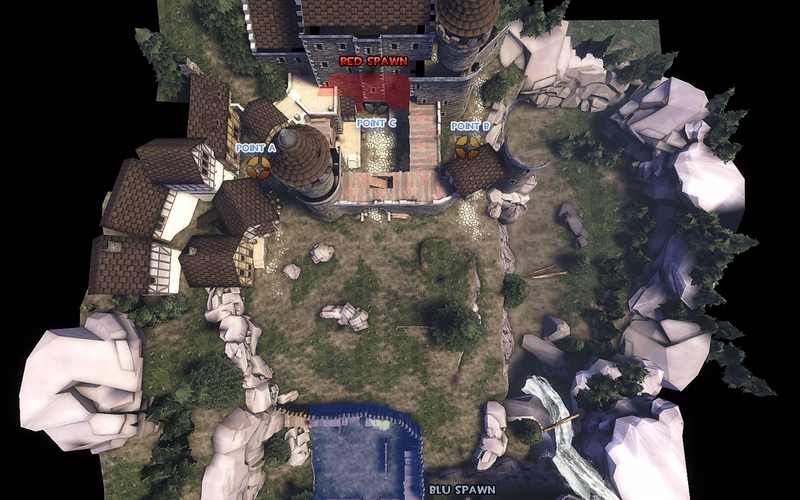
1 Main battlefield 2 Rock 3 Battlements 4 Gate 5 Courtyard 6 Castle halls A BLU spawn (BLU Camp) B RED spawn (Keep) Control point A (Town) Control point B (Cliffside) Control point C (Courtyard)
|
Burghausen
| Burghausen - overview indicators |
|---|
|
Mouseover the markers to see the name of the location
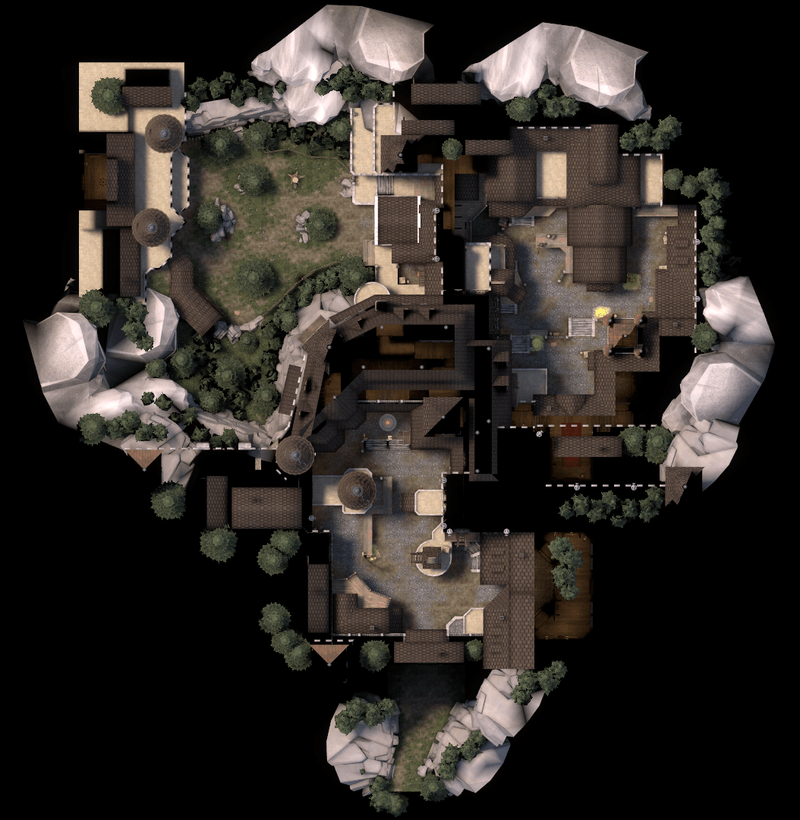
1 Battlefield 2 Top Floor 3 Town Square 4 Clocktower 5 Target Range 6 Tower A BLU stage 1 spawn B RED stage 1 spawn C BLU stage 2 spawn D RED stage 2 spawn E BLU stage 3 spawn Control point A (Stage 1 end) Control point B (Stage 2 end) Control point C (Stage 3 end)
|
Sandcastle
| Sandcastle - overview indicators |
|---|
|
Mouseover the markers to see the name of the location
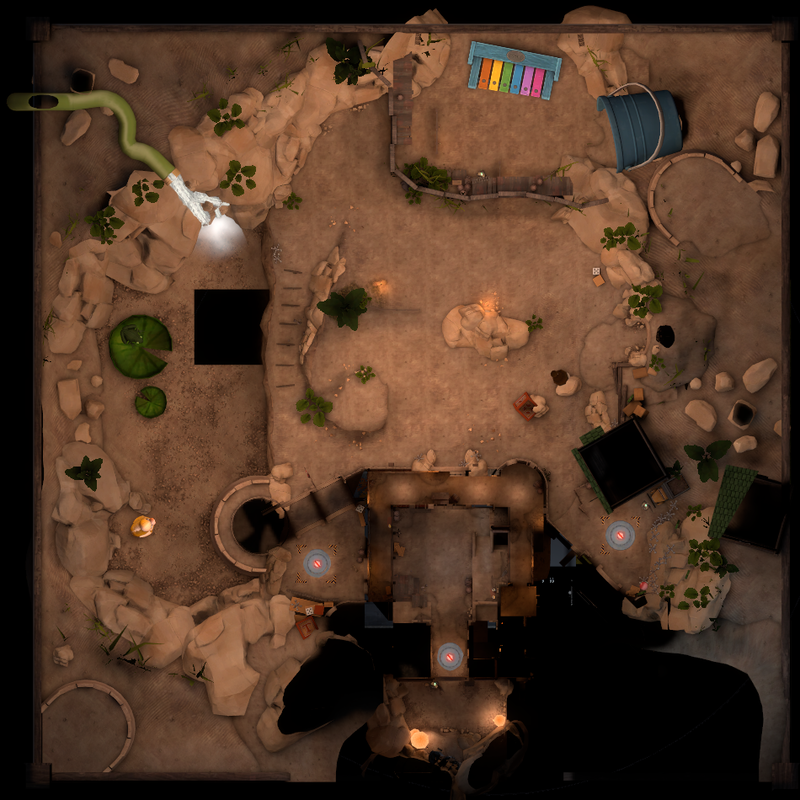
1 Main battlefield 2 Rock 3 Battlements 4 Gate 5 Courtyard 6 Castle halls A BLU spawn (BLU Camp) B RED spawn (Keep) Control point A (Town) Control point B (Cliffside) Control point C (Courtyard)
|
Dustbowl
Stage 1
| Dustbowl, stage 1 - overview indicators |
|---|
|
Mouseover the markers to see the name of the location

1 Left Exit Shed 2 Right Exit Shed 3 Canyon 4 Left Tunnel 5 Right Tunnel 6 Platform 7 Bridge 8 Upper Tunnel 9 Battlements A BLU spawn B RED spawn Control point A Control point B (Stage 1 end)
|
Stage 2
| Dustbowl, stage 2 - overview indicators |
|---|
|
Mouseover the markers to see the name of the location

1 Dugout 2 Large Shed 3 Control Point Building 4 Signpost 5 Office 6 Mining Tunnel 7 Double Tunnel 8 Courtyard 9 Gated Tunnel 10 Middle Building A BLU spawn B RED spawn Control point A Control point B (Stage 2 end)
|
Stage 3
| Dustbowl, stage 3 - overview indicators |
|---|
|
Mouseover the markers to see the name of the location

1 Factory 2 Pillbox 3 Side Exit 4 Basement Stairs 5 Loading Dock 6 Alleys 7 Balcony House 8 Equipment Room 9 Valley 10 Sniper House A BLU spawn B RED spawn C Alternate RED spawn Control point A Control point B (Final control point)
|
Egypt
Stage 1
| Egypt, stage 1 - overview indicators |
|---|
|
Mouseover the markers to see the name of the location

1 Small Courtyard 2 Ledges 3 Shortcut 4 Large Courtyard 5 Main Stairs 6 Tunnels 7 Point Courtyard A BLU spawn B RED spawn Control point A Control point B (Stage 1 end)
|
Stage 2
| Egypt, stage 2 - overview indicators |
|---|
|
Mouseover the markers to see the name of the location

1 Side Route 2 Tower 3 Stairs 4 Main Building 5 Flank Path 6 Temple Ruins A BLU spawn B RED spawn Control point A Control point B (Stage 2 end)
|
Stage 3
| Egypt, stage 3 - overview indicators |
|---|
|
Mouseover the markers to see the name of the location

1 Roof Opening 2 Central Pillar 3 Valley 4 Side Path 5 Flank Stairs 6 Catacombs 7 Flank Cave 8 Final Courtyard 9 Battlements 10 Vault (Hidden below) A BLU spawn B RED spawn Control point A Control point B (Final point)
|
Erebus
Stage 1
| Erebus, stage 1 - overview indicators |
|---|
|
Mouseover the markers to see the name of the location

1 Tree Stumps 2 Lower Area 3 Lumber Yard 4 Sawmill 5 Dropdown (Sawmill) 6 Left Mineshaft 7 Yard 8 Right Mineshaft 9 Coffin House A BLU spawn B RED spawn Control point A Control point B (Stage 1 end)
|
Stage 2
| Erebus, stage 2 - overview indicators |
|---|
|
Mouseover the markers to see the name of the location

1 Goldstream Shed 2 Ravine 3 Cliff 4 Cave 5 Hunker-down Shed 6 Sniper's Deck 7 Central Area 8 Church 9 Far Left Flank A BLU spawn B RED spawn Control point A Control point B (Stage 2 end)
|
Stage 3
| Erebus, stage 3 - overview indicators |
|---|
|
Mouseover the markers to see the name of the location

1 Building 237 2 Left Yard 3 Gray Gravel co. 4 Right Yard 5 Garage 6 Ditch 7 Computer Room 8 Under Flank 9 Warehouse 10 Propane Tank Yard A BLU spawn B RED spawn Control point A/Elevation Control point B (Final point)
|
Gorge
| Gorge - overview indicators |
|---|
|
Mouseover the markers to see the name of the location
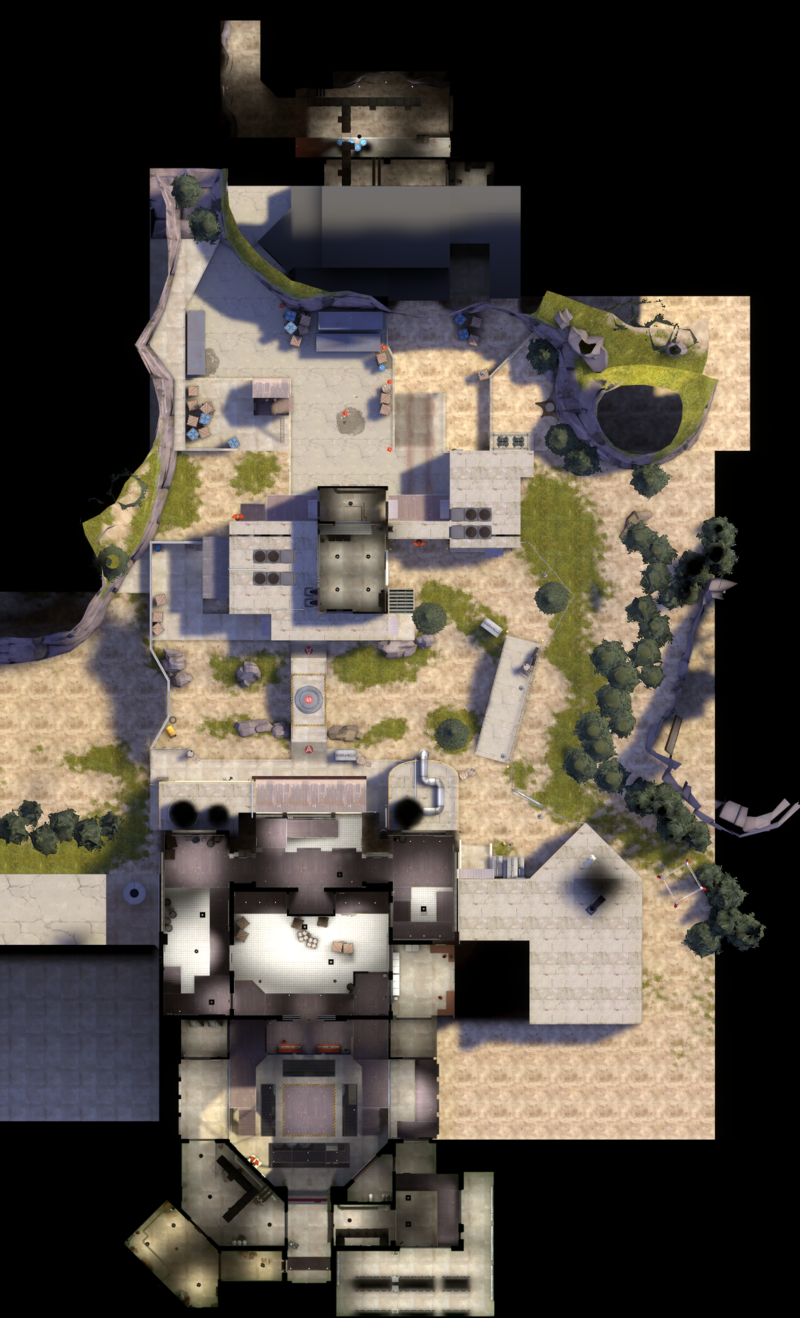
1 Toll both 2 Entrance Yard 3 Upper Deck 4 Checkpoint Building 5 Gully 6 Maintenance Area 7 Flank Hallway 8 Second Floor 9 Main Hallway 10 Choke Room 11 Flank Room 12 Catwalks 13 Final Room 14 Spawn Flank A BLU first spawn B BLU second spawn C RED spawn Control point A Control point B (Final point)
|
Gorge Event
| Gorge Event - overview indicators |
|---|
|
Mouseover the markers to see the name of the location
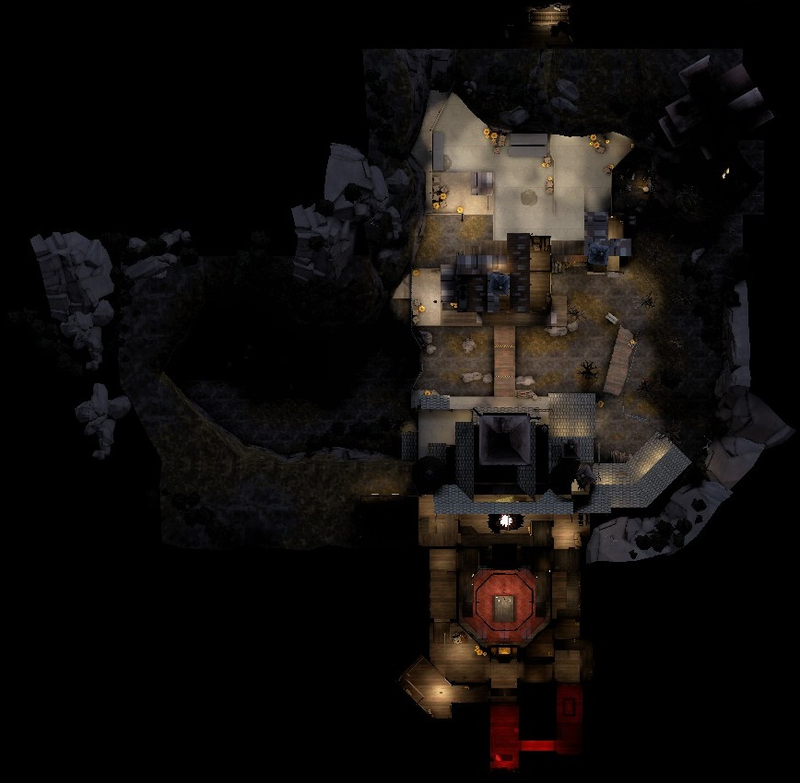
1 Toll Both 2 Entrance Yard 3 Upper Deck 4 Checkpoint Building 5 Gully 6 Maintenance Area 7 Flank Hallway 8 Second Floor 9 Main Hallway 10 Choke Room 11 Flank Room 12 Catwalks 13 Final Room 14 Spawn Flank A BLU first spawn B BLU second spawn C RED spawn Control point A Control point B (Final point)
|
Gravel Pit
| Gravel Pit - overview indicators |
|---|
|
Mouseover the markers to see the name of the location

1 Long B Tunnel 2 Short B Tunnel 3 Radar 4 Shadow Side 5 B/C Connector 6 Balcony 7 A/B Connector 8 A Side Tunnel 9 Valley 10 Path 11 Radio Tower 12 A/C Connector 13 Ground Level 14 Laser Tower A BLU spawn B RED spawn
|
Junction
| Junction - overview indicators |
|---|
|
Mouseover the markers to see the name of the location
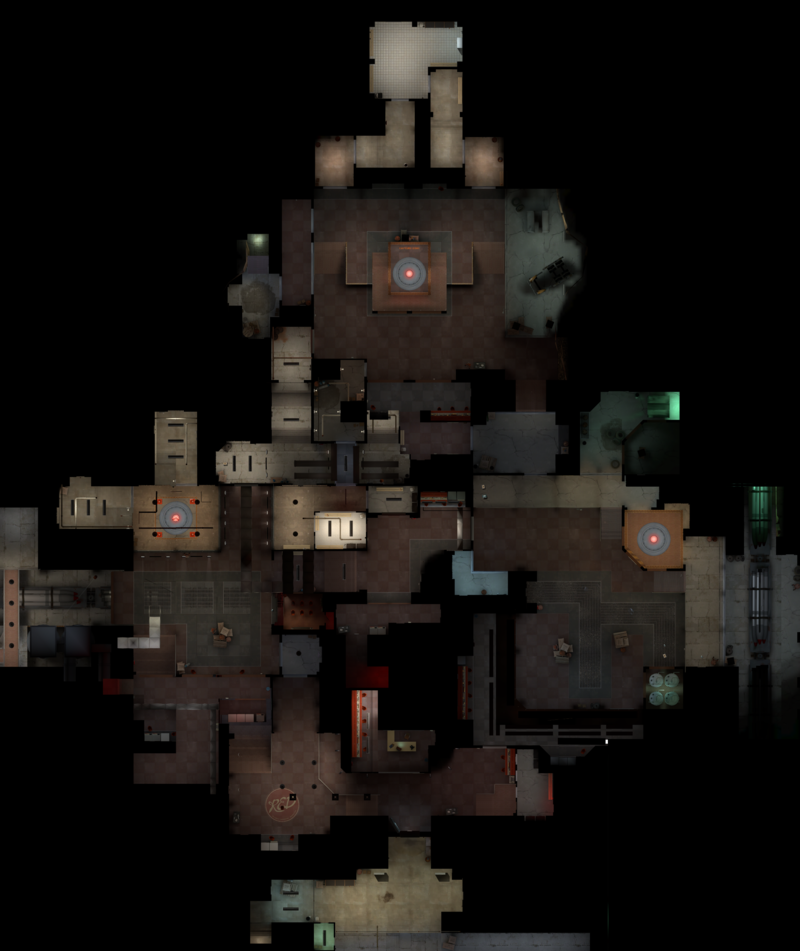
1 Balconies 2 B Lobby 3 Balconies 4 B/C Flank 5 Platform 6 A/C Flank 7 A/B Route 8 A Lobby 9 Stairs A BLU spawn B RED spawn
|
Mercenary Park
| Mercenary Park - overview indicators |
|---|
|
Mouseover the markers to see the name of the location
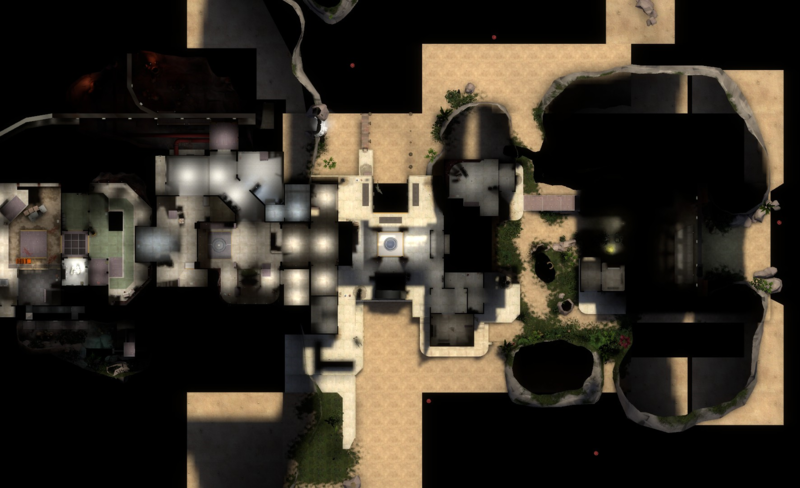
1 Gift shop 2 Playground 3 Mann.Co building 4 Transport cages 5 Catwalks 6 Server room 7 Elevator shaft 8 Institute for Research and Development (YTI Room) 9 Ventilation shaft 10 Side stairs 11 Platform A BLU first spawn B BLU second spawn C BLU third spawn D RED first spawn E RED final spawn
|
Mossrock
| Mossrock - overview indicators |
|---|
|
Mouseover the markers to see the name of the location
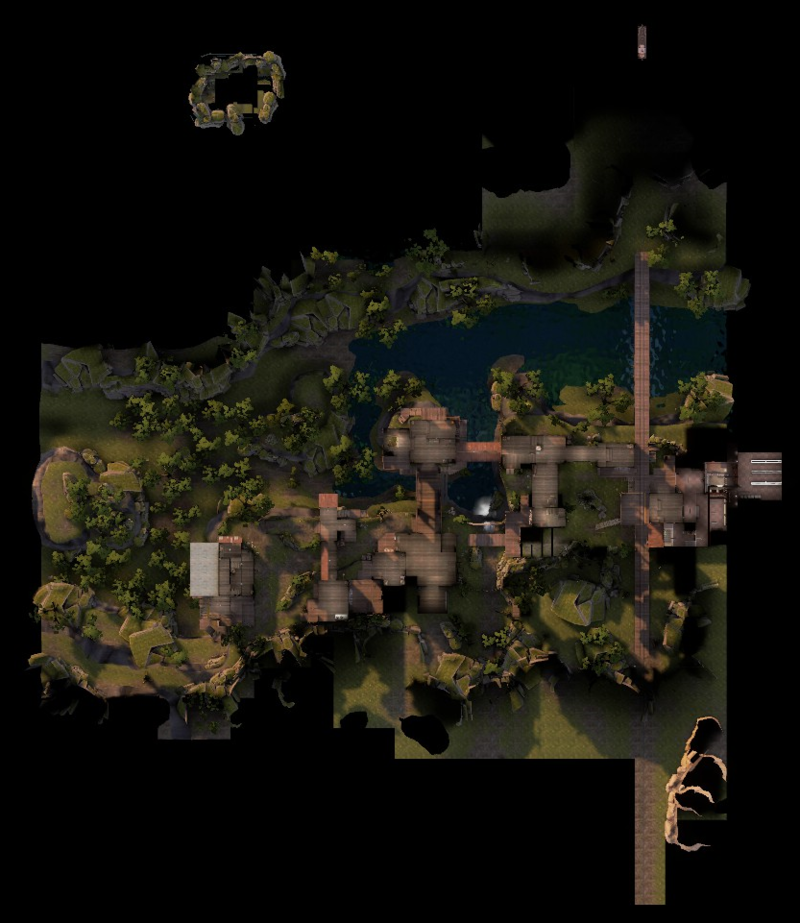
1 Captain Dan's Wood pulp 2 Casali Shafting Co. 3 Riverwalk 4 Radio Shack with Radio Room 5 Island flank 6 Jenkin Coal Co. 7 Shipping 8 One tree hill 9 Trestle A BLU first spawn B BLU second spawn C RED spawn
|
Mountain Lab
| Mountain Lab - overview indicators |
|---|
|
Mouseover the markers to see the name of the location
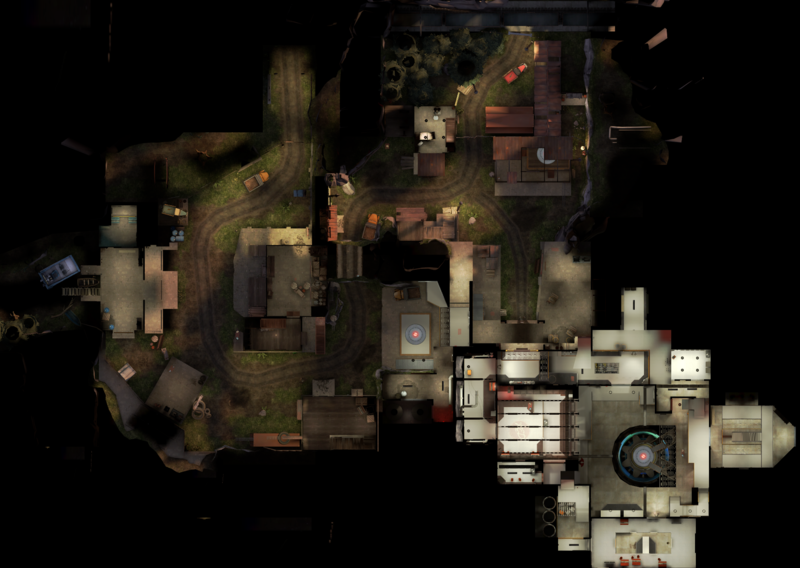
1 Yard 2 Warehouse 3 Shed 4 Tunnel 5 Small house 6 Cliffs 7 Upper entrance tunnels 8 Lower entrance tunnels 9 Top floor A BLU spawn B RED spawn
|
Mann Manor
| Mann Manor - overview indicators |
|---|
|
Mouseover the markers to see the name of the location
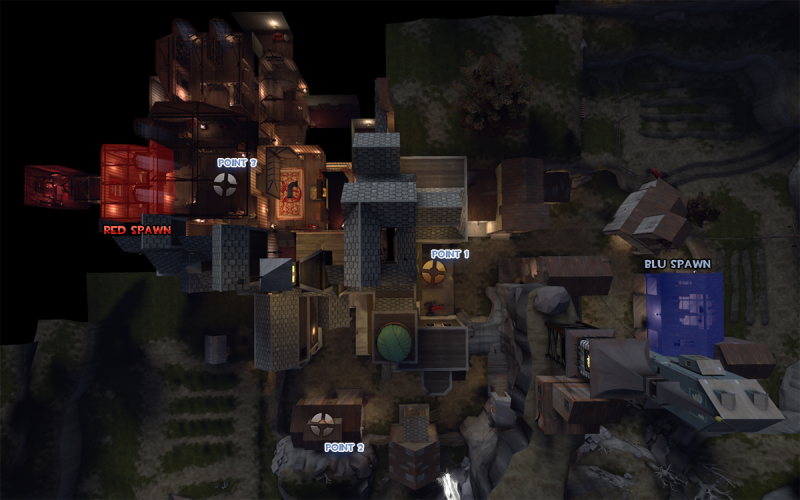
1 Yard 2 Warehouse 3 Shed 4 Tunnel 5 Small house 6 Cliffs 7 Upper entrance tunnels 8 Lower entrance tunnels 9 Top floor A BLU spawn B RED spawn
|
Snowplow
Stage 1
| Snowplow, stage 1 - overview indicators |
|---|
|
Mouseover the markers to see the name of the location
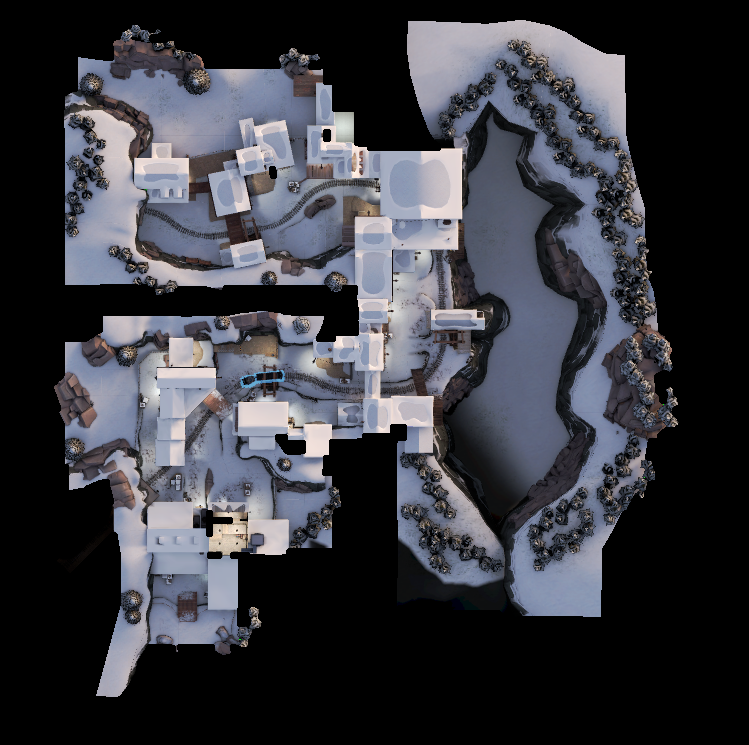
1 Left Exit Building 2 Right Side Building 3 Right Side Structure 4 Structural Path 5 Warehouse 6 Wooden Tower A BLU first spawn B BLU second spawn C RED first spawn D RED second spawn
|
Stage 2
| Snowplow, stage 2 - overview indicators |
|---|
|
Mouseover the markers to see the name of the location
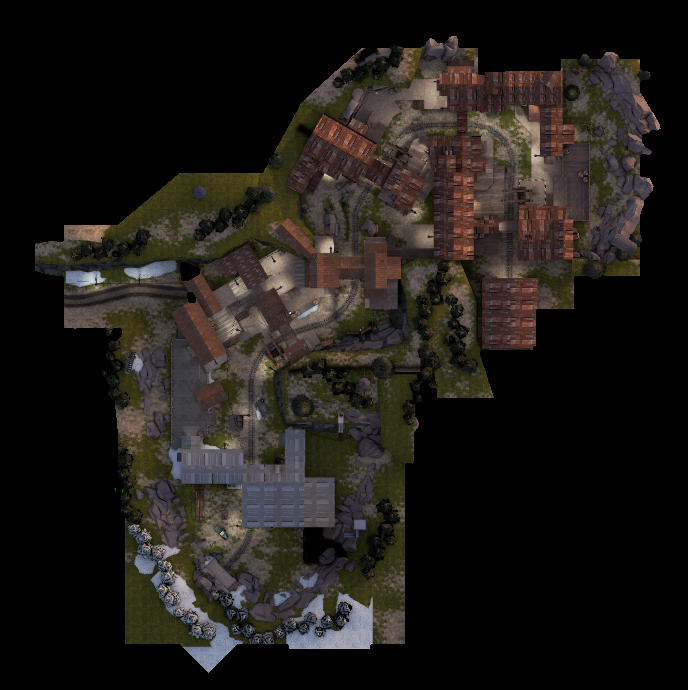
1 Supply Shed 2 Left House 3 Battlements 4 Left Path Structure A BLU first spawn B BLU second spawn C RED spawn
|
Steel
| Steel - overview indicators |
|---|
|
Mouseover the markers to see the name of the location
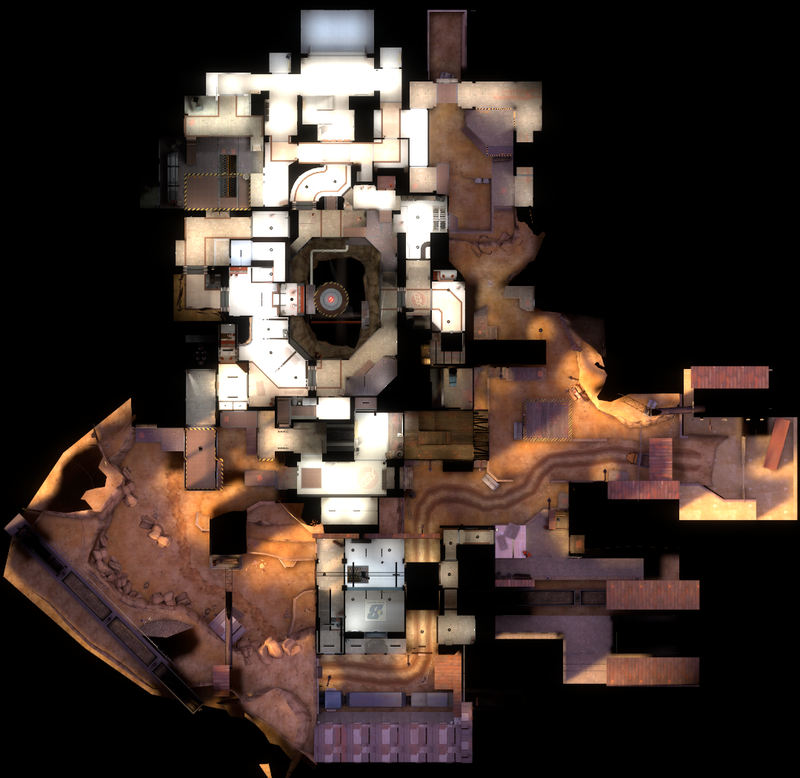
1 Hill 2 Cliffs 3 Shipping Dock 4 Launch Room 5 Storehouse 6 Canyon 7 Rocks 8 Truck Yard 9 Wooden Building 10 Narrow Building A BLU spawn B RED spawn
|
Altitude
| Altitude - overview indicators |
|---|
|
Mouseover the markers to see the name of the location
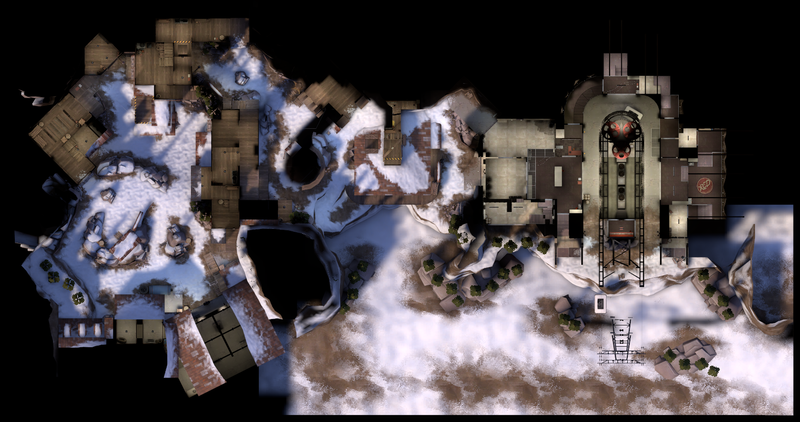
1 Cubby hole 2 Mine shack 3 Freight House 4 Yard 5 Horsemann's house 6 Hells Bells 7 Foyer 8 Wet Paint! 9 Hell Pit 10 Shack A BLU first spawn B BLU second spawn C BLU third spawn D RED first spawn E RED final spawn Cart start Checkpoint A Checkpoint B Checkpoint C Checkpoint D Checkpoint E/Final Checkpoint
|
Brew
| Brew - overview indicators |
|---|
|
Mouseover the markers to see the name of the location
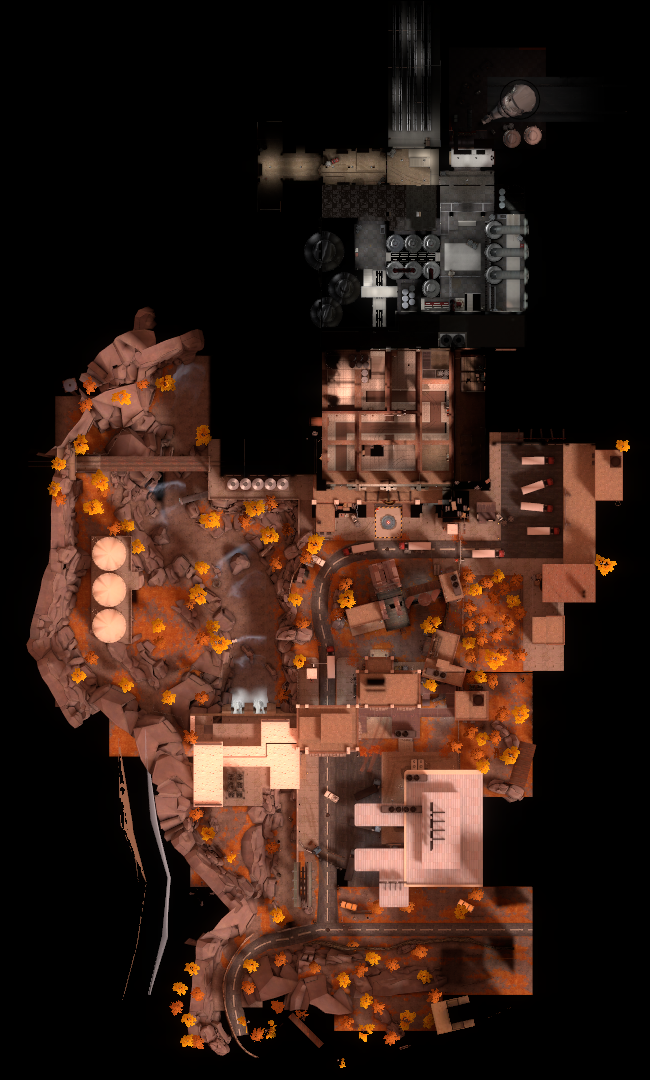
1 Cubby hole 2 Mine shack 3 Freight House 4 Yard 5 Horsemann's house 6 Hells Bells 7 Foyer 8 Wet Paint! 9 Hell Pit 10 Shack A BLU first spawn B BLU second spawn C BLU third spawn D RED first spawn E RED final spawn Cart start Checkpoint A Checkpoint B Checkpoint C Checkpoint D Checkpoint E/Final Checkpoint
|
Carrier
| Carrier - overview indicators |
|---|
|
Mouseover the markers to see the name of the location

1 Cubby hole 2 Mine shack 3 Freight House 4 Yard 5 Horsemann's house 6 Hells Bells 7 Foyer 8 Wet Paint! 9 Hell Pit 10 Shack A BLU first spawn B BLU second spawn C BLU third spawn D RED first spawn E RED final spawn Cart start Checkpoint A Checkpoint B Checkpoint C Checkpoint D Checkpoint E/Final Checkpoint
|
Coal Pit
| Coal Pit - overview indicators |
|---|
|
Mouseover the markers to see the name of the location
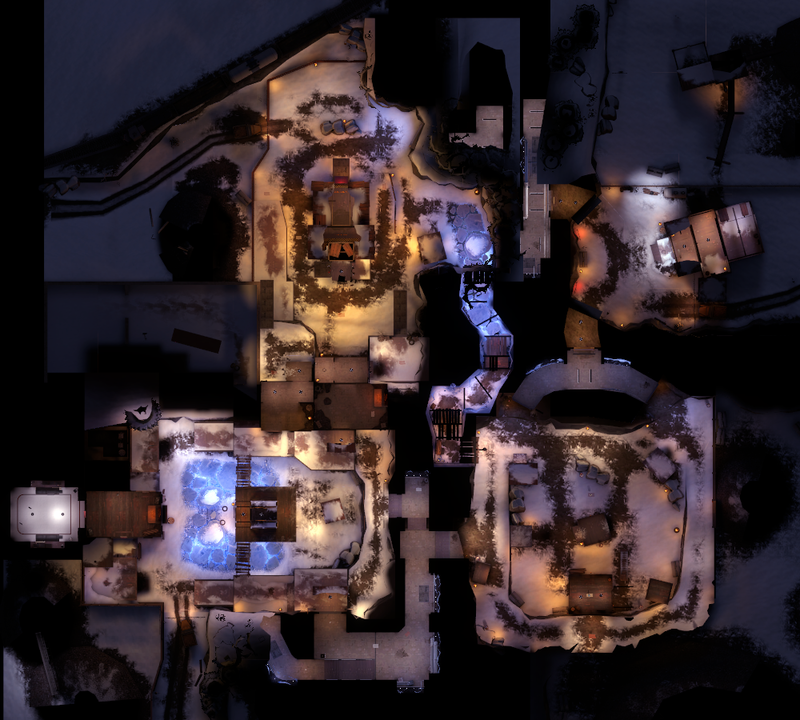
1 Cubby hole 2 Mine shack 3 Freight House 4 Yard 5 Horsemann's house 6 Hells Bells 7 Foyer 8 Wet Paint! 9 Hell Pit 10 Shack A BLU first spawn B BLU second spawn C BLU third spawn D RED first spawn E RED final spawn Cart start Checkpoint A Checkpoint B Checkpoint C Checkpoint D Checkpoint E/Final Checkpoint
|
Frostwatch
Stage 1
| Frostwatch, stage 1 - overview indicators |
|---|
|
Mouseover the markers to see the name of the location

1 Cubby hole 2 Mine shack 3 Freight House 4 Yard 5 Horsemann's house 6 Hells Bells 7 Foyer 8 Wet Paint! 9 Hell Pit 10 Shack A BLU first spawn B BLU second spawn C BLU third spawn D RED first spawn E RED final spawn Checkpoint A Checkpoint B Checkpoint C Checkpoint D Checkpoint E/Final Checkpoint
|
Stage 2
| Frostwatch, stage 2 - overview indicators |
|---|
|
Mouseover the markers to see the name of the location

1 Cubby hole 2 Mine shack 3 Freight House 4 Yard 5 Horsemann's house 6 Hells Bells 7 Foyer 8 Wet Paint! 9 Hell Pit 10 Shack A BLU first spawn B BLU second spawn C BLU third spawn D RED first spawn E RED final spawn Checkpoint A Checkpoint B Checkpoint C Checkpoint D Checkpoint E/Final Checkpoint
|
Stage 3
| Frostwatch, stage 3 - overview indicators |
|---|
|
Mouseover the markers to see the name of the location

1 Cubby hole 2 Mine shack 3 Freight House 4 Yard 5 Horsemann's house 6 Hells Bells 7 Foyer 8 Wet Paint! 9 Hell Pit 10 Shack A BLU first spawn B BLU second spawn C BLU third spawn D RED first spawn E RED final spawn Checkpoint A Checkpoint B Checkpoint C Checkpoint D Checkpoint E/Final Checkpoint
|
Haarp
Stage 1
| Haarp, stage 1 - overview indicators |
|---|
|
Mouseover the markers to see the name of the location

1 Cubby hole 2 Mine shack 3 Freight House 4 Yard 5 Horsemann's house 6 Hells Bells 7 Foyer 8 Wet Paint! 9 Hell Pit 10 Shack A BLU first spawn B BLU second spawn C BLU third spawn D RED first spawn E RED final spawn Checkpoint A Checkpoint B Checkpoint C Checkpoint D Checkpoint E/Final Checkpoint
|
Stage 2
| Haarp, stage 2 - overview indicators |
|---|
|
Mouseover the markers to see the name of the location

1 Cubby hole 2 Mine shack 3 Freight House 4 Yard 5 Horsemann's house 6 Hells Bells 7 Foyer 8 Wet Paint! 9 Hell Pit 10 Shack A BLU first spawn B BLU second spawn C BLU third spawn D RED first spawn E RED final spawn Checkpoint A Checkpoint B Checkpoint C Checkpoint D Checkpoint E/Final Checkpoint
|
Stage 3
| Haarp, stage 3 - overview indicators |
|---|
|
Mouseover the markers to see the name of the location

1 Cubby hole 2 Mine shack 3 Freight House 4 Yard 5 Horsemann's house 6 Hells Bells 7 Foyer 8 Wet Paint! 9 Hell Pit 10 Shack A BLU first spawn B BLU second spawn C BLU third spawn D RED first spawn E RED final spawn Checkpoint A Checkpoint B Checkpoint C Checkpoint D Checkpoint E/Final Checkpoint
|
Hadal
| Hadal - overview indicators |
|---|
|
Mouseover the markers to see the name of the location
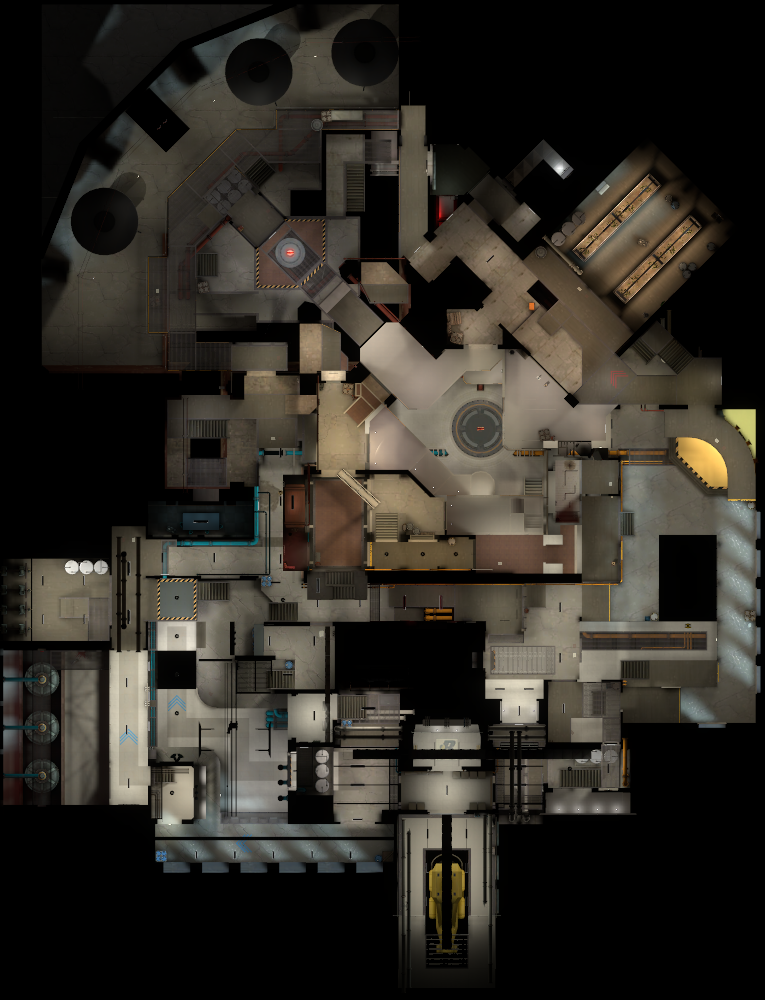
1 Cubby hole 2 Mine shack 3 Freight House 4 Yard 5 Horsemann's house 6 Hells Bells 7 Foyer 8 Wet Paint! 9 Hell Pit 10 Shack A BLU first spawn B BLU second spawn C BLU third spawn D RED first spawn E RED final spawn Checkpoint A Checkpoint B Checkpoint C Checkpoint D Checkpoint E/Final Checkpoint
|
Hardwood
| Hardwood - overview indicators |
|---|
|
Mouseover the markers to see the name of the location
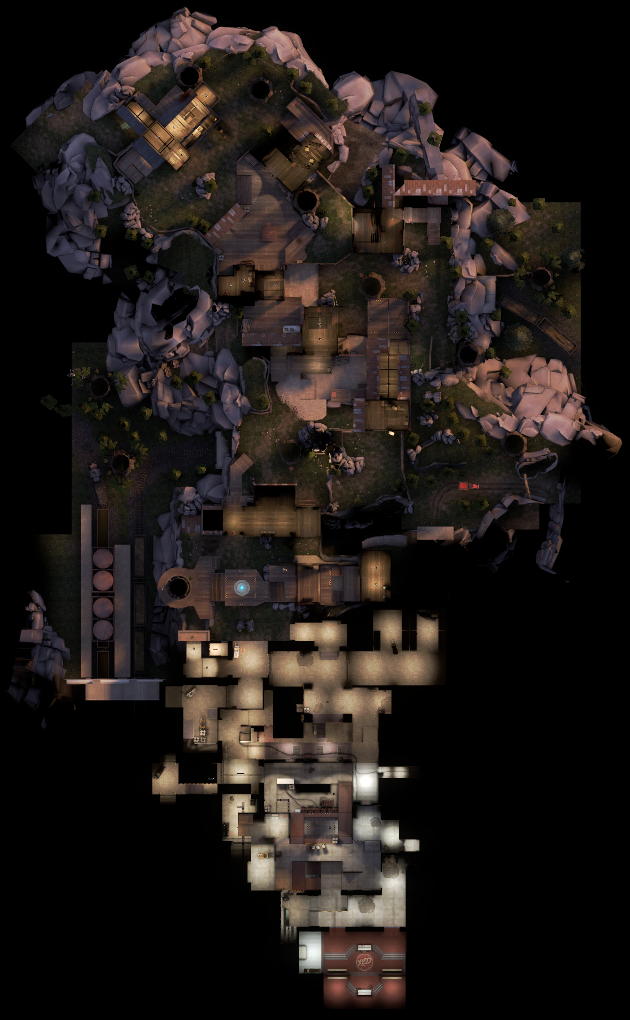
1 Cubby hole 2 Mine shack 3 Freight House 4 Yard 5 Horsemann's house 6 Hells Bells 7 Foyer 8 Wet Paint! 9 Hell Pit 10 Shack A BLU first spawn B BLU second spawn C BLU third spawn D RED first spawn E RED final spawn Checkpoint A Checkpoint B Checkpoint C Checkpoint D Checkpoint E/Final Checkpoint
|
Lava Pit
| Lava Pit - overview indicators |
|---|
|
Mouseover the markers to see the name of the location
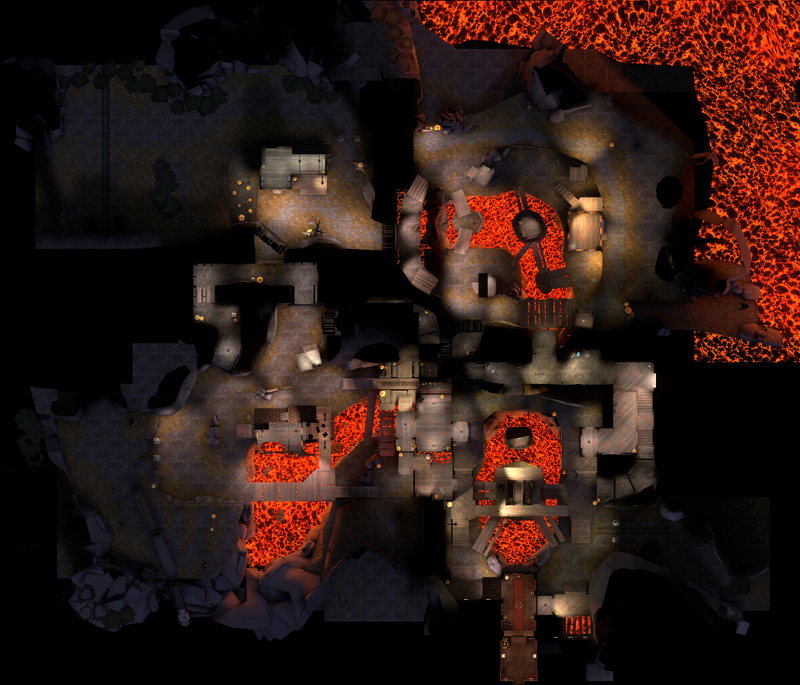
1 Cubby hole 2 Mine shack 3 Freight House 4 Yard 5 Horsemann's house 6 Hells Bells 7 Foyer 8 Wet Paint! 9 Hell Pit 10 Shack A BLU first spawn B BLU second spawn C BLU third spawn D RED first spawn E RED final spawn Checkpoint A Checkpoint B Checkpoint C Checkpoint D Checkpoint E/Final Checkpoint
|
Spookeyridge
| Spookeyridge - overview indicators |
|---|
|
Mouseover the markers to see the name of the location
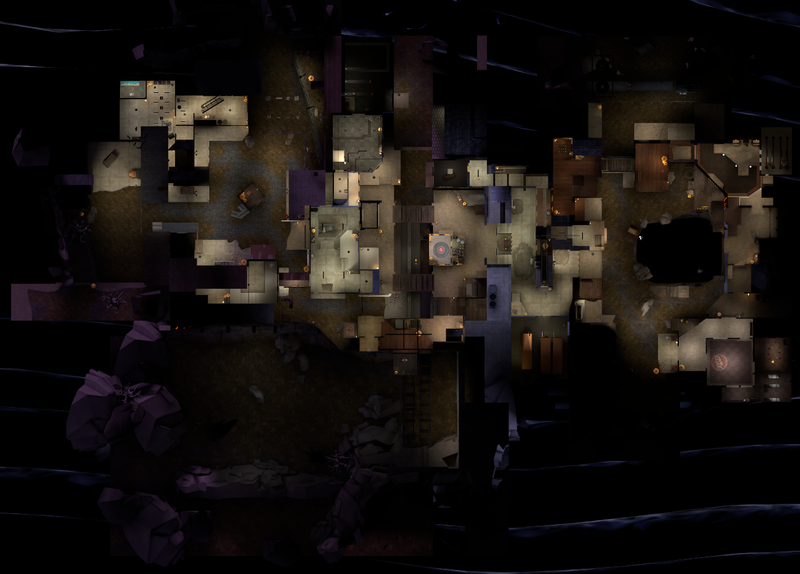
1 Cubby hole 2 Mine shack 3 Freight House 4 Yard 5 Horsemann's house 6 Hells Bells 7 Foyer 8 Wet Paint! 9 Hell Pit 10 Shack A BLU first spawn B BLU second spawn C BLU third spawn D RED first spawn E RED final spawn Checkpoint A Checkpoint B Checkpoint C Checkpoint D Checkpoint E/Final Checkpoint
|
Sulfur
| Sulfur - overview indicators |
|---|
|
Mouseover the markers to see the name of the location
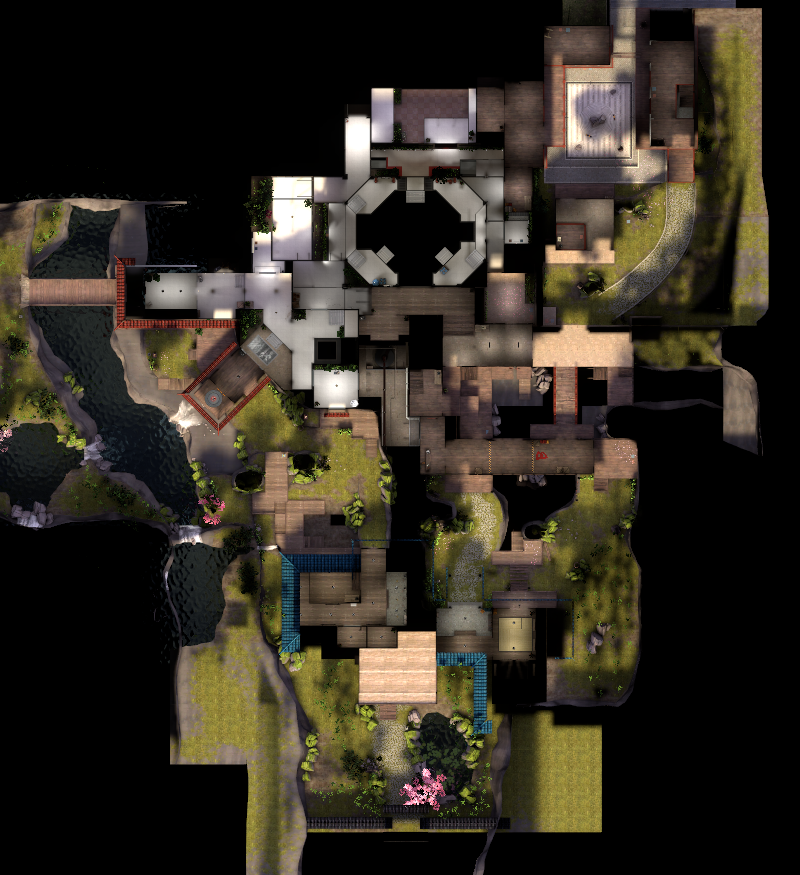
1 Cubby hole 2 Mine shack 3 Freight House 4 Yard 5 Horsemann's house 6 Hells Bells 7 Foyer 8 Wet Paint! 9 Hell Pit 10 Shack A BLU first spawn B BLU second spawn C BLU third spawn D RED first spawn E RED final spawn Checkpoint A Checkpoint B Checkpoint C Checkpoint D Checkpoint E/Final Checkpoint
|
Overgrown
| Overgrown - overview indicators |
|---|
|
Mouseover the markers to see the name of the location
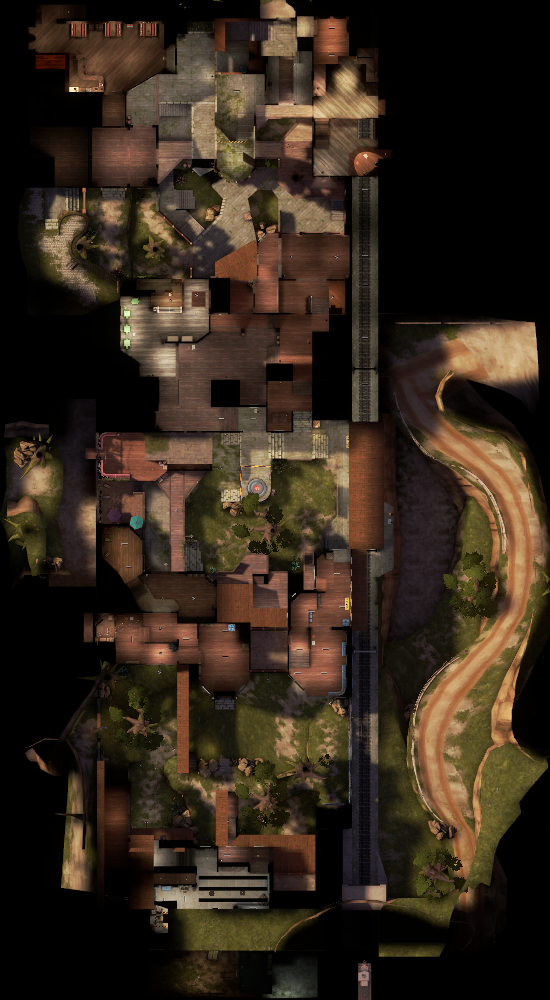
1 Cubby hole 2 Mine shack 3 Freight House 4 Yard 5 Horsemann's house 6 Hells Bells 7 Foyer 8 Wet Paint! 9 Hell Pit 10 Shack A BLU first spawn B BLU second spawn C BLU third spawn D RED first spawn E RED final spawn Checkpoint A Checkpoint B Checkpoint C Checkpoint D Checkpoint E/Final Checkpoint
|
Fortezza
| Fortezza - overview indicators |
|---|
|
Mouseover the markers to see the name of the location
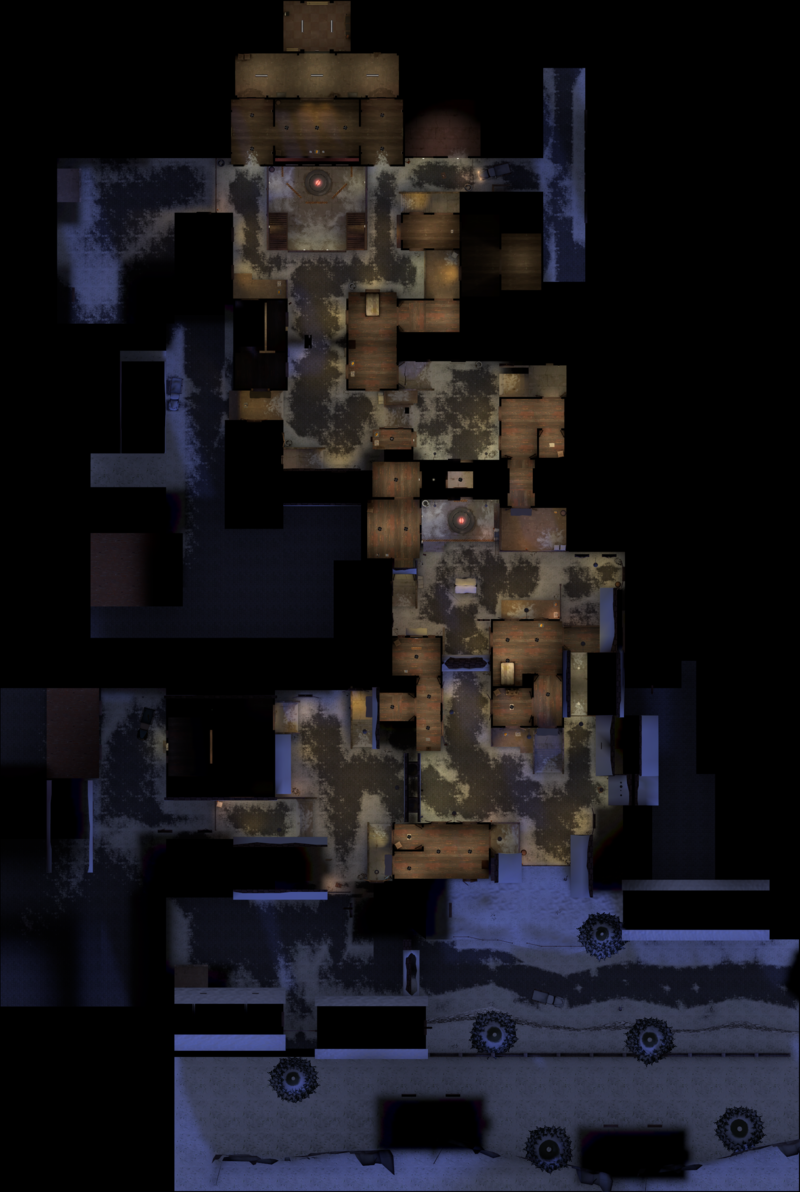
1 Spawn areas 2 Tracks/Ramp 3 Battlements 4 High Ground 5 Side Buildings A RED spawn B BLU spawn
|
Cargo
| Cargo - overview indicators |
|---|
|
Mouseover the markers to see the name of the location
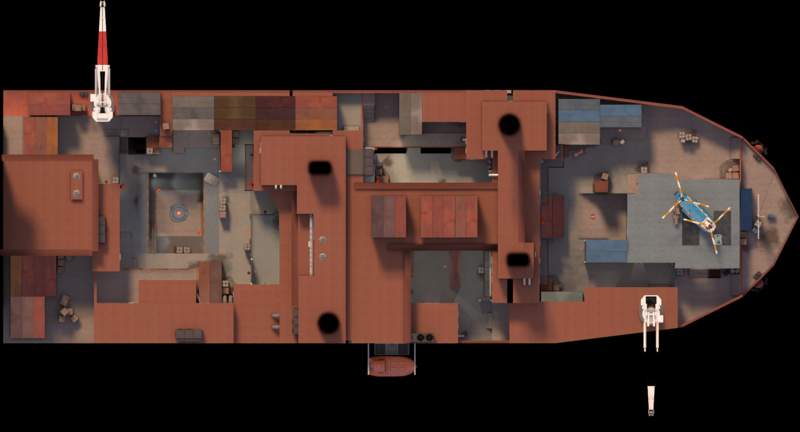
1 Cliffs 2 Elevated tracks 3 Side Cliffs 4 Hut 5 Tunnel 6 Imperial building 7 Red deck 8 Ditch 9 Attic 10 Staircase to Attic 11 Mineshaft A BLU spawn B Red spawn Cart start Checkpoint A Checkpoint B/Stage 1 end
|
Conifer
| Conifer - overview indicators |
|---|
|
Mouseover the markers to see the name of the location

1 Cliffs 2 Elevated tracks 3 Side Cliffs 4 Hut 5 Tunnel 6 Imperial building 7 Red deck 8 Ditch 9 Attic 10 Staircase to Attic 11 Mineshaft A BLU spawn B Red spawn Cart start Checkpoint A Checkpoint B/Stage 1 end
|
Fulgur
| Fulgur - overview indicators |
|---|
|
Mouseover the markers to see the name of the location
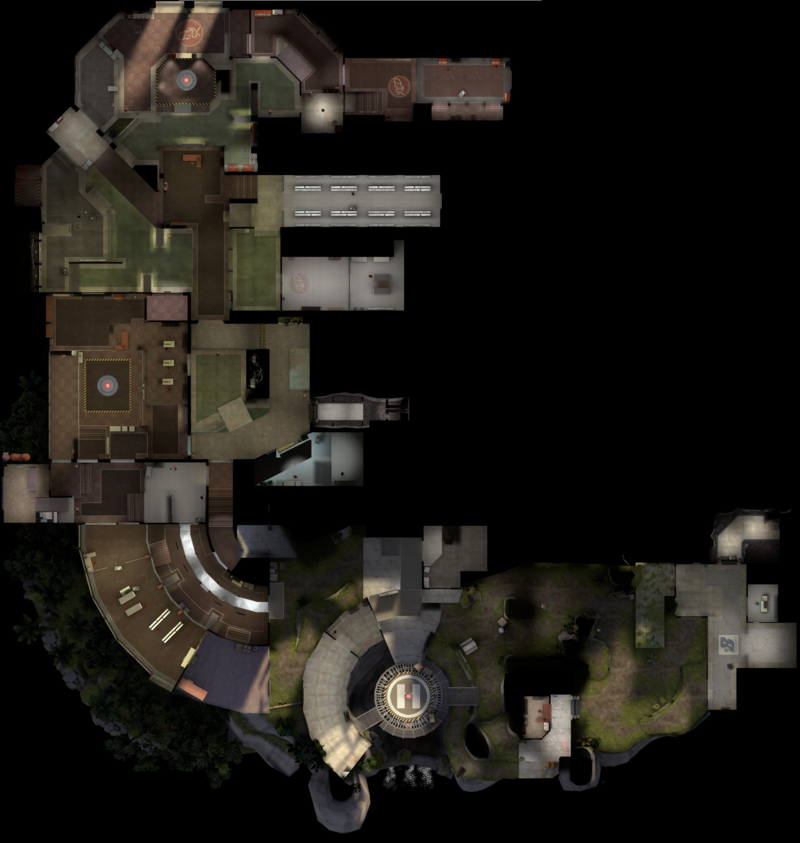
1 Cliffs 2 Elevated tracks 3 Side Cliffs 4 Hut 5 Tunnel 6 Imperial building 7 Red deck 8 Ditch 9 Attic 10 Staircase to Attic 11 Mineshaft A BLU spawn B Red spawn Cart start Checkpoint A Checkpoint B/Stage 1 end
|
Control Points
5Gorge
| 5Gorge = overview indicators |
|---|
|
Mouseover the markers to see the name of the location
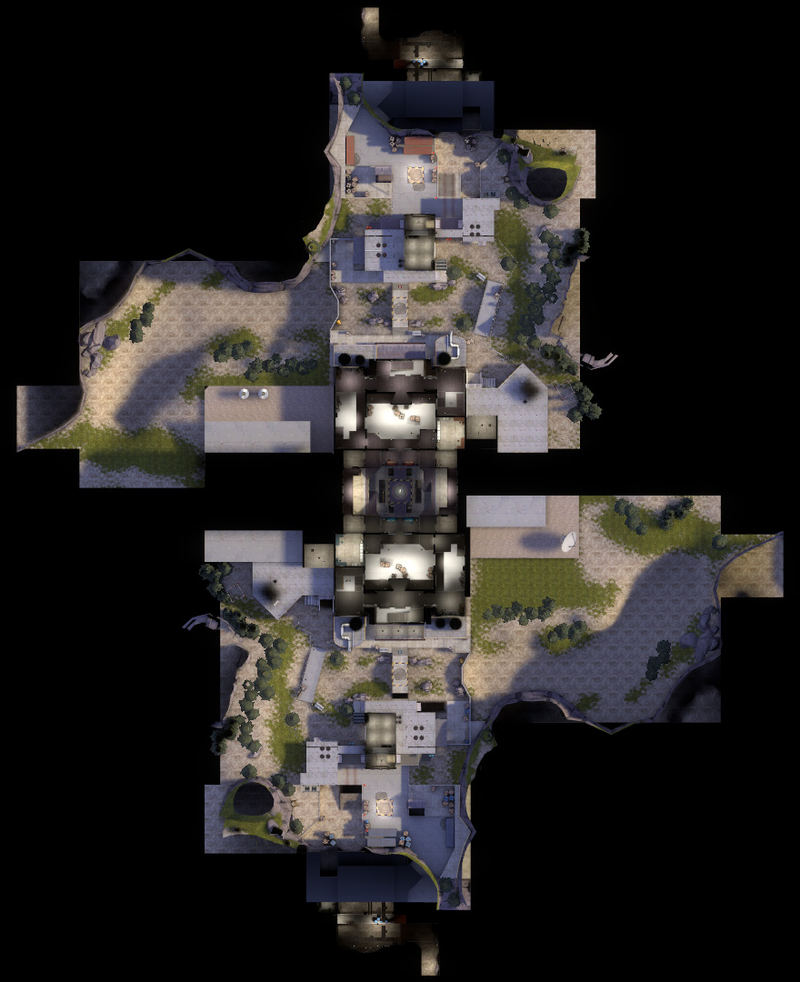
1 Pit 2 Upper ring 3 Lobby 4 Main Hallway 5 Flank Hallway 6 Valley(Gorge) 7 Main Building 8 Second Floor 9 Small Shed 10 Crates A RED first spawn B RED second spawn C RED third spawn
|
Badlands
| Badlands (Control point) - overview indicators |
|---|
|
Mouseover the markers to see the name of the location

1 Rail cars 2 Pillars 3 Window and the Balcony 4 Valley 5 Ledge 6 Bridge 7 Battlements 8 Lower Left Entrance
|
Darkmarsh
| Darkmarsh - overview indicators |
|---|
|
Mouseover the markers to see the name of the location
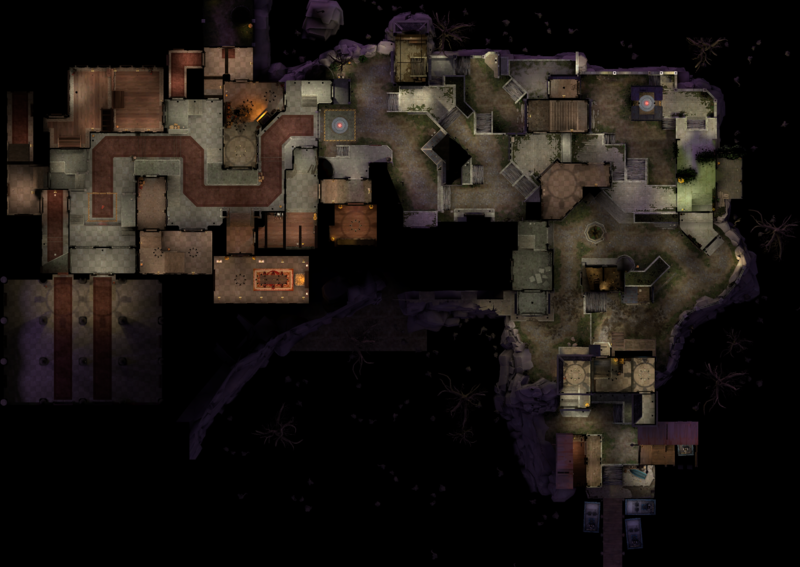
1 Spawn areas 2 Tracks/Ramp 3 Battlements 4 High Ground 5 Side Buildings A RED spawn B BLU spawn
|
Coldfront
| Coldfront - overview indicators |
|---|
|
Mouseover the markers to see the name of the location

1 Rocks 2 High Cliff 3 Yard 4 Garage 5 Platform 6 Silo 7 Outer Ring 8 Side Entrance A RED first spawn B RED second spawn C RED third spawn
|
Fastlane
| Fastlane - overview indicators |
|---|
|
Mouseover the markers to see the name of the location

1 Shacks 2 Valley 3 House 4 Bridge 5 Lobby 6 Upper Hallway A RED first spawn B RED second spawn C RED third spawn
|
Foundry
| Foundry- overview indicators |
|---|
|
Mouseover the markers to see the name of the location

1 Roof and the Central Platform 2 Transition Building 3 Platform 4 Yard 5 Side path 6 Upper Walkway 7 Stairs 8 Foundry A RED first spawn B RED second spawn C RED third spawn
|
Freight
| Freight - overview indicatotors |
|---|
|
Mouseover the markers to see the name of the location

1 Central Building 2 Yard 3 Stairs 4 Water 5 Main Entrance 6 Flank Entrance 7 Yard Exit 8 Stairs to the Second Floor 9 Tracks A RED first spawn B RED second spawn C RED third spawn
|
Granary
| Granary - overview indicators |
|---|
|
Mouseover the markers to see the name of the location

1 Crates 2 Garage 3 Choke 4 Left Yard 5 Chute Hallway 6 Right Yard 7 Granary Mill 8 Grand Yard 9 Pipes 10 Grand Yard 11 Headquarters
|
Metalworks
| Metalworks - overview indicators |
|---|
|
Mouseover the markers to see the name of the location
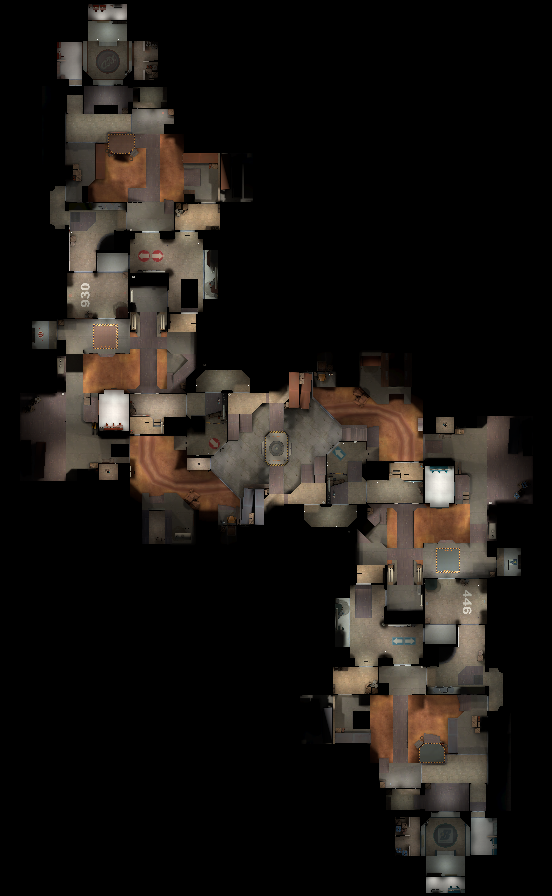
1 Control Point Bridge 2 Choke 3 Pipe Room 4 Yard 5 Flank 6 Bridge 7 Main Building 8 Walkway 9 Front Yard A RED first spawn B RED second spawn C RED third spawn
|
Powerhouse
| Powerhouse - overview indicators |
|---|
|
Mouseover the markers to see the name of the location
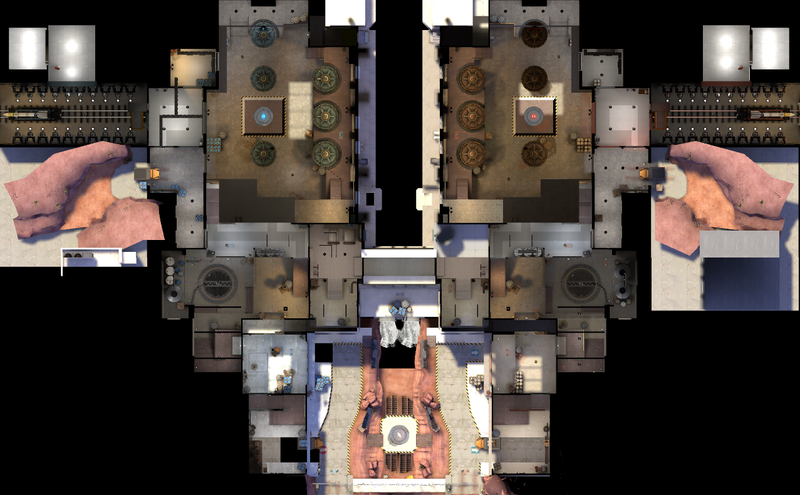
1 Fence 2 Team Sides 3 Water 4 Chokepoint 5 Launch Pad Room 6 Control Room A RED spawn B BLU spawn
|
Process
| Process - overview indicators |
|---|
|
Mouseover the markers to see the name of the location

1 Platform 2 Behind 3 Sewers 4 Choke 5 IT/PC 6 Spiral 7 Balcony 8 Rollout 9 Tunnel 10 Upper A RED first spawn B RED second spawn C RED third spawn
|
Gullywas
| Gullywash - overview indicators |
|---|
|
Mouseover the markers to see the name of the location
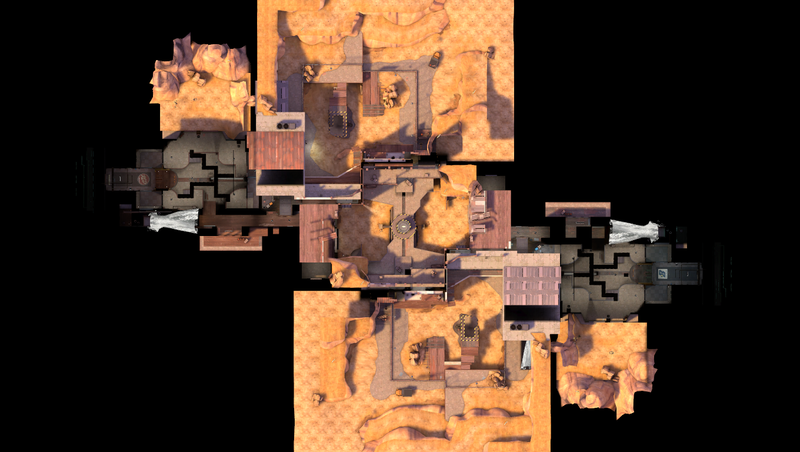
1 Platform 2 Behind 3 Sewers 4 Choke 5 IT/PC 6 Spiral 7 Balcony 8 Rollout 9 Tunnel 10 Upper A RED first spawn B RED second spawn C RED third spawn
|
Sunshine
| Sunshine - overview indicators |
|---|
|
Mouseover the markers to see the name of the location
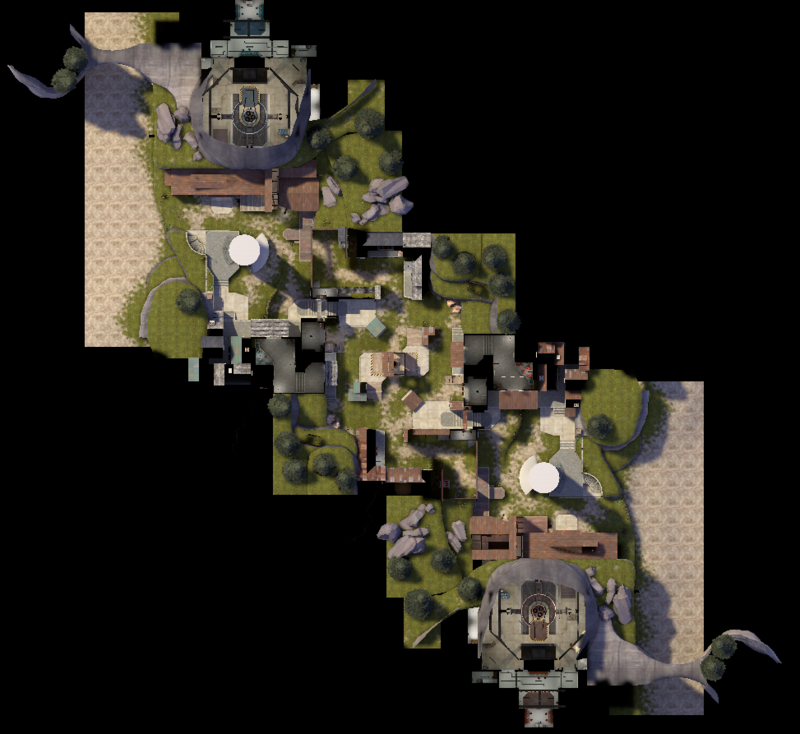
1 Shacks 2 Caffe 3 Chokepoint 4 Valley 5 Platform 6 Staircase 7 Wooden Warehouse 8 Elevation 9 Wall 10 Crates A RED first spawn B RED second spawn C RED third spawn
|
Sinshine
| Sinshine - overview indicators |
|---|
|
Mouseover the markers to see the name of the location
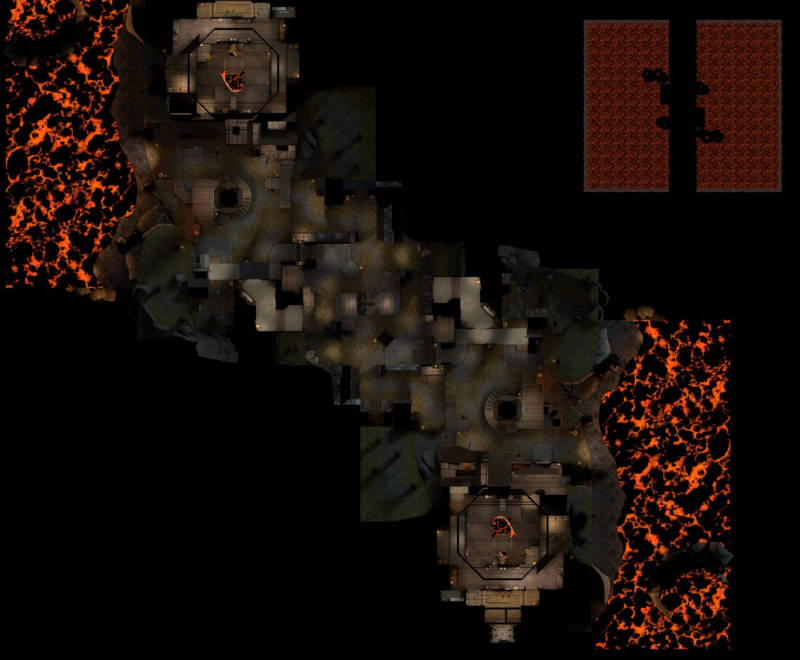
1 Shacks 2 Caffe 3 Chokepoint 4 Valley 5 Platform 6 Staircase 7 Wooden Warehouse 8 Elevation 9 Wall 10 Crates A RED first spawn B RED second spawn C RED third spawn
|
Snakewater
| Snakewater - overview indicators |
|---|
|
Mouseover the markers to see the name of the location
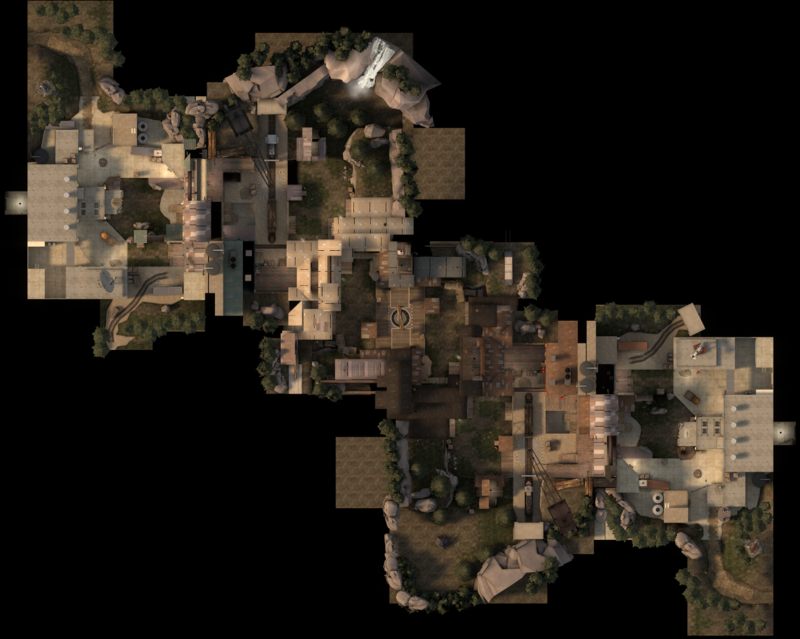
1 Kitchen/Shed 2 House 3 Buildings 4 Main 5 Cliff 6 Lobby 7 Right Flank 8 Lower/Main 9 Left Flank A RED first spawn B RED second spawn C RED third spawn
|
Vanguard
| Vanguard - overview indicators |
|---|
|
Mouseover the markers to see the name of the location
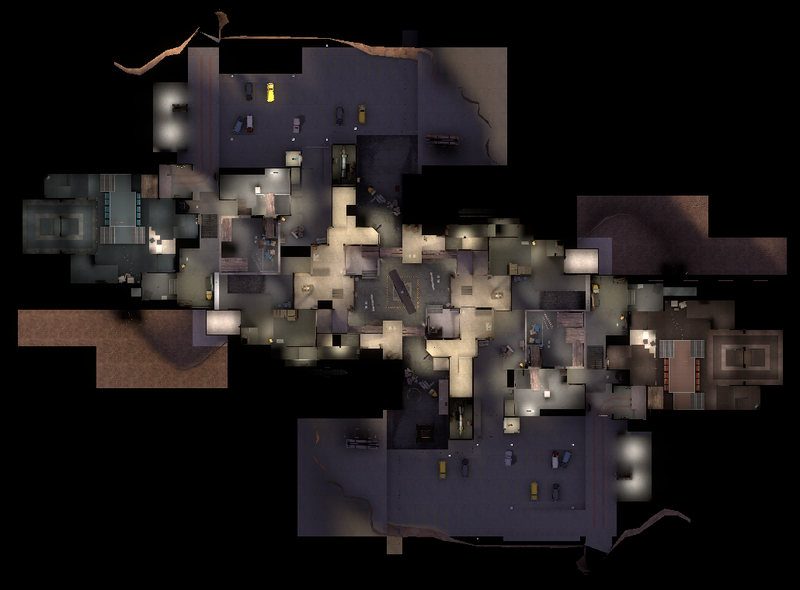
1 Center Yard 2 Scaffoldings 3 Right Balcony 4 Center Scaffoldings 5 Elevator 6 Left Building 7 Observation Room 8 Air Vent A RED first spawn B RED second spawn C RED third spawn
|
Well (Control point)
| Well (Control point) - overview indicators |
|---|
|
Mouseover the markers to see the name of the location
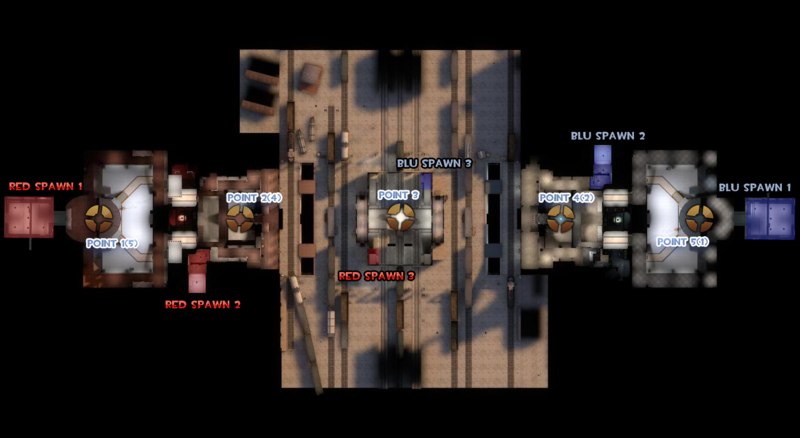
1 Main building 2 Yard 3 Swing Door 4 Swing Door 5 Battlements 6 Inner Lobby 7 Command Room 8 Catwalks A RED first spawn B RED second spawn C RED third spawn
|
Yukon
| Yukon - overview indicators |
|---|
|
Mouseover the markers to see the name of the location
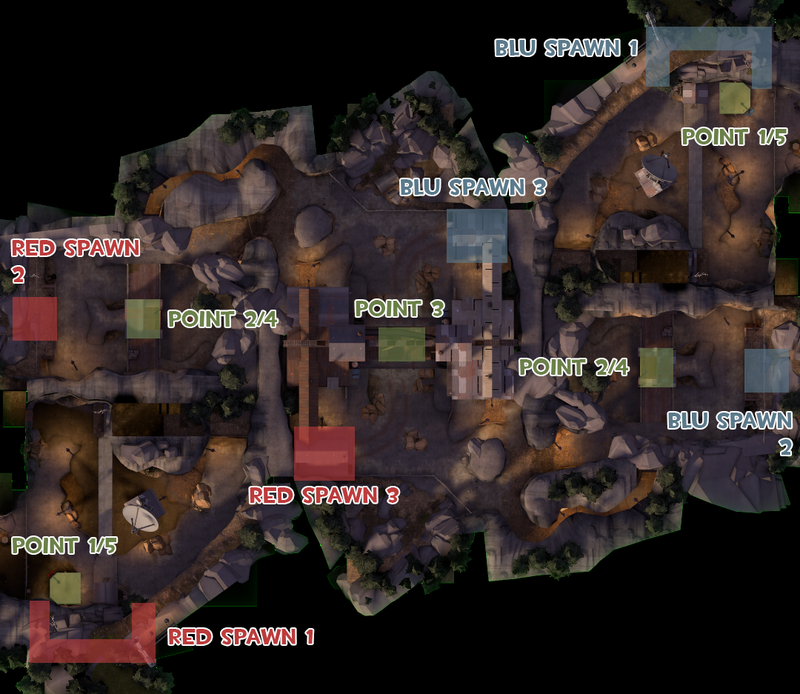
1 Bridge Valley 2 Valley 3 Back Path 4 Main Path 5 Lower Tunnel 6 Side Tunnel 7 Bridge 8 Basin 9 Right Path A RED first spawn B RED second spawn C RED third spawn
|
| Canaveral - overview indicators |
|---|
|
Mouseover the markers to see the name of the location
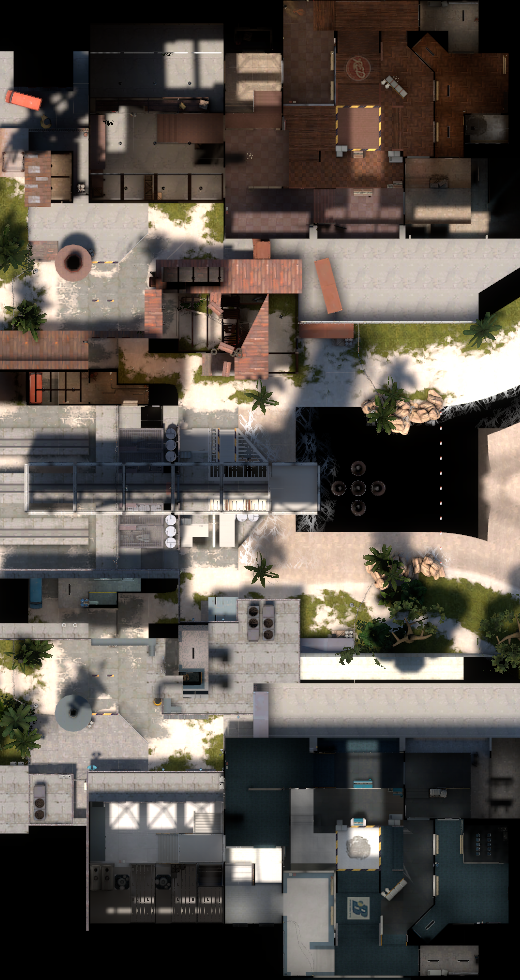
1 Cubby hole 2 Mine shack 3 Freight House 4 Yard 5 Horsemann's house 6 Hells Bells 7 Foyer 8 Wet Paint! 9 Hell Pit 10 Shack A BLU first spawn B BLU second spawn C BLU third spawn D RED first spawn E RED final spawn Checkpoint A Checkpoint B Checkpoint C Checkpoint D Checkpoint E/Final Checkpoint
|
Reckoner
| Reckoner - overview indicators |
|---|
|
Mouseover the markers to see the name of the location

1 Cubby hole 2 Mine shack 3 Freight House 4 Yard 5 Horsemann's house 6 Hells Bells 7 Foyer 8 Wet Paint! 9 Hell Pit 10 Shack A BLU first spawn B BLU second spawn C BLU third spawn D RED first spawn E RED final spawn Checkpoint A Checkpoint B Checkpoint C Checkpoint D Checkpoint E/Final Checkpoint
|
Freaky Fair
| Freaky Fair - overview indicators |
|---|
|
Mouseover the markers to see the name of the location
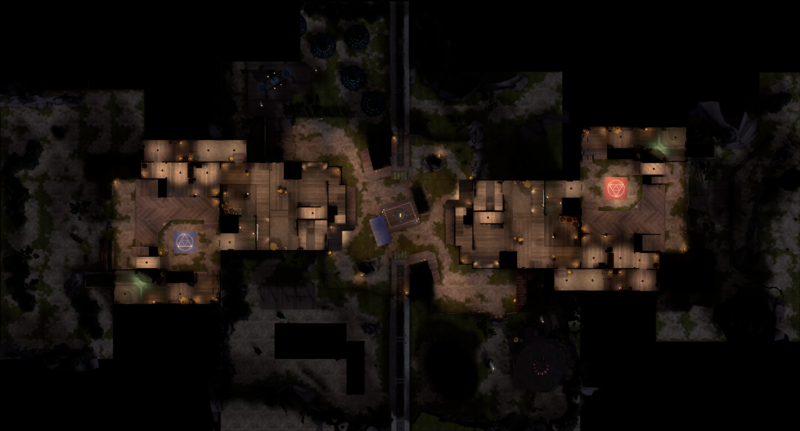
1 Spawn areas 2 Tracks/Ramp 3 Battlements 4 High Ground 5 Side Buildings A RED spawn B BLU spawn
|
King of the Hill
Badlands
| Badlands (King of the Hill) - overview indicators |
|---|
|
Mouseover the markers to see the name of the location
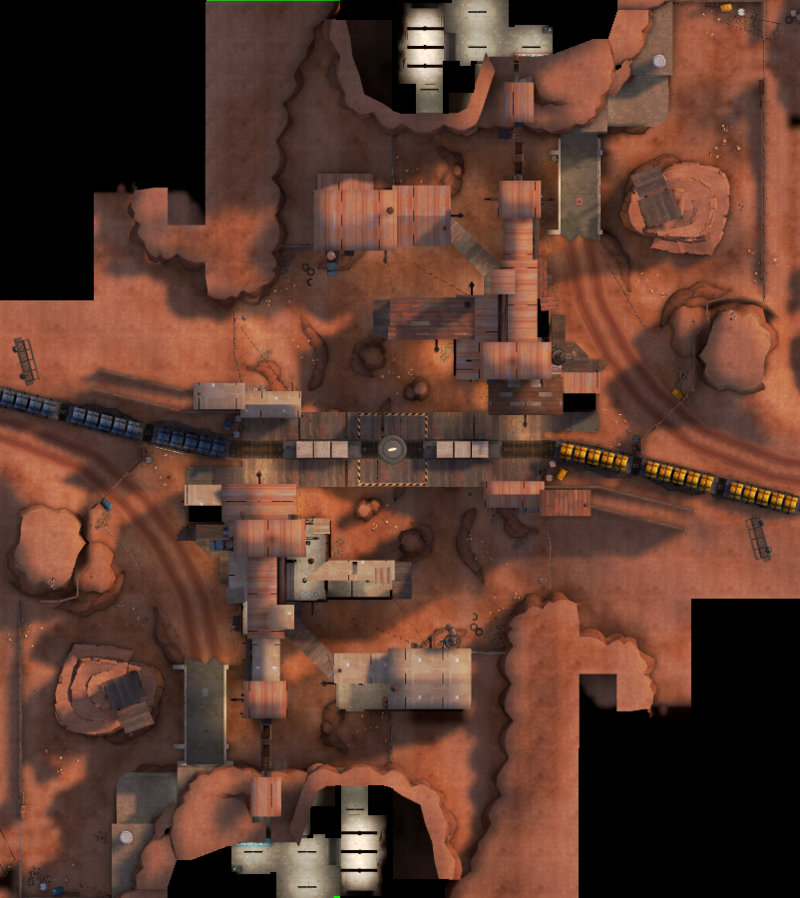
1 Rail cars 2 Rocky Pillars 3 Balcony 4 Valley A RED spawn B BLU spawn
|
Boardwalk
| Boardwalk - overview indicators |
|---|
|
Mouseover the markers to see the name of the location
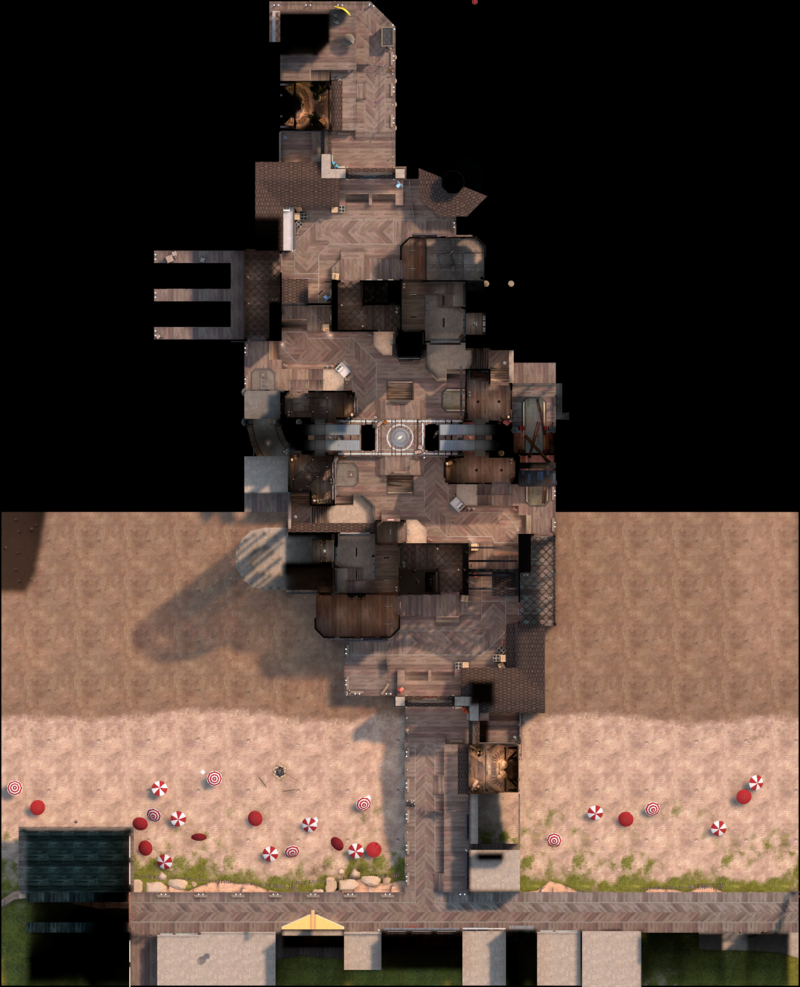
1 Cliffs 2 Elevated tracks 3 Side Cliffs 4 Hut 5 Tunnel 6 Imperial building 7 Red deck 8 Ditch 9 Attic 10 Staircase to Attic 11 Mineshaft A BLU spawn B Red spawn Cart start Checkpoint A Checkpoint B/Stage 1 end
|
Blowout
| Blowout - overview indicators |
|---|
|
Mouseover the markers to see the name of the location
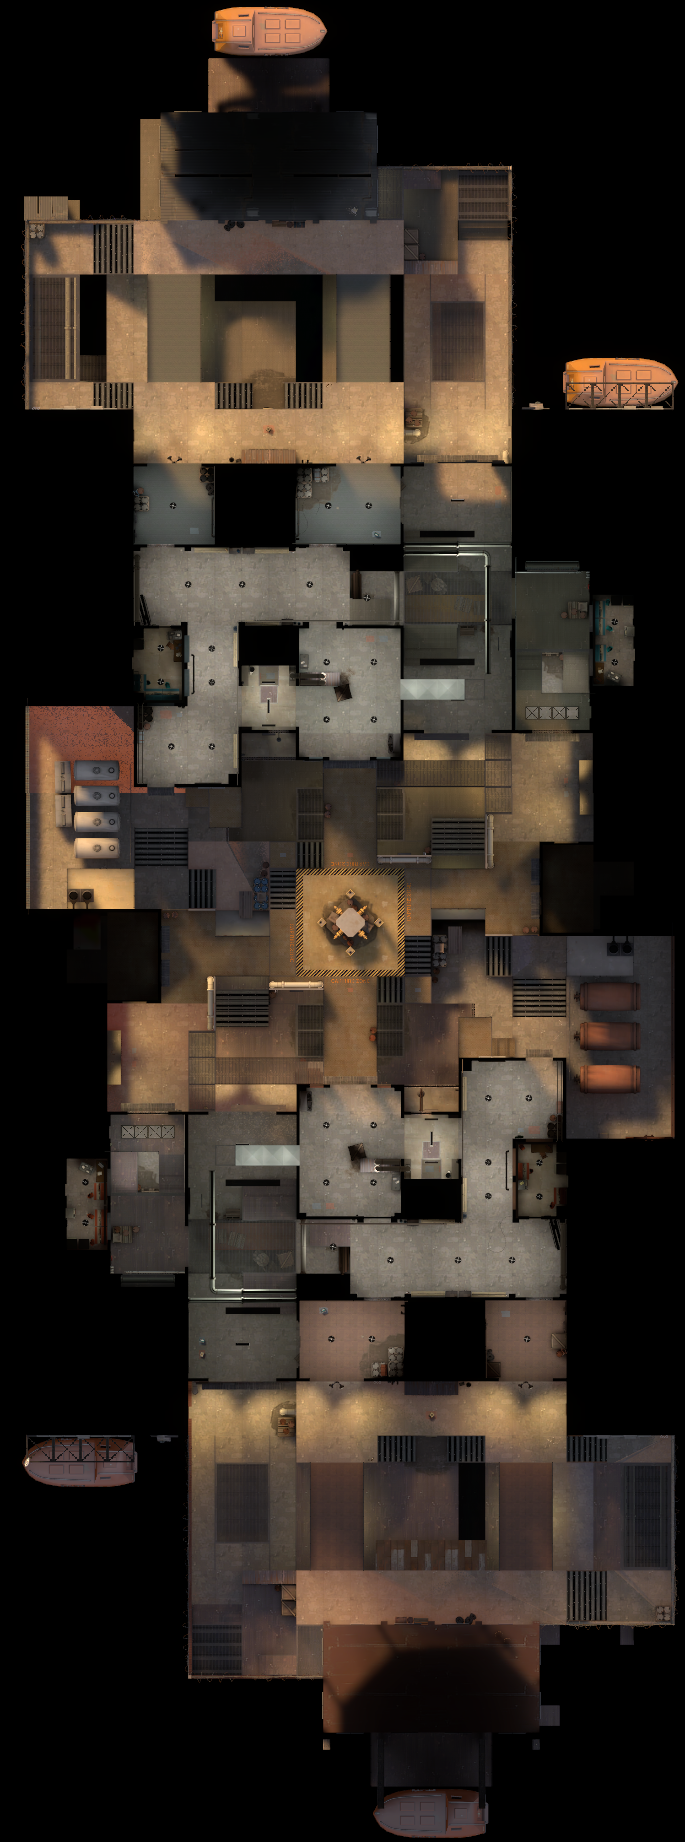
1 Cliffs 2 Elevated tracks 3 Side Cliffs 4 Hut 5 Tunnel 6 Imperial building 7 Red deck 8 Ditch 9 Attic 10 Staircase to Attic 11 Mineshaft A BLU spawn B Red spawn Cart start Checkpoint A Checkpoint B/Stage 1 end
|
Brazil
| Brazil - overview indicators |
|---|
|
Mouseover the markers to see the name of the location
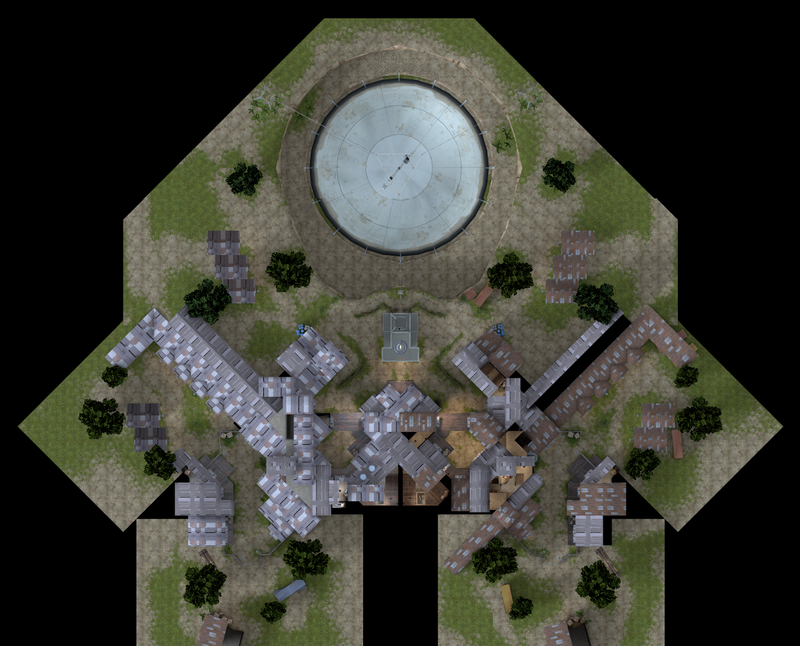
1 Spawn Yard 2 Outside Route 3 Middle route 4 Inside route 5 Vault room (Above the Alley) 6 Alley 7 Stairwell 8 Huge Perch 9 Coal House 10 Back Road A BLU spawn B RED spawn
|
Cauldron
| Cauldron - overview indicators |
|---|
|
Mouseover the markers to see the name of the location
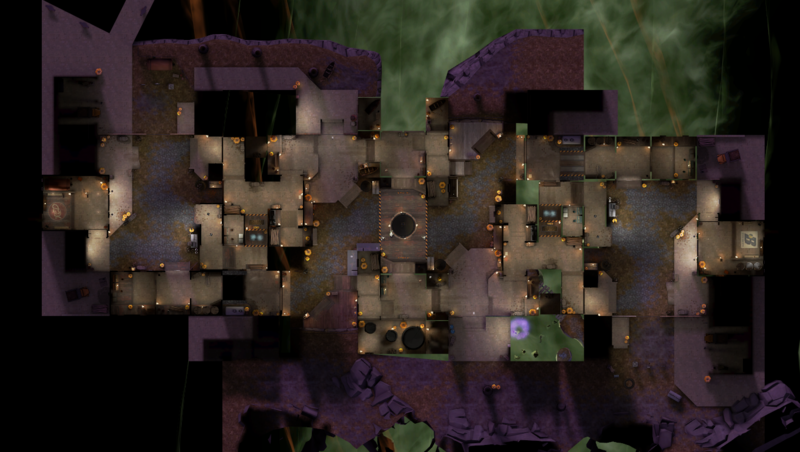
1 Spawn areas 2 Tracks/Ramp 3 Battlements 4 High Ground 5 Side Buildings A RED spawn B BLU spawn
|
Demolition
| Demolition - overview indicators |
|---|
|
Mouseover the markers to see the name of the location
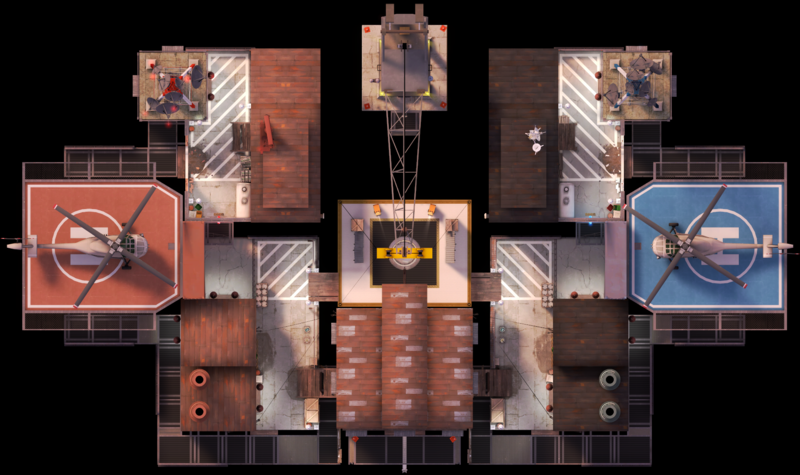
1 Cliffs 2 Elevated tracks 3 Side Cliffs 4 Hut 5 Tunnel 6 Imperial building 7 Red deck 8 Ditch 9 Attic 10 Staircase to Attic 11 Mineshaft A BLU spawn B Red spawn Cart start Checkpoint A Checkpoint B/Stage 1 end
|
Harvest
| Harvest - overview indicators |
|---|
|
Mouseover the markers to see the name of the location
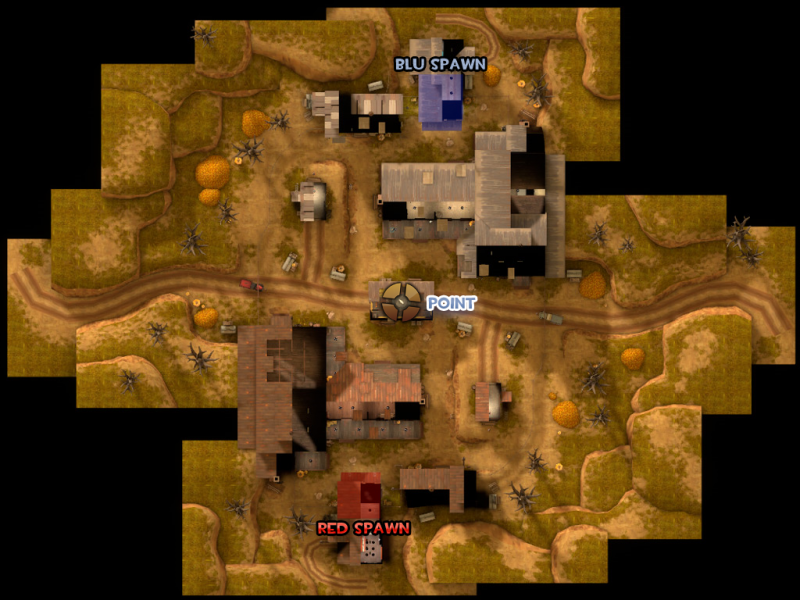
1 Center Shed 2 Farmhouse 3 Side Sheds A RED spawn B BLU spawn
|
Harvest Event
| Harvest event - overview indicators |
|---|
|
Mouseover the markers to see the name of the location
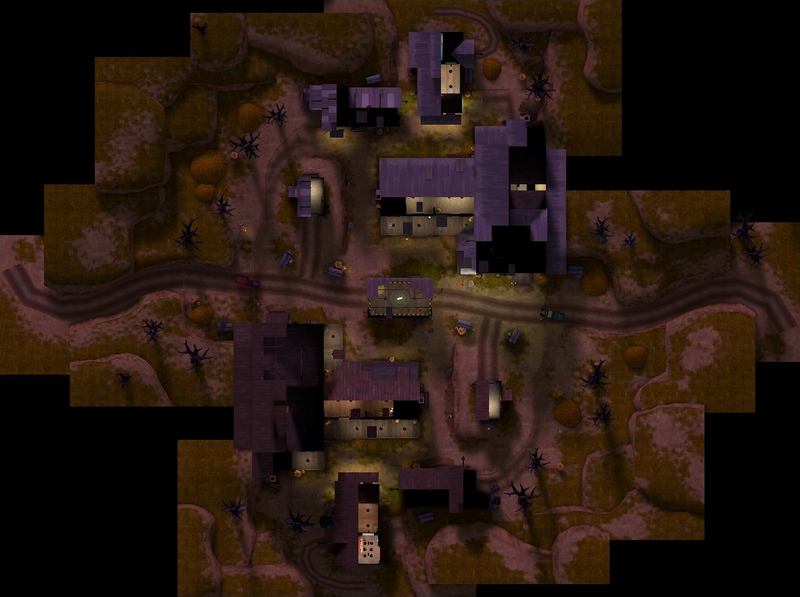
1 Center Shed 2 Farmhouse 3 Side Sheds A RED spawn B BLU spawn
|
Highpass
| Highpass - overview indicators |
|---|
|
Mouseover the markers to see the name of the location
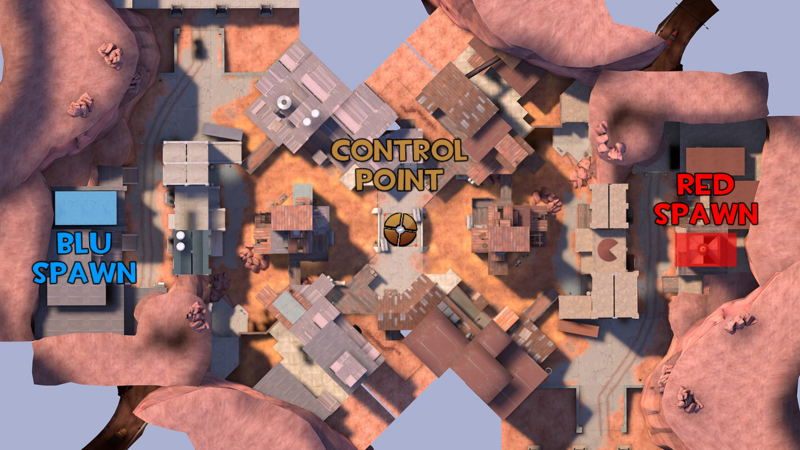
1 Bridge 2 Yard 3 Industrial Houses A BLU spawn B RED spawn
|
Kong King
| Kong King - overview indicators |
|---|
|
Mouseover the markers to see the name of the location
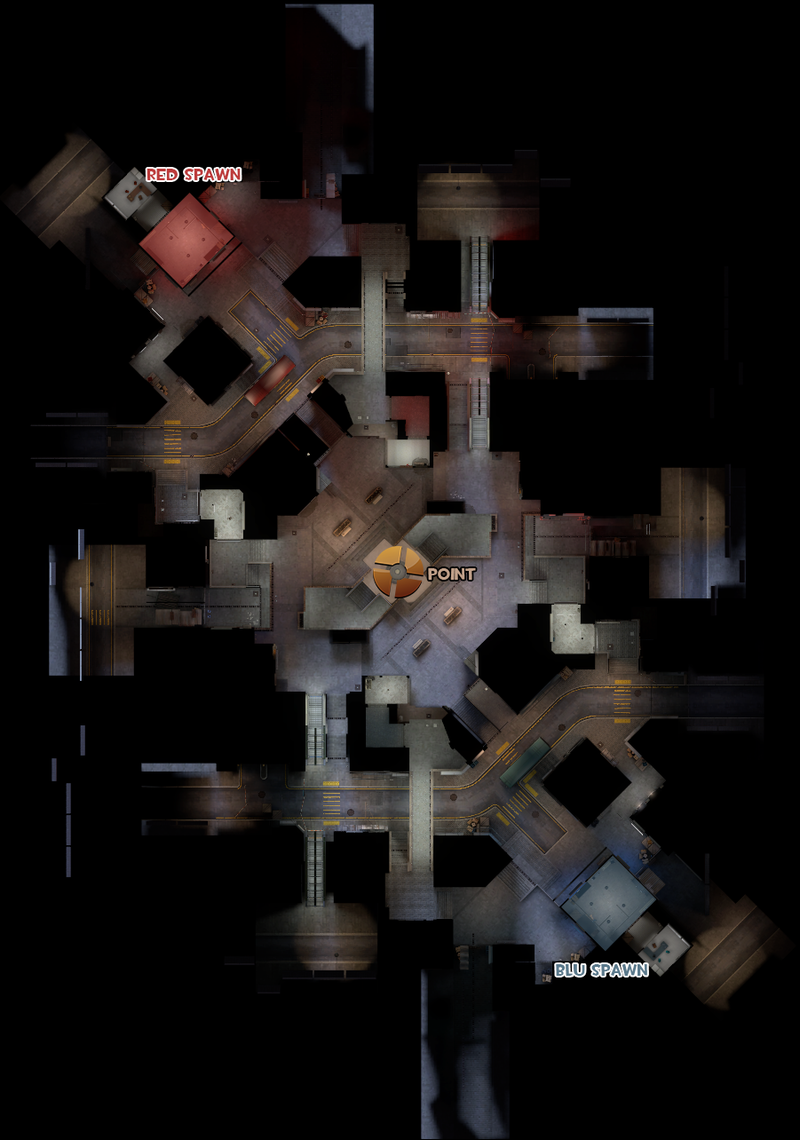
1 Alleyways 2 Buses 3 Covered Bridges 4 Double Stairs 5 Short Stairs 6 Side Stairs 7 Pillar Rooms A RED spawn B BLU spawn
|
Lakeside
| Lakeside - overview indicators |
|---|
|
Mouseover the markers to see the name of the location
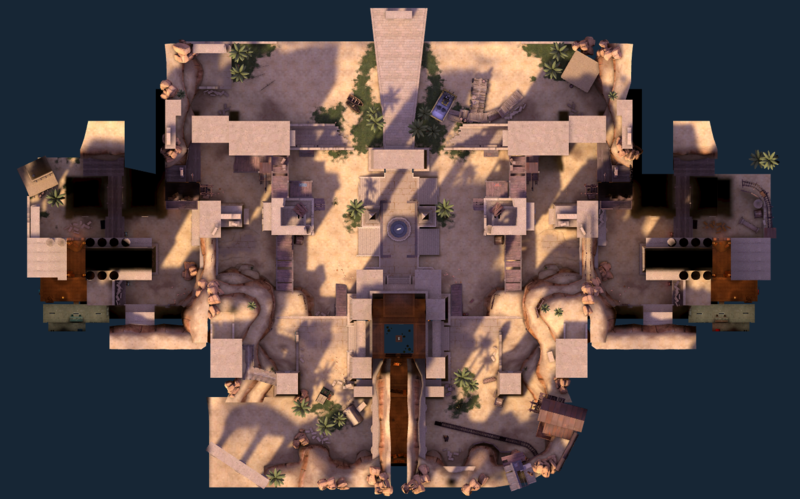
1 Team Courtyard 2 Small Wooden Structure 3 Sandstone Archway 4 Winding Tunnel 5 Forts 6 Health Room 7 Ammunition Archway 8 Obelisk 9 Water Temple A RED spawn B BLU spawn
|
Ghost Fort
| Ghost Fort - overview images |
|---|
|
Mouseover the markers to see the name of the location
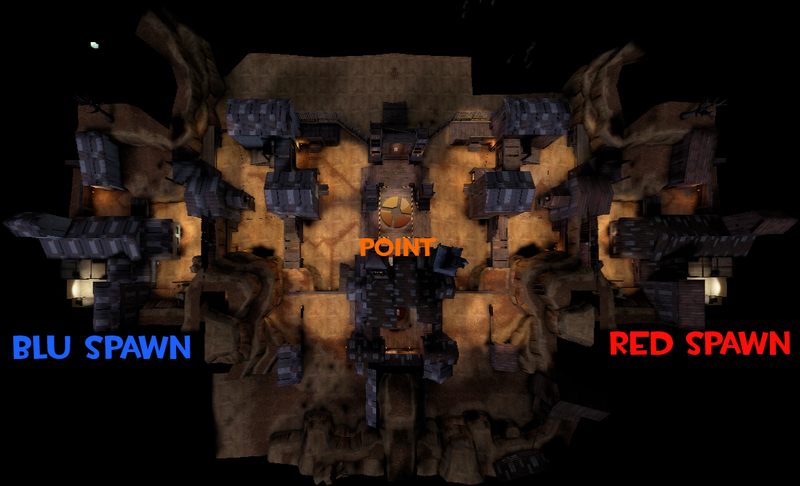
1 Team Courtyard 2 Small Wooden Structure 3 Catwalks Archway 4 Winding Tunnel 5 Forts 6 Health Room 7 Ammunition Archway 8 Tower 9 Pit Temple A RED spawn B BLU spawn
|
Laughter
| Laughter - overview indicators |
|---|
|
Mouseover the markers to see the name of the location
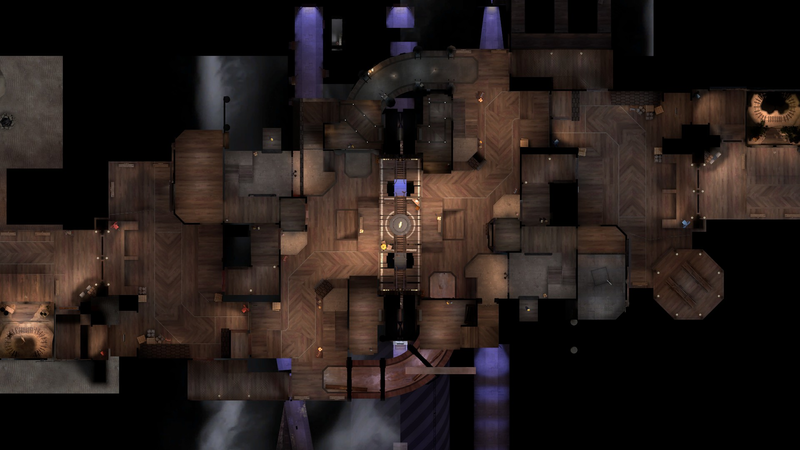
1 Badlands Bandito/Pirate's Blunder 2 Bottle Buster/Pumpkin Smash 3 Spawn Yard 4 Gift Shop/Arcade 5 Robotic Sideshow/Real Live Crocodiles 6 Balcony 7 Stairs 8 Mike Toss/Hall of Mirrors 9 Sawmill of Love/Mad Mansion A BLU spawn B RED spawn
|
Lazarus
| Lazarus - overview indicators |
|---|
|
Mouseover the markers to see the name of the location
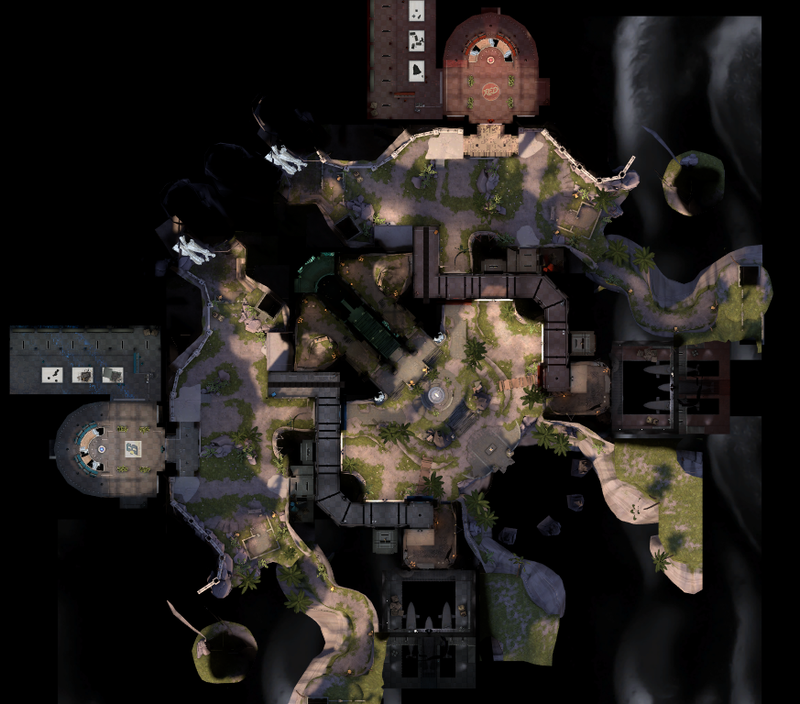
1 Yard 2 Outside Exit 3 Low Route 4 High Route 5 Digs 6 Corridor 7 Stairs 8 Garage 9 Altar A BLU spawn B RED spawn
|
Maple Ridge Event
| Maple Ridge Event - overview indicators |
|---|
|
Mouseover the markers to see the name of the location
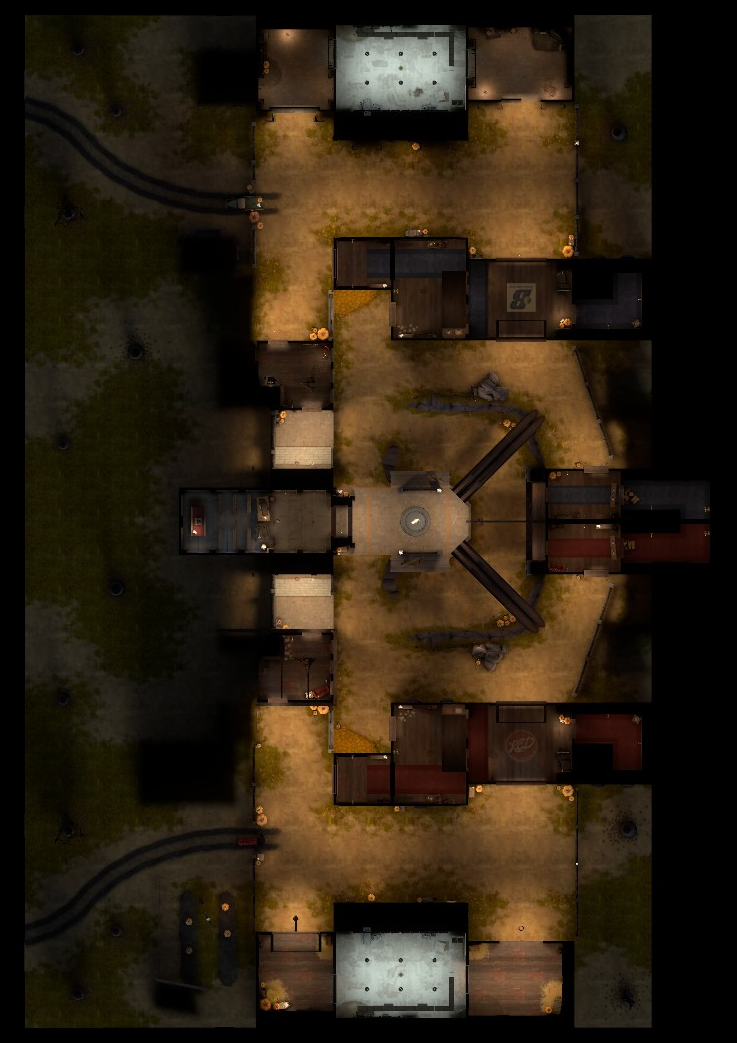
1 Yard 2 Hall 3 Flank Fence 4 Library 5 Patio 6 Chapel 7 Pipes 8 Ramp 9 Redmond's House A RED spawn B BLU spawn
|
Megalo
| Megalo - overview indicators |
|---|
|
Mouseover the markers to see the name of the location
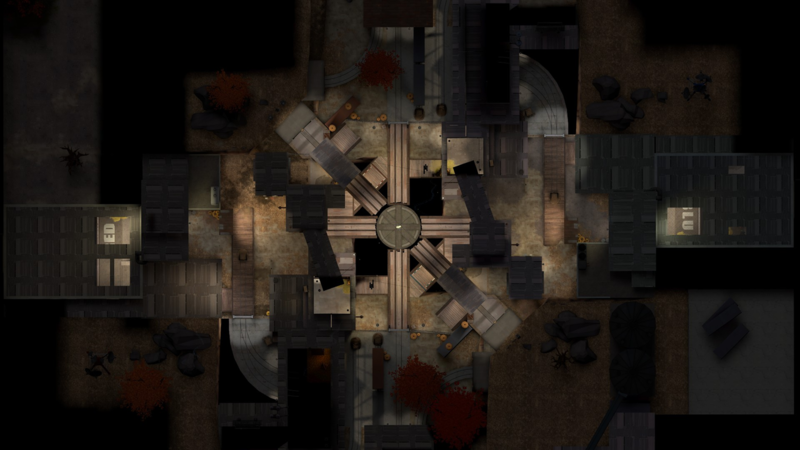
1 Yard 2 Valley 3 Factories A RED spawn B BLU spawn
|
Moldergrove
| Moldergrove - overview indicators |
|---|
|
Mouseover the markers to see the name of the location
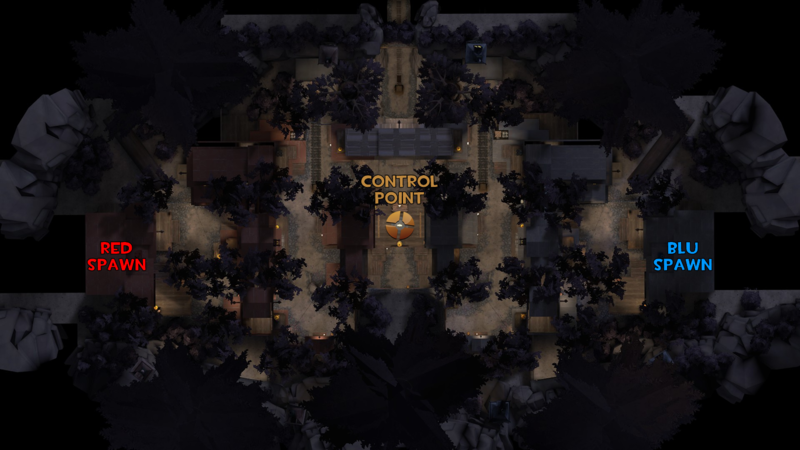
1 Spawn Yard 2 Blinski Logging 3 End of the Line 4 Central building 5 Mine Pit 6 Red Valley Mountain A RED spawn B BLU spawn
|
Moonshine Event
| Moonshine Event - overview indicators |
|---|
|
Mouseover the markers to see the name of the location
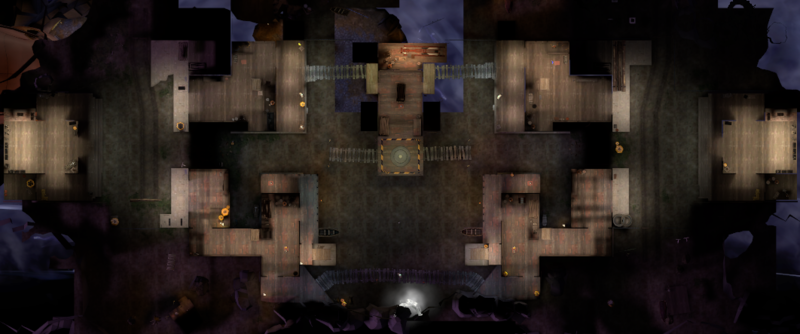
1 Spawn Yard 2 Industrial Houses 3 Bay Shipping House A RED spawn B BLU spawn
|
Nucleus (King of the Hill)
| Nucleus (King of the Hill) - overview indicators |
|---|
|
Mouseover the markers to see the name of the location

1 Perimeter 2 Roofs 3 Bridges 4 Flank Buildings 5 Access Building A RED spawn B BLU spawn
|
Probed
| Probed - overview indicators |
|---|
|
Mouseover the markers to see the name of the location
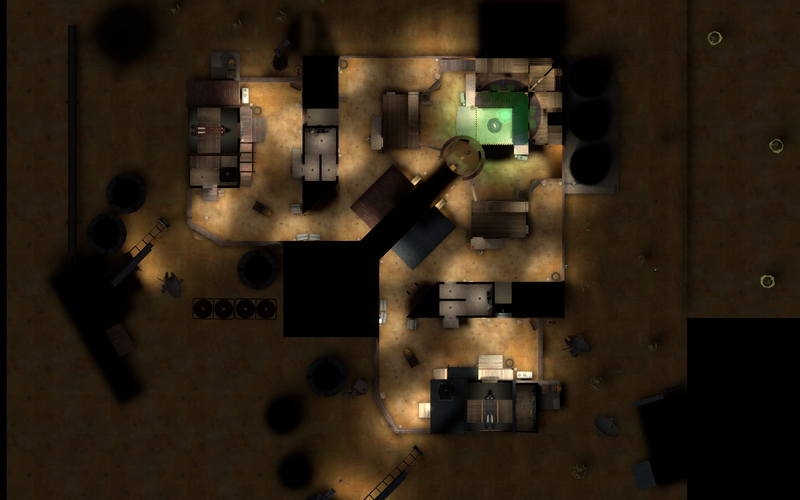
1 Spawn Yard 2 Transition Building 3 Sheds 4 Grain Silo A RED spawn B BLU spawn
|
Sawmill (King of the Hill)
| Sawmill (King of the Hill) - overview indicators |
|---|
|
Mouseover the markers to see the name of the location

1 Rooftops 2 Cave 3 Waterfall 4 Alcoves 5 Center Shed 6 Log Shed A RED spawn B BLU spawn
|
Slasher
| Slasher - overview indicators |
|---|
|
Mouseover the markers to see the name of the location
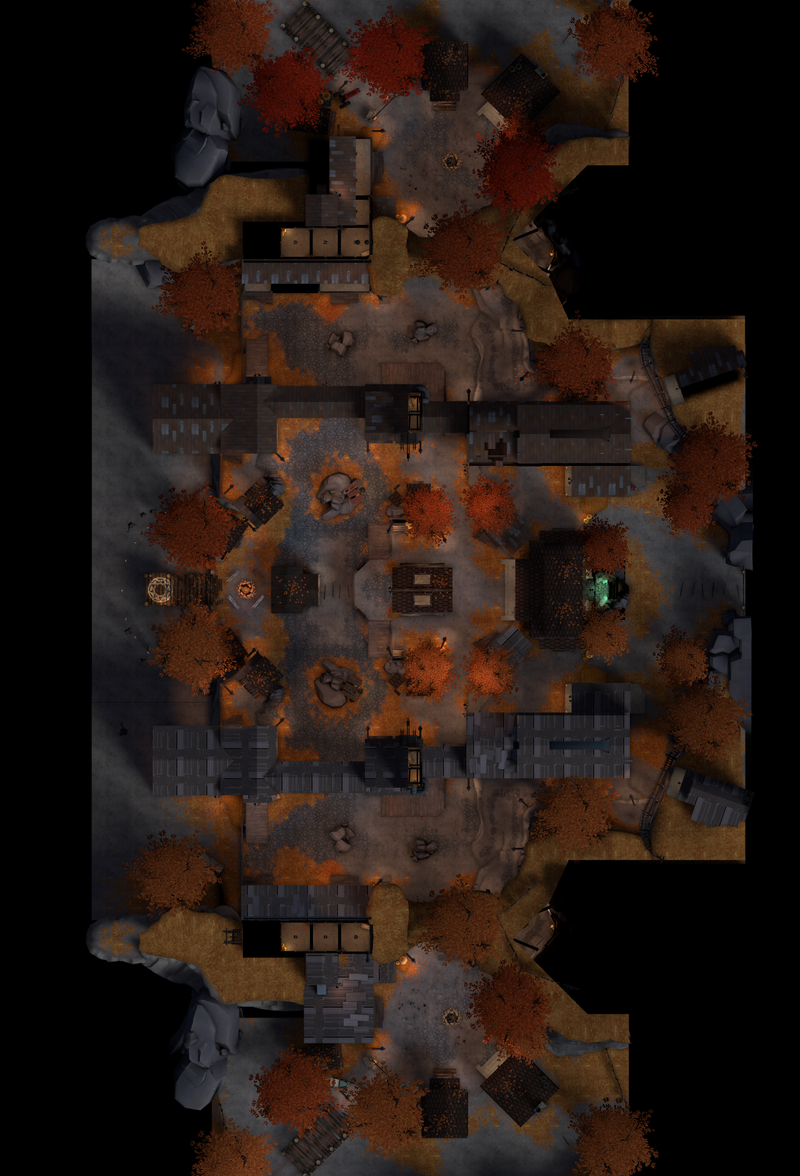
1 Campfire 2 Mines 3 Middle Entrance 4 Boat Rentals 5 Maintenance 6 Boat Dock 7 Bonfire 8 Supply Shed 9 Ramps 10 Ranger Lodge A RED spawn B BLU spawn
|
Suijin
| Suijin - overview indicators |
|---|
|
Mouseover the markers to see the name of the location
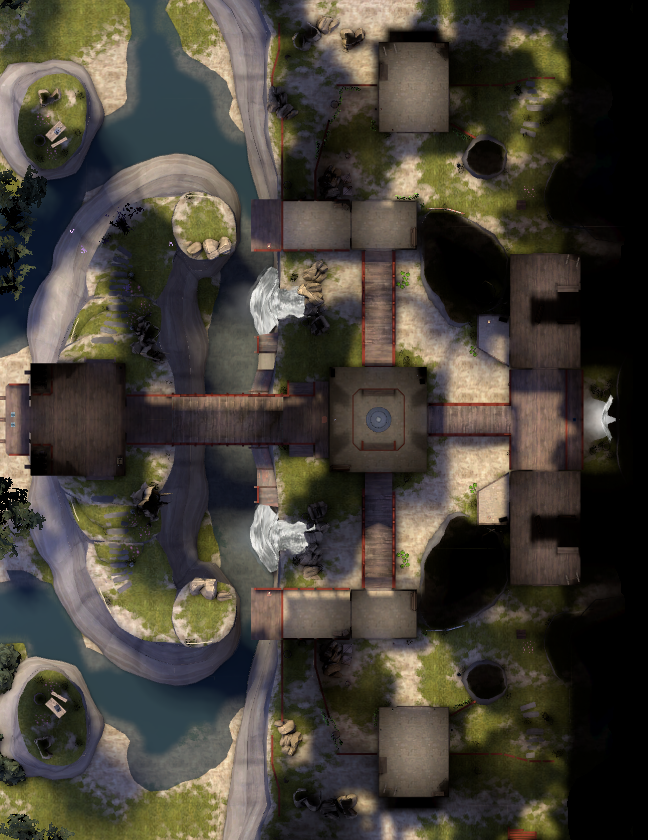
1 Far Islands 2 Cliffside Temple 3 Bamboo Buildings 4 Temple Tower 5 Calligaphy Temple A RED spawn B BLU spawn
|
Viaduct
| Viaduct - overview indicators |
|---|
|
Mouseover the markers to see the name of the location
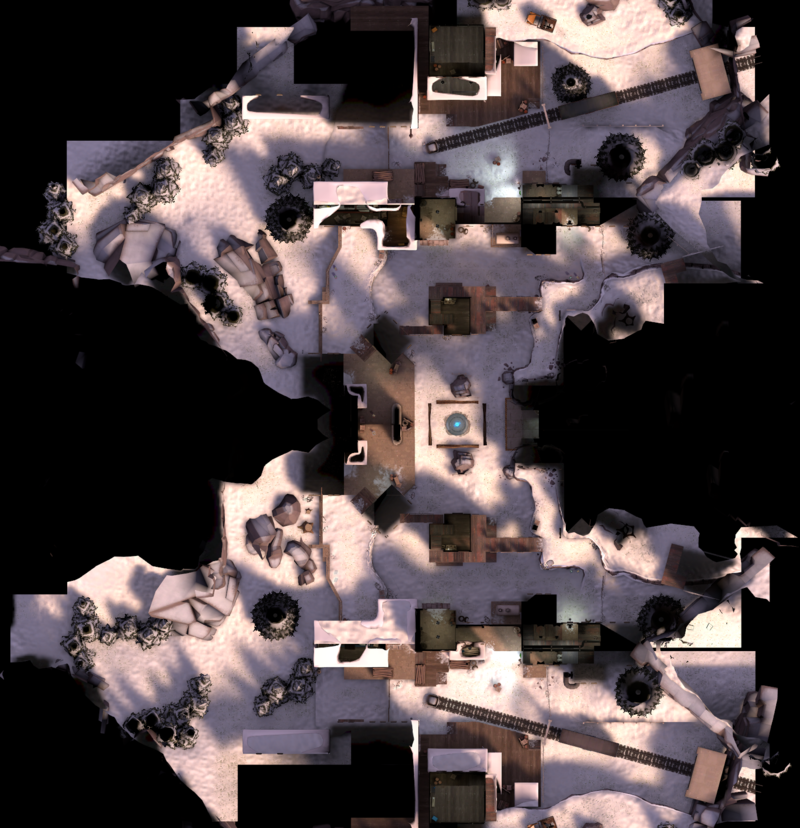
1 Spawn Yard 2 Transition Building 3 Valley 4 Scullery (House) 5 Stairs 6 Hills 7 Summit with the Point A RED spawn B BLU spawn
|
Sinthetic
| Sinthetic - overview indicators |
|---|
|
Mouseover the markers to see the name of the location
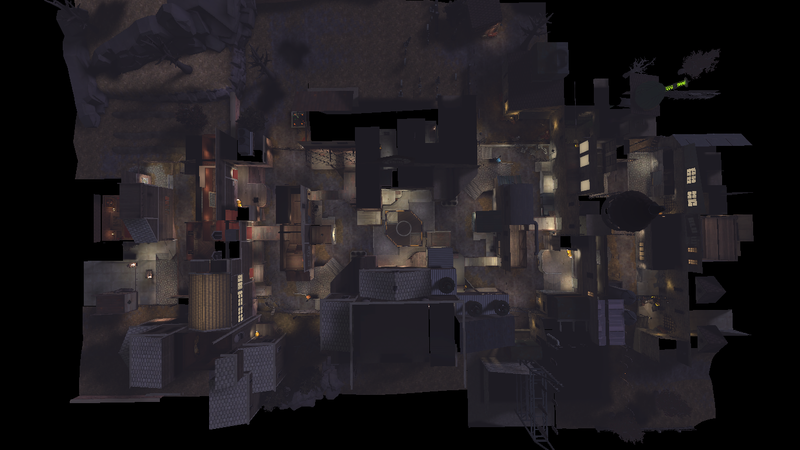
1 Spawn Yard 2 Transitional Building 3 Valley 4 House 5 Flanks 6 Tunnels A RED spawn B BLU spawn
|
Los Muertos
| Los Muertos - overview indicators |
|---|
|
Mouseover the markers to see the name of the location
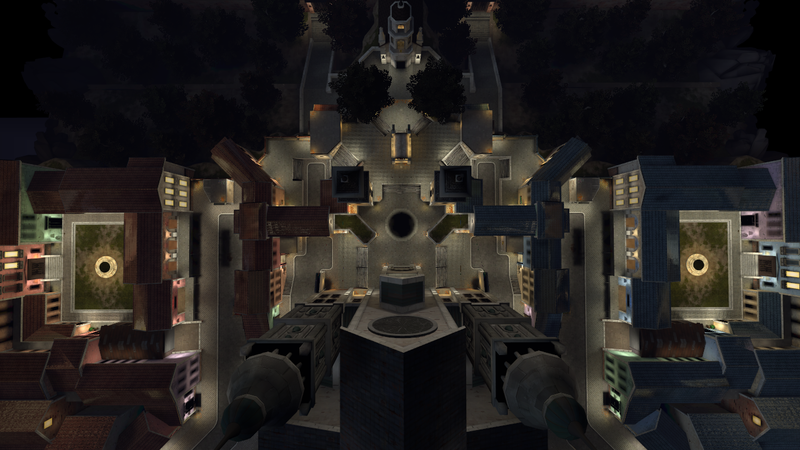
1 Bus 2 Terminal 3 Bakery 4 Alley (And the Balcony) 5 House 6 Street 7 Bell Tower 8 Cathedral (And the Sarcophagus) 9 Entrance 10 Town Square 11 Planters 12 Crypt 13 Church A RED spawn B BLU spawn
|
Cachoeira
| Cachoeira - overview indicators |
|---|
|
Mouseover the markers to see the name of the location
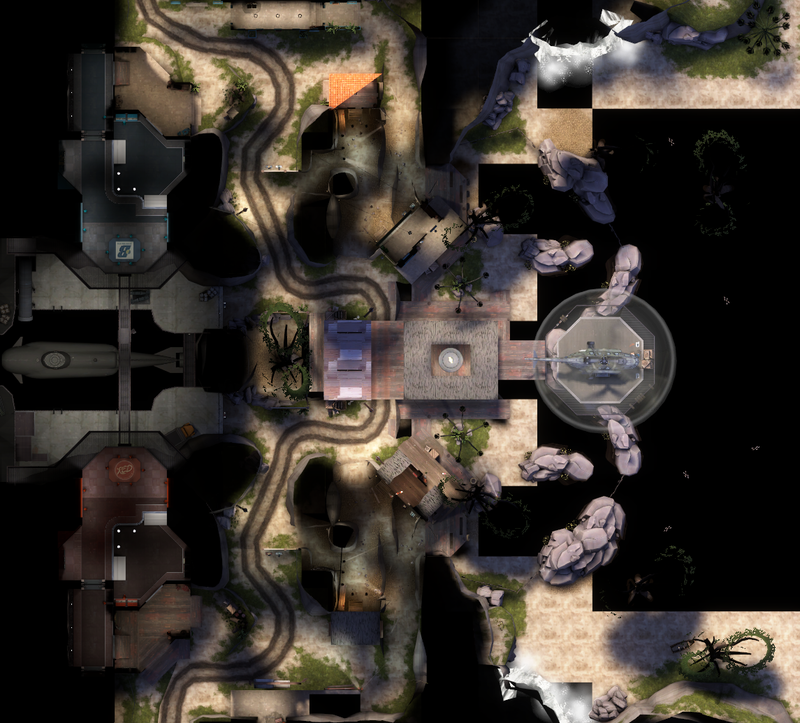
1 Bus 2 Terminal 3 Bakery 4 Alley (And the Balcony) 5 House 6 Street 7 Bell Tower 8 Cathedral (And the Sarcophagus) 9 Entrance 10 Town Square 11 Planters 12 Crypt 13 Church A RED spawn B BLU spawn
|
Cascade
| Cascade - overview indicators |
|---|
|
Mouseover the markers to see the name of the location
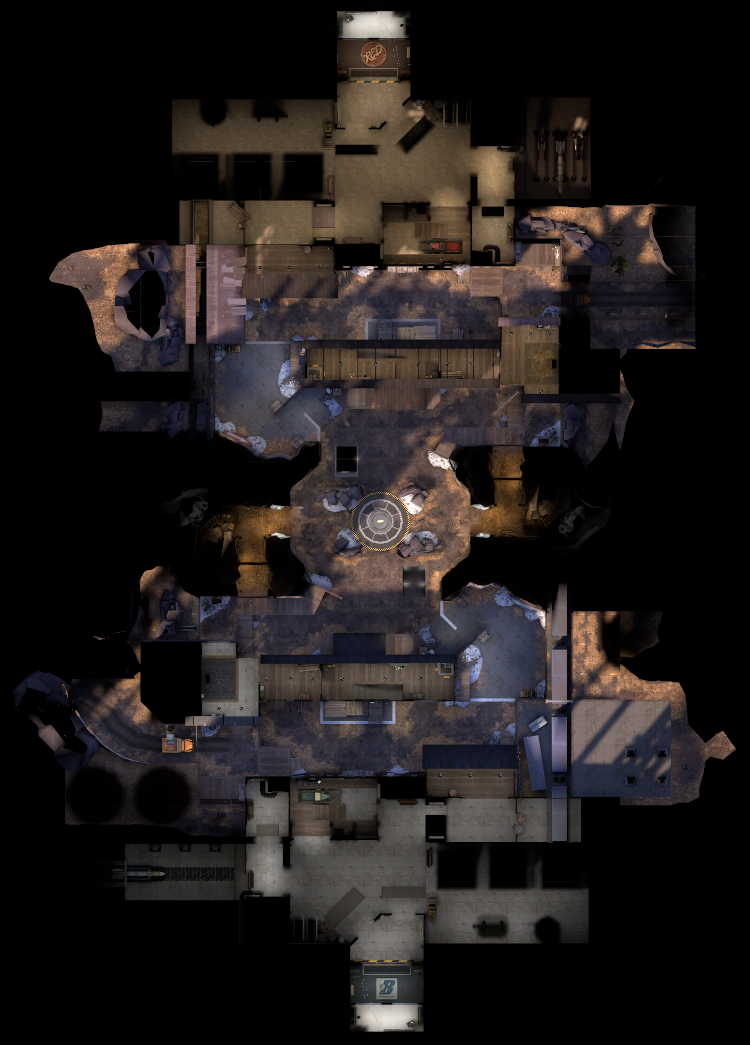
1 Bus 2 Terminal 3 Bakery 4 Alley (And the Balcony) 5 House 6 Street 7 Bell Tower 8 Cathedral (And the Sarcophagus) 9 Entrance 10 Town Square 11 Planters 12 Crypt 13 Church A RED spawn B BLU spawn
|
Eyeaduct
| Eyeaduct - overview indicators |
|---|
|
Mouseover the markers to see the name of the location
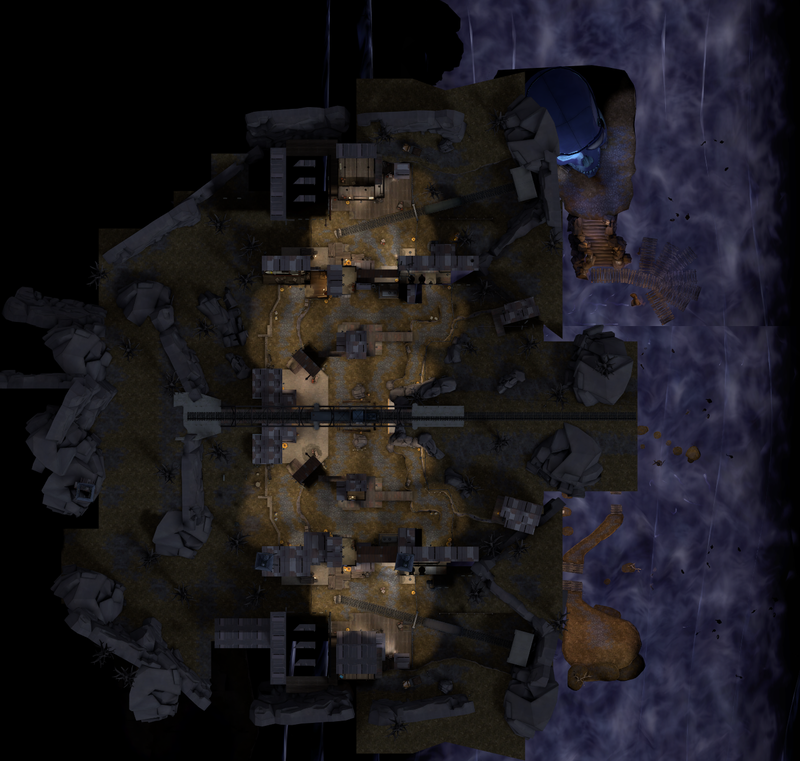
1 Bus 2 Terminal 3 Bakery 4 Alley (And the Balcony) 5 House 6 Street 7 Bell Tower 8 Cathedral (And the Sarcophagus) 9 Entrance 10 Town Square 11 Planters 12 Crypt 13 Church A RED spawn B BLU spawn
|
Krampus
| Krampus - overview indicators |
|---|
|
Mouseover the markers to see the name of the location

1 Bus 2 Terminal 3 Bakery 4 Alley (And the Balcony) 5 House 6 Street 7 Bell Tower 8 Cathedral (And the Sarcophagus) 9 Entrance 10 Town Square 11 Planters 12 Crypt 13 Church A RED spawn B BLU spawn
|
Megaton
| Megaton - overview indicators |
|---|
|
Mouseover the markers to see the name of the location
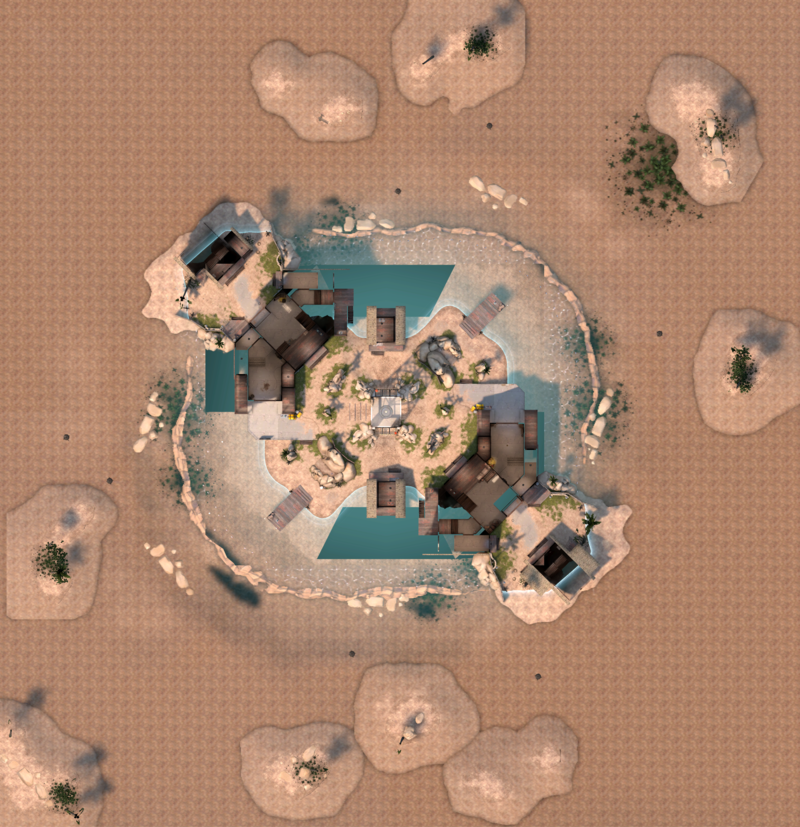
1 Bus 2 Terminal 3 Bakery 4 Alley (And the Balcony) 5 House 6 Street 7 Bell Tower 8 Cathedral (And the Sarcophagus) 9 Entrance 10 Town Square 11 Planters 12 Crypt 13 Church A RED spawn B BLU spawn
|
Rotunda
| Rotunda - overview indicators |
|---|
|
Mouseover the markers to see the name of the location
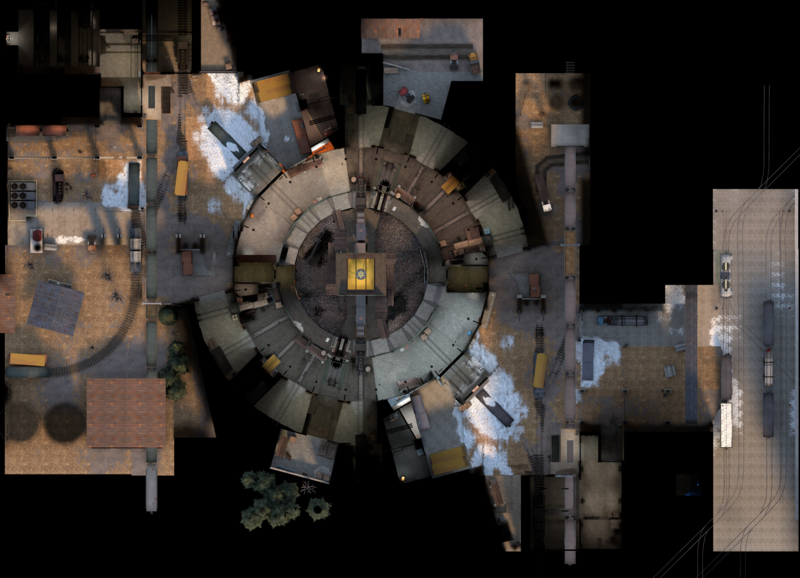
1 Bus 2 Terminal 3 Bakery 4 Alley (And the Balcony) 5 House 6 Street 7 Bell Tower 8 Cathedral (And the Sarcophagus) 9 Entrance 10 Town Square 11 Planters 12 Crypt 13 Church A RED spawn B BLU spawn
|
Sharkbay
| Sharkbay - overview indicators |
|---|
|
Mouseover the markers to see the name of the location
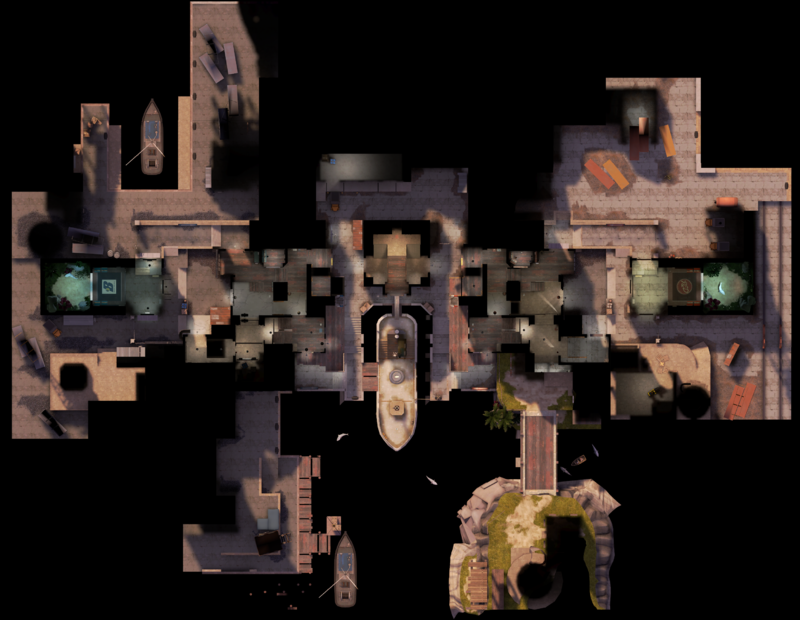
1 Bus 2 Terminal 3 Bakery 4 Alley (And the Balcony) 5 House 6 Street 7 Bell Tower 8 Cathedral (And the Sarcophagus) 9 Entrance 10 Town Square 11 Planters 12 Crypt 13 Church A RED spawn B BLU spawn
|
Slime
| Slime - overview indicators |
|---|
|
Mouseover the markers to see the name of the location
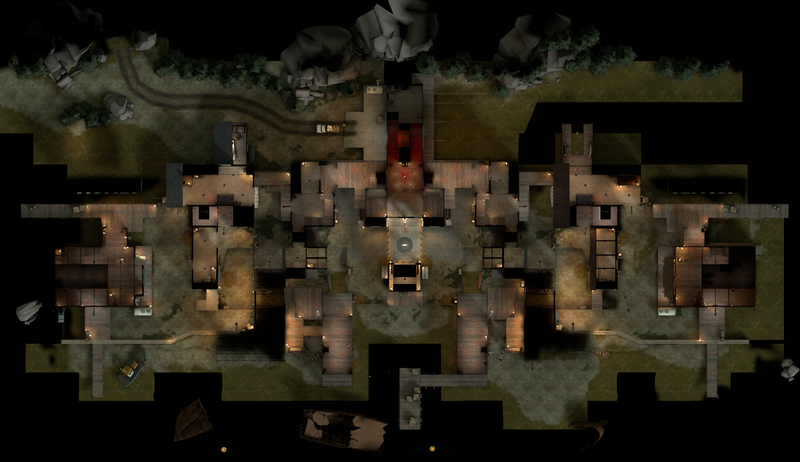
1 Bus 2 Terminal 3 Bakery 4 Alley (And the Balcony) 5 House 6 Street 7 Bell Tower 8 Cathedral (And the Sarcophagus) 9 Entrance 10 Town Square 11 Planters 12 Crypt 13 Church A RED spawn B BLU spawn
|
Snowtower
| Snowtower - overview indicators |
|---|
|
Mouseover the markers to see the name of the location

1 Bus 2 Terminal 3 Bakery 4 Alley (And the Balcony) 5 House 6 Street 7 Bell Tower 8 Cathedral (And the Sarcophagus) 9 Entrance 10 Town Square 11 Planters 12 Crypt 13 Church A RED spawn B BLU spawn
|
Soul-Mill
| Soul-Mill - overview indicators |
|---|
|
Mouseover the markers to see the name of the location
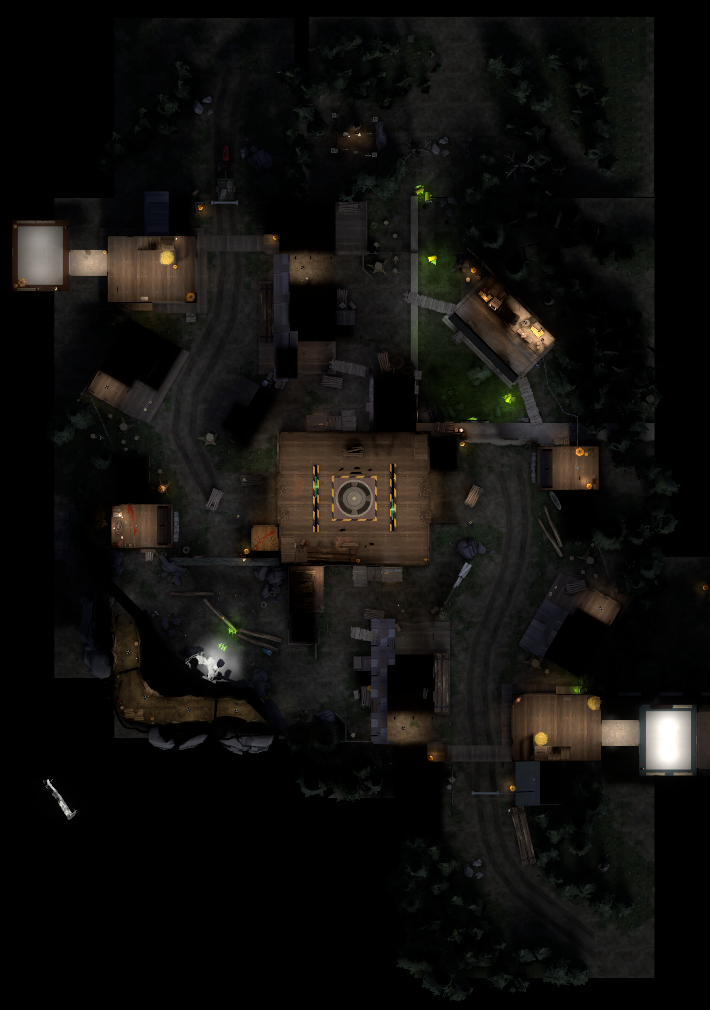
1 Bus 2 Terminal 3 Bakery 4 Alley (And the Balcony) 5 House 6 Street 7 Bell Tower 8 Cathedral (And the Sarcophagus) 9 Entrance 10 Town Square 11 Planters 12 Crypt 13 Church A RED spawn B BLU spawn
|
Circus
| Circus - overview indicators |
|---|
|
Mouseover the markers to see the name of the location

1 Spawn areas 2 Tracks/Ramp 3 Battlements 4 High Ground 5 Side Buildings A RED spawn B BLU spawn
|
Toxic
| Toxic - overview indicators |
|---|
|
Mouseover the markers to see the name of the location
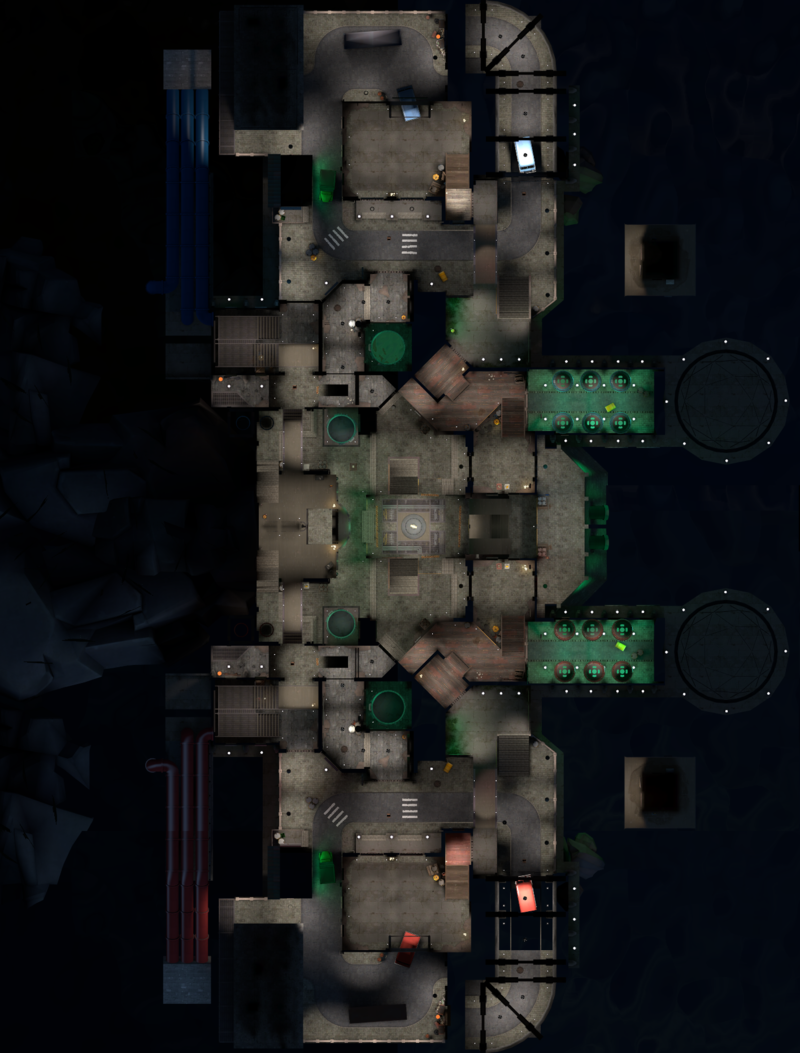
1 Spawn areas 2 Tracks/Ramp 3 Battlements 4 High Ground 5 Side Buildings A RED spawn B BLU spawn
|
Overcast
| Overcast - overview indicators |
|---|
|
Mouseover the markers to see the name of the location
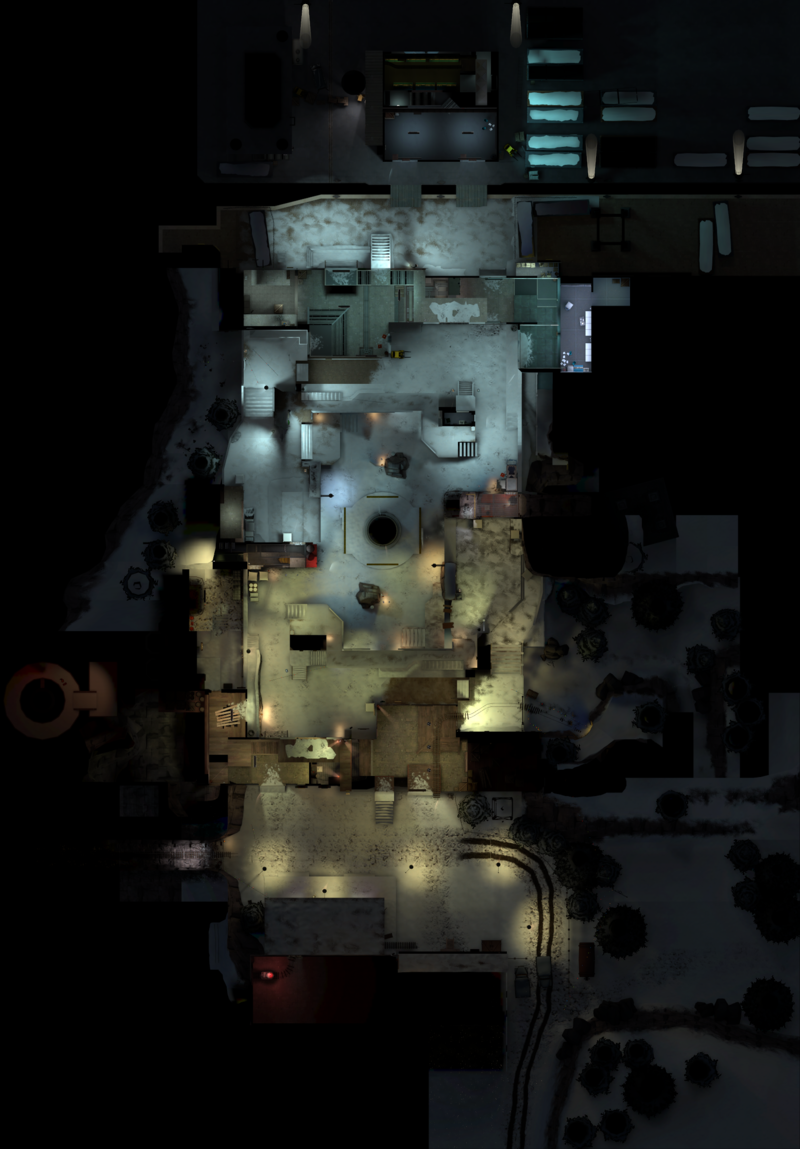
1 Spawn areas 2 Tracks/Ramp 3 Battlements 4 High Ground 5 Side Buildings A RED spawn B BLU spawn
|
Mannhole
| Mannhole - overview indicators |
|---|
|
Mouseover the markers to see the name of the location
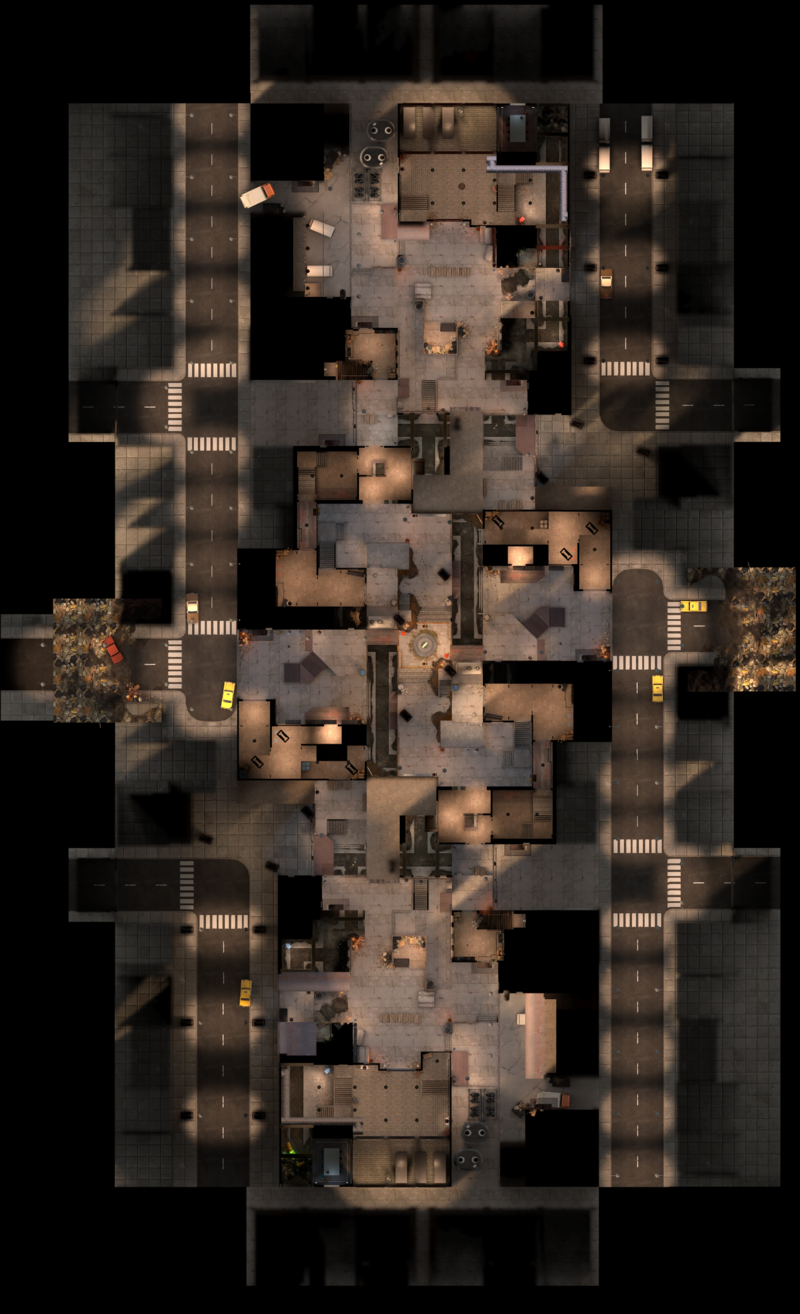
1 Cliffs 2 Elevated tracks 3 Side Cliffs 4 Hut 5 Tunnel 6 Imperial building 7 Red deck 8 Ditch 9 Attic 10 Staircase to Attic 11 Mineshaft A BLU spawn B Red spawn Cart start Checkpoint A Checkpoint B/Stage 1 end
|
Capture the Flag
2Fort
| 2Fort - overview indicators |
|---|
|
Mouseover the markers to see the name of the location

1 Bridge 2 Entrance 3 Battlements 4 Grate 5 Entrance Side Room 6 Courtyard 7 Stairs 8 Basement 9 Spiral 10 Intelligence Room 11 Sewer Exit A BLU spawn B BLU spawn C RED spawn D RED spawn
|
2Fort Invasion
| 2Fort Invasion - overview indicators |
|---|
|
Mouseover the markers to see the name of the location

1 Bridge 2 Entrance 3 Battlements 4 Grate 5 Entrance Side Room 6 Courtyard 7 Stairs 8 Basement 9 Spiral 10 Intelligence Room 11 Sewer Exit A BLU spawn B BLU spawn C RED spawn D RED spawn
|
Double Cross
| Double Cross - overview indicators |
|---|
|
Mouseover the markers to see the name of the location
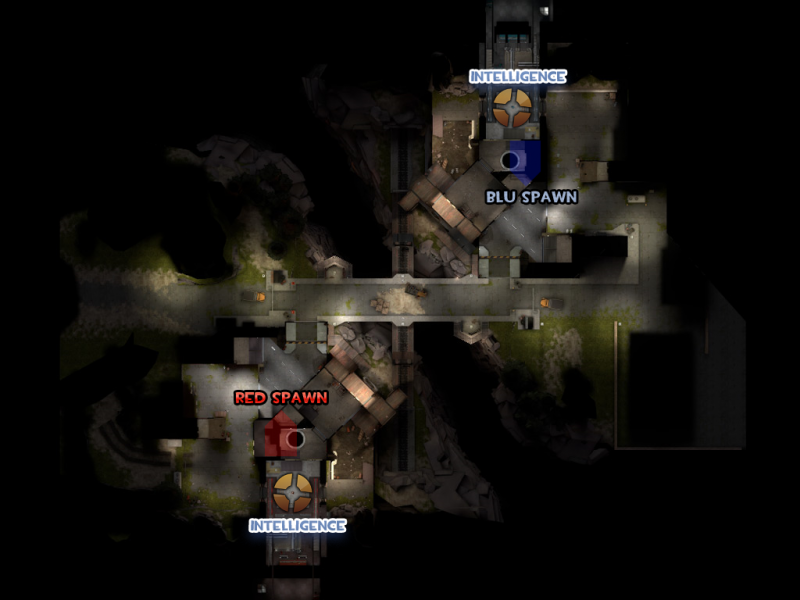
1 Main Bridge 2 Train Bridge 3 Battlements 4 Courtyard 5 Intelligence Room A RED spawn B BLU spawn
|
Landfall
| Landfall - overview indicators |
|---|
|
Mouseover the markers to see the name of the location
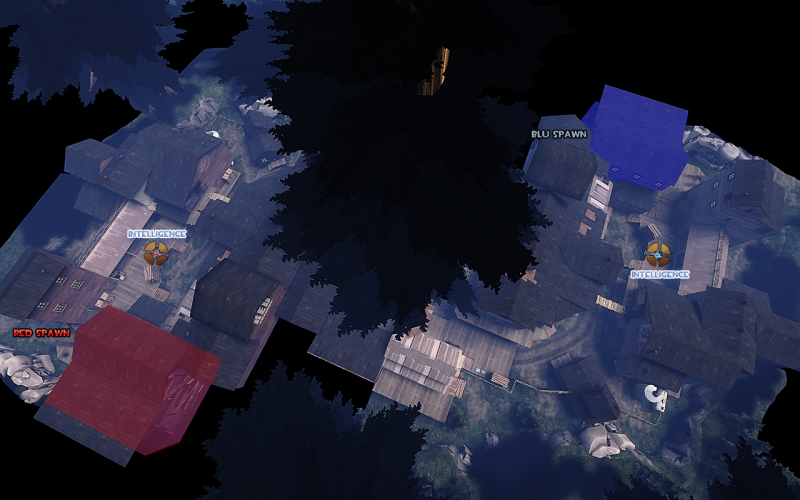
1 Tree 2 Resources Deck 3 Lumber Building 4 Side Route 5 Shack 6 Courtyard 7 Rooftops A RED spawn B BLU spawn
|
Snowfall
| Snowfall - overview indicators |
|---|
|
Mouseover the markers to see the name of the location
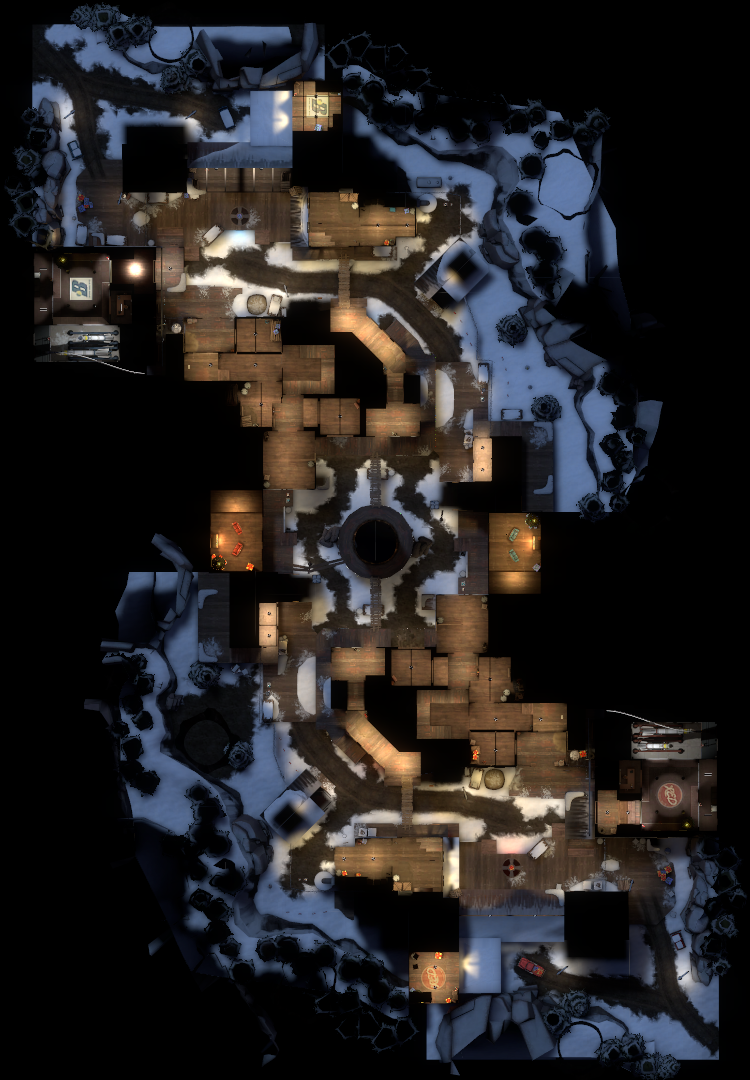
1 Tree 2 Resources Deck 3 Lumber Building 4 Side Route 5 Shack 6 Courtyard 7 Rooftops A BLU spawn B RED spawn
|
Sawmill (Capture the Flag)
| Sawmill (Capture the Flag) - overview indicators |
|---|
|
Mouseover the markers to see the name of the location
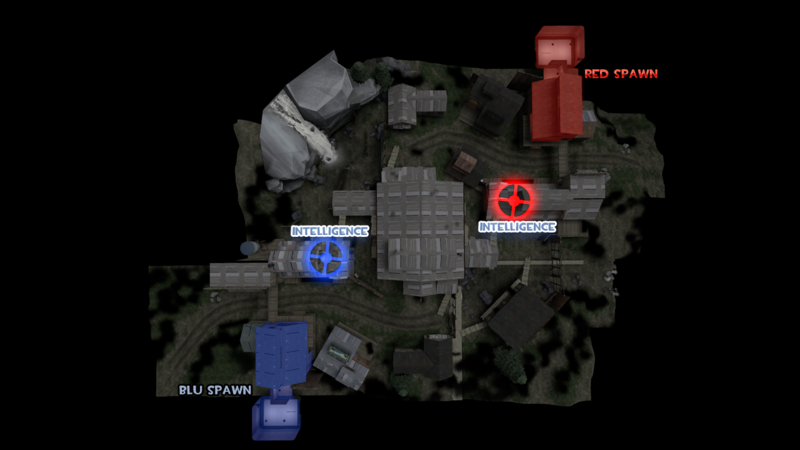
1 Rooftops 2 Cave 3 Waterfall 4 Alcoves 5 Center Shed 6 Log Shed A BLU spawn B RED spawn
|
Turbine
| Turbine - overview indicators |
|---|
|
Mouseover the markers to see the name of the location

1 Turbines 2 Alcoves 3 Balcony 4 Vents 5 Main Hallway 6 Raised Platform A BLU spawn B RED spawn
|
Well (Capture the Flag)
| Well (Control point) - overview indicators |
|---|
|
Mouseover the markers to see the name of the location

1 Main building 2 Yard 3 Swing door 4 Swing door 5 Battlements 6 Inner Lobby 7 Command room 8 Catwalks A RED first spawn B RED second spawn C RED third spawn
|
Applejack
| Applejack - overview indicators |
|---|
|
Mouseover the markers to see the name of the location
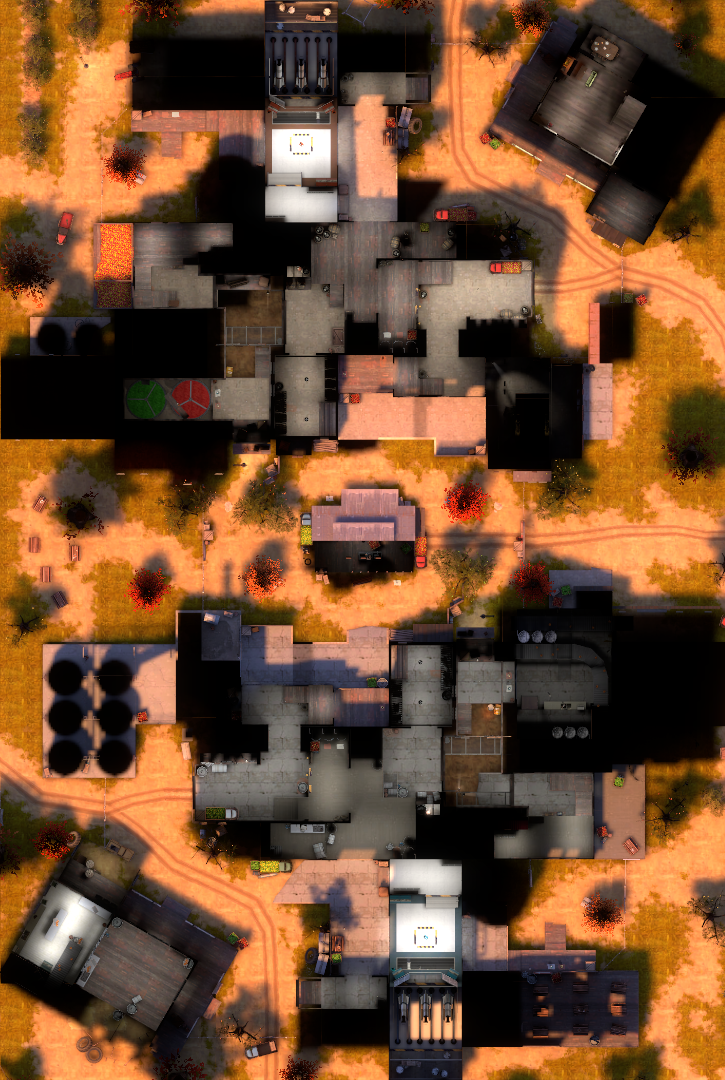
1 Bus 2 Terminal 3 Bakery 4 Alley (And the Balcony) 5 House 6 Street 7 Bell Tower 8 Cathedral (And the Sarcophagus) 9 Entrance 10 Town Square 11 Planters 12 Crypt 13 Church A RED spawn B BLU spawn
|
Crasher
| Crasher - overview indicators |
|---|
|
Mouseover the markers to see the name of the location
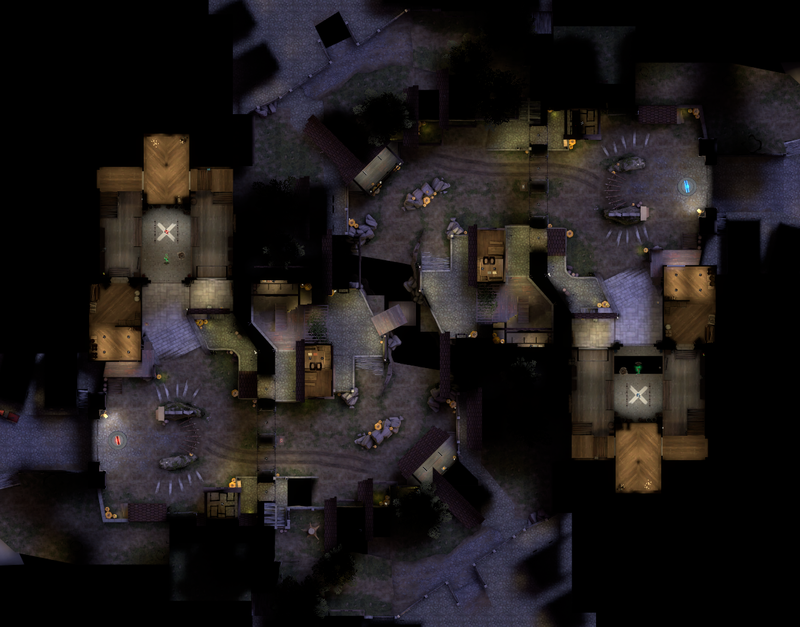
1 Bus 2 Terminal 3 Bakery 4 Alley (And the Balcony) 5 House 6 Street 7 Bell Tower 8 Cathedral (And the Sarcophagus) 9 Entrance 10 Town Square 11 Planters 12 Crypt 13 Church A RED spawn B BLU spawn
|
Doublefrost
| Doublefrost - overview indicators |
|---|
|
Mouseover the markers to see the name of the location
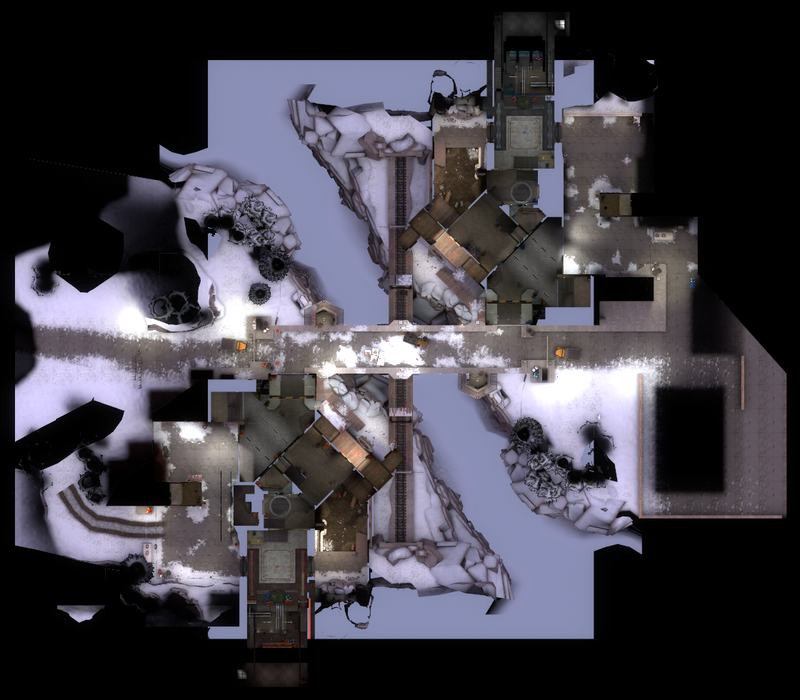
1 Bus 2 Terminal 3 Bakery 4 Alley (And the Balcony) 5 House 6 Street 7 Bell Tower 8 Cathedral (And the Sarcophagus) 9 Entrance 10 Town Square 11 Planters 12 Crypt 13 Church A RED spawn B BLU spawn
|
Frosty
| Frosty - overview indicators |
|---|
|
Mouseover the markers to see the name of the location
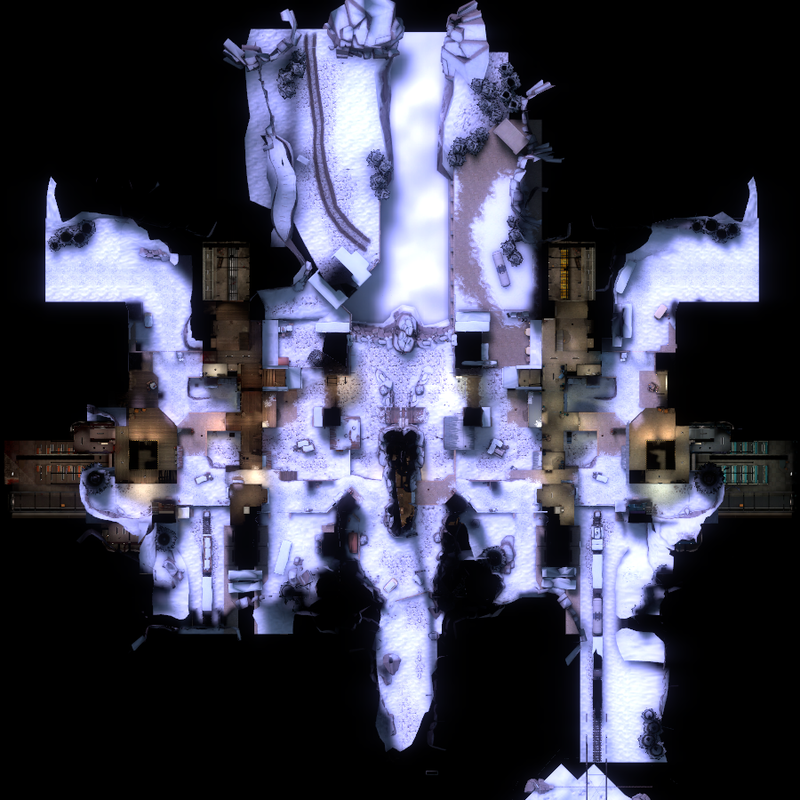
1 Bus 2 Terminal 3 Bakery 4 Alley (And the Balcony) 5 House 6 Street 7 Bell Tower 8 Cathedral (And the Sarcophagus) 9 Entrance 10 Town Square 11 Planters 12 Crypt 13 Church A RED spawn B BLU spawn
|
Helltrain
Lower Level
| Helltrain - overview indicators |
|---|
|
Mouseover the markers to see the name of the location
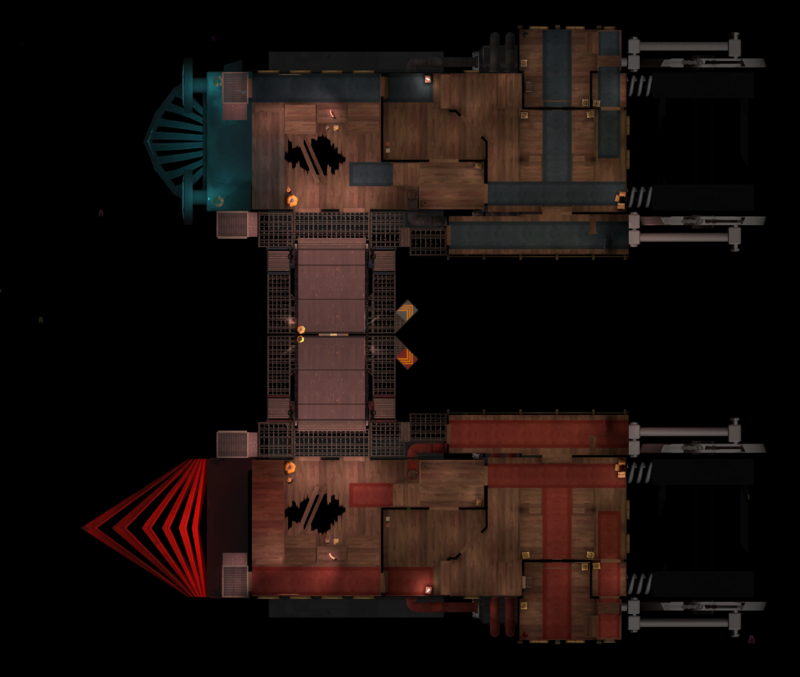
1 Bus 2 Terminal 3 Bakery 4 Alley (And the Balcony) 5 House 6 Street 7 Bell Tower 8 Cathedral (And the Sarcophagus) 9 Entrance 10 Town Square 11 Planters 12 Crypt 13 Church A RED spawn B BLU spawn
|
Upper Level
| Helltrain - overview indicators |
|---|
|
Mouseover the markers to see the name of the location

1 Bus 2 Terminal 3 Bakery 4 Alley (And the Balcony) 5 House 6 Street 7 Bell Tower 8 Cathedral (And the Sarcophagus) 9 Entrance 10 Town Square 11 Planters 12 Crypt 13 Church A RED spawn B BLU spawn
|
Pelican Peak
| Pelican Peak - overview indicators |
|---|
|
Mouseover the markers to see the name of the location
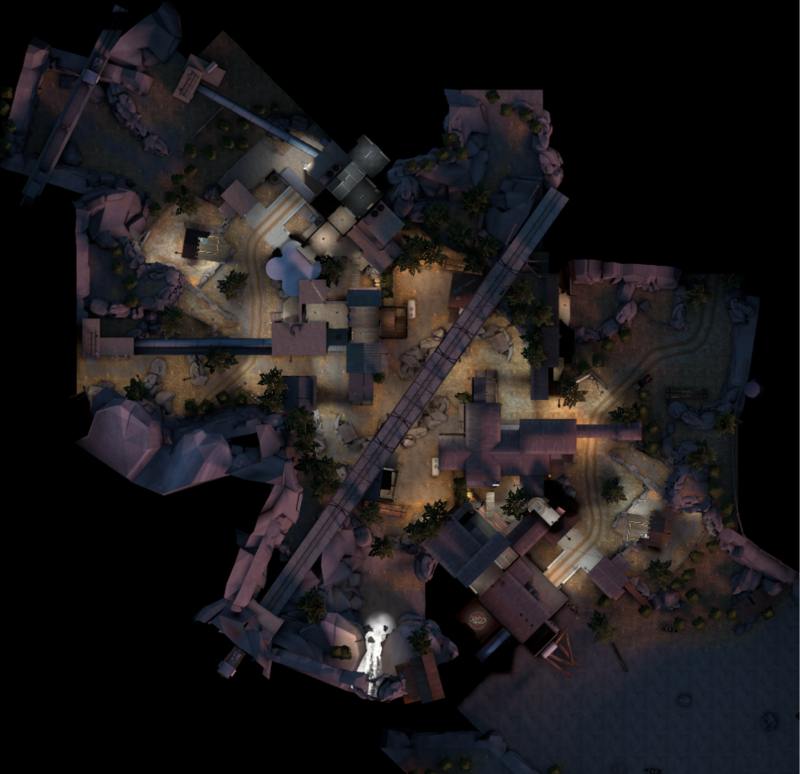
1 Bus 2 Terminal 3 Bakery 4 Alley (And the Balcony) 5 House 6 Street 7 Bell Tower 8 Cathedral (And the Sarcophagus) 9 Entrance 10 Town Square 11 Planters 12 Crypt 13 Church A RED spawn B BLU spawn
|
Turbine Center
| Turbine Center - overview indicators |
|---|
|
Mouseover the markers to see the name of the location
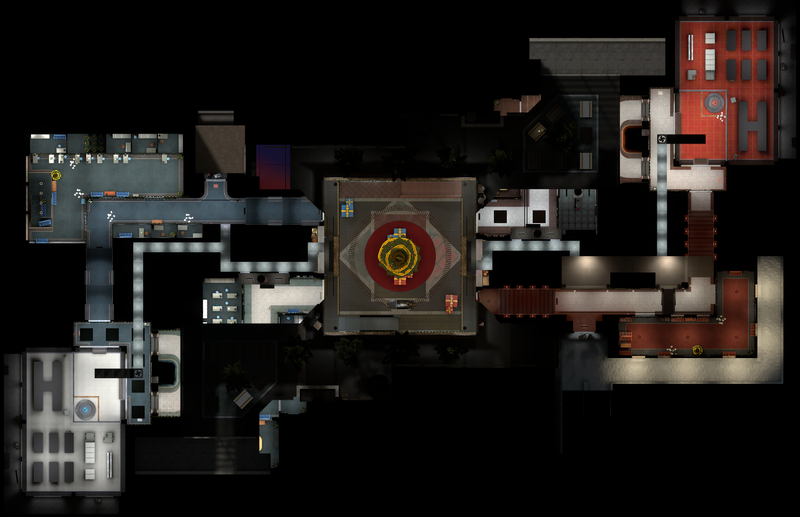
1 Bus 2 Terminal 3 Bakery 4 Alley (And the Balcony) 5 House 6 Street 7 Bell Tower 8 Cathedral (And the Sarcophagus) 9 Entrance 10 Town Square 11 Planters 12 Crypt 13 Church A RED spawn B BLU spawn
|
Penguin Peak
| Penguin Peak - overview indicators |
|---|
|
Mouseover the markers to see the name of the location
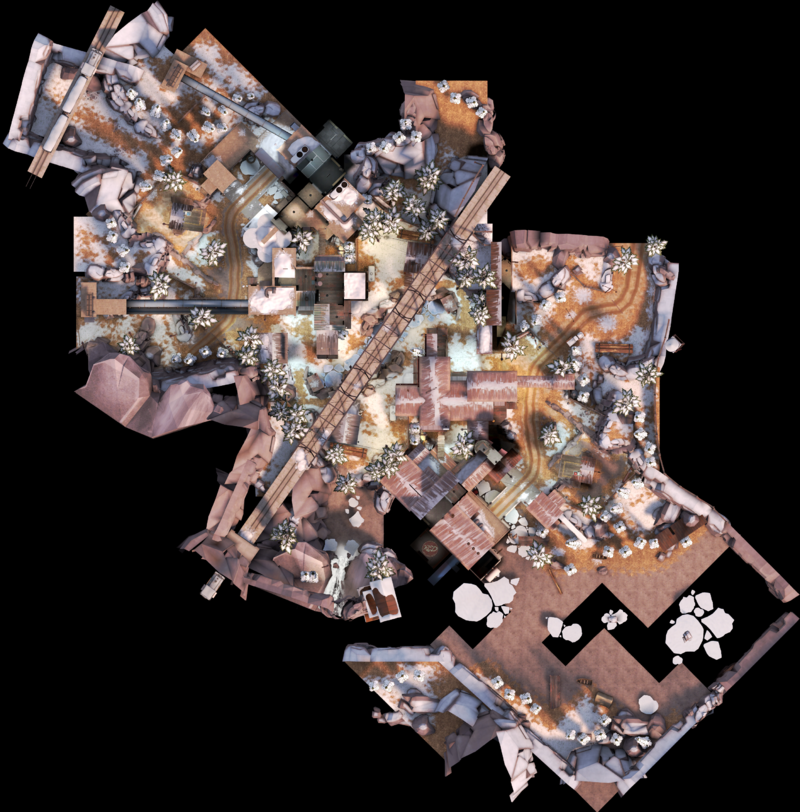
1 Spawn areas 2 Tracks/Ramp 3 Battlements 4 High Ground 5 Side Buildings A RED spawn B BLU spawn
|
Pressure
| Pressure - overview indicators |
|---|
|
Mouseover the markers to see the name of the location
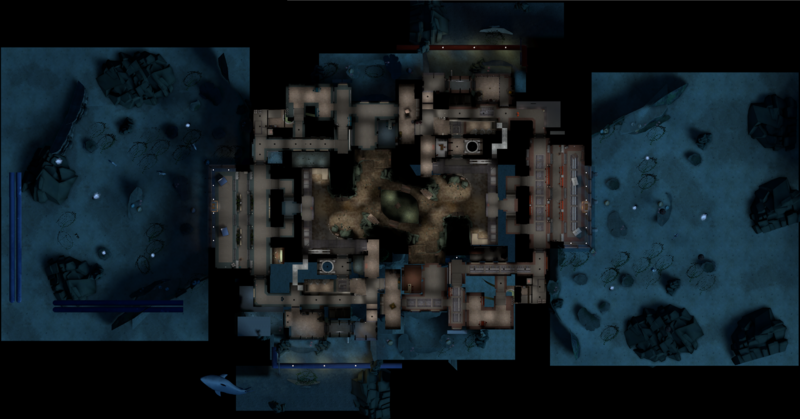
1 Cliffs 2 Elevated tracks 3 Side Cliffs 4 Hut 5 Tunnel 6 Imperial building 7 Red deck 8 Ditch 9 Attic 10 Staircase to Attic 11 Mineshaft A BLU spawn B Red spawn Cart start Checkpoint A Checkpoint B/Stage 1 end
|
Player Destruction
Farmagddon
| Farmageddon - overview indicators |
|---|
|
Mouseover the markers to see the name of the location
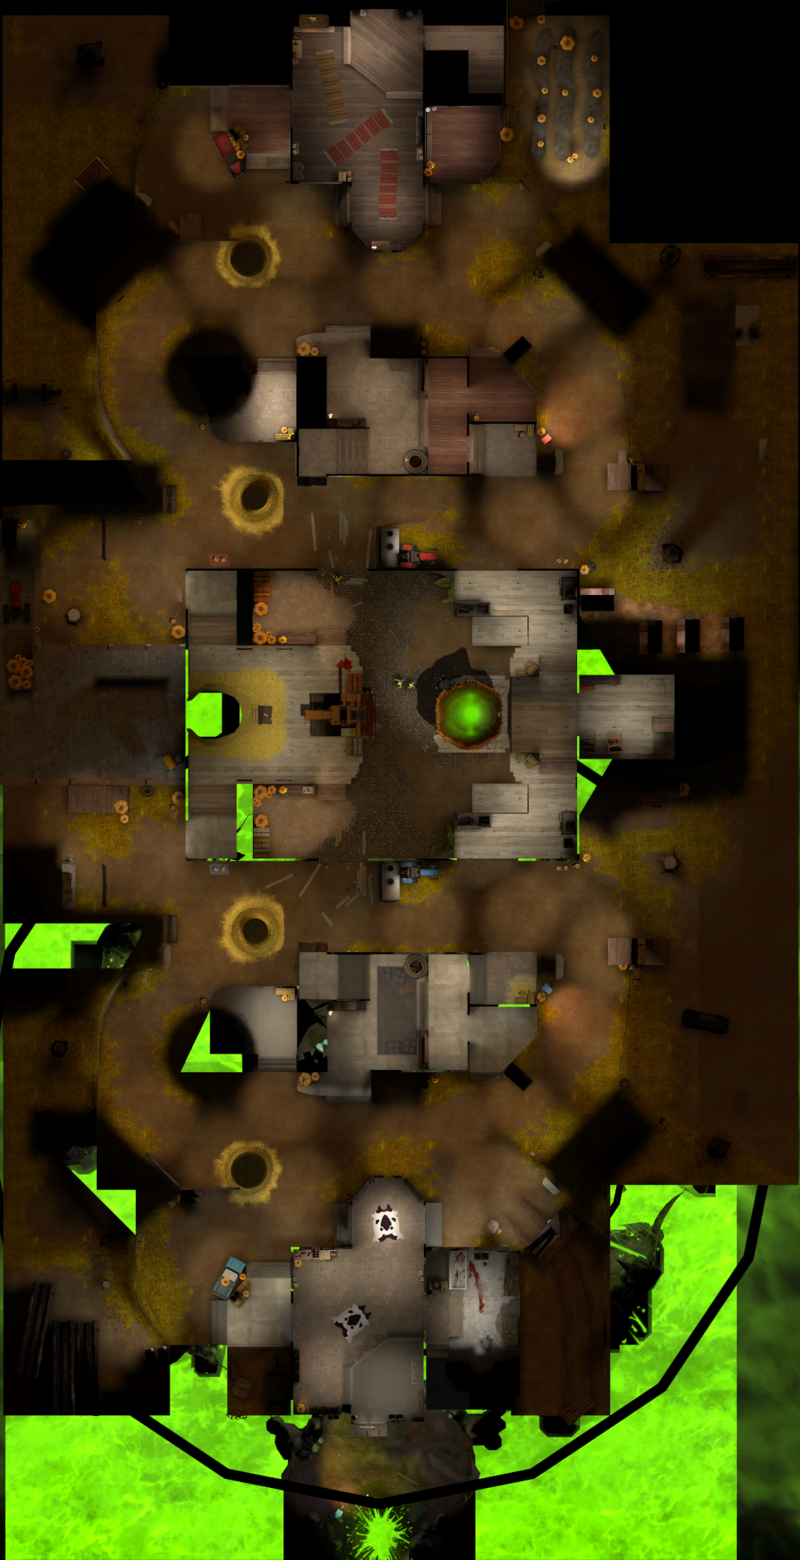
1 Grain Shed 2 Road 3 Hayrack Ride 4 Combine 5 Machine Shed 6 Machine Room A RED spawn B BLU spawn
|
Galleria
| Galleria - overview indicators |
|---|
|
Mouseover the markers to see the name of the location
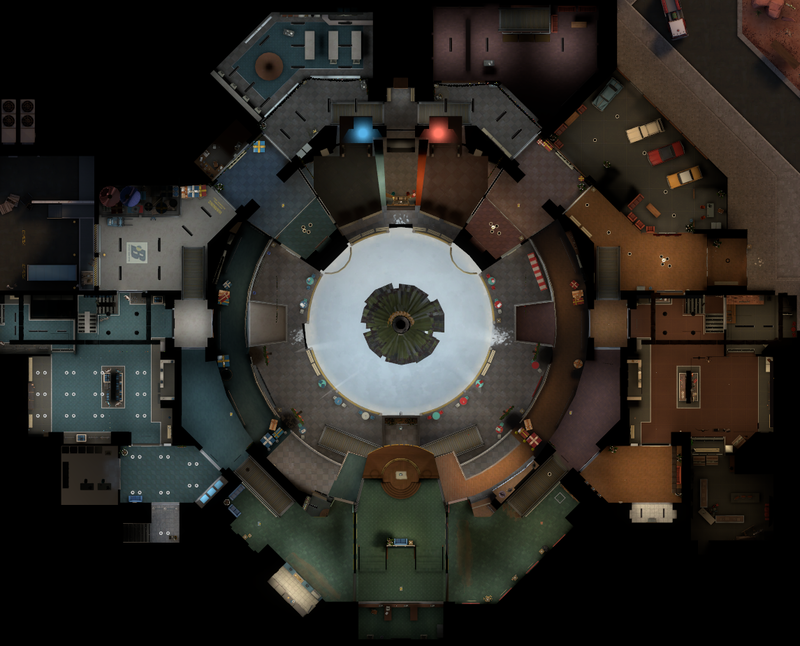
1 Boxcars 2 Waterways 3 Battlements 4 Train Rails 5 Catwalk A BLU spawn B RED spawn
|
SnowVille
| SnowVille . overview indicators |
|---|
|
Mouseover the markers to see the name of the location
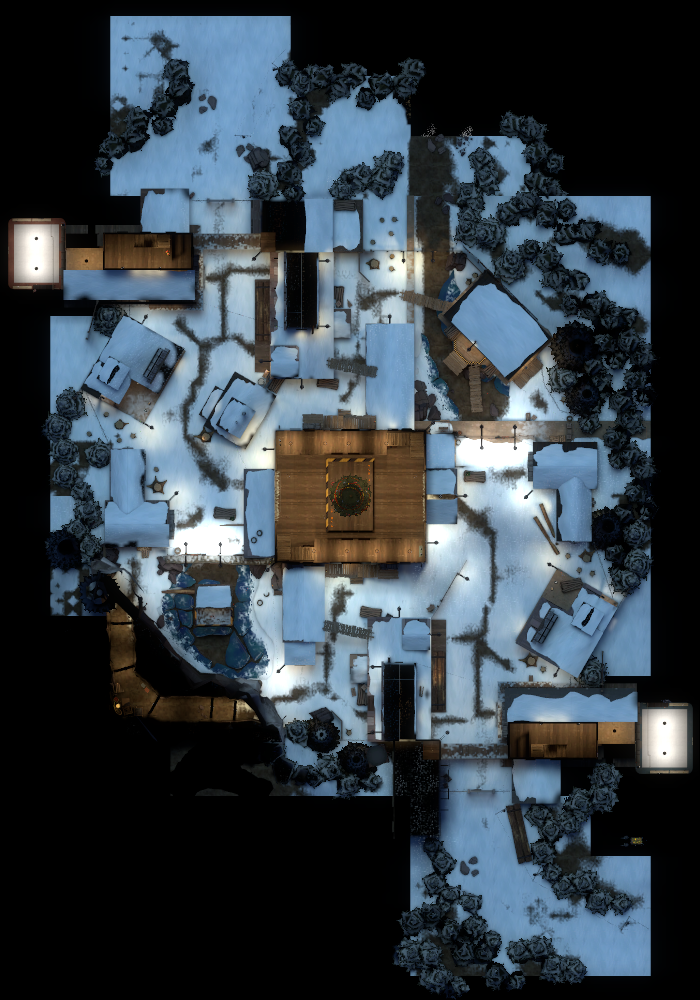
1 Wood Shed 2 Rooftops 3 Garage 4 Coal Shed 5 Alcoves 6 Center Shed 7 Sewers 8 Small Delivery Zone 9 Cave A RED spawn B BLU spawn
|
Cursed Cove
| Cursed Cove - overview indicators |
|---|
|
Mouseover the markers to see the name of the location
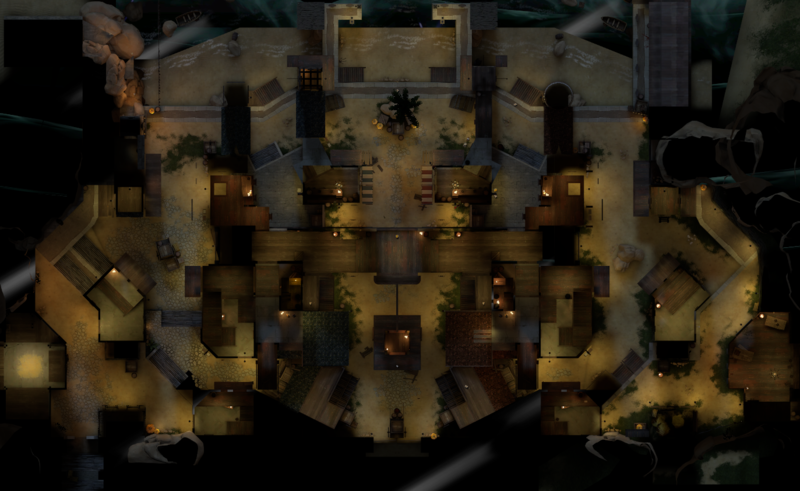
1 Beach 2 Docks 3 Port 4 Gate 5 Courtyard A BLU spawn B RED spawn
|
Monster Bash
| Monster Bash - overview indicators |
|---|
|
Mouseover the markers to see the name of the location
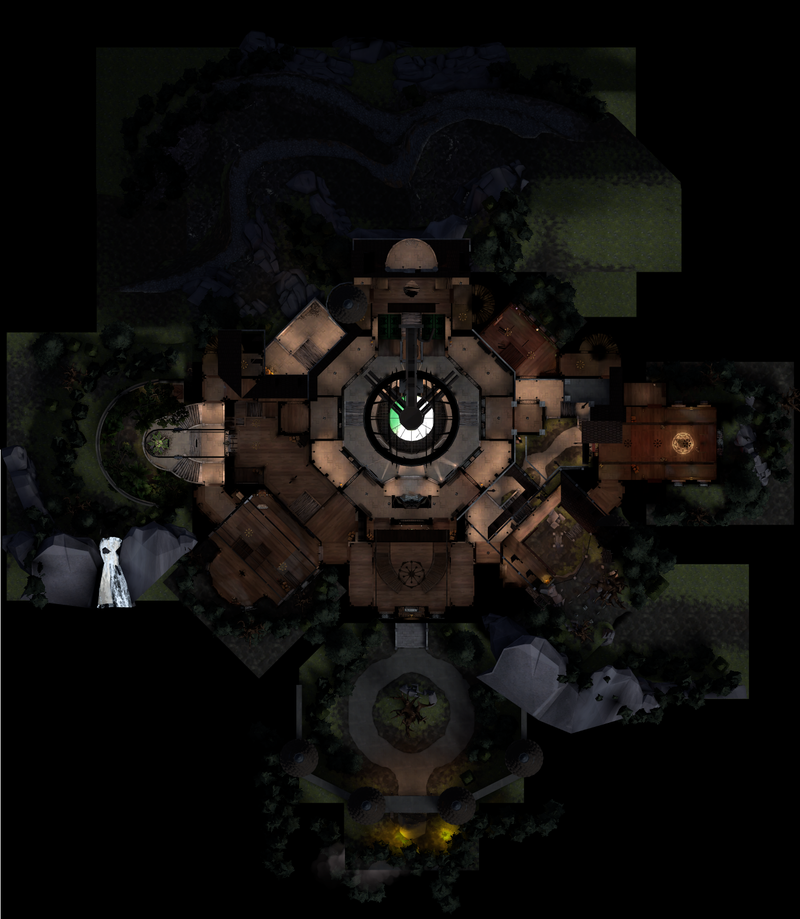
1 Chemicals 2 Courtyard 3 Causeway 4 Grand Foyer 5 Lab 6 Ballroom 7 Balcony 8 Patio 9 Gallery 10 Library A BLU spawn B RED spawn
|
Pit of Death
| Pit of Death - overview indicators |
|---|
|
Mouseover the markers to see the name of the location
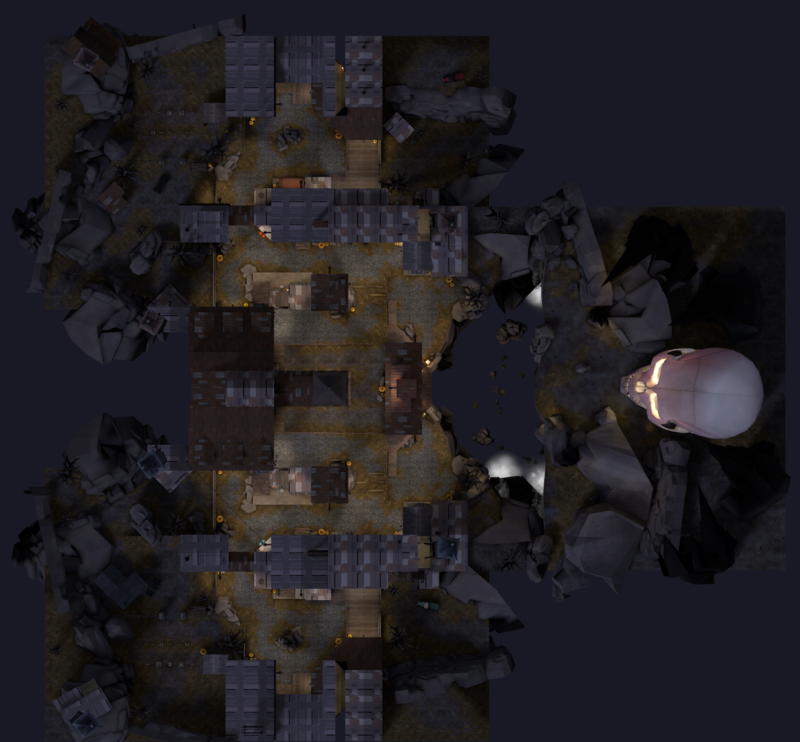
1 Courtyard 2 Bridge Route 3 Dock Route 4 Staircase 5 Rooftops (Above)/Hallway (Below) 6 Ledges 7 Pit Access 8 Basement 9 Pit Flanks 10 Overlook Building 11 Broken Bridge A RED spawn B BLU spawn
|
Watergate
| Watergate - overview indicators |
|---|
|
Mouseover the markers to see the name of the location
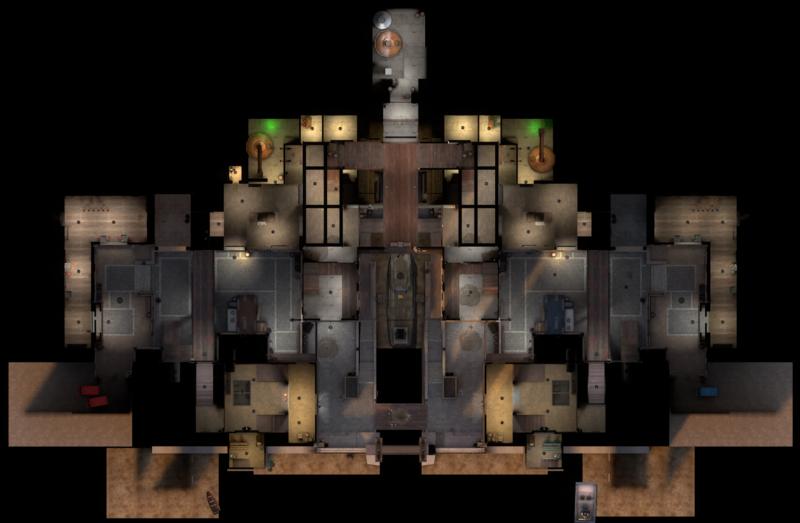
1 Open Alley 2 Catwalk 3 Gatehouse 4 Drop-off 5 Central Corridors 6 Cellars (Entrance) 7 Sewers 8 Overhead Bar (Above)/Central Sewer (Below) 9 Dilapidated Boat 10 Overhead Catwalks A RED spawn B BLU spawn
|
Mannsylvania
| Mannsylvania - overview indicators |
|---|
|
Mouseover the markers to see the name of the location
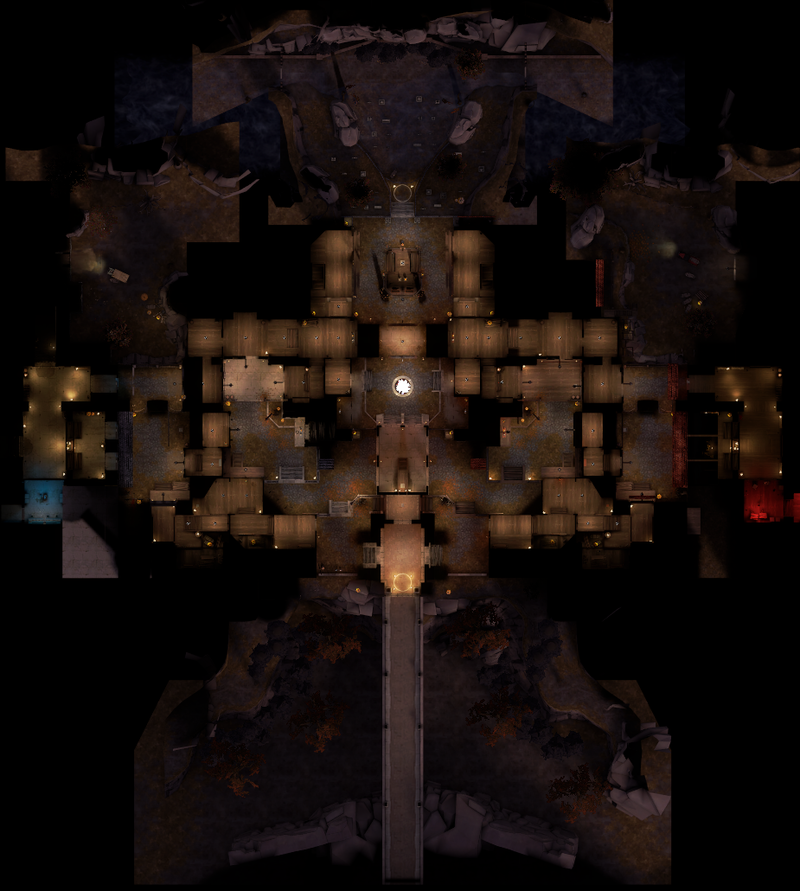
1 Bus 2 Terminal 3 Bakery 4 Alley (And the Balcony) 5 House 6 Street 7 Bell Tower 8 Cathedral (And the Sarcophagus) 9 Entrance 10 Town Square 11 Planters 12 Crypt 13 Church A RED spawn B BLU spawn
|
Atom Smash
| Atom Smash - overview indicators |
|---|
|
Mouseover the markers to see the name of the location

1 Bus 2 Terminal 3 Bakery 4 Alley (And the Balcony) 5 House 6 Street 7 Bell Tower 8 Cathedral (And the Sarcophagus) 9 Entrance 10 Town Square 11 Planters 12 Crypt 13 Church A RED spawn B BLU spawn
|
Selbyn
| Selbyen - overview indicators |
|---|
|
Mouseover the markers to see the name of the location
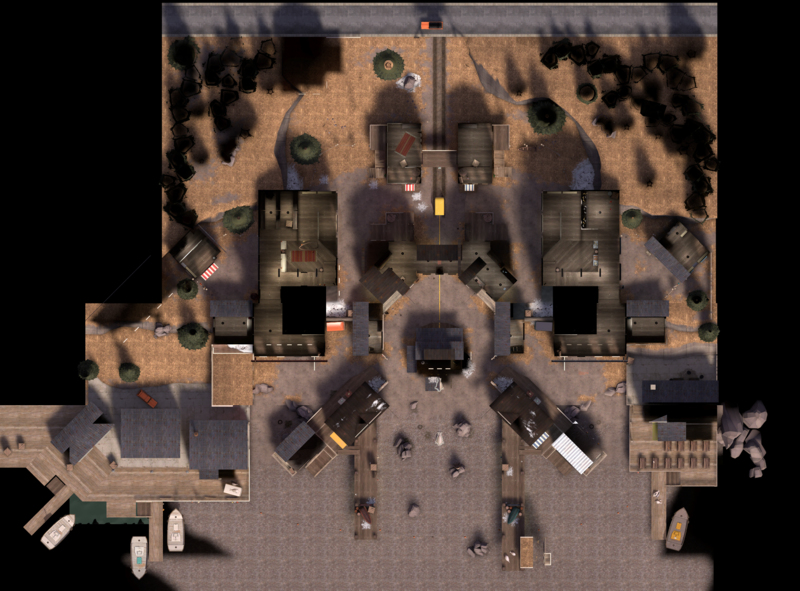
1 Bus 2 Terminal 3 Bakery 4 Alley (And the Balcony) 5 House 6 Street 7 Bell Tower 8 Cathedral (And the Sarcophagus) 9 Entrance 10 Town Square 11 Planters 12 Crypt 13 Church A RED spawn B BLU spawn
|
Arena
Lumberyard
| Lumberyard - overview indicators |
|---|
|
Mouseover the markers to see the name of the location
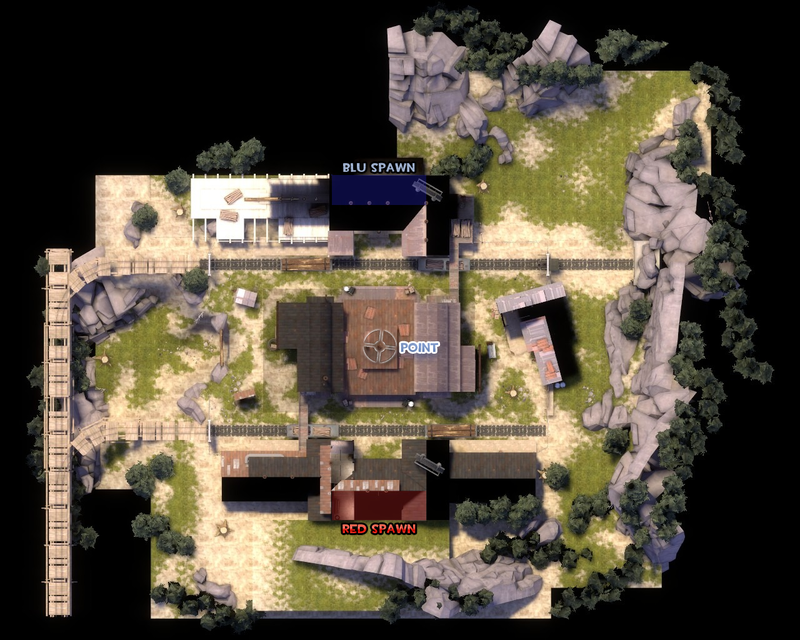
1 Cliff Side 2 Central Building 3 Mountain Side
|
Graveyard
| Graveyard - overview indicators |
|---|
|
Mouseover the markers to see the name of the location
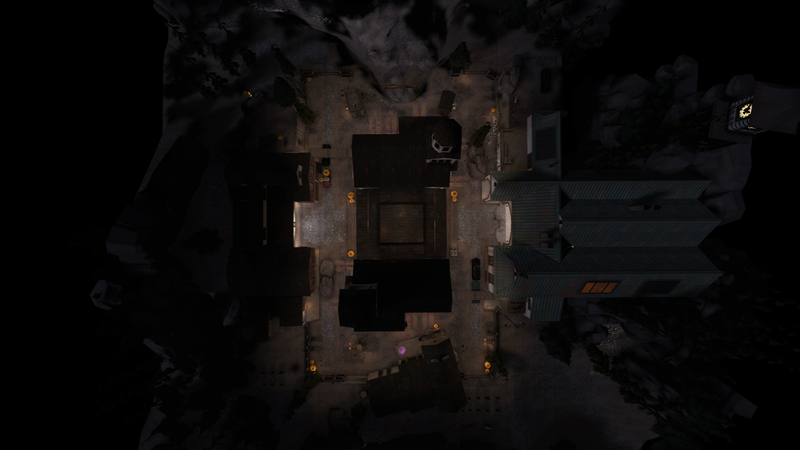
1 Cliff Side 2 Charnel Church 3 Mountain Side A RED spawn B BLU spawn
|
Badlands (Arena)
| Badlands (Arena) - overview indicators |
|---|
|
Mouseover the markers to see the name of the location
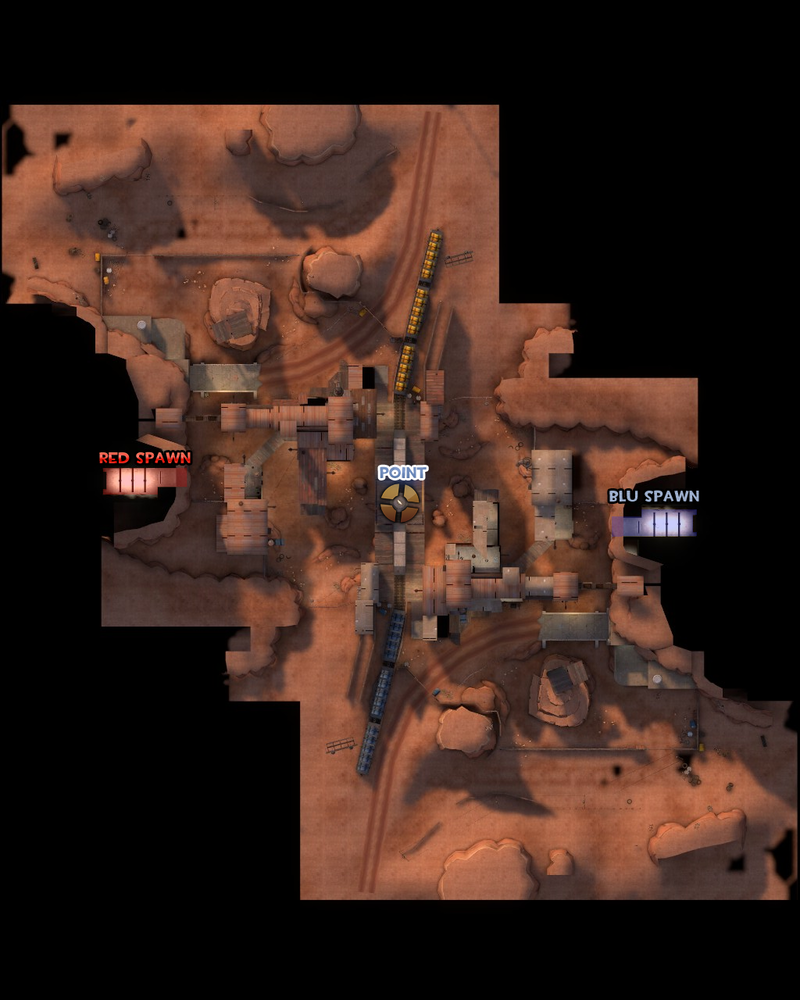
1 Closet 2 Rail Cars 3 Bridge 4 Pillars 5 House 6 Valley 7 Well 8 Spire (Blocked off)
|
Byre
| Byre - overview indicators |
|---|
|
Mouseover the markers to see the name of the location
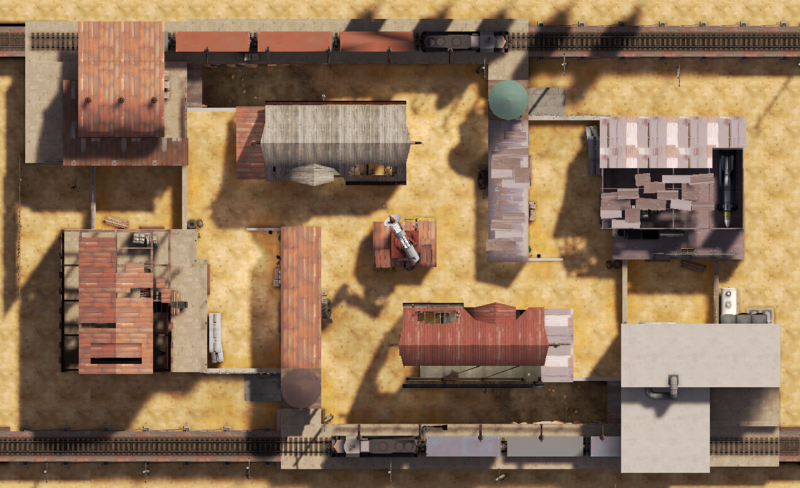
1 Ditch 2 Tool Barn 3 Tool Shed 4 Death Ray A RED spawn B BLU spawn
|
Watchtower
| Watchtower - overview indicators |
|---|
|
Mouseover the markers to see the name of the location
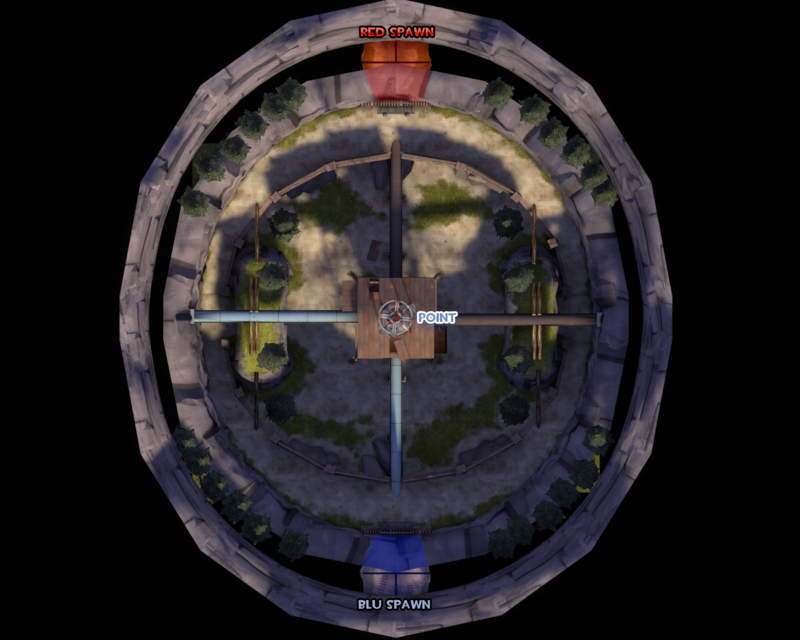
1 Tower Shack 2 Lower Pipe 3 Higher Pipe 4 Center Valley 5 External Ring
|
Granary (Arena)
| Granary (Arena) - overview indicators |
|---|
|
Mouseover the markers to see the name of the location
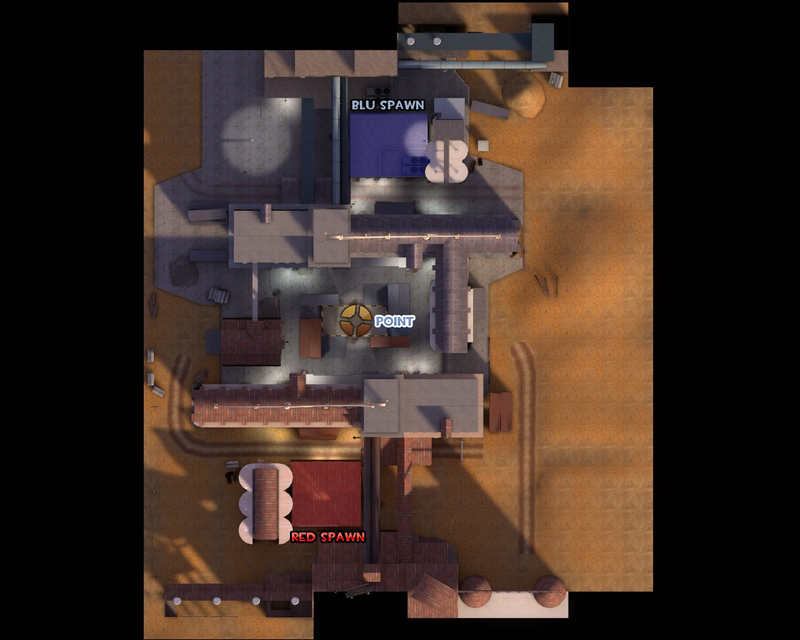
1 Ledge 2 Choke 3 Garage 4 Catwalks 5 Crates
|
Nucleus (Arena)
| Nucleus (Arena) - overview indicators |
|---|
|
Mouseover the markers to see the name of the location

1 Perimeter 2 Roofs 3 Bridges 4 Flank Buildings 5 Access Building
|
Offblast
| Offblast - overview indicators |
|---|
|
Mouseover the markers to see the name of the location
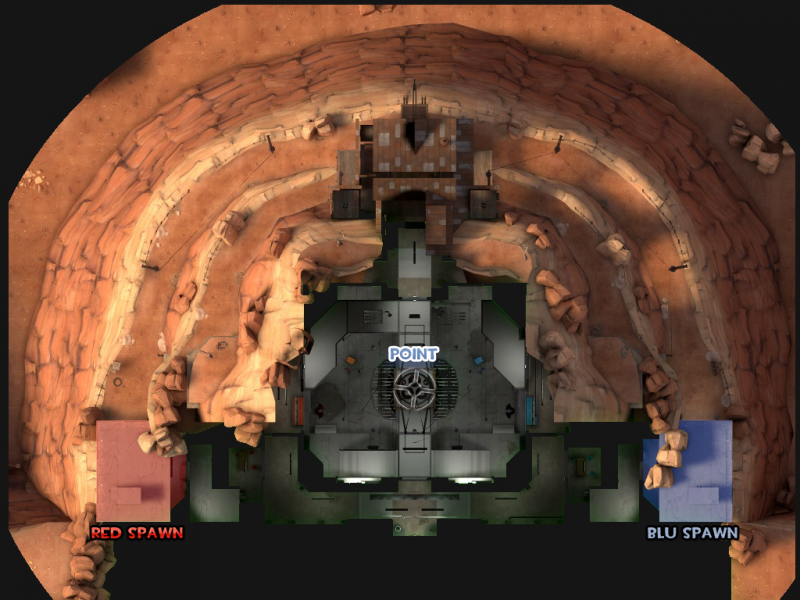
1 House 2 Cliff-Side 3 Top Floor 4 Main Floor 5 Top Floor
|
Ravine
| Ravine - overview indicators |
|---|
|
Mouseover the markers to see the name of the location
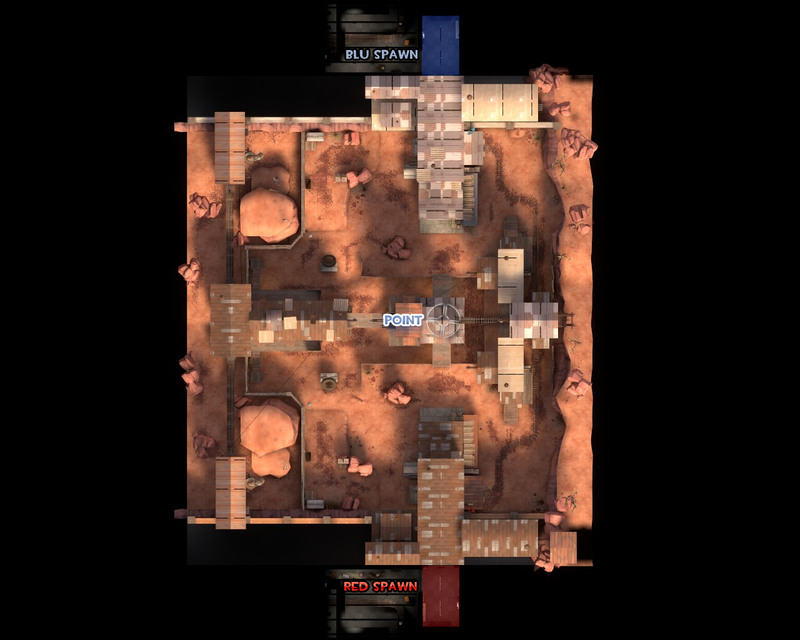
1 Yard 2 House 3 Shack 4 Well
|
Sawmill (Arena)
| Sawmill (Arena) - overview indicators |
|---|
|
Mouseover the markers to see the name of the location

1 Rooftops 2 Cave 3 Waterfall 4 Alcoves 5 Center Shed 6 Log Shed A RED spawn B BLU spawn
|
Well (Arena)
| Well (Arena) - overview indicators |
|---|
|
Mouseover the markers to see the name of the location
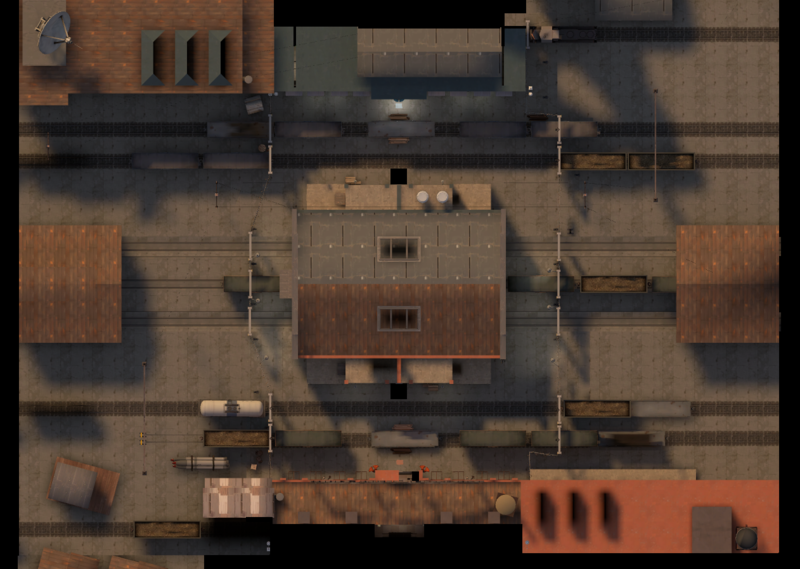
1 Boxcars 2 Waterways 3 Battlements 4 Train Rails 5 Catwalk A BLU spawn B RED spawn
|
Perks
| Perks - overview indicators |
|---|
|
Mouseover the markers to see the name of the location
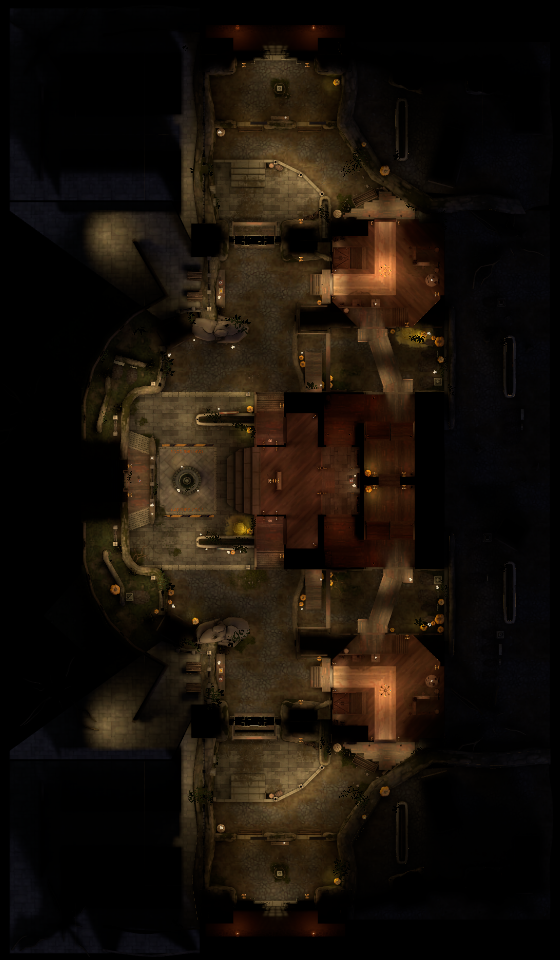
1 Boxcars 2 Waterways 3 Battlements 4 Train Rails 5 Catwalk A BLU spawn B RED spawn
|
Tug of War
Dynamite
| Dynamite - overview indicators |
|---|
|
Mouseover the markers to see the name of the location
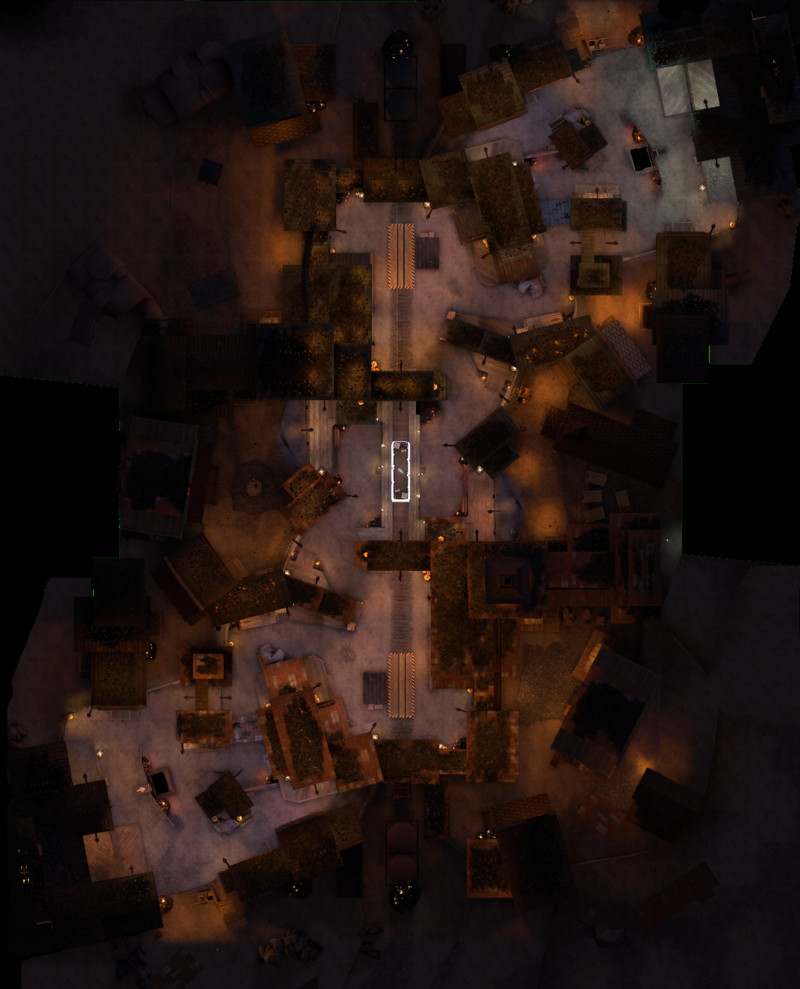
1 Spawn areas 2 Tracks/Ramp 3 Battlements 4 High Ground 5 Side Buildings A RED spawn B BLU spawn
|
Mannpower
Foundry (Capture the Flag)
| Foundry (Capture the Flag) - overview indicators |
|---|
|
Mouseover the markers to see the name of the location

1 Boxcars 2 Waterways 3 Battlements 4 Train Rails 5 Catwalk A BLU spawn B RED spawn
|
Gorge (Capture the Flag)
| Gorge (Capture the Flag) - overview indicators |
|---|
|
Mouseover the markers to see the name of the location

1 Boxcars 2 Waterways 3 Battlements 4 Train Rails 5 Catwalk A BLU spawn B RED spawn
|
Hellfire
| Hellfire - overview indicators |
|---|
|
Mouseover the markers to see the name of the location

1 Boxcars 2 Waterways 3 Battlements 4 Train Rails 5 Catwalk A BLU spawn B RED spawn
|
Thunder Mountain
| Thunder Mountain (Capture the Flag) - overview indicators |
|---|
|
Mouseover the markers to see the name of the location

1 Boxcars 2 Waterways 3 Battlements 4 Train Rails 5 Catwalk A BLU spawn B RED spawn
|
Pass Time
Brickyard
| Brickyard - overview indicators |
|---|
|
Mouseover the markers to see the name of the location

1 Boxcars 2 Waterways 3 Battlements 4 Train Rails 5 Catwalk A BLU spawn B RED spawn
|
Timbertown
| Timbertown - overview indicators |
|---|
|
Mouseover the markers to see the name of the location
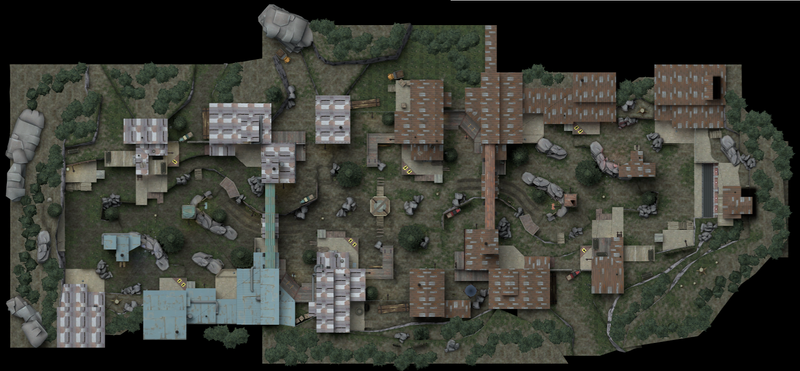
1 Boxcars 2 Waterways 3 Battlements 4 Train Rails 5 Catwalk A BLU spawn B RED spawn
|
District
| District - overview indicators |
|---|
|
Mouseover the markers to see the name of the location
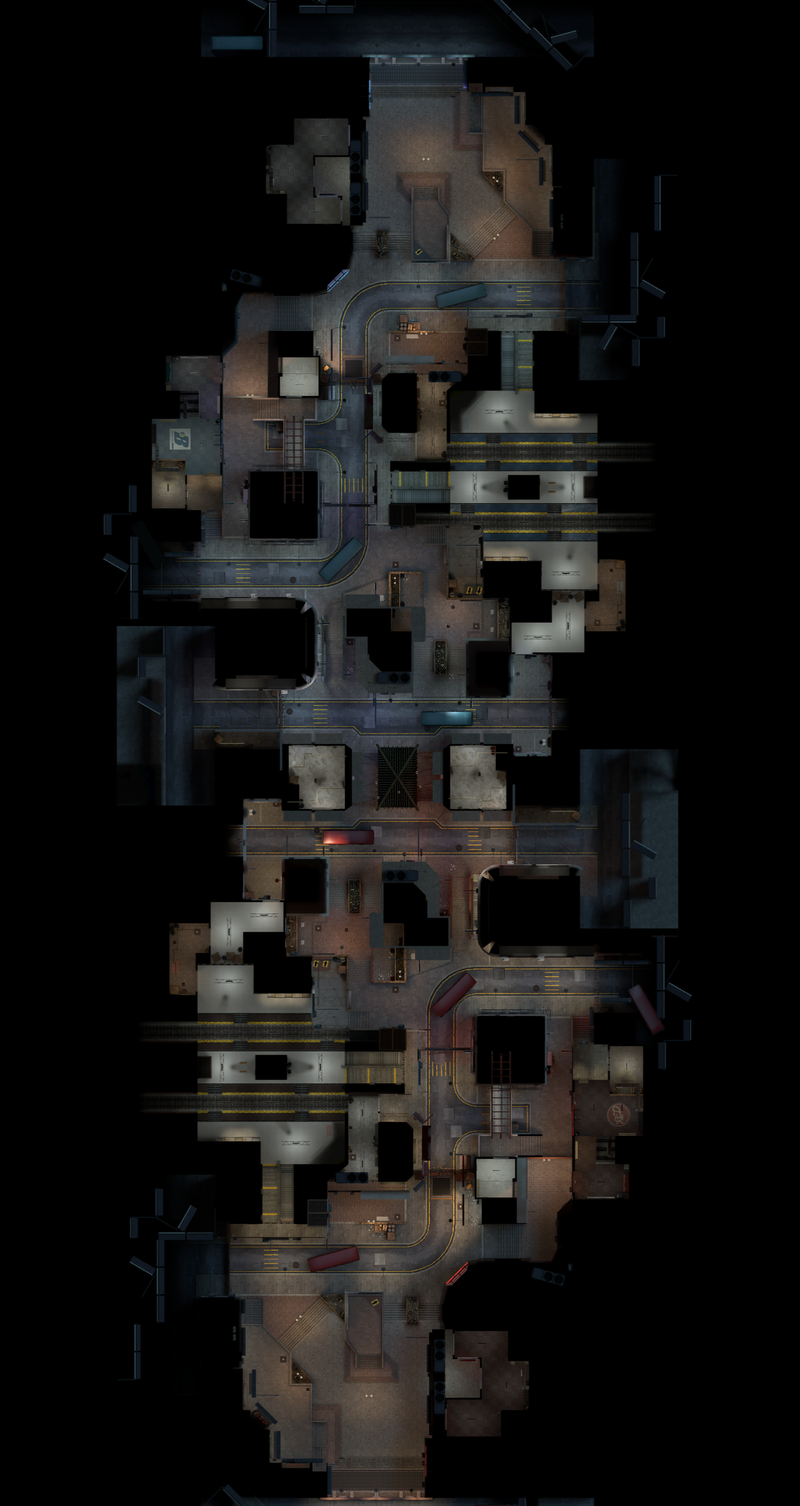
1 Boxcars 2 Waterways 3 Battlements 4 Train Rails 5 Catwalk A BLU spawn B RED spawn
|
Special Delivery
Doomsday
| Doomsday - overview indicators |
|---|
|
Mouseover the markers to see the name of the location
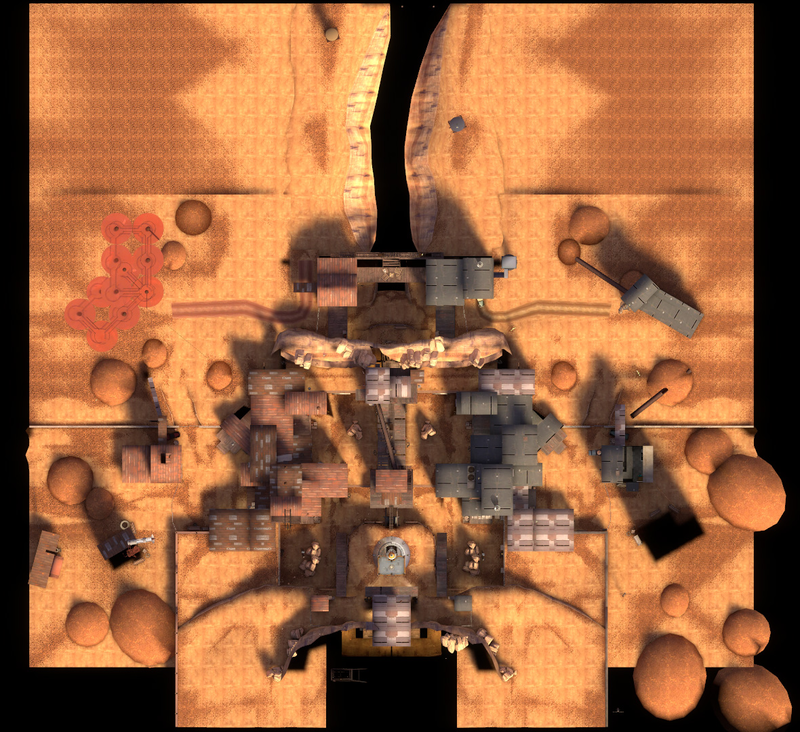
1 Boxcars 2 Waterways 3 Battlements 4 Train Rails 5 Catwalk A BLU spawn B RED spawn
|
Carnival of Carnage
| Carnival of Carnage - overview indicators |
|---|
|
Mouseover the markers to see the name of the location
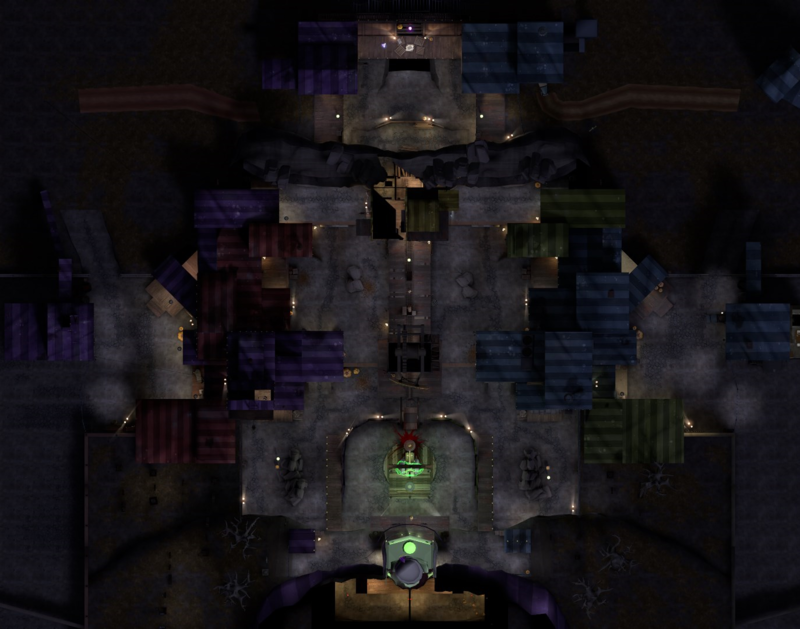
1 Boxcars 2 Waterways 3 Battlements 4 Train Rails 5 Catwalk A BLU spawn B RED spawn
|
Robot Destruction
Asteroid
| Asteroid - overview indicators |
|---|
|
Mouseover the markers to see the name of the location
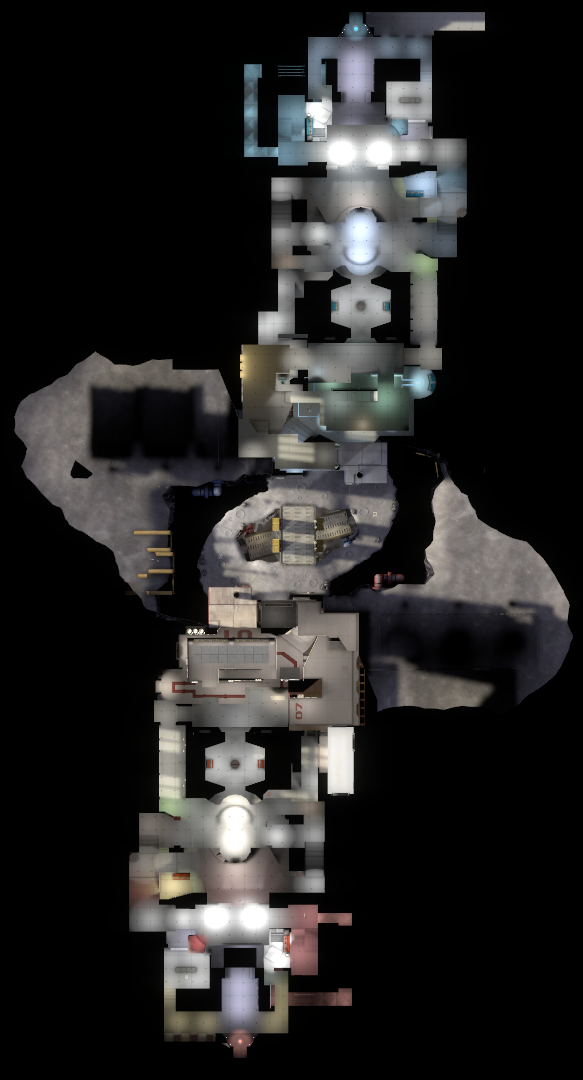
1 Boxcars 2 Waterways 3 Battlements 4 Train Rails 5 Catwalk A BLU spawn B RED spawn
|
Territorial Control
Hydro
| Hydro - overview indicators |
|---|
|
Mouseover the markers to see the name of the location

1 Boxcars 2 Waterways 3 Battlements 4 Train Rails 5 Catwalk A BLU spawn B RED spawn
|
Versus Saxton Hale
Distillery
| Distillery - overview indicators |
|---|
|
Mouseover the markers to see the name of the location

1 Boxcars 2 Waterways 3 Battlements 4 Train Rails 5 Catwalk A BLU spawn B RED spawn
|
Nucleus VSH
| Nucleus VSH - overview indicators |
|---|
|
Mouseover the markers to see the name of the location
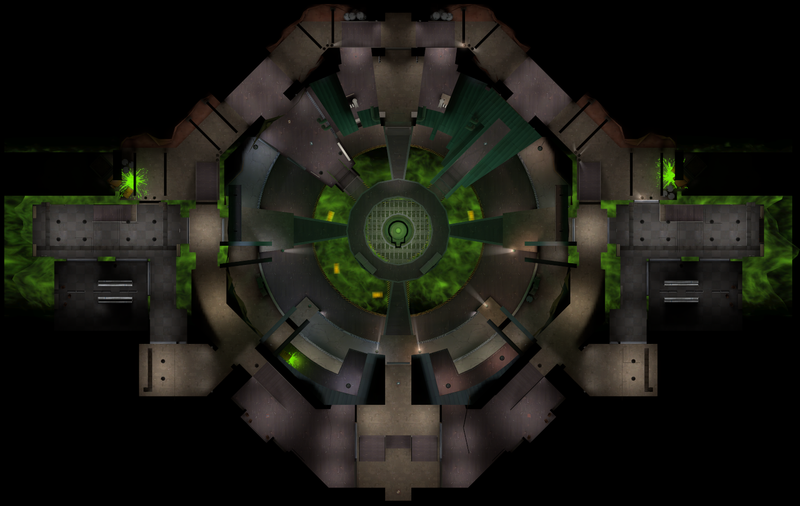
1 Boxcars 2 Waterways 3 Battlements 4 Train Rails 5 Catwalk A BLU spawn B RED spawn
|
Skirmish
| Skirmish - overview indicators |
|---|
|
Mouseover the markers to see the name of the location
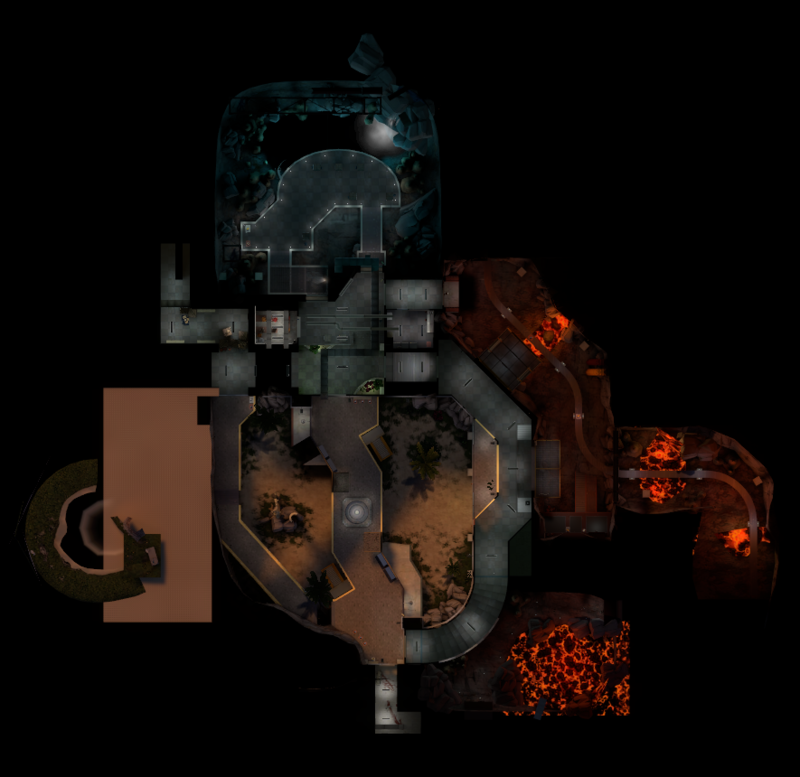
1 Boxcars 2 Waterways 3 Battlements 4 Train Rails 5 Catwalk A BLU spawn B RED spawn
|
Tiny Rock
| Tiny Rock - overview indicators |
|---|
|
Mouseover the markers to see the name of the location
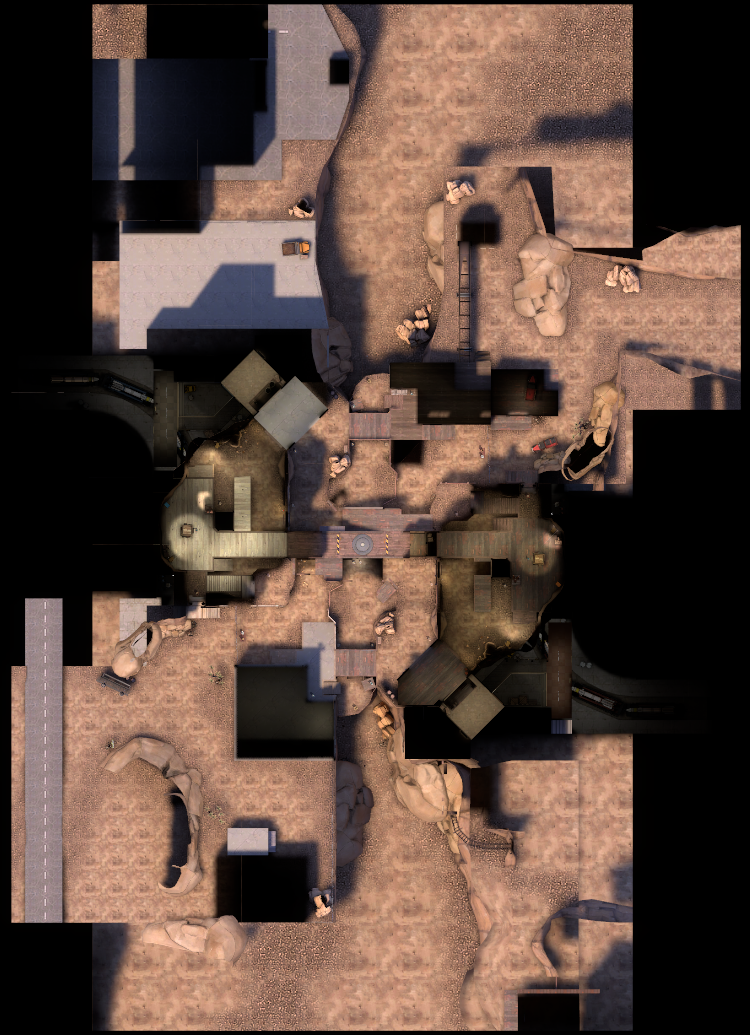
1 Boxcars 2 Waterways 3 Battlements 4 Train Rails 5 Catwalk A BLU spawn B RED spawn
|
Outburst
| Outburst - overview indicators |
|---|
|
Mouseover the markers to see the name of the location
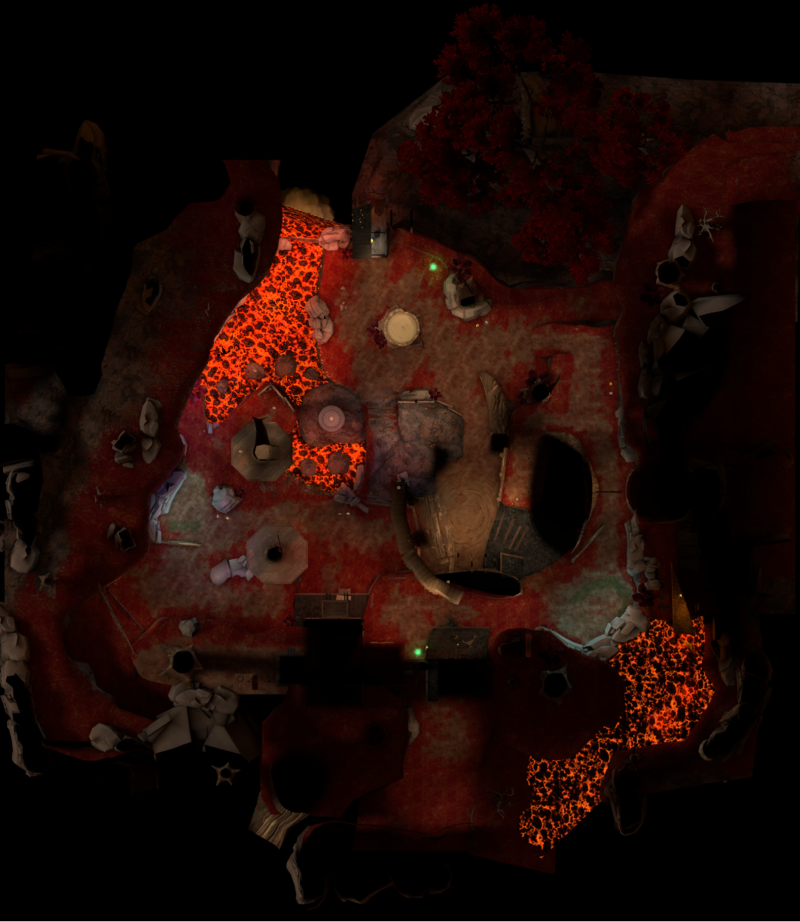
1 Spawn areas 2 Tracks/Ramp 3 Battlements 4 High Ground 5 Side Buildings A RED spawn B BLU spawn
|
Maul
| Maul - overview indicators |
|---|
|
Mouseover the markers to see the name of the location
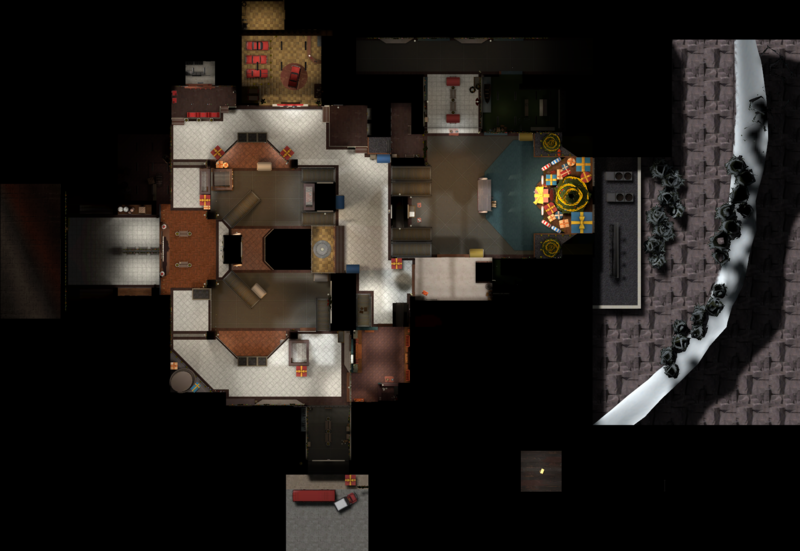
1 Spawn areas 2 Tracks/Ramp 3 Battlements 4 High Ground 5 Side Buildings A RED spawn B BLU spawn
|
Zombie Infection
Atoll
| Atoll - overview indicators |
|---|
|
Mouseover the markers to see the name of the location
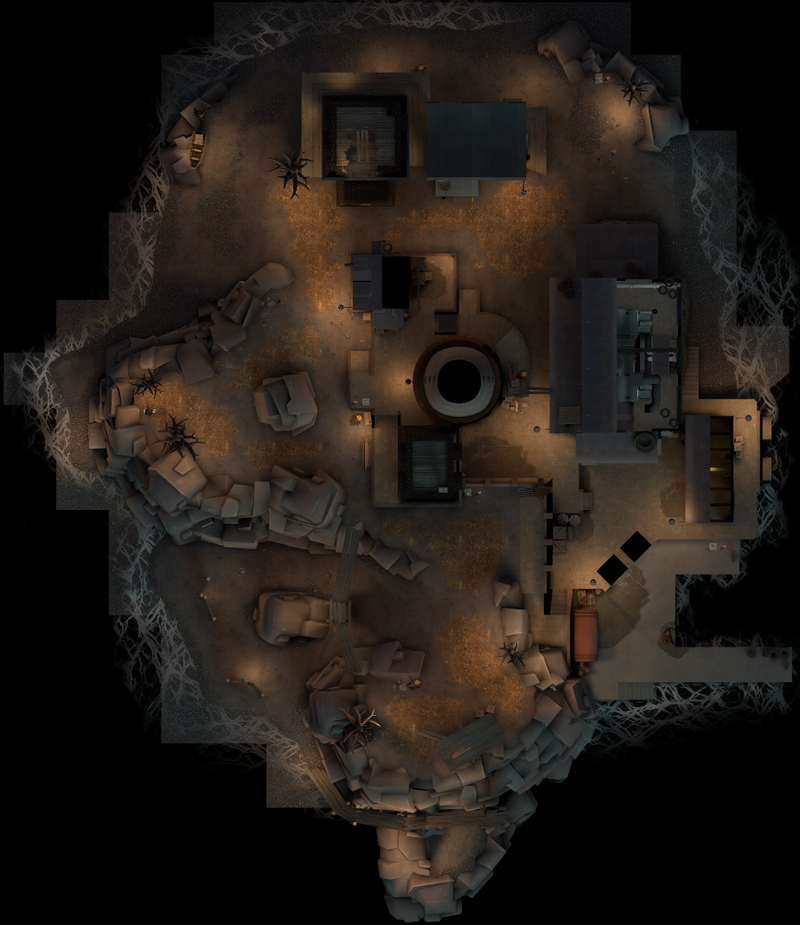
1 Boxcars 2 Waterways 3 Battlements 4 Train Rails 5 Catwalk A BLU spawn B RED spawn
|
Devastation
| Devastation - overview indicators |
|---|
|
Mouseover the markers to see the name of the location

1 Boxcars 2 Waterways 3 Battlements 4 Train Rails 5 Catwalk A BLU spawn B RED spawn
|
Murky
| Murky - overview indicators |
|---|
|
Mouseover the markers to see the name of the location
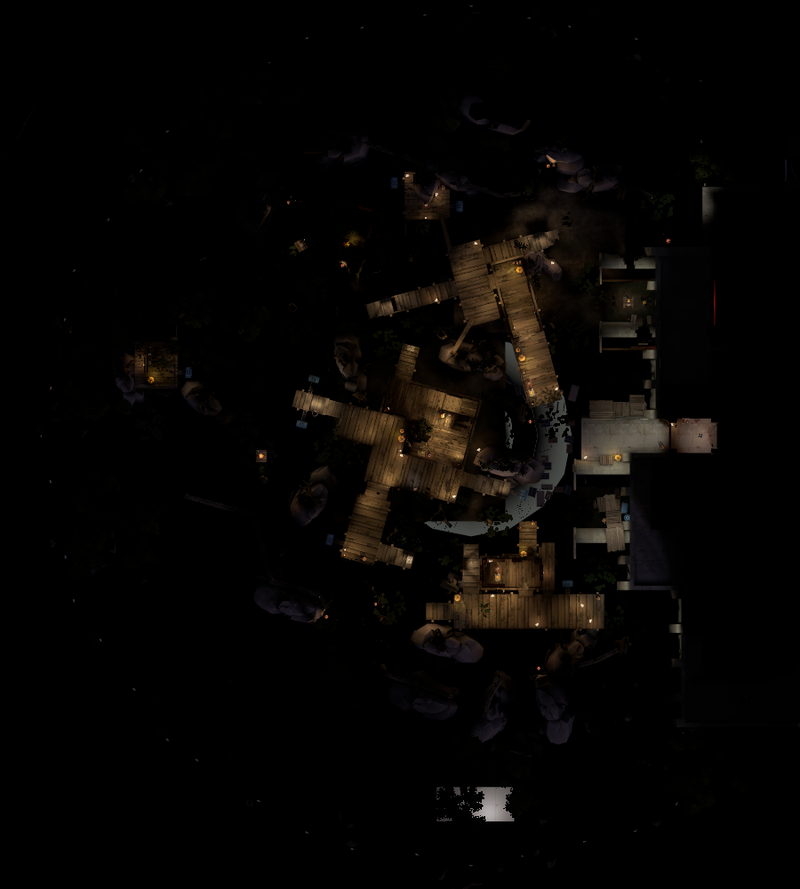
1 Boxcars 2 Waterways 3 Battlements 4 Train Rails 5 Catwalk A BLU spawn B RED spawn
|
Sanitarium
Ground Floor
| Sanitarium - overview indicators |
|---|
|
Mouseover the markers to see the name of the location
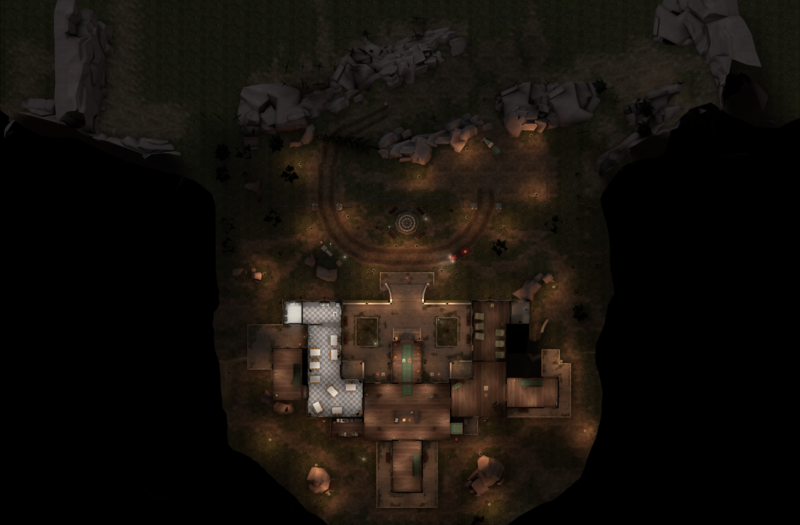
1 Boxcars 2 Waterways 3 Battlements 4 Train Rails 5 Catwalk A BLU spawn B RED spawn
|
First Floor
| Sanitarium - overview indicators |
|---|
|
Mouseover the markers to see the name of the location

1 Boxcars 2 Waterways 3 Battlements 4 Train Rails 5 Catwalk A BLU spawn B RED spawn
|
Second Floor
| Sanitarium - overview indicators |
|---|
|
Mouseover the markers to see the name of the location
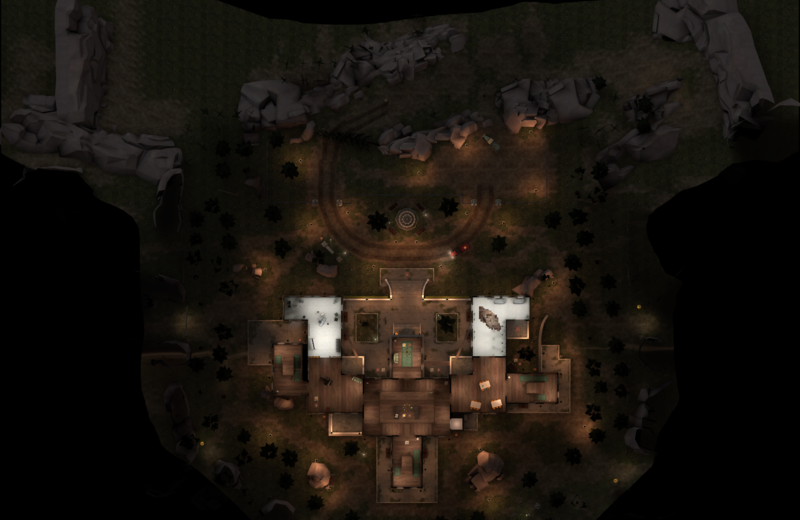
1 Boxcars 2 Waterways 3 Battlements 4 Train Rails 5 Catwalk A BLU spawn B RED spawn
|
Woods
| Woods - overview indicators |
|---|
|
Mouseover the markers to see the name of the location
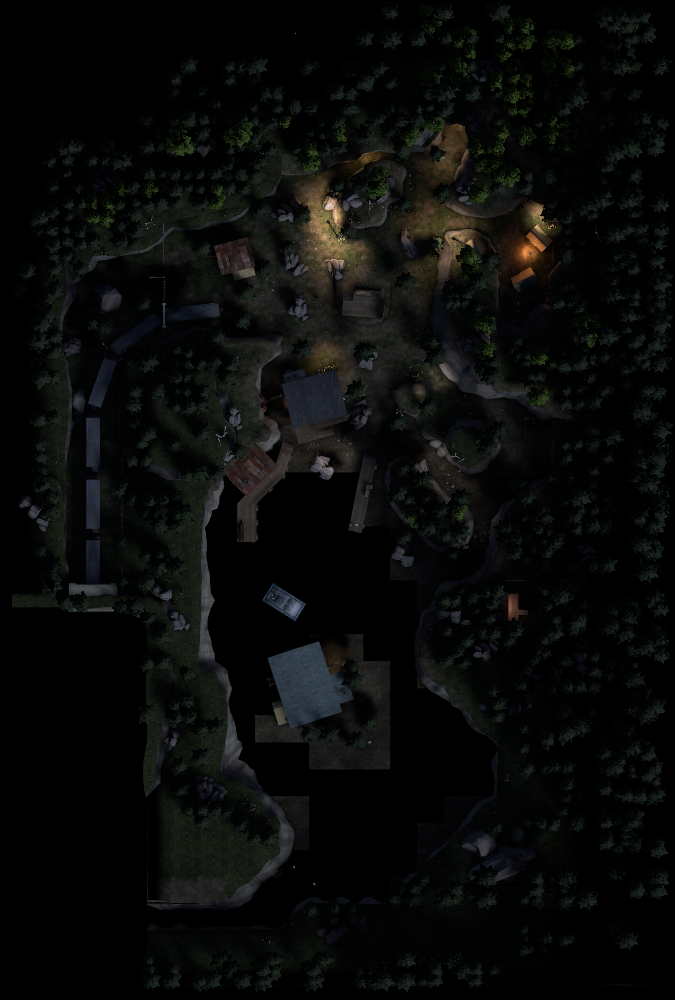
1 Boxcars 2 Waterways 3 Battlements 4 Train Rails 5 Catwalk A BLU spawn B RED spawn
|
Mann versus Machine
Big Rock
| Big Rock - overview indicators |
|---|
|
Mouseover the markers to see the name of the location
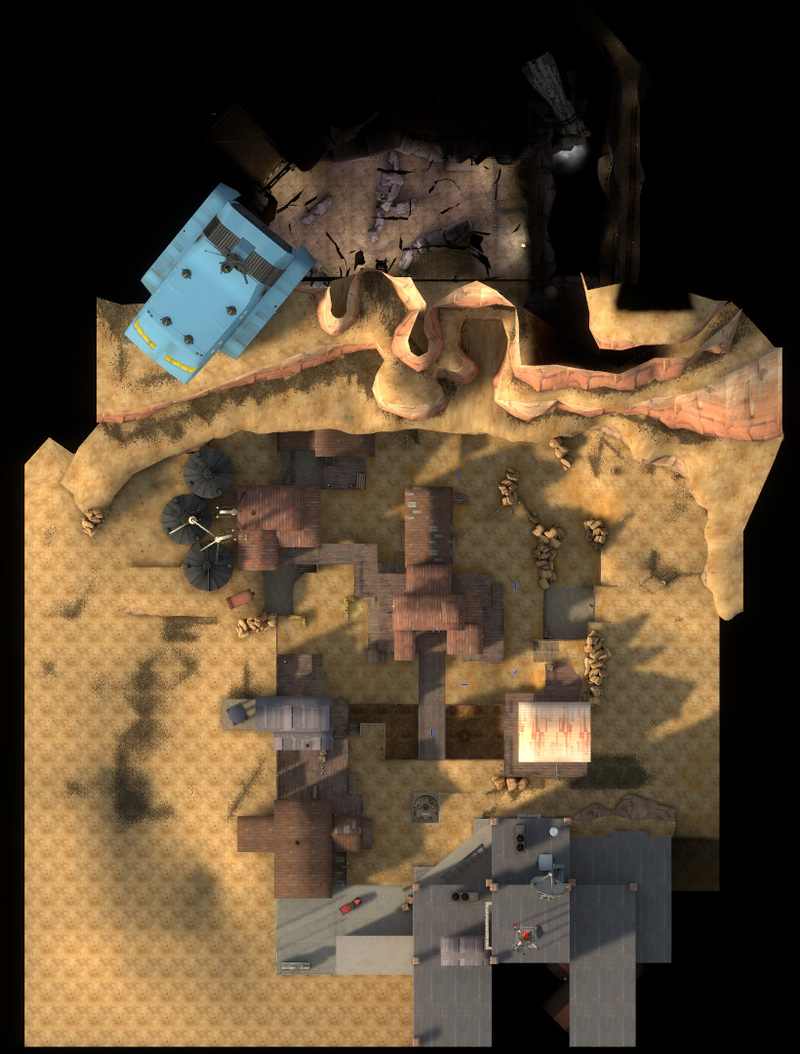
1 Left Catwalk 2 Center Bridge 3 Right Catwalk 4 Right Lane 5 Casali Shafting Co. 6 Left Lane 7 Entrance 8 Robot Cave A RED spawn B Robot spawn C Tank spawn
|
Coal Town
| Coal Town - overview indicators |
|---|
|
Mouseover the markers to see the name of the location
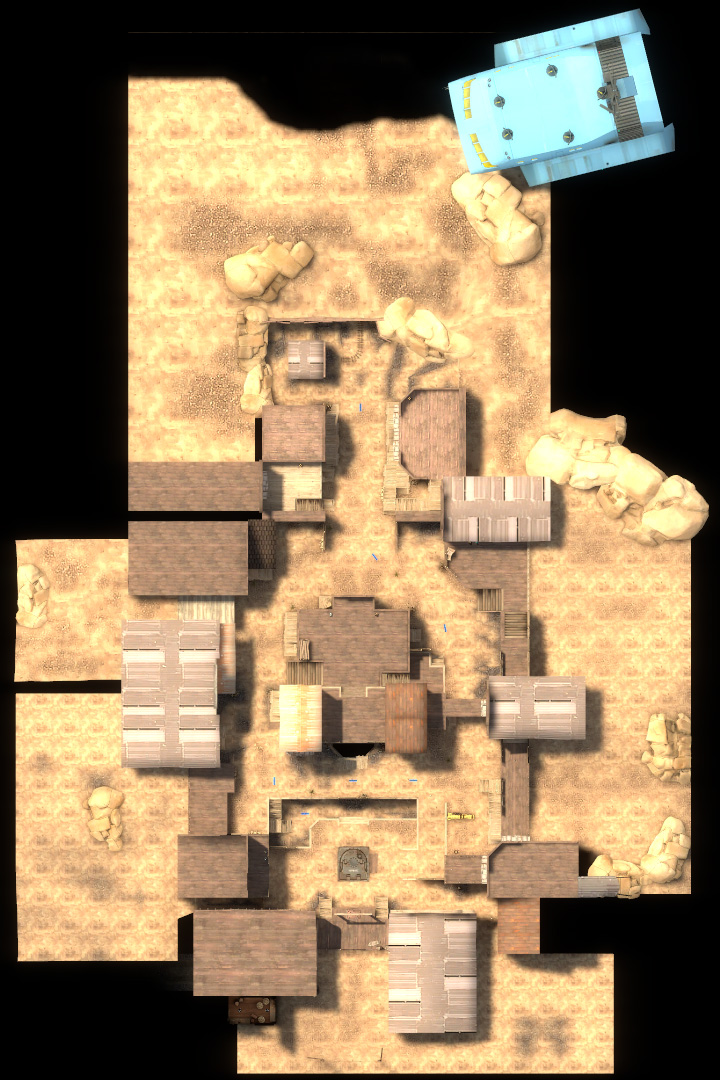
1 Left Side Hotel 2 Mining Accident Simulator 3 Right Side Mann Mining 4 Right Lane 5 Salt Rock Interior 6 Rooftop 7 Left Lane A RED spawn B RED spawn C Robot/Tank spawn
|
Ghost Town
| Ghost Town - overview indicators |
|---|
|
Mouseover the markers to see the name of the location
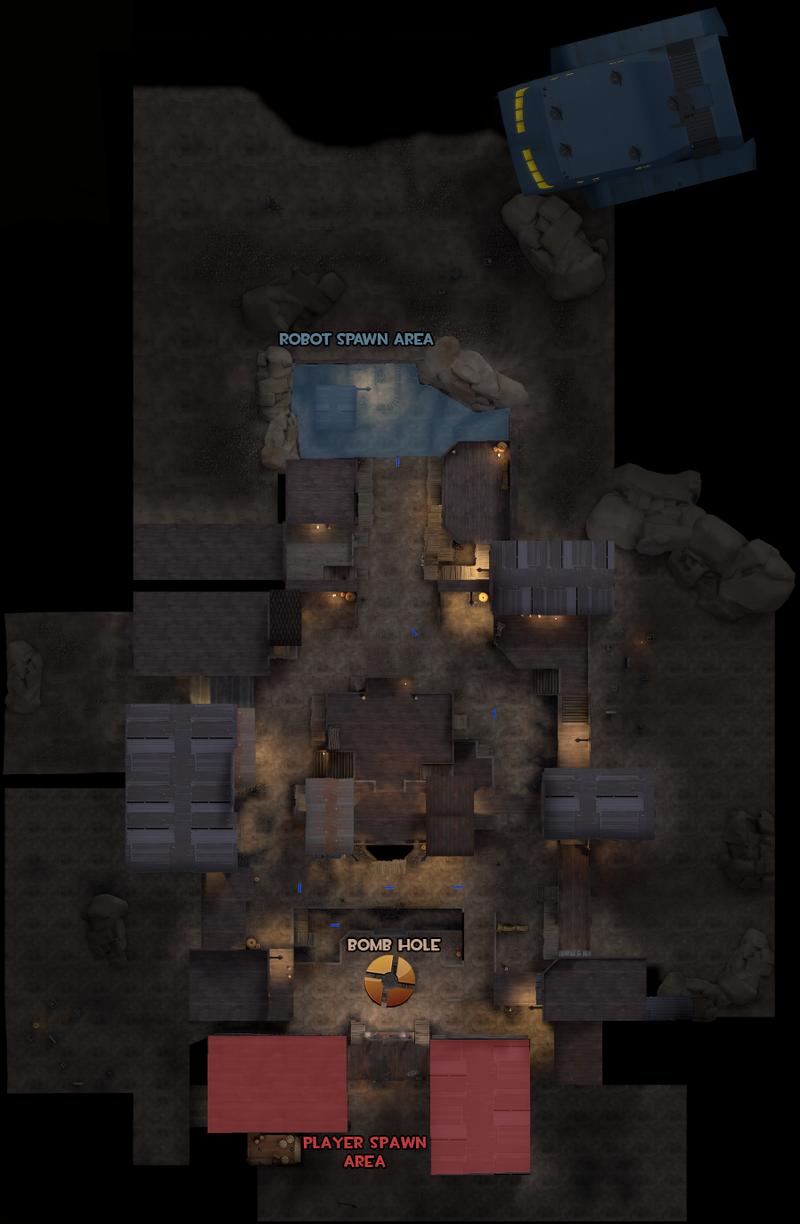
1 Left Side Hotel 2 Mining Accident Simulator 3 Right Side Mann Mining 4 Right Lane 5 Salt Rock Interior 6 Rooftop 7 Left Lane A RED spawn B RED spawn C Robot/Tank spawn
|
Decoy
| Decoy - overview indicators |
|---|
|
Mouseover the markers to see the name of the location
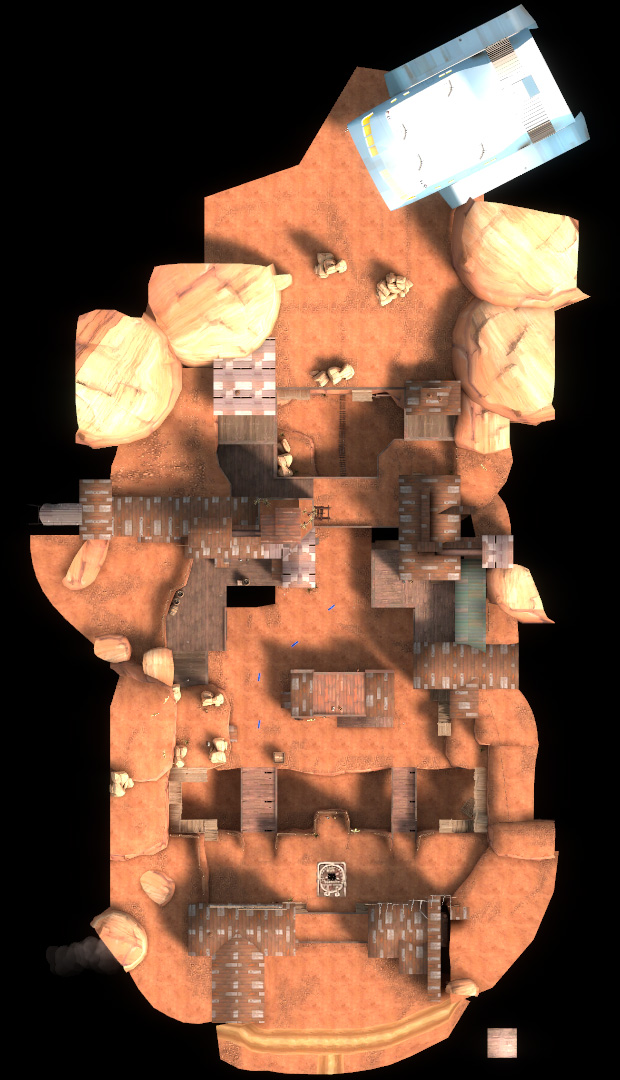
1 Mann Co. Hatch of Great Importance 2 Base Bridge 3 Base Bridge 4 Left Cliff 5 Center Structure 6 Left Structure 7 Structure Bridge 8 Right Structure A RED spawn B RED spawn C Robot spawn
|
Rottenburg
| Rottenburg - overview indicators |
|---|
|
Mouseover the markers to see the name of the location
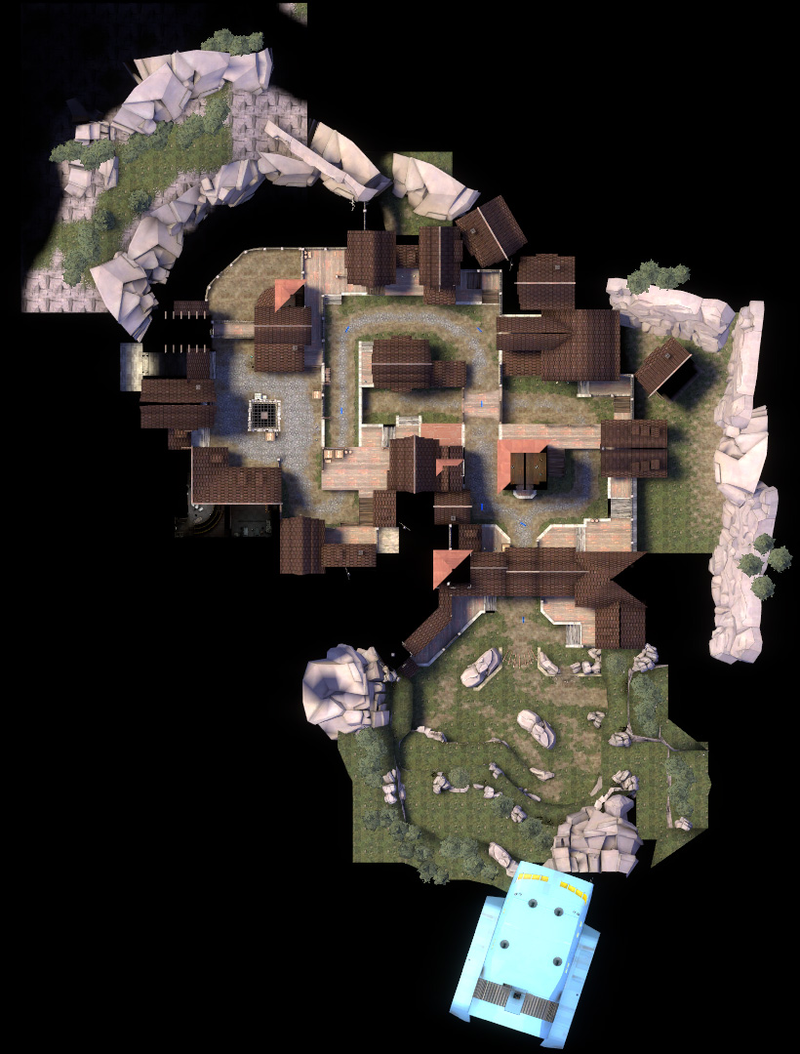
1 Hatch Area 2 Tank Path 3 Overhead Platform 4 Catwalks 5 Tunnel Entrance 6 Stone Tower 7 Pitchfork Checkpoint 8 City Gates 9 Barricade 10 Field 11 Rightside Cliff A RED spawn B RED spawn C Robot spawn D Robot/Tank spawn
|
Mannhattan
| Mannhattan - overview indicators |
|---|
|
Mouseover the markers to see the name of the location
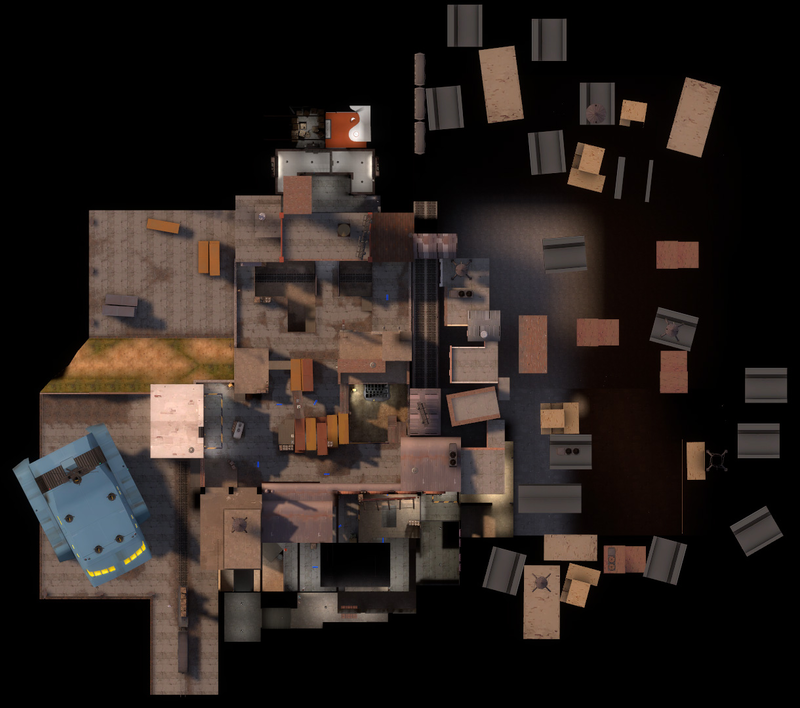
1 Warehouse 2 Shipping Containers 3 Grinder 4 Mannhattan Used Fireworks (And Repair) 5 Old Railway Ditch A Robot spawn #1 B Robot spawn #2 C Robot spawn #3 D RED spawn
|
Mannworks
| Mannworks - overview indicators |
|---|
|
Mouseover the markers to see the name of the location
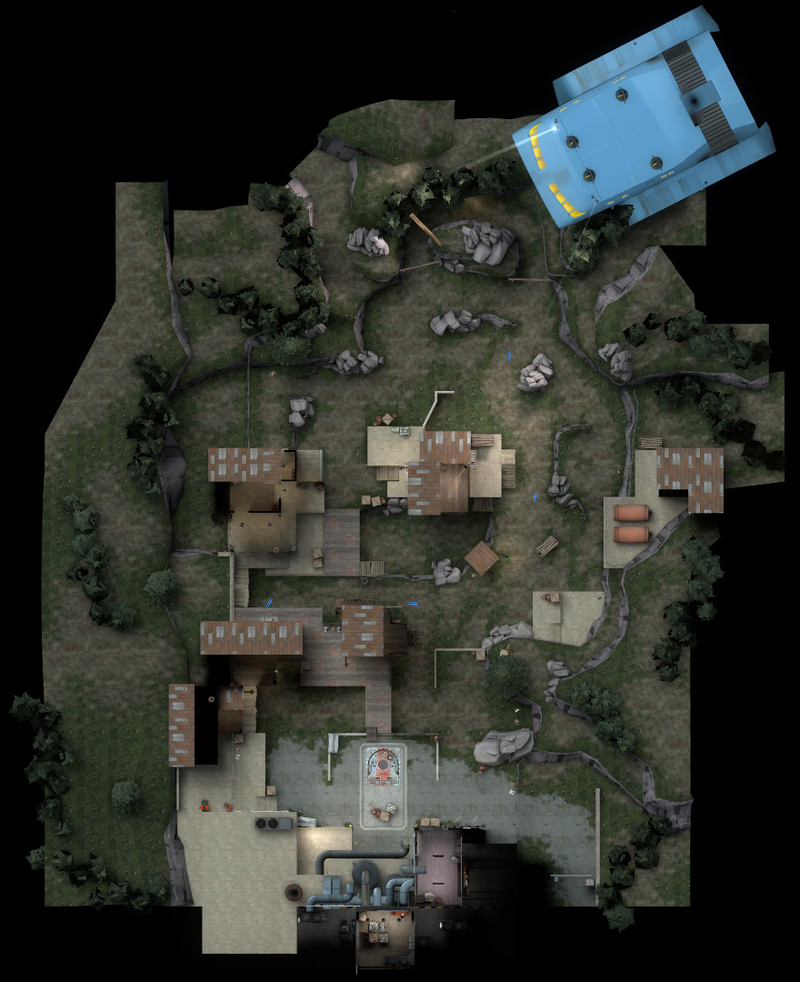
1 Central Hatch 2 Dual Structures 3 Red Structure 4 Center Structure 5 Valley A RED spawn B Robot spawn
|
Blazehattan
| Blazehattan - overview indicators |
|---|
|
Mouseover the markers to see the name of the location
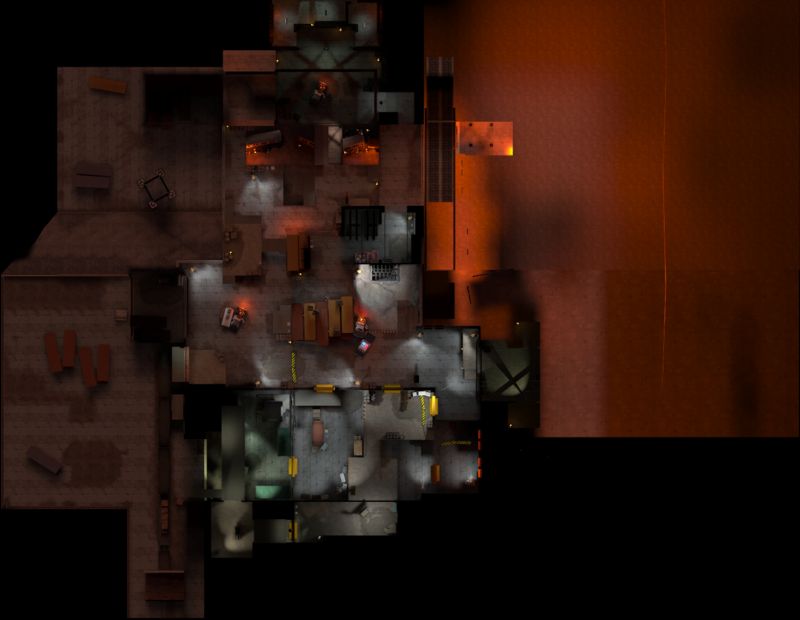
1 Spawn areas 2 Tracks/Ramp 3 Battlements 4 High Ground 5 Side Buildings A RED spawn B BLU spawn
|