Difference between revisions of "User:Plutonium/HLMV Guide"
| Line 143: | Line 143: | ||
* If making a render for an item with the 'Feet' [[equip region]], always have it focus on the character's feet, rather than the whole model. Take [[Media:Argyle Ace.png|Argyle Ace.png]] for reference. | * If making a render for an item with the 'Feet' [[equip region]], always have it focus on the character's feet, rather than the whole model. Take [[Media:Argyle Ace.png|Argyle Ace.png]] for reference. | ||
* Similarly, the 'Back' equip region focuses on the back. | * Similarly, the 'Back' equip region focuses on the back. | ||
| + | * Can't find an image to make/remake?. Monitor the [[Category:Articles needing images|Articles needing images]] and [[Category:Images that need improving|Images that need improving]] categories. | ||
== Examples == | == Examples == | ||
Revision as of 09:43, 11 October 2025
This is a tutorial on how to set up HLMV, plus some additional tips. This guide will mainly cover the basics, and serves as an updated version of the Cosmetic Images help article.
For additional tips, see Gabrielwoj's HLMV setup help and tricks..
Contents
Getting Started
Hello, and welcome to Plutonium's HLMV guide. This guide is a demonstration on how to create cosmetic item images for the wiki. For this tutorial, HLMV++ is highly recommended, as the original HLMV requires a bit of tinkering in order for it to work in modern Team Fortress 2. If you are content with this, simply following what's on Help:Model Viewer, and subsequently, Help:Cosmetic Images.
Programs
- HLMV++ (optional, but highly recommended)
Download (bundled with Hammer++. If you do not want it, simply delete Hammer++ and keep HLMV++.)
HLMV++ is a fan-made remaster of the original HLMV, that patches long-standing bugs (such as the screenshot feature not outputting corrupted images), alongside other quality-of-life improvements. Its download is slightly different compared to the original HLMV (with TF2's 64-bit update), which will be covered in the next section.
How to install HLMV++
- Download the .zip, extract it, and then open the HLMVPlusPlus-main folder inside it.
- Extract the Team Fortress 2.zip within the folder.
- Place the 2 items (the .exe and its .dll) inside TF2's bin/x64 folder.
- GIMP
GIMP is a beneficial tool for cropping images automatically. We will use this later for our images.
Modelling
Now that you have set up HLMV++, open up hlmvplusplus.exe.
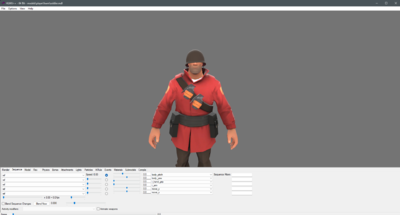
First of all, you need to apply the correct settings to create images. Take a look at the settings in the 'Render' tab at the bottom, and change it to those shown in the image on the right.
Now, let's spawn in a model. At the top bar, click on File, then (Steam) Load Model.
 Note: Do not click on Load Model, as it does not let you access TF2's files, but rather, puts you into a normal File Explorer window.
You should now be seeing a large amount of folders in the pop-up window. These are TF2's files, alongside custom ones from community servers you have visited. Now, look for the player folder, then the hwmfolder.
 Note: Do not use the normal models not in the
 hwmfolder. The only exception to this is full-head cosmetics (such as the Chicken Kiev or Kathman-Hairdo), or items that blend with the character's face texture (such as the Vampire Makeover or Make Ogre.)
Now, inside the hwmfolder, select soldier.mdl, then 'Open'. You should now see a Soldier in your model viewer.
Bodygroups
Some hats tend to hide certain bodygroups, so we need to remove them.
 Note This is only necessary if the hat you want to apply hides a bodygroup. If it does not, skip to the Submodels section.
- Click on the 'Model' tab at the bottom section of the model viewer.
- In the first-drop down menu, select
hat. - In the drop-down menu next to that, select
Submodel 2.
This will hide the Soldier's helmet. We can now give him the hat.
Submodels (cosmetic items)
Now, we will give him the Team Captain.
- In the bottom section of the model viewer, click on the
Submodelstab. - From there, click on
Add (Steam).
Valve-made cosmetics are found in \player\items and community made ones are found in \workshop\player\items In this case, we go to \player\items.
- Inside
\player\items\soldier, then findsoldier_officer.mdl, and open it.
Your Soldier is now wearing the Team Captain.
Changing skins
You may need to change the team colours of your model and subsequently, the submodel (granted it is different depending on team colour.) for styles and painted variant images. To do so;
- Go into the 'Model' tab at the bottom of the model viewer.
- Select the drop-down menu with
Skin 1. (RED) - Change it to
Skin 2. (BLU)
For submodels;
- Go into the 'Submodels' tab at the bottom of the model viewer.
- Click on the assigned submodel.
- Select the drop-down menu with
Skin 1. - Change it to
Skin 2.
You do not need to do this for infobox images; they are always on Skin 1.
Weapons
If you are using a pose that uses a weapon, you generally need to add said weapon to the model (granted the pose uses the weapon, as some many not actually require the weapon). Most older weapons are located in \weapons\c_models, whilst newer ones are in \weapons\c_models, or \workshop_partner\weapons\c_models. Despite this, you should always use stock weapons when creating renders. Similarily, do not add attachments like Festivizers, Botkiller and Australium variants of the stock weapons.
 Note The only exception to this is if you are making a render of an item set that has a weapon with it. If this is the case, you may add the weapon.
Some weapons also change depending on team colour. To switch, simply change the skin as you would with a submodel (see Changing skins)
Posing
Now, we will give our Soldier a pose.
- Make sure to pick a pose that is not too distracting or one that covers the cosmetic.
- As an example, we will use
taunt01, so our Soldier can mock salute. - In the bottom section of the model viewer, click on the
Sequencetab. - Select the first drop-down menu, the one currently set to
ref - In the drop-down menu, select
taunt01.
You will now notice he is standing on the floor. This is the very first frame of the taunt.
- Now, to get him to stand up, move the
Frameslider, and move it until the number on the right of the bar is at frame 60.
You should now see your Soldier move into position.
Lastly, you will need to rotate the Soldier for a better view of the cosmetic item. This is done by clicking and holding MOUSE1 in the center of the view and then dragging the model to rotate it.
Face posing
Now that you have gotten the Soldier into a good pose, you will need to pose his face accordingly, as to make the pose more expressive. To do so;
- Click on the
Flextab in the bottom section of the model viewer.
In the tab, there will be several sliders, each for different parts of the face. For this tutorial, we will make him smile. To do so, simply locate the left_smile and right_smile sliders, and set it to around the middle of the sliders each (not too high.)
Screenshotting
This step is quite easy, and can be down quickly. Simply click on the Options tab in the top section of the model viewer, then press 'Make Transparent Screenshot'. Save the image wherever you like. You should now see your image wherever you have saved it. But we're not done yet.
Cropping
Now, we will crop our image. This is the final step before we upload our image.
- Download GIMP (if you haven't already.)
- Open the application.
- Open your file in GIMP.
- When it has opened, right click the image, then hover over the 'Image' drop-down. Select 'Crop to Content'.
You should now see the image being cropped. Now, simply do Shift+Ctrl+E, then 'Export', and then 'Export' again on the second pop-up.
Optionally, you can make this a bit faster using shortcuts.
- Hover over the 'Edit' tab at the top of GIMP, then click on 'Keyboard Shortcuts'.
- In the search bar, search for 'Crop to Content'.
- Double click on the 'Shortcut' part of 'Crop to Content'
- Press the button you want to assign it to. It can be anything you prefer, but I personally use 1.
- Now, search up 'Export As'
- Repeat, and assign a key to 'Export As'. I use 2.
Now, you can simply click those 2 buttons, when on an image, buying a respectable amount of time.
You should now see your final image!
Uploading
Now, with your final image, comes the last step; uploading your image to the wiki.
You can do this by uploading it directly, or if the image is an updated version of another, by clicking Upload a new version of this file under the file you want to overwrite.
If you are uploading directly, remember to use the {{classimg}} template when uploading (see documentation on how to use the template.) This will automatically apply the correct categories and license.
Tips
- If you can't find the model you are looking for, find its name in
items_game.txtand look for themodel_playervariable. This tells where it's located. - The Pyro's lenses tend to appear white at certain angles. To fix this, adjust the angle of the model, or change the lighting position, by moving your cursor while holding CTRL.
- Be careful to not move the lighting too far, as the model may appear too dark.
- If you accidentally forget to change the name of the image you are uploading, if it helps, consider renaming it to the target final location on the wiki (e.g. naming the file 'Scout Arms Race Participant Medal.png' instead of 'scout image.png' or something similar).
- Try to avoid having the model face straight ahead, rather than angled to the left or to the right (either or).
- If making a render for an item with the 'Feet' equip region, always have it focus on the character's feet, rather than the whole model. Take Argyle Ace.png for reference.
- Similarly, the 'Back' equip region focuses on the back.
- Can't find an image to make/remake?. Monitor the and categories.
Examples
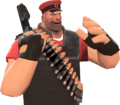
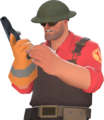
Below are some examples of good images, alongside a few examples of poorly-made ones.
Good
Bad
Troubleshooting
- Missing models or textures
If your model appears with a purple and black checkerboard texture, or shows a large flashing ERROR model:
- Make sure you are using the correct
.mdlfrom the\playeror\weaponsfolders. - Verify your game cache in Steam, to ensure models are not missing or corrupted.
- Weapons not appearing or are misaligned
- Always use models from the
c_modelsfolder, notv_models.
- Black, white, or corrupted screenshots
- Make sure you are using HLMV++’s Make Transparent Screenshot option. If you do not use HLMV++, rather, follow this guide courtesy of Gabrielwoj.
- Check that your graphics drivers are up to date, as outdated drivers may affect rendering.
See also
- Painted variants tutorial - tutorial on how to make painted variants of cosmetic items.
- Help:Images - some extra, helpful information on placing of images.


