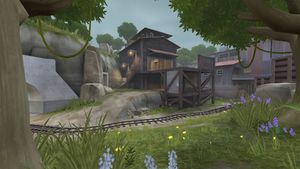
Community Borneo strategy
| Community Borneo strategy | |
|---|---|

| |
| Basic Information | |
| Developer(s): | {{{map-developer}}} |
| Map Info | |
| Environment: | Jungle |
| Setting: | Daylight, overcast |
This article is about Community Borneo strategy.
Contents
General strategy(All Classes)
- RED team Engineers will often immediately set up in the maintenance building. This often does not become problematic until BLU team attempts to push the cart towards the first checkpoint. Often there will be a Sentry nest set up preventing the cart from being moved too far beyond the catwalk.
- BLU team will often lead out of their base with an Übercharged Heavy, Soldier, or Demoman. It is often incredibly helpful for RED to have a Pyro on their team to use their compression blast in an attempt to more easily nullify the push.
- RED will oftentimes have many offensive classes set up in the area immediately outside of the BLU base. It is wise for BLU to counter this with splash damage from Soldiers and Demomen so that the rest of the team can leave the base more easily.
- It is crucial that BLU have at least one Spy. This will be of great importance to disabling the Sentry and allowing a Heavy, Soldier, or Demoman to eliminate the nest.
- It is imperative for BLU to have at least one Medic on their team. The Übercharge is often the driving force behind a push in this map. While the charged pair is clearing ground, the rest of the combo should work to push the cart forward.
- When pushing with an Übercharge, be sure to prioritize targets correctly.
- The first priority while charged should almost always be buildings, followed by the enemy Medic, with the third being the most powerful classes on the enemy team.
Class-specific strategy
 Scout
Scout
- Use the corridors and corners that are scattered throughout the map in order to flank and more easily deal damage in close-quarters combat.
- When the area has been cleared of immediate threats, stay close to the cart.
- While you not only push the cart twice as fast as any other class, the health and ammo regeneration will help you get back to flanking once pushing becomes impossible.
 Soldier
 Pyro
Pyro
- The most important job for a Pyro is to check for Spies often. Fire a quick burst of flame at any players you see with your Flame Thrower. If the players that you check stay lit, this means that you have found a Spy. Keep the flame on them until they appear to have died.
 Demoman
 Heavy
Heavy
 Engineer
 Medic
Medic
- Stay safe in order to successfully build up an Übercharge without dying.
- Once you are completely charged and have a capable healing target, activate the charge and begin to push forward.
- It is usually best to activate the charge on a very powerful class capable of putting out vast amounts of damage very quickly. Some of the best targets include Heavies, Soldiers, and Demomen.
 Sniper
- There is a very clear sight line to the BLU base. It is nearby a rock in case cover should be needed, however, it should be noted that Spies can flank and maneuver around these barriers with relative ease.
- With little natural Spy protection provided, the Razorback may prove to be an item of choice.