Difference between revisions of "User:Plutonium/MapStrategy"
| Line 1: | Line 1: | ||
| − | {{Community strategy stub}} | + | <!--{{Community strategy stub}}--> |
{{Map infobox | {{Map infobox | ||
| map-strategy = yes | | map-strategy = yes | ||
| Line 29: | Line 29: | ||
== General Strategy (All Classes) == | == General Strategy (All Classes) == | ||
{{See also|Community King of the Hill strategy}} | {{See also|Community King of the Hill strategy}} | ||
| − | + | * Both of the teams' spawn rooms have 3 exits, that is; the primary, side and sewer exit. Each can serve useful if one of them is being [[Camping|spawncamped]] by the enemy team, for ambushes, especially if the team is camping the primary exit (where you can use either the side or sewer exit for [[Ambushing|flanking]] opportunities. | |
| + | ** Should there be more than 2 enemies, consider coordinating a push using these exits with your team, especially if you are a slower class like [[Heavy]]. | ||
| + | * The Team Yards have a medium ammo pack and small health kit against a garage door on the opposite side of the spawn doors. You can use this to recover some additional health or ammo if retreating to the yard. | ||
| + | * Control Mid early. The central point is exposed, but rewards coordinated team control. Utilize the Side Areas and the Central Buildings for cover, areas to ambush and to retreat, should the enemy team counter-attack or if isolated from your team. | ||
| + | * If your team has strong control over the Sewers, you can use them as ambush routes across entrances from the Sewers to Mid or going into the enemy's Team Yard. | ||
==Class-specific strategy== | ==Class-specific strategy== | ||
=== {{class link|Scout}} === | === {{class link|Scout}} === | ||
| + | * You can reach the higher part of the Side Areas from the lower part of the area from a [[Jumping|double jump]]. This can be used to quickly evade close-range classes like [[Pyro]]s, of which cannot easily fire at you unless they have the [[Shotgun]]. | ||
=== {{class link|Soldier}} === | === {{class link|Soldier}} === | ||
| + | * The Central Buildings can provide high-ground advantage for shooting rockets onto Mid, with its cover and quick accessibility. | ||
=== {{class link|Pyro}} === | === {{class link|Pyro}} === | ||
| Line 50: | Line 56: | ||
=== {{class link|Spy}} === | === {{class link|Spy}} === | ||
| − | {{Map Strategy Nav}} | + | <!--{{Map Strategy Nav}}--> |
Revision as of 16:46, 22 August 2025
| Mannhole | |
|---|---|

| |
| Basic Information | |
| Map type: | King of the Hill |
| File name: | koth_mannhole
|
| Released: | July 24, 2025 Patch (Summer 2025 Update) |
| Developer(s): | Harlen "UEAKCrash" Linke Aeon "Void" Bollig Benjamin "blaholtzen" Blåholtz Alex "FGD5" Stewart Al "Square" Rodgers Norman "Mikusch" Masanek Juniper donhonk Freyja |
| Map Info | |
| Environment: | Urban |
| Setting: | Daylight, sunny |
| Map Items | |
| Map Photos | |
| Map overview | |
This article is about Community Mannhole strategy.
Note: It is recommended to read the main Mannhole article first to become familiar with the names of key map locations used in this article.
General Strategy (All Classes)
See also: Community King of the Hill strategy
- Both of the teams' spawn rooms have 3 exits, that is; the primary, side and sewer exit. Each can serve useful if one of them is being spawncamped by the enemy team, for ambushes, especially if the team is camping the primary exit (where you can use either the side or sewer exit for flanking opportunities.
- Should there be more than 2 enemies, consider coordinating a push using these exits with your team, especially if you are a slower class like Heavy.
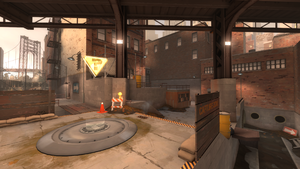
- The Team Yards have a medium ammo pack and small health kit against a garage door on the opposite side of the spawn doors. You can use this to recover some additional health or ammo if retreating to the yard.
- Control Mid early. The central point is exposed, but rewards coordinated team control. Utilize the Side Areas and the Central Buildings for cover, areas to ambush and to retreat, should the enemy team counter-attack or if isolated from your team.
- If your team has strong control over the Sewers, you can use them as ambush routes across entrances from the Sewers to Mid or going into the enemy's Team Yard.
Class-specific strategy
 Scout
Scout
- You can reach the higher part of the Side Areas from the lower part of the area from a double jump. This can be used to quickly evade close-range classes like Pyros, of which cannot easily fire at you unless they have the Shotgun.
 Soldier
- The Central Buildings can provide high-ground advantage for shooting rockets onto Mid, with its cover and quick accessibility.

