Difference between revisions of "User:Linux lover/Stop that Tank!"
Linux lover (talk | contribs) m (Removed slot restriction and reshuffled) |
(Added more giants to the table) |
||
| Line 75: | Line 75: | ||
|- | |- | ||
| style="border:1px solid #333;" align="center" | {{Table icon|Shovel}} | | style="border:1px solid #333;" align="center" | {{Table icon|Shovel}} | ||
| + | | style="border:1px solid #333;" | | ||
| + | |- | ||
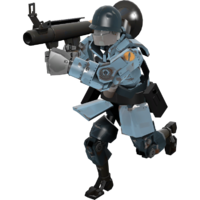
| + | | style="border:1px solid #333; border-right: 0; width: 200px;" rowspan="2"| [[Image:Soldierbot blu.png|200px]] | ||
| + | | style="border:1px solid #333; border-left: 0; max-width: 400px; min-width: 150px;" rowspan="2" | | ||
| + | {{icon class|Soldier}} '''Giant 10-Shot Bazooka Soldier'''<br /> | ||
| + | Health: 10,000<br /> | ||
| + | Movespeed: 98 HU/s<br /><br /> | ||
| + | |||
| + | What the Giant 10-Shot Bazooka Soldier lacks in quality, it makes up for in quantity. As the name implies, up to ten rockets can be quickly loaded and fired at a time, making for deadly close-to-mid range barrages. Alternatively, rockets can be rapidly fired individually, resulting in a steady stream of damage output. However, the Giant 10-Shot Bazooka Soldier is relatively slow, and the rockets are extremely inaccurate at longer ranges. | ||
| + | | style="border:1px solid #333;" align="center" | {{Table icon|Beggar's Bazooka}} | ||
| + | | style="border:1px solid #333;" | | ||
| + | {{buff|+7 clip size}} | ||
| + | {{buff|+80% reload speed}} | ||
| + | {{buff|+80% firing speed}} | ||
| + | {{buff|No overloading}} | ||
| + | {{nerf|+6 degrees in random projectile deviation}} | ||
| + | {{nerf|-45% damage penalty}} | ||
| + | {{nerf|No random critical hits}} | ||
| + | |- | ||
| + | | style="border:1px solid #333;" align="center" | {{Table icon|Shovel}} | ||
| + | | style="border:1px solid #333;" | | ||
| + | |- | ||
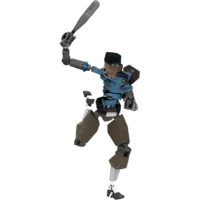
| + | | style="border:1px solid #333; border-right: 0; width: 200px;" rowspan="2"| [[Image:Pyrobot blu.png|200px]] | ||
| + | | style="border:1px solid #333; border-left: 0; max-width: 400px; min-width: 150px;" rowspan="2" | | ||
| + | {{icon class|Pyro}} '''Giant Pyro'''<br /> | ||
| + | Health: 10,000<br /> | ||
| + | Movespeed: 171 HU/s<br /><br /> | ||
| + | |||
| + | Some giants just want to watch the world burn. Others, like the Giant Pyro, just want everyone to get the hell away from them. Should you feel the need to get close anyway, you'll either be either enjoying a nice & warm shower of fire, or you'll be punted halfway across the map. Keep your distance instead, and you'll be relatively safe, so long as you don't feed it projectiles to reflect. | ||
| + | | style="border:1px solid #333;" align="center" | {{Table icon|Flame Thrower}} | ||
| + | | style="border:1px solid #333;" | | ||
| + | {{buff|Airblast destroys enemy stickybombs}} | ||
| + | {{buff|Reflected projectiles become critical}} | ||
| + | {{buff|+150% airblast push force}} | ||
| + | {{buff|+40% airblast range}} | ||
| + | {{buff|+40% damage bonus}} | ||
| + | {{buff|+50% flame particle lifetime (flames travel further)}} | ||
| + | {{buff|+25% flame particle size}} | ||
| + | |- | ||
| + | | style="border:1px solid #333;" align="center" | {{Table icon|Fire Axe}} | ||
| + | | style="border:1px solid #333;" | | ||
| + | |- | ||
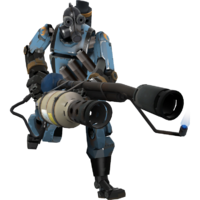
| + | | style="border:1px solid #333; border-right: 0; width: 200px;" rowspan="2"| [[Image:Pyrobot blu.png|200px]] | ||
| + | | style="border:1px solid #333; border-left: 0; max-width: 400px; min-width: 150px;" rowspan="2" | | ||
| + | {{icon class|Pyro}} '''Giant Flare Pyro'''<br /> | ||
| + | Health: 10,000<br /> | ||
| + | Movespeed: 111 HU/s<br /><br /> | ||
| + | |||
| + | You better get ready for some heat, because things (specifically you) are about to get a lot hotter up in here thanks to the Giant Flare Pyro. This giant, as one might expect, specializes in sending enemies scrambling for health due to its ability to hand out long-lasting critical afterburn like candy. With that in mind, it's particularly vulnerable against fireproof humans. | ||
| + | | style="border:1px solid #333;" align="center" | {{Table icon|Scorch Shot}} | ||
| + | | style="border:1px solid #333;" | | ||
| + | {{buff|+80% reload speed}} | ||
| + | {{buff|+100% afterburn length}} | ||
| + | {{buff|+300% afterburn damage}} | ||
| + | {{nerf|Does not mini-crit burning players}} | ||
| + | {{nerf|No random critical hits}} | ||
| + | |- | ||
| + | | style="border:1px solid #333;" align="center" | {{Table icon|Third Degree}} | ||
| + | | style="border:1px solid #333;" | | ||
| + | |- | ||
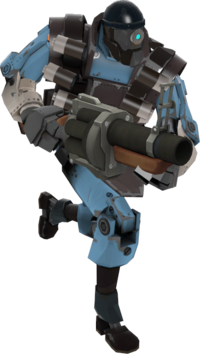
| + | | style="border:1px solid #333; border-right: 0; width: 200px;" rowspan="2"| [[Image:Demobot blu.png|200px]] | ||
| + | | style="border:1px solid #333; border-left: 0; max-width: 400px; min-width: 150px;" rowspan="2" | | ||
| + | {{icon class|Demoman}} '''Giant Rapid Fire Demoman'''<br /> | ||
| + | Health: 10,000<br /> | ||
| + | Movespeed: 109 HU/s<br /><br /> | ||
| + | |||
| + | Need some pills? This one's got plenty of 'em. It dispenses tons of hard-hitting explosives, although it's unlikely every one will hit its target. Despite being one of the slowest giants, it's capable of performing an explosive jump in PLR maps. | ||
| + | | style="border:1px solid #333;" align="center" | {{Table icon|Grenade Launcher}} | ||
| + | | style="border:1px solid #333;" | | ||
| + | {{buff|+75% firing speed}} | ||
| + | {{buff|+75% reload speed}} | ||
| + | {{buff|+1 clip size}} | ||
| + | {{nerf|No random critical hits}} | ||
| + | |- | ||
| + | | style="border:1px solid #333;" align="center" | {{Table icon|Bottle}} | ||
| + | | style="border:1px solid #333;" | | ||
| + | |- | ||
| + | | style="border:1px solid #333; border-right: 0; width: 200px;" rowspan="2"| [[Image:Demobot blu.png|200px]] | ||
| + | | style="border:1px solid #333; border-left: 0; max-width: 400px; min-width: 150px;" rowspan="2" | | ||
| + | {{icon class|Demoman}} '''Giant Demoknight'''<br /> | ||
| + | Health: 10,000<br /> | ||
| + | Movespeed: 140 HU/s<br /><br /> | ||
| + | |||
| + | Hits hard, hits fast, but has no ranged weaponry. Try not to get too close, as this giant is king of close quarter combat, and every kill will make him more powerful. It has no real means of dealing with Sentry Guns however, which means it must rely on teammate support to clear Engineer nests. | ||
| + | | style="border:1px solid #333;" align="center" | {{Table icon|Chargin' Targe}} | ||
| + | | style="border:1px solid #333;" | | ||
| + | {{buff|+25% charge recharge rate}} | ||
| + | {{buff|+100% charge impact damage}} | ||
| + | {{buff|Full turning control while charging}} | ||
| + | |- | ||
| + | | style="border:1px solid #333;" align="center" | {{Table icon|Eyelander}} | ||
| + | | style="border:1px solid #333;" | | ||
| + | {{buff|On Kill: 3 seconds of 100% critical chance}} | ||
| + | {{buff|+200 health restored on kill}} | ||
| + | {{buff|+140% damage bonus}} | ||
| + | {{buff|+50% melee attack range}} | ||
| + | {{buff|+20% melee attack speed}} | ||
| + | {{buff|+0.5s increase in charge length}} | ||
| + | {{nerf|No head collection}} | ||
| + | |- | ||
| + | | style="border:1px solid #333; border-right: 0; width: 200px;" rowspan="2"| [[Image:Demobot blu.png|200px]] | ||
| + | | style="border:1px solid #333; border-left: 0; max-width: 400px; min-width: 150px;" rowspan="2" | | ||
| + | {{icon class|Demoman}} '''Sir Nukesalot'''<br /> | ||
| + | Health: 10,000<br /> | ||
| + | Movespeed: 118 HU/s<br /><br /> | ||
| + | |||
| + | Makes Michael Bay look like an explosive amateur. This one certainly lives up to its name, as it's capable of clearing large areas with a single shot. The large explosions leave a cloud of smoke, which can help teammates advance without being seen. However, it has very little means of direct combat, which makes Pyros, Scouts, and other close range attackers much more threatening. | ||
| + | | style="border:1px solid #333;" align="center" | {{Table icon|Loose Cannon}} | ||
| + | | style="border:1px solid #333;" | | ||
| + | {{buff|Always deals critical hits}} | ||
| + | {{buff|+600% damage bonus}} | ||
| + | {{buff|+100% explosion radius}} | ||
| + | {{nerf|No fuse}} | ||
| + | {{nerf|-75% clip size}} | ||
| + | {{nerf|-47% projectile speed}} | ||
| + | {{nerf|-80% reload speed}} | ||
| + | {{nerf|-100% slower firing speed}} | ||
| + | |- | ||
| + | | style="border:1px solid #333;" align="center" | {{Table icon|Bottle}} | ||
| + | | style="border:1px solid #333;" | | ||
| + | {{nerf|No random critical hits}} | ||
| + | |- | ||
| + | | style="border:1px solid #333; border-right: 0; width: 200px;" rowspan="2"| [[Image:Heavybot blu.png|200px]] | ||
| + | | style="border:1px solid #333; border-left: 0; max-width: 400px; min-width: 150px;" rowspan="2" | | ||
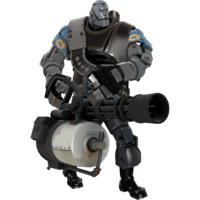
| + | {{icon class|Heavy}} '''Giant Heavy'''<br /> | ||
| + | Health: 10,000<br /> | ||
| + | Movespeed: 115 HU/s (revved down) 71.5 HU/s (revved up)<br /><br /> | ||
| + | |||
| + | When it's time to bring in the big guns, this giant's got you covered. It's the slowest giant when attacking, but pumps out massive damage in a constant hail of bullets. Like normal Heavies, it's more vulnerable to Snipers and Spies due to the slow speed and the "focus down individual targets" style of attacking. | ||
| + | | style="border:1px solid #333;" align="center" | {{Table icon|Minigun}} | ||
| + | | style="border:1px solid #333;" | | ||
| + | {{buff|+60% damage bonus}} | ||
| + | {{buff|+30% faster move speed while deployed}} | ||
| + | {{nerf|No random critical hits}} | ||
| + | |- | ||
| + | | style="border:1px solid #333;" align="center" | {{Table icon|Fists}} | ||
| style="border:1px solid #333;" | | | style="border:1px solid #333;" | | ||
|- | |- | ||
Revision as of 08:55, 20 September 2015
| Stop that Tank! | |
|---|---|
| |
| Basic information | |
| Type: | Game mode |
| Availability: | Public |
| Creator(s): | Banshee and linux_lover |
| Released: | September 21, 2013 (First debut) August 13, 2015 (Public release) |
| Link(s): | Steam group GitHub |
| “ | Stop that Tank!
Click to listen
— The Administrator issuing a directive.
|
” |
Stop that Tank! is a community game mode that combines themes from both Payload and Mann vs. Machine. Play unfolds on Payload and Payload Race maps. The payload Cart is replaced by the Tank Robot and moves on its own, following the path of the cart. There are two teams: Robots and Humans. They are tasked with escorting the Tank or preventing it from reaching its destination. Players have the opportunity to take control of Giant Robots and Sentry Busters which typically have buffed health, loadouts, and special abilities.
Contents
Gameplay
There are two distinct types of gameplay for Payload and Payload race maps.
Payload
Write about specific game play mechanics for payload.
Payload Race
Write about specific gameplay mechanics for payload race.
Giant Robots
Available in Payload
| List of Payload Giants | ||||||||||||||||||||||||||||||||||||||||||||||||||||||||||||
|---|---|---|---|---|---|---|---|---|---|---|---|---|---|---|---|---|---|---|---|---|---|---|---|---|---|---|---|---|---|---|---|---|---|---|---|---|---|---|---|---|---|---|---|---|---|---|---|---|---|---|---|---|---|---|---|---|---|---|---|---|
|
Available in Payload Race
Trivia
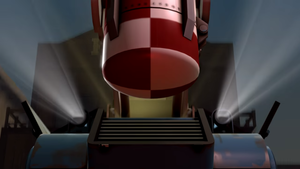
- The logo is from the TF2 short MvM Wars I - Stop that tank!.
| |||||
