Meridian
 | “I built that.” This page contains information about a custom map that is not an officially released Team Fortress 2 map. All released Valve and Community-made TF2 maps can be found on the list of maps. |
| Meridian | |
|---|---|
| |
| Basic Information | |
| Map type: | Territorial Control |
| File name: | tc_meridian_rc3
|
| Version: | Release Candidate 3 |
| Released: | September 29, 2009 |
| Last updated: | September 2, 2009 |
| Developer(s): | Mark "Shmitz" Major Sage A. "Carlmanz" Rollins |
| Link(s): | Gamebanana |
| Map Info | |
| Environment: | Tropical volcanic island, secret base |
| Setting: | Daylight, sunny |
| Hazards: | Pitfalls |
| Deep Water: | Yes |
| Map Items | |
| “ | Thus begins my thousand year reign of blood!
Click to listen
— The Demoman on global takeovers
|
” |
Meridian is a custom Territorial Control map. The map takes place on an ancient tropical island in the middle of the sea. Unlike in Hydro, where the goal is to capture each control point in each territory on the map, Meridian instead uses capturing Intelligence as the goal. Whoever captures the Intelligence in each area captures the territory. For each "final stage" (for both BLU and RED), the defending team wins by holding onto their intelligence until time expires.
Contents
Locations
RED CP1: The Volcano
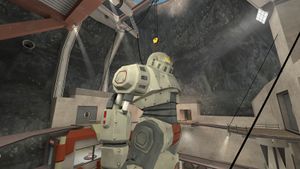
A robotics facility inside a volcano where the RED team appears to be building an enormous battle machine of sorts. The Intelligence rests in an observation post on the second floor of the volcano's walkway system.
- Entrances from the temple: The design of the temple's exterior practically forces players to allocate a number of teammates to each of two potential routes. The first route, which heads out to the left and over a waterfall on top of the canyon, has numerous pillars and small, thin environmental barriers which provide protection against attackers, but limit sight-lines and overall maneuverability. The more long-winded path off to the right heads across a bridge spanning the canyon, which eventually connects into the outer hallways of the facility alongside the other route. Both open up on the third floor of the volcano's walkway system, providing excellent visibility over any possible enemy movement or camping positions.
- Entrances from the submarine bay: Two small hallways lead out from the submarine's main catwalk. The two paths meet in a side-chamber flanked by open spaces and a tight-cornered, narrow staircase. Upon entering the facility, the Intelligence sits in a precarious position, as the room affords various locations for enemies to drop in unexpected and divide team strength.
- Entrances from the village: Two branching pathways head out from the village, passing over the canyon and into the outer hallways of the facility. The precarious location of the two bridges outside the facility make team-based rushes both necessary and hazardous for attempts at the Intelligence.
BLU CP1: The Temple
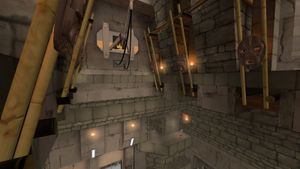
An ancient temple, which has been overrun by the BLU team and is currently being used as a base of operations against RED on the island. Much of the temple's original architecture has been refitted with lighting and equipment brought in by the BLU team. The Intelligence can be found outside BLU's spawn, inside the base of the temple.
- Entrances from the volcano: The facility's interior forces players to climb to the third level of the walkway in order to reach the branching path heading towards the temple. The walkway itself branches off in two directions, both of which make their way to the canyon outside. While one path follows a bridge crossing the canyon off to the left, the path that exits the facility on the right heads across a waterfall which is blocked up by rocks, separating any sight-lines with the other path into the temple. Both paths follow a few tight-cornered corridors, before eventually emptying out into high-ground perches overlooking the Intelligence.
- Entrances from the submarine bay: Both potential paths are quick, cramped means of emptying into the bottom of the canyon, and the river which runs through it. A set of rock formations breaks the path into two separate forks. Both eventual paths lead into the lower confines of the temple, providing flanking positions both to the left and right of the Intelligence.
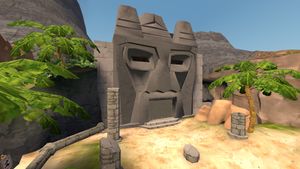
- Entrances from the village: Located relatively close to the village's spawn rooms, two paths wind through the rock formations outside of the temple, and eventually join and re-branch into two separate routes to the temple interior. The larger of the two opens into a moderately-sized area outside the temple, dwarfed by a large tiki head and filled with various small environmental barriers. The alternate route runs parallel to the main entrance, slipping off down and to the side into a tightly-packed corridor. Both quickly empty into the main chamber of the temple, providing ample high ground for an attack on the Intelligence.
RED CP2: The Submarine Bay
A submarine bay located on the edge of the island's coast. The Intelligence sits on a grated walkway near the entrance hatch of the submarine.
- Entrances from the volcano: Two doorways on the bottom floor, left of the initial spawn point, lead to a large antechamber with numerous height differences and opportunities for ambush and flanking positions. The paths merge into a set of hallways, one high and one low, that show a clear line of sight to the Intelligence.
- Entrances from the temple: A series of paths through the convoluted rock structure at the bottom of the canyon eventually focus into a clear sight of both of the entrances to the drydock. The following paths into the submarine bay consist of numerous tight corners, with both opening up to clear views of the Intelligence, but obstructed views of much of the rest of the room, which provides numerous ambush opportunities for the opposing team.
- Entrances from the village: Two paths on opposite sides of the village head into two cramped, narrow tunnels with few sight-lines of enemy positions. The momentary opening of space leads to a small field, covered on both sides by covered positions. The tunnels which lead into the drydock itself remain primarily straight, and upon opening up provide either high or equal ground to the Intelligence on the catwalks.
BLU CP2: The Village
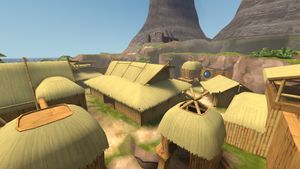
This walled village appears to have once been the home to a group of tribal natives. Many of the buildings have been re-purposed as supply and power centers for BLU operations. The Intelligence sits in the basement of a large building in the center of the village.
- Entrances from the volcano: From the robotics facility, a branching pathway on the third level of the walkway system leads outside to two rope bridges overlooking the canyon. The bridge along the left pathway connects to the village at a lower elevation, increasing the risk of ambush and flanking from attacks on the upper walks.
- Entrances from the temple: After leaving the spawn room, players are immediately focused into one of two small corridors which give way to a much more open, outdoor area filled with numerous objects to block sight-lines and set up ambushes. This larger area is then funneled under the rock formations outside the village, becoming increasingly narrow as they approach the village wall. Progress to the Intelligence is tight and difficult, with spawn rooms located right next to both entrances.
- Entrances from the submarine bay: The path splits between a higher route that pushes the team farther away from the village, and a lower, more direct route which places the team on a low ground dangerously open to attack. Both paths empty into a crowded open area, with covered positions available for both teams. Players can then, yet again, choose between a direct-yet-dangerous route leading into the center of the village, or a side route following the village barricade which places the team farther away, yet closer to enemy respawn rooms.
BLU Ship
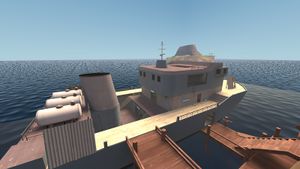
The last line of defense for BLU operations, this large barge located outside the old native village contains minimal munitions and technology, but is placed in a region so environmentally diverse that a counter-attack is still plausible and capable of succeeding.
- Direction of attack: Both exits from the village empty players into a rocky, coastal area. Rocks, trees and other environmental barriers greatly reduce visibility, and funnel teammates into almost straight paths towards the barge. The water under the barge can drown players quickly, making progress onto the ship a necessity. The barge itself contains various entrances, and a great deal of open space on the bow and main deck. The Intelligence sits in the center of the cargo hold, a highly enclosed room filled with tight corners, secondary walls, jutting computers and plenty of spaces for enemies to set up ironclad defenses.
- Pattern of defense: The barge itself provides minimal cover from an aggressive attack pattern, making offense the only practical defense on this final stage. The battle from the barge up to the coast is an uphill one, though the various pieces of cover and environmental obstacles almost casually focus players down one of the two straight paths into the village. As the entrances to the village are very close to the spawn rooms, control of the coast is key to maintaining the Intelligence.
RED Lair
This secluded, highly guarded section of RED's operation clearly shows their plans and goals far beyond the conflict over this island. A highly condensed, tightly compartmentalized, and cleverly constructed mass of tunnels and catwalks guards the last line of defense for RED's global intentions.
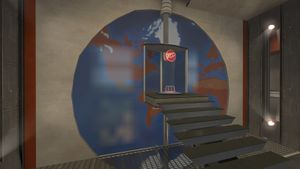
- Direction of attack: Located at the bottom of the robotic facility's main chamber, both pathways out of the volcano lead to a very small, vertically-inclined chamber. From here, players can choose to either scale the forklifts and take to the catwalks, or follow a more direct, yet highly corner-based, path towards the final chamber. The final room contains yet another vertically-inclined chamber, with numerous walls and awkward ramp placements making it easy for enemies to hide nests or hold choke points. The Intelligence rests in front of a rotating globe against the nearest wall as you round the corner, up a staircase and in an easily-defensible position.
- Pattern of defense: The vertical nature of the last two rooms of the cycle provide enough creative mobility for a reasonable defense pattern to be drawn up. The catwalks provide just enough unobstructed sight-lines so that teammates can assess the direction the enemy is moving in and have time and a means to intercept them. Tight corners both in the first room's catwalks and in the lower path to the final room allow for a quick turnaround of control in the event that dominance over the battlefield shifts one way or another.
Strategy
- One of the keys with Meridian is understanding just how a Territorial control map works and which parts of Meridian are currently in play. At the start of each round you will emerge from your spawn area and will be connected to one of the enemy territories detailed above. A key to good play is working this out quickly and getting your assault underway.
- There is always more than one route to the opposition's control point.
- As with all other maps familiarize yourself with all these various routes. Micro-management of forces is key.
- In almost complete contrast with the length of stages in Hydro, Meridian's paths (for the most part) are short, angular and consist of tight corners mixed with long, straight hallways. Combat moves very quickly, and focus shifts from defense to offense almost instantly. Keeping an aggressive play style and knowing where your enemy is moving and allocating forces is key to success.
- Paths at the end of the stages, particularly in the temple and submarine bay, often open up very close to the Intelligence and provide little opportunity for players to catch their enemy or stall a rapidly moving force. In these instances, an ironclad defense is a necessity before any honest attempt at offense can be made.
- With the game moving quickly, intelligence and communication are everything. Keeping in touch with fellow players, knowing where enemies are moving, and particularly being aware of your enemy's proximity to the Intelligence will make all the difference in prolonged matches.
Changelog
- Fixed problem with invisible robot booth props.
- Improved several older props.
- Fixed a few other visual problems.
- Fixed a bug where the "take it home" radar would point to the wrong area.
- Changed HUD to just have the flag radars, without the erroneous score information.
Beta 5:
- Reworked interior of the boat (BLU final defense round). Main blue spawn is now at the top level, with the Intelligence being in the hold of the ship.
- Improved temple textures.
- Intelligence return timer increased from 30 seconds to 40.
- Spawn times start slightly lower, but their reduction over the course of a round is much less. Spawn times are no longer instant at the end of a round.
Trivia
- On close inspection, you can see the head of the Heavy, the head of the Engineer, and a carved Wrench sitting on the top of the totem pole located in-between the village and the submarine dock.
Gallery
| ||||||||||||||||||||||||||||||||||||||||||||||||

