Difference between revisions of "Hydro/zh-hant"
< Hydro
(Created page with "{{DISPLAYTITLE:Hydro/水壩}} {{trans}} {{Featured article tag}} {{Map infobox | game-type=Territorial Control | map-image=Hydro_Dam.png | file-name=tc_hydro | map-environment ...") |
(No difference)
|
Revision as of 10:25, 2 August 2012
| 這頁目前正處於被翻譯至繁體中文的狀態。 如果你會說繁體中文,請在討論頁中留下你的大名,或透過查看歷史紀錄跟有編輯這頁的用戶聯繫。 |
| Hydro | |
|---|---|
| |
| 資訊 | |
| 開發者: | 未知 |
| 地圖資料 | |
| 所處地區: | 工業區 |
| 環境設定: | 白天、晴朗 |
| 特定致死因素: | 無底坑洞 |
| 地圖相片 | |
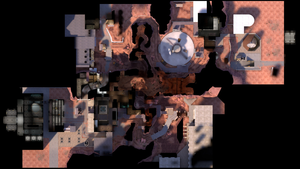
| 地圖的俯瞰圖 | |
| “ | 控制點不會自己佔領自己!快點給我過去那裡!
點擊試聽
— 工程師
|
” |
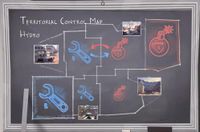
Hydro(水壩)是一張地區控制模式地圖,也是遊戲剛推出時即有的六張地圖之一。到目前為止,或許是因為模式的複雜度和設計難度,Hydro 是唯一一張模式為地區控制模式的地圖。
這張地圖的隊伍目標是佔領地圖所有的「地區」。每一個回合電腦會選擇兩塊地區,並讓兩隊開始進行控制點的爭奪戰,隊伍必須要佔領敵方的 控制點,同時防止己方的控制點被敵方佔領。當其中一個隊伍佔領了敵方控制點時,下一回合將會在不同的地區開始,而隊伍能獲得佔領地區的擁有權。當某一隊伍佔領了四個地區,使得弱勢方只剩下一個地區時,攻擊方必須要在時間限制內佔領敵方的最後一個地區,而防守方則必須要不計代價地防守。如果主基地成功被佔領,攻擊方就能獲勝。當下一場比賽開始時,地區的擁有權將重置,電腦會再次選擇兩塊地區讓玩家們對戰。
在地區控制模式的任一回合(除了紅/藍隊主基地攻防戰),如果在時間限制內沒有任何隊伍佔領控制點,回合將會強制進行t驟死戰模式。
內容
介紹影片
細部介紹
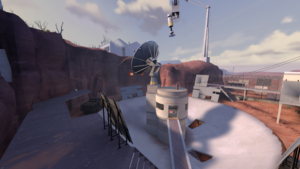
紅隊區域 1:大型雷達站
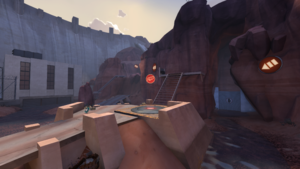
這地區有一個大型的雷達,控制點位於雷達的正中央。
- 來自水壩的路徑:雷達站和水壩之間是由位於地面的隧道和地面路徑連接而成的。
- 來自發電廠的路徑:發電廠和水壩之間,是由類似洞窟的岩石路徑連接的。這條路徑在中間會分成兩半,中間有一個大洞,The turbine room is connected to the radar dish by a large suspended rock formation. This formation is split into two paths with a hole in the middle, the paths splitting left and right at the radar dish end, and connecting to the turbine room at the other end.
- 來自倉庫的路徑:There are three paths from the radar dish to the bridge area. The first is the large path on the right hand side of the map. The other two paths are to the left of the main path, one of which goes off to the left (either down to the ground or onto a catwalk), while the middle one connects directly to the raised rocky ledge of the bridge area.
- Under the stairs: All of the stairs in the radar dish area can be shot through, and are a common place for Sentry Guns.
藍隊區域 1:發電廠
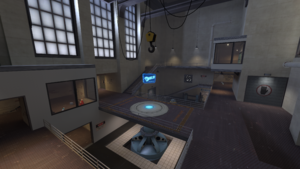
控制點位於發電廠內部,渦輪機房裡的一條鐵橋上。
- 來自水壩的路徑:The flood area connects to the turbine room via three paths. The two left paths connect to an open area outside of the turbine room, which in turn allows access to either the lower area of the building, or the room with the large pipes. The third path is on the right, and goes from the flooded area through a small tunnel and meets with the lower left path.
- 來自倉庫的路徑:The turbine room is connected to the bridge area by a main road, sewer tunnels, and the ventilation system. The main road leads to an area outside of the turbine room that allows access either to the lower or middle levels of the building. The sewers connect the bridge area to the lower area of the turbine building, while the vents connect the roof of the bridge area to the room full of pipes next to the main building.
- 來自發電廠的路徑:The radar dish connects to the turbine room via a rock formation. Once inside the building, the exits lead either onto the cat walk, or follow the stairs down to the middle of the room.
- 工作室:There is a small windowed room that is next to the bridge. This room is often used as a hiding place for Engineers as it allows them to see attackers without being shot at.
紅隊區域 2:水壩
水壩區域的控制點位於大型淺水坑中間的一個混凝土高台上。
- 來自水壩的路徑:The bridge area connects to the flood area via an upper and lower path. Both paths converge in a cavern that then splits into an upper, lower, and sewer path. The upper path connects to the ledge overlooking the bridge. The lower path follows the water along the ground under the ledge. The sewer path exits in front of a truck just next to the bridge.
- 來自雷達站的路徑:The flood area is connected to the radar dish by a pair of small tunnels. One tunnel comes out near the flood area spawn room, while the other comes out behind the flood area point.
- 來自發電廠的路徑:The turbine room connects to the flood area via three paths. One path leads from the ground level and to the right, and eventually connects to the long stairs in the flood area. The second path follows the ground around to the left, and can either stay at ground level, or connect to the top of the long stairs. The final path branches off the second path, and leads down a small tunnel to the water area behind the flood area capture point.
- 二樓的窗戶區域:The flood area spawn room has a second floor that Snipers often use as a nest.
藍隊區域 2:倉庫
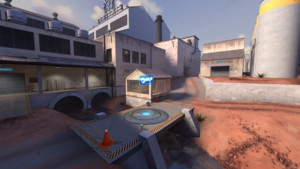
這地區的控制點位於倉庫大型建築外的一條混凝土橋上方。
- 來自雷達站的路徑:The bridge area is connected to the radar dish via three paths. The main path hugs the left side of the map. The second path connects the bridge area ledge to the middle of the radar dish area, while the right path comes out on the ledge on the radar dish side.
- 來自水壩的路徑:The flood area connects to the bridge area by two paths. The upper path connects exits above the flood area capture point, while the lower path comes out in the water behind the flood area capture point.
- 來自發電廠的路徑:The bridge area connects to the turbine room via the road, the sewers, and the vents. The road leads to a small area that connects to the middle and lower levels of the turbine room. The sewers lead to the lower level of the turbine room, and the vents connect to the room full of pipes adjacent to the main building.
藍隊&紅隊主基地
參見
請查看社群 Hydro 策略。
佔點所需時間
| 控制點模式 | 玩家人數 | 秒 | ||
|---|---|---|---|---|
| 中間四個控制點 | ×1 |
| ||
| ×2 |
| |||
| ×3 |
| |||
| ×4 |
| |||
| 最終控制點 | ×1 |
| ||
| ×2 |
| |||
| ×3 |
| |||
| ×4 |
|
相關成就
 一般成就
一般成就
|
|
更新紀錄
- 修正玩家在地圖 Hydro 行動時會卡在某些地方的問題。
- 修正一些關於地圖 Dustbowl 和 Hydro 在回合中段使伺服器變得沒有玩家的問題。
- 修正一個可以讓玩家跳到地圖外的漏洞。
- 為正開始要佔點的隊伍新增重生時間減少的優勢。這優勢會在佔領進度歸零時重置。
- 根據社群的回報而修正了許多不可建造建築或是模型重疊的地方。
- 移除因回合剩餘時間而減少重生所需時間的程式運算法。
錯誤
- The boom barrier at the BLU Base entrance is solid when the Power Plant control point is owned by BLU, but not when it is owned by RED and the BLU Base is under attack.
相關細節
- 雷達站的大型雷達,是參考真實世界的Template:W電波望遠鏡的樣子製成的。
- Hydro 在遊戲《百戰天蟲:重裝上陣》裡,是可當作戰場的要塞之一。
畫廊
參見

