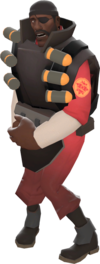
 | “You are so small! Is funny to me!”
This article is a stub. As such, it is not complete. You can help Team Fortress Wiki by expanding it.
|
The Demoman, while an excellent ranged fighter, lacks an efficient means of self defense at close range.
General
Weapon Specific
A list of useful tidbits about the Demoman's tools, and how to counter them.
Primary Weapons

Grenade Launcher
|
- The Grenade Launcher has a lengthy reload time. Attack the Demoman when he's empty.
- A Demoman can arc and bounce his Grenades, so don't rely on cover when fighting a Demoman using his Grenade Launcher.
- When firing the launcher and hitting at close range, the Demoman will likely get hit by his own grenade's explosion, dealing splash damage to himself. Use this to your advantage.
|

Loch-n-Load
|
- The Loch 'n' Load deals additional self-damage to the Demoman. Even if you die at close range, there is a chance of the Demoman severely damaging or killing himself.
- The Loch 'n' Load has a small clipsize. Dodge the two shots, and then go in for the kill.
|
Secondary Weapons

Stickybomb Launcher
|
- The Stickybomb Launcher is more difficult to use at close range due to the lengthy arming time.
- The Stickybomb Launcher has a lengthy reload time. Attack the Demoman when he's empty.
|

Scottish Resistance
|
- The Scottish Resistance is not suited for direct combat. Pressure the Demoman, but be wary of any traps he may have set.
|

Chargin' Targe
|
- The Targe gives the Demoman blast and fire resistance. Use a weapon with a different form of attack.
- The Charge effect can be cancelled or delayed by using weapons with Stun, Slowdown and/or Knockback.
|
Melee Weapons
 
Bottle / Frying Pan
|
- Whenever you close the distance between you and a Demoman, he might be evoked to pull out this weapon. Since his speed is below average, use this to your advantage when he is chasing you down with this weapon.
|
 
Eyelander / Horseless Headless Horsemann's Headtaker
|
- Demoman wielding this melee weapon would like nothing more than taking your head, so they will have an urge to try whatever they can to receive one. When a Demoman pulls out this weapon, avoid fighting him with melee weapons since you may add to his head collection.
|

Scotsman's Skullcutter
|
- This weapon makes the Demoman much slower, making him an easier target.
|

Claidheamh Mòr
|
- Because this weapon's only advantage is increased charge duration, once he charges, he is only a little stronger than an Eyelander Demoman with no heads.
|

Pain Train
|
- The Demoman has a 10% vulnerability to bullets with the Pain Train equipped. Switch to a weapon that fires bullets for extra damage.
|

Ullapool Caber
|
- This weapon explodes on contact with the world. Try to make the Demoman miss and hit a wall. He will either die or severely injure himself.
- This weapon can easily take out or severely damage most classes, if you encounter a Demoman attempting to use this weapon against you, try to avoid getting in melee range.
- A Demoman using a Chargin' Targe in conjunction with this weapon can close the distance between you quickly and attack you with a guaranteed critical, beware of standing in a straight line to a Demoman using this set-up.
|
Item Set
See also


