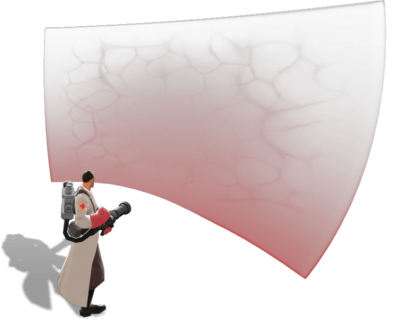
This article is about Community Projectile Shield strategy.
Medic
- Be wary of your surroundings, especially when in a defensive posture against Soldier and Demo Robots.
- Doorways can be effective places to defend with the Projectile Shield, since you can have an easier time preventing Robots getting past you and be safer from splash damage.
- Blocking critical-boosted Robots, most notably Soldier or Demoman Robots, especially spamming giants, is essential to your team's survival.
- Pay attention to when these spawn and have a Projectile Shield ready, you may need more than one charge to take down the really big ones.
- If caught without a charge, hold back as those Robots advance while you find a teammate in a safe location, possibly run back towards Spawn, especially if you know your Pockets are coming from there.
- The Projectile Shield can be used as a fall-back option if your team cannot handle the robots, or if most of your team is down, use it to save your ÜberCharge.
- Or use your Invuln ÜberCharge to save your Energy charge, often your well-timed Projectile Shield can contribute much more than an ÜberCharge.
- As patient damage can charge the Projectile Shield, heal classes in situations where they would either deal more damage or hit more enemies at once.
- Don't get too heavily invested on charging the Projectile Shield, however.
- Be wary of temptations to charge Robots just to kill them with your Projectile Shield, you risk being too far forward without support and often flanked when the charge is exhausted.
- Lighting up a Vaccinator resistance when you charge Robots with the Projectile Shield can protect you and your Pocket if they can fire through.
- Reviving dead teammates's reanimators will help you gain Projectile Shield charge, despite not able to gain Übercharge while doing the same.
- Using Übercharge on a dead ally's reanimators speeds up reviving immensely, which also charges Projectile Shield quickly at the same time.
- Deploying Vaccinator's resistance bubbles will instead instantly add a huge amount of charge for your Projectile Shield; The amount of charge depends on the health required for a reanimator.
- With these in mind, you can potentially have infinite Projectile Shields if you have allies who die often. It can also provide the benefit of them having instant respawns or infinite ammo. [1]
- The Projectile Shield moves closer to you if you look up or look down. You can exploit this to bodyblock giant robots without any threat of them firing back.
- Closing the Projectile Shield towards yourself while moving forward can also stop projectiles from passing through the Shield.
- A Friendly Engineer's Wrench hits that are aimed towards his buildings can be nullified by the Projectile Shield, exercise caution when trying to defend your Engineer and his Sentry Gun.
- Medic Robots cannot heal their patient if the human Projectile Shield is between them: this may be useful to temporarily make their patient lose an Übercharge's effects or grant vulnerability to a Giant Medic's patient.
- Note this also affects other Medics on your own team and also cause teammates being unable to check the health of either giant robots or robots with passive health regeneration.
- Since the Projectile Shield charges based on healing, the Quick-Fix will help you in charging the Projectile Shield quickly.
- Using the Quick-Fix's Megaheal will refill your Projectile Shield's charge even quicker.
- Standing on slanted areas allow splash damage to go under your Projectile Shield and damage you and your teammates. A form of rapid communication like voice chat or binds can help in letting them know to get away from the slope.
- Because teammates play nearer to you as a Projectile Shield Medic, practice Überring two or three teammates simultaneously.
- Effectiveness of the Kritzkrieg charge is enhanced by Crit-boosted teammates shooting from safety behind the Projectile Shield.
- The Medi Gun's Invuln ÜberCharge is usually redundant behind the Projectile Shield, pop it before or after you use your Projectile Shield.
- After the Pybro, the Projectile Shield is your best Spy checker.
- If a Super Scout is running past the team's defenses, slow it down with the Projectile Shield whenever possible.
Other classes
- Understand what your Medic needs to build Energy; keep a practical safe distance while building, but close to striking range for the activation.
- With a good Projectile Shield Medic, the Heavy's position is in the direct path of the Robots; pick a place to stand where you would not be overrun before the charge runs out.
- Soldier's splash damage hitting multiple robots recharges the Projectile Shield much faster than any direct rocket hit on a single robot.
- Understand what you need to do for both you and the Medic to survive the expiration.
- Watch out for the expiration, be in reach of cover.
- If a Medic is attempting to revive you and is using a Vaccinator, consider letting him revive you before you decline a revive, as he could be wanting to use an Übercharge on you in order to recharge his Projectile Shield.
- Standing on slopes does not let the Projectile Shield entirely shield you and your Medic from damage as it leaves an opening below which invites splash damage. Getting closer to your Medic or using a form of rapid communication such as voice chat or binds can draw him away from the slope.
Reference
