Difference between revisions of "Control point (objective)"
m (→Offense) |
|||
| (26 intermediate revisions by 10 users not shown) | |||
| Line 1: | Line 1: | ||
| − | [[ | + | {{Needimage|Image of the [[Demolition]] and [[Megalo]] control points. Also add them to their respective articles}} |
| + | [[File:Controlpoint.png|right|thumb|A [[RED]]-owned Control Point.|400px]] | ||
| − | {{ | + | {{Other uses|this=the game objective|for=the game mode|Control Point (game mode)}} |
| − | {{Quotation|'''The | + | {{Quotation|'''The Medic'''|Standing near ze point does nussing. Get '''''ON''''' ze point, dummkopf!|sound=Medic standonthepoint05.wav}} |
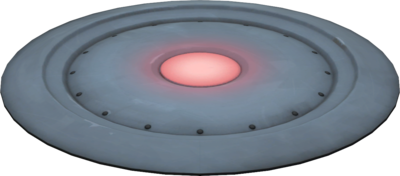
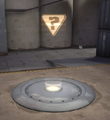
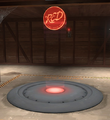
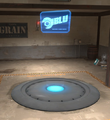
| − | '''Control Points''' (also known as '''capture points''' or simply '''points''') are used as the main objective in [[Control Point (game mode)|Control Point]], [[Territorial Control]], and [[King of the Hill]] maps, | + | '''Control Points''' (also known as '''capture points''' or simply '''points''') are used as the main objective in [[Control Point (game mode)|Control Point]], [[Territorial Control]], and [[King of the Hill]] maps, a secondary objective in [[Arena]] and [[Versus Saxton Hale]] maps, and a similar variant appears in [[Payload]] maps. In appearance, they are circular metallic platforms with a team-colored light in the center with their team logo hologrammed above it (neutral points have a white light and a question mark above them). |
== Gameplay == | == Gameplay == | ||
| Line 14: | Line 15: | ||
<gallery> | <gallery> | ||
File:CP Neutral.png|'''Neutral:''' The Control Point can be taken by either team (usually the central point in a standard CP map). | File:CP Neutral.png|'''Neutral:''' The Control Point can be taken by either team (usually the central point in a standard CP map). | ||
| − | File:CP Captured RED.png|'''Captured:''' The Control Point is currently owned by the RED team but can be retaken by the BLU team. | + | File:CP Captured RED.png|'''Captured:''' The Control Point is currently owned by the RED team, but can be retaken by the BLU team. |
File:CP Locked RED.png|'''Locked:''' The Control Point is currently owned by the RED team and cannot be retaken by the BLU team. | File:CP Locked RED.png|'''Locked:''' The Control Point is currently owned by the RED team and cannot be retaken by the BLU team. | ||
</gallery> | </gallery> | ||
=== Offense === | === Offense === | ||
| − | Control Points are [[Capping (competitive)|captured]] by standing on top of them. The speed at which a Control Point is captured depends on how many players from the capturing team are present on the point: two BLU players capturing a RED point | + | Control Points are [[Capping (competitive)|captured]] by standing on top of them. The speed at which a Control Point is captured depends on how many players from the capturing team are present on the point: two BLU players capturing a RED point capture that point faster than only one BLU player would. [[Scout]]s count as two players, as do [[Soldier]]s and [[Demoman|Demomen]] wielding the [[Pain Train]], and [[Versus Saxton Hale#Saxton Hale|Saxton Hale]] counts as three players. The exact time it takes for a control point to be captured is determined via a [[w:Harmonic number|harmonic number]], which effectively means that stacking more players on the control point has diminishing returns; two players capture a point 50% faster, three players increase that rate by another 33%, a fourth player only adds an extra 25% to the progress for a total of 108% (or slightly over 2 times) quicker capture time (see [[Control Point timing]] for more details). |
| + | |||
| + | There is a limit on how fast a Control Point can be captured for each map. A [[Spy]] is allowed to capture a point while disguised as a friendly player but do not gain the aforementioned capture rate buffs from disguises. Likewise, a Spy cannot capture his own team's control point when disguised as an enemy. | ||
=== Defense === | === Defense === | ||
| Line 25: | Line 28: | ||
=== Reverting a capture === | === Reverting a capture === | ||
| − | When a Control Point is neutral and both teams are trying to capture it, captures can be '''reverted'''. If a team begins, but does not finish, to capture a neutral point and then is driven off, when the other team begins to capture that point, they | + | When a Control Point is neutral and both teams are trying to capture it, captures can be '''reverted'''. If a team begins, but does not finish, to capture a neutral point and then is driven off, when the other team begins to capture that point, they first have to "revert" the progress that the first team made before they can begin to make progress of their own. The revert rate increases in speed with more players of the second team standing on the point. |
=== Limitations === | === Limitations === | ||
* [[Disguise]]d [[Spy|Spies]] cannot block a capture if they are disguised as the team capturing the point, and cannot capture a point if they are disguised as the enemy team. | * [[Disguise]]d [[Spy|Spies]] cannot block a capture if they are disguised as the team capturing the point, and cannot capture a point if they are disguised as the enemy team. | ||
* [[Cloak]]ed Spies can not defend or capture a Control Point. | * [[Cloak]]ed Spies can not defend or capture a Control Point. | ||
| − | * [[ÜberCharge]]d players cannot capture points, but can block enemy captures. Note that [[Kritzkrieg]] and [[Vaccinator]] ÜberCharged players can capture points. | + | * [[ÜberCharge]]d players cannot capture points, but can block enemy captures. Note that [[Quick-Fix]] ÜberCharged players can neither capture or block points; [[Kritzkrieg]] and [[Vaccinator]] ÜberCharged players can still capture and defend points. |
* Scouts under the effects of [[Bonk! Atomic Punch]] can neither block enemy captures nor capture points themselves. | * Scouts under the effects of [[Bonk! Atomic Punch]] can neither block enemy captures nor capture points themselves. | ||
| − | * The [[Rocket Jumper]] and [[Sticky Jumper]] do not block point capture, they only prevent the wielder from carrying the intelligence. | + | * The [[Rocket Jumper]] and [[Sticky Jumper]] do not block point capture, they only prevent the wielder from carrying the [[Capture the Flag#Intelligence|intelligence]]. |
== Gallery == | == Gallery == | ||
<gallery perrow=3> | <gallery perrow=3> | ||
| − | + | File:Control Point Neutral.png|A neutral Control Point on [[Granary (Control Point)|Granary]]. | |
| − | + | File:Control Point RED.png|A RED-owned Control Point on Granary. | |
| − | + | File:Control Point BLU.png|A BLU-owned Control Point on Granary. | |
| + | File:Mannhole_Control_point.png|The Control point on [[Mannhole]]. | ||
</gallery> | </gallery> | ||
== Related achievements == | == Related achievements == | ||
| − | + | === {{Achiev type link|general}} === | |
| − | === | ||
{{Achievement table | {{Achievement table | ||
| 1 = {{Show achievement|General|Impenetrable Defense}} | | 1 = {{Show achievement|General|Impenetrable Defense}} | ||
| Line 50: | Line 53: | ||
}} | }} | ||
| − | ==={{Class link|Scout}}=== | + | |
| + | === {{Class link|Scout}} === | ||
{{Achievement table | {{Achievement table | ||
| 1 = {{Show achievement|Scout|Block the Plate}} | | 1 = {{Show achievement|Scout|Block the Plate}} | ||
| Line 60: | Line 64: | ||
}} | }} | ||
| − | ==={{Class link|Soldier}}=== | + | |
| + | === {{Class link|Soldier}} === | ||
{{Achievement table | {{Achievement table | ||
| 1 = {{Show achievement|Soldier|Hamburger Hill}} | | 1 = {{Show achievement|Soldier|Hamburger Hill}} | ||
}} | }} | ||
| − | ==={{Class link|Pyro}}=== | + | |
| + | === {{Class link|Pyro}} === | ||
{{Achievement table | {{Achievement table | ||
| 1 = {{Show achievement|Pyro|Controlled Burn}} | | 1 = {{Show achievement|Pyro|Controlled Burn}} | ||
}} | }} | ||
| − | ==={{Class link|Demoman}}=== | + | |
| + | === {{Class link|Demoman}} === | ||
{{Achievement table | {{Achievement table | ||
| 1 = {{Show achievement|Demoman|The High Road}} | | 1 = {{Show achievement|Demoman|The High Road}} | ||
}} | }} | ||
| − | ==={{Class link|Heavy}}=== | + | |
| + | === {{Class link|Heavy}} === | ||
{{Achievement table | {{Achievement table | ||
| 1 = {{Show achievement|Heavy|Gorky Parked}} | | 1 = {{Show achievement|Heavy|Gorky Parked}} | ||
| Line 81: | Line 89: | ||
}} | }} | ||
| − | ==={{Class link|Engineer}}=== | + | |
| + | === {{Class link|Engineer}} === | ||
{{Achievement table | {{Achievement table | ||
| 1 = {{Show achievement|Engineer|No Man's Land}} | | 1 = {{Show achievement|Engineer|No Man's Land}} | ||
}} | }} | ||
| − | ==={{Class link|Medic}}=== | + | |
| + | === {{Class link|Medic}} === | ||
{{Achievement table | {{Achievement table | ||
| 1 = {{Show achievement|Medic|Preventive medicine}} | | 1 = {{Show achievement|Medic|Preventive medicine}} | ||
| Line 92: | Line 102: | ||
}} | }} | ||
| − | ==={{Class link|Sniper}}=== | + | |
| + | === {{Class link|Sniper}} === | ||
{{Achievement table | {{Achievement table | ||
| 1 = {{Show achievement|Sniper|Not a Crazed Gunman, Dad}} | | 1 = {{Show achievement|Sniper|Not a Crazed Gunman, Dad}} | ||
}} | }} | ||
| − | ==={{Class link|Spy}}=== | + | |
| + | === {{Class link|Spy}} === | ||
{{Achievement table | {{Achievement table | ||
| 1 = {{Show achievement|Spy|on her majesty's secret surface}} | | 1 = {{Show achievement|Spy|on her majesty's secret surface}} | ||
| Line 104: | Line 116: | ||
}} | }} | ||
| − | === | + | |
| + | === {{Achiev type link|foundry}} === | ||
{{Achievement table | {{Achievement table | ||
| 1 = {{Show achievement|Foundry|Real Steal}} | | 1 = {{Show achievement|Foundry|Real Steal}} | ||
| Line 113: | Line 126: | ||
}} | }} | ||
| − | === | + | |
| + | === {{Achiev type link|powerhouse}} === | ||
{{Achievement table | {{Achievement table | ||
| 1 = {{Show achievement|Powerhouse|Balance Of Power}} | | 1 = {{Show achievement|Powerhouse|Balance Of Power}} | ||
| Line 137: | Line 151: | ||
* Fixed being able to capture Control Points during [[setup time]]. | * Fixed being able to capture Control Points during [[setup time]]. | ||
| − | ==Trivia== | + | == Trivia == |
* Despite not contributing to the progress of capturing a point, ÜberCharged players and Disguised Spies still gain credit for capping the Control Point if they are on it when the capture completes. | * Despite not contributing to the progress of capturing a point, ÜberCharged players and Disguised Spies still gain credit for capping the Control Point if they are on it when the capture completes. | ||
| Line 144: | Line 158: | ||
* [[Payload#Carts|Carts]], the objective in [[Payload]] games. | * [[Payload#Carts|Carts]], the objective in [[Payload]] games. | ||
* [[Control point timing]] | * [[Control point timing]] | ||
| − | * The [[vdc:trigger_capture_area|trigger_capture_area]] and [[vdc:team_control_point|team_control_point]] | + | * The [[vdc:trigger_capture_area|trigger_capture_area]] and [[vdc:team_control_point|team_control_point]] entities on the [[vdc:Main_Page|VDC]]. |
[[Category:Gameplay]] | [[Category:Gameplay]] | ||
Latest revision as of 16:42, 27 October 2025
| “What are you lookin' at?!” This page or section would benefit from the addition of one or more images. Please add a suitable image, then remove this notice. The specific instructions are: "Image of the Demolition and Megalo control points. Also add them to their respective articles" |

| “ | Standing near ze point does nussing. Get ON ze point, dummkopf!
Click to listen
— The Medic
|
” |
Control Points (also known as capture points or simply points) are used as the main objective in Control Point, Territorial Control, and King of the Hill maps, a secondary objective in Arena and Versus Saxton Hale maps, and a similar variant appears in Payload maps. In appearance, they are circular metallic platforms with a team-colored light in the center with their team logo hologrammed above it (neutral points have a white light and a question mark above them).
Gameplay
There are three statuses for a Control Point:
Offense
Control Points are captured by standing on top of them. The speed at which a Control Point is captured depends on how many players from the capturing team are present on the point: two BLU players capturing a RED point capture that point faster than only one BLU player would. Scouts count as two players, as do Soldiers and Demomen wielding the Pain Train, and Saxton Hale counts as three players. The exact time it takes for a control point to be captured is determined via a harmonic number, which effectively means that stacking more players on the control point has diminishing returns; two players capture a point 50% faster, three players increase that rate by another 33%, a fourth player only adds an extra 25% to the progress for a total of 108% (or slightly over 2 times) quicker capture time (see Control Point timing for more details).
There is a limit on how fast a Control Point can be captured for each map. A Spy is allowed to capture a point while disguised as a friendly player but do not gain the aforementioned capture rate buffs from disguises. Likewise, a Spy cannot capture his own team's control point when disguised as an enemy.
Defense
If players from both teams are on the same, unlocked Control Point, that point is said to be contested, which means no progress is made toward the point changing team control. When players from the offensive team are removed from the point, all of their progress is lost gradually over time, not immediately.
Reverting a capture
When a Control Point is neutral and both teams are trying to capture it, captures can be reverted. If a team begins, but does not finish, to capture a neutral point and then is driven off, when the other team begins to capture that point, they first have to "revert" the progress that the first team made before they can begin to make progress of their own. The revert rate increases in speed with more players of the second team standing on the point.
Limitations
- Disguised Spies cannot block a capture if they are disguised as the team capturing the point, and cannot capture a point if they are disguised as the enemy team.
- Cloaked Spies can not defend or capture a Control Point.
- ÜberCharged players cannot capture points, but can block enemy captures. Note that Quick-Fix ÜberCharged players can neither capture or block points; Kritzkrieg and Vaccinator ÜberCharged players can still capture and defend points.
- Scouts under the effects of Bonk! Atomic Punch can neither block enemy captures nor capture points themselves.
- The Rocket Jumper and Sticky Jumper do not block point capture, they only prevent the wielder from carrying the intelligence.
Gallery
Related achievements
 General achievements
|
|
 Scout
Scout
|
|
 Soldier
|
 Pyro
Pyro
|
 Demoman
|
 Heavy
Heavy
|
|
 Engineer
|
 Medic
Medic
|
|
 Sniper
|
 Spy
Spy
|
|
 Foundry achievements
|
|
 Powerhouse achievements
|
|
Update history
April 29, 2008 Patch (Gold Rush Update)
- Spies disguised as their own team can now capture Control Points
- Fixed rare client crash on level change during Control Point capturing
- Fixed a case where capturing a point in Overtime would end the round before time could be added
- Fixed missing materials in the Control Point HUD on attack/defend maps
December 17, 2015 Patch (Tough Break Update)
- Players can no longer capture objectives while under the effects of Quick-Fix ÜberCharge.
- Fixed being able to capture Control Points during setup time.
Trivia
- Despite not contributing to the progress of capturing a point, ÜberCharged players and Disguised Spies still gain credit for capping the Control Point if they are on it when the capture completes.
See also
- Intelligence, the objective in Capture the Flag games.
- Carts, the objective in Payload games.
- Control point timing
- The trigger_capture_area and team_control_point entities on the VDC.


