Mechanics/ko
| 이 페이지는 한국어로 번역 중입니다. 한국어를 능숙하게 하신다면 토론 페이지에 글을 남기거나 문서 역사를 참고하여 문서 번역에 참여한 번역가들과 이를 상의하시기 바랍니다. |
| “ | 이렇게 하는것이다, 제군들!
클릭하시면 들을 수 있습니다
— 솔저가 승리하는 법을 가르쳐주며.
|
” |
팀포트리스의 구조는 규칙과 플레이어들의 능력, 서버, 등을 정의 합니다. 이구조를 아셔야지 메끄럽고 원활한 팀포트리스 플레이가 가능합니다.
목차
엔진
팀포트리스2는 오렌지박스버젼의 소스 엔진을 사용합니다. 컴퓨터, mac, 엑스박스 PS3에서 돌아가도록 만들어졌습니다. 오렌지 박스 엔진은 예전 소스 엔진에 하드웨어 렌더링과 부드러운 표현과 갖가지 것들을 가미한 엔진입니다. 팀포트리스2는 24명보다 적은 인원의 환경에서 가장 효율적으로 플레이할수있게 만들어져 있습니다.(Xbox 360에서 18명, PS3에서 16명). 물론 서버에서 32명의 인원을 원할수도 있습니다.(PC/Mac에서만 가능). 팀포트리스2의 서버는 콘솔 명령어에 의해서 마음대로 바뀔수있습니다.
클래스
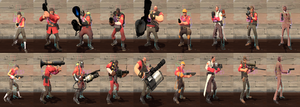
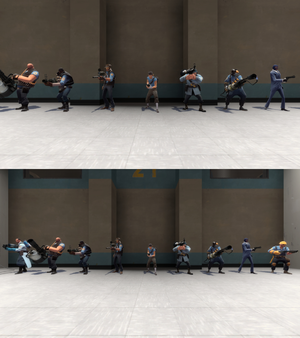
팀포트리스2에는 9가지의 사용가능한 클래스가 있습니다. 크게 "공격", "방어", "지원"으로 나뉘게 되는데 이것들에 게임에서 가장 큰 영향을 미칩니다. 클래스들의 특성과 스텟과 능력은 로드아웃에 따라 크게 다릅니다.
 스카웃: 공격 클래스로써 133.33%의 이동 속도와 125 체력을 가지고 있으며 히트 앤 런 전략과 점령지역 장악에 특화 되어있습니다. 더블 점프가 가능하며 점령 지점 장악과 (수레밀기)에서 두사람의 몫을 해낼수 있는 클래스입니다.
 파이로: 공격클래스로써 100%의 이동속도와 175의 체력을 가지고있는 초근접 케릭터이고 팀을 지원할수 있습니다. 적을 불태울 수 있고 압축 공기 블래스트을 사용해 아군의 화상을 치료하거나 적이나 적의 포탄을 날려버릴 수 있습니다.
 데모맨: 93.33%의 이동속도를 가진 방어형 클래스로써 175의 체력과 지역 방어와 데미지를 주는것을 전문으로 하는 클래스 입니다. 점착점프를 할수있습니다.
 헤비: 80%의 이동속도를 가진 방어형 클래스로써 300의 체력과 9개의 클래스중의 최고의 화력을 보여줍니다
 엔지니어: 100%의 의동속도를 가진 방어형 클래스로써 125의 체력과 지역 방어에 가장 중심적인 역활을 하고 팀원을 지원해주는 클래스입니다. 건물을 부수고, 만들고, 옮기고, 업그레이드 시키고, 조종할 수 있습니다
 메딕: 106.67%의 이동속도를 가진 지원형 캐릭터로써 150의 체력과 팀원의 명줄을 길게 해주는데 주력을하는 클래스입니다. 자가치료 능력이 있고 힐을 주다보면 우버차지를 사용할수 있습니다.
게임 코드에는 시민이라는 클래스가 존재한다고 나와있지만 어떠한 공식적인 게임모드에서도 나오지 않았습니다.
전투
전투는 팀포트리스에서는 적팀에 맞써 전투하는 것을 의미합니다. 팀포트리스2에서는 전투에 다양한 영향를 줄수있는 굉장히 많은 효과들이 있습니다.
데미지
부주제: 체력
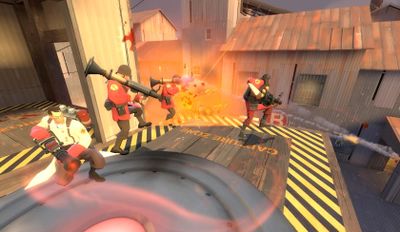
거의 모든 무기들이 체력에 데미지를 줍니다. 서버에 플러그인을 넣지않고 정상적이라면 아군 사격은 불가능 합니다. 그럼에도 불구하고 거의 모든 무기들이 자해가 가능합니다. 무기의 데미지에는 변수가 많습니다. 그래서 엄청 많은 무기들이 상황에 따라 정해진 데미지와 다르게 데미지가 나오게 됩니다. (큰 예로 스나이퍼와 스파이의 헤드샷과 스파이의 백스텝). 거의 모든 무기들이 맞은 상대가 가까이 있을수록 데미지가 늘어나고 멀리있을수록 데미지가 줄어들게 됩니다, 그럼에도 불구하고 미니 크리는 맞은 대상의 거리에 구애받지 않습니다. 크리티컬 히트도 마찬가지 입니다. 데미지의 변화는 데미지를 맞은 상대와 공격자의 거리에 기반을 두고 있습니다. 폭팔의 데미지는 폭팔의 거리와 상대의 거리에 따라 틀려집니다. 폭발에 가까이 있을수록 더 치명적입니다. 이런류의 무기들은 스스로를 공격할수 있는데 유저 자신을 공격할경우 데미지의 삭감이 있습니다.
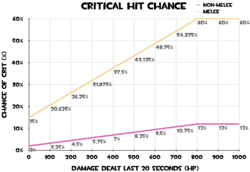
서버의 세팅이 아닌 이상, 거의 모든 공격이 데미지의 변동이 있습니다.(대략 15%정도) 그리고 반 무작위 적으로 크리티컬 히트가 있습니다.(거의 모든 무기들이 최근의 데미지에 근거하여 2%에서 12%까지의 크리티컬 히트 발생 확률 변동이 있고, 근접 무기는 15%~25%의 크리티컬 히트 발생 확률 변화가 있고 또한 어떤 무기는 랜덤 크리티컬 히트가 전혀 없습니다.). 크리티컬 히트는 랜덤적으로나 거리에 비례하여 데미지가 변하지 않습니다. 크리티컬 히트는 대부분 팀색깔의 효과와 전자음을 동반합니다(폭팔하는 공격에서 두드러지게 보입니다). 크리티컬 히트에 맞았을 경우 맞은 상대의 머리 위에서 타격 소리와 다른 소리가 나면서 Critical hit이라는 글자가 뜨게 됍니다. 또 크리티컬 히트는 넉백도 굉장히 심합니다. 크리티컬 히트의 데미지 배율은 무기에 따라 다양하고, 기본적으로 200%에서 300%의 데미지가 발생합니다. 크리티컬 히트는 자신에게 맞는다면 크리티컬 히트 효과가 뜨지 않습니다. 그리고 크리티컬의 힌트인 그들의 귀에 들리는 크리티컬 히트 효과음과 눈에 보이는 크리티컬 히트 효과도 뜨지않습니다.
많은 종류의 무기와 능력은 미니 크리를 발생시킵니다. 미니 크리 기능은 크리티컬 샷과 비슷합니다, 비록 35%만의 데미지가 증가하기는 하지만 말입니다, 크리티컬 샷 보다는 넉백을 적게 줍니다. 또한 오디오 사운드도 미니크리와 틀립니다. 또한 거리에 따라 데미지가 약해지지 않습니다. 가까운 곳에서 미니 크리공격을 당하더라도 데미지의 증가는 없습니다. 미니크리와 크리티컬이 같이 떳을 경우 크리티컬의 기능만 나오게 됩니다. 크리티컬 히트처럼 미니 크리 공격도 스스로에게는 데미지가 증가하지 않습니다.
건물은 미니 크리와 크리티컬 히트에 추가적인 데미지를 입지 않습니다. 거리에 따른 데미지의 변경도 없습니다. 마찬가지로, 건물에서 나온 데미지 또한 거리에 따른 데미지의 변경이 없으며 크리티컬 히트 또한 없습니다. 그렇지만 그래도 미니 크리는 가능 합니다.
공격 판정
거이 모든 무기들은 발사물을 발사하는 무기이거나 hitscan 무기입니다. 발사형식의 무기의 예로 로켓 발사기가 있고, 움직이는 물체가 만들어져 그 물체의 위치와 효과는 서버의 상태에 따라 결정됩니다, 고로 컴퓨터 대기 시간이 긴 플레이어들에게 적합하지 않습니다. 발사체는 플레이어와 분리되어있는 고유의 물리학을 따르며, 플레이어의 속도는 발사체의 속도에 영향을 주지 않습니다. 발사체들은 중앙 화면에서 나타나지 않지고, 무기를 들고 있는쪽에서 나타납니다 (오른손잡이인 솔저는 로켓이 오른쪽에서 나갑니다). Projectile collision detection does not use model-conforming hitboxes, instead using single, large projectile hitboxes that completely encompass the player model modified only by whether or not the subject is crouching (for example, a standing Heavy has the same projectile hit detection as a standing Scout). The Pyro's particle-based flame attacks follow most projectile weapon mechanics.
Hitscan weapons produce instant hit-or-miss attacks instead of projectiles. Melee weapons and bullet/pellet-producing weapons are generally hitscan. Hitscan weapons determine collision based on the game state of the attacker (as opposed to projectiles, which use the server's game state), which can produce somewhat disjointed hit detection ("I already got behind cover; how did that hit me?"). Hitscan weapons are produced from center-screen, even if visual effects seem to suggest otherwise. Non-melee hitscan weapons use fairly accurate model-fitting hitboxes (a standing Heavy would indeed be a much larger target than a standing Scout); melee weapons use the same large hitbox used by projectile weapons.
With the exception of the shots fired by the Ambassador, at least one bullet or pellet per shot of non-melee hitscan weapons are perfectly accurate but for a period of random weapon spread 1.25 seconds after firing a shot (notably, the Sniper Rifle's shots always occur after this period). The Ambassador, the sole exception to this rule, shoots perfectly accurately about a little less than a second after firing a shot. The server cvar tf_use_fixedweaponspreads standardizes pellet spread, affecting only the shotguns. No weapons have recoil.
무기의 타입
각각의 클래스들은 그들이 가지고있는 특별한 무기를 그들의 무기슬롯 1번,2번 그리고 3번에 넣을수 있다(종종 주무기, 보조무기, 그리고 근접무기로 각각 불리워지는 것들)Each class has a unique set of weapons at their disposal occupying weapon slots 1, 2, and 3 (often referred to as primary, secondary, and melee, respectively). 몇몇의 클래스들은 부가적인 슬롯을 가지고있을수 있다, 예를들어 엔지니어의PDA와 스파이의 변장 키트등이다. Some classes may have additional slots, such as the Engineer's PDA and Spy's Disguise Kit. 플레이어들은 각자 그들의 loadout에서 무기와 아이템을 골라 구성할수 있다. The choices players make in choosing weapons and items constitutes their loadout.
대부분의 근접무기가 무기들은 사용할때 탄약을 필요로 한다. Most non-melee weapons require Ammo for use. 재장전할 탄약이 있어야 하는 무기이거나(권총과 같은 제한된 탄약 크기가 있거나 재장전할 탄약이 있어야 하는 무기) Weapons that use Ammo can be either reserve-based (having a limited clip size and requiring reloading from stored ammo, such as the Pistol) 혹은 완전히 장전된 무기이다(미니건과 같이 재장전 없이 모든 탄약을 사용할수 있는 무기). or fully-loaded (capable of using all ammo without reloading, such as the Minigun). Reserve-based weapons either use magazine-style reloading (reload fills loaded ammo in single, one-time animation, such as the Revolver) or sequential reloading (reloads ammo from reserve one at a time, such as the Shotgun). Reloading can be interrupted by attacking or changing weapons, though time spent reloading (beyond the last carried ammo increment, in the case of sequential weapons) is wasted. When reloading a sequential reload weapon, a different animation is used for reloading the first ammo than subsequent ammo (for example, an emptied Grenade Launcher takes 1.24 seconds to reload 1 ammo, plus 0.6 seconds for each ammo after that).
Many weapons that don't use ammo must be recharged instead (such as Jarate). Recharging can usually be done by waiting for a set amount of time, going to the resupply cabinet, or respawning, though exceptions exist (such as the Chargin' Targe). Some weapons without ammo require manual refill based on specific requirements, such as the Medi Gun (which requires refill for ÜberCharge, though not for healing) and Buff Banner.
특수 효과
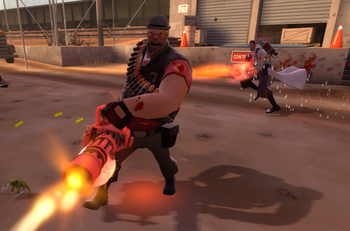
Status effects include a variety of weapon-induced player conditions, such as Fire and Bleeding. All status effects are removed by death or class change, and most are removed by ÜberCharge. Some can be removed by healing or submersion in water.
- 우버차지ÜberCharge:우버차지를 받은 플레이어는 모든 공격에 대하여 데미지를 입지 않고 또한 환경적 위험, 즉 기차와 같은것에도 데미지를 입지 않습니다.우버차지를 받은 플레이어는 희미하게 반짝거리는 그들의 팀 색깔과 번쩍이는 눈에 의해 구별이 가능합니다. ÜberCharged players can be identified by their bright team-colored shimmer and glowing eyes. 이것은 메디건에 의해 일어납니다. Caused by the Medi Gun.
- 메가힐 Megaheal:이 효과에 영향을 받은 플레이어는 운동방해 요과에 대해 면역이 됩니다(예를들어 넉백 , 스턴 그리고 느려짐 등 입니다.) A player under this effect is immune to movement-impairing effects (such as knockback, stun, and slowdown) 그리고 이것은 대상을 100.8-302.4HP/S 의 속도로 치료합니다,(플레이어가 최근에 어떻게 데미지를 받았는지에 달려있습니다.) and is healed at 100.8-302.4 HP per second (depending on how recently the player was damaged),혹은 응급처치의 기본 치유 속도의 3배입니다. or 3x the Quick-Fix's base heal rate.메가힐의 횩과를 받은 플레이어의 발 주변엔 버프 배너와 비슷한 반짝이는 원이 형성됩니다. Megahealed players have a glowing ring around their feet, similarly to the Buff Banner. 이것은 응급처치에 의해 일어납니다. Caused by the Quick-Fix.
- Crit boost: All attacks from a player under the effects of a Crit boost result in Critical hits. The weapons of such a player glow with team-color electricity. Caused by the Kritzkrieg, Killing Gloves of Boxing, Frontier Justice, the Chargin' Targe, and the Splendid Screen; this effect also occurs after capturing the Intelligence, attaining First Blood, collecting a Halloween pumpkin on a Haunted Halloween Special or for the winning team during humiliation. The Cow Mangler 5000 cannot be forced to crit, even during a crit boost.
- Mini-crit boost: Attacks that are mini-crits deal 35% more damage. Mini-crit boosted weapons glow with electricity based on team color, with a slight yellow tint (greenish blue for BLU, orange for RED). Caused by Crit-a-Cola, Buff Banner, Chargin' Targe, Splendid Screen, and Buffalo Steak Sandvich.
- Overheal: An overhealed player's health is above 100% (limited to 150%). Overhealed players produce health icon-shaped, team-colored particles. Caused by the Medi Gun, Kritzkrieg, Eyelander, Powerjack, Horseless Headless Horsemann's Headtaker, Conniver's Kunai, Dalokohs Bar, and Nessie's Nine Iron.
- Fire: A burning player takes damage over time (an effect known as "afterburn"), to which Pyros are immune. From most sources, this deals 3 damage every half-second over 10 seconds for a total of 60 damage (Degreaser only deals 2 damage at a time, totaling 40). Caused by the Flamethrower, Backburner, Degreaser, flaming arrows, Flare Gun, Detonator, Sharpened Volcano Fragment, and the charged shot from the Cow Mangler 5000.
- Bleeding: Bleeding players take damage over time. Bleeding duration is based on the source (either 5 or 6 seconds), dealing 3-5 damage every half-second. Caused by the Southern Hospitality, Tribalman's Shiv, and Boston Basher.
- Slowdown: Some weapons can reduce enemy movement speed on hit, with varying efficacy. Caused by Natascha.
- Jarate-soaked: Attacks made against Jarate-soaked players become Mini-Crits. Jarate-soaked players are tinted yellow and drip yellow particles, which reveals cloaked Spies. Caused by Jarate and the Sydney Sleeper.
- Milk-soaked: Players who attack Milk-soaked enemies are healed for 60% of the damage dealt (does not overheal). Milk-soaked players drip white particles, and reveals cloaked Spies. Caused by Mad Milk.
- Evasion: Evasion prevents enemy weapons from damaging a player, though it has no impact on knock back or the induction of status effects. Evasive players produce an afterimage distortion effect behind them, and attacks against them cause flashes of text indicating misses. Caused by Bonk! Atomic Punch.
- Damage Softening: Players benefiting from damage softening are immune to extra damage and knock back from Critical hits and mini-crits, and take 35% reduced weapon damage overall. Such players have a glowing ring around their feet (an effect shared by the Buff Banner's Crit boost effect). Caused by the Battalion's Backup.
- Fleeing State: Fleeing players move at -10% speed, cannot move while crouched, and cannot fire or change weapons (though they can taunt). Such players can be recognized by their change in character animations, which vary by class (most can be characterized as looking "frightened" or "impatient"). Caused by the Sandman, humiliation, Ghosts, and the Horseless Headless Horsemann.
- Marked For Death: Attacks made against players who are Marked For Death become mini-crits. A player who is marked for death has a white skull and crossbones image above their head. Players are Marked for ten seconds by being hit by a Scout wielding the Fan O'War. Each Scout can only Mark a single enemy at a time.
- Honorbound: When a player draws an Honorbound weapon that player is unable to put this weapon away until he scores a kill with it. Once a kill is earned the player may draw and sheath the weapon as he pleases. The Half-Zatoichi is currently the only weapon that is Honorbound.
In addition to these status effects, players are subject to changes in statistics and abilities based on weapon and item set choices in their loadouts.
넉백
Most weapons produce at least some sort of Knock back (though many can be too minor to notice). Attack modifiers to knock back include damage, critical hit or mini-crit status, and weapon-specific effects. Knockback can be used to manipulate the positioning and movement of players, especially those of enemies through juggling and oneself through rocket jumping or sticky jumping. Some weapons and abilities, such as the Force-A-Nature and compression blast, are based on unique knock back functionality. ÜberCharged targets are less influenced by enemy knock-back than normal targets, and Disguised Spies are not subject to knock back from enemy weapons with the exception of the compression blast.
환경
Depending on the map and server, the goals and rules of TF2 gameplay can change dramatically. By understanding these variables in gameplay (and how to parse them in the Server Browser), players can find a game environment that suits them and fully contribute to their team's goals.
물건들
Maps are made based on a variety of game modes, which are used to determine the objectives for both teams. Teams may compete over the same goals (such as in Push Control Point and King of the Hill maps) or oppose each other in an offense vs. defense setup (such as in Attack/Defend Control Point and standard Payload maps).
Many game modes use control points (objective)/ko, which are captured when a player whose color does not match that of the control point stands on it for a set time. The capture time varies by map, and its speed is increased when more players stand on it (though each player beyond the first provides diminishing returns). Capture is halted when an opposing team member stands on it in defense, and capture progress is gradually undone when no capturing team mates stand on the point. Control points cannot be captured while "locked." Payload carts are pushed and halted the same way control points are captured, though instead of capturing a Payload cart, the pushing team tries to bring it to a checkpoint.
In all official maps with offense vs. defense game modes, BLU plays offense while RED plays defense. In such maps, BLU tends to have faster respawn times, but RED is given a setup time to prepare a robust defense.
- Arena: Players spawn only at the beginning of the round, with no respawning. After a set time, a neutral control point unlocks, which can be captured to win the round. If all members of a team die, that team loses the round. Has first blood and automated team assignment/shuffling by default. Official arena maps don't have resupply cabinets.
- Capture the Flag (CTF): Teams work to capture the opposing side's Intelligence faster than their opponents do the same. Any player can pick up an enemy's Intelligence, and their team gains a point if that player returns the enemy's Intelligence to their team's own original Intelligence spot. The Intelligence drops on command or when its carrier dies; it is returned to its original location if it remains on the ground for a set time after being dropped.
- Control Point, Push (CP): Each team starts with two locked control points and fight for the middle, neutral control point. From then on, at any given time, each team's furthest control point is unlocked, while all others are locked. Teams must capture all five control points to win the round.
- Control Point, Attack/Defend (CP): If the offensive team captures all of the defense's control points before time runs out, they win (if defense can prevent this, they win). In most maps, only one or two control points are unlocked at a time (the notable exception being Steel).
- King of the Hill (KOTH): Each team has their own countdown timer, and a team wins when their countdown timer reaches zero. A team's timer counts down while they own the control point, but is frozen while that team does not have ownership of the control point. Note that a team's timer will still count down even if there are enemies trying to capture the point.
- Payload (PL): Offense pushes the Payload cart in a manner similar to capturing a control point, trying to reach checkpoints instead of finishing point captures. The Payload cart supports allies as if it were a level 1 Dispenser. Offense wins if the cart reaches the final checkpoint, while defense wins by making sure the cart doesn't reach the final point..
- Payload Race (PLR): Essentially identical to Payload, but instead of offense vs. defense, each team pushes their own cart in an attempt to reach the finish before the opposing team does.
- Territory Control (TC): Each team is randomly assigned territories, and rounds consist of each team trying to contest one of their opponent's control points (while the opposing team tries to capture one of theirs). Most of the map is locked during gameplay, consisting of only one territory vs. one territory. After enough successive wins, a round takes place at the losing side's base point, which they must defend against the offense-only opposing team.
- Training Mode (TR): Training maps are for practicing skills against obstacles and/or bots and learning through tutorials. They are often played with only one human player, or at the very least, no opposing human sides.
맵의 요소들
Players start the round in their team's respawn room, where they can change class and loadout. Most respawn rooms contain resupply cabinets, which fully restore health, restock weapon ammo, refill most item meters, and remove most negative status effects, though a similar effect can be achieved by class switching. Upon dying, a player waits to respawn in a respawn wave, which typically come at ten- or five-second intervals (the exact wait time for respawning varies by map, team color and size, objective status, and server settings), at which point they appear at their team's furthest respawn room; respawn rooms can be earned by capturing points or pushing Payload carts to checkpoints, and can be lost if the opposing team makes such progress themselves.
Many maps make use of doors. Although their visuals suggest otherwise, doors are handled by the server as being either completely open or completely shut, alternating between the two instantly. Most doors are opened when a player of the appropriate team(s) approaches them from the appropriate side(s) (most doors away from respawn areas open for anyone coming from any direction), closing when no such players are nearby anymore. Some doors remain locked until certain conditions are met, such as control points being captured or Payload cart checkpoints being reached. Some effects, such as Jarate and Mad Milk splashes, can go through doors.
The boundaries and surfaces of maps are not determined by visual elements, but invisible surfaces that determine where players and projectiles can go. All maps--even outdoor ones--have player ceilings and walls, though they may be invisible, and projectiles may even appear to go through them. Additionally, many surfaces and objects in the game that appear to take physical space are completely ignored for collision detection, with players and projectiles passing through them as if nonexistent; these surfaces can be used for hiding Stickybombs or spamming targets from cover.
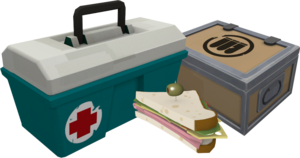
Maps usually have pickups placed in various locations. Map-specific health and ammo pickups will remain in place until grabbed, respawning after a ten-second delay. The map health pickups restore 20.5%, 50%, or 100% health based on size (pill bottle, first aid tin, and ice cooler, respectively); similarly, the map ammo pickups restore 20.5%, 50%, or 100% ammo and 41, 100, or 200 metal based on size (small grey metal box, medium beige metal box, and large wood crate, respectively). When players die, they usually drop weapons that can be picked up for 50% ammo and 100 metal (unless the dropped item was an Engineer toolbox, which drops 100% ammo and 200 metal); destroyed buildings also leave behind metal debris, which can be picked up for ammo and metal. A Heavy who dies with a Sandvich, Dalokohs Bar, Fishcake, or Buffalo Steak Sandvich active will instead drop that, which can be picked up for 50 health points (75 for Scouts).
서버 세팅

Server settings can have a strong impact on gameplay in terms of performance and game balance. Players can select what kind of server on which they want to play using the Server Browser, filtering based on tags (which include game modes and changes to respawn times), player count, map, latency, and the like. Generally, servers closer to the player's location will have reduced latency, resulting in faster connection and more accurate hit detection. Game smoothness is also affected by the server's hardware and networking settings, especially at higher player counts or when running some mods.
Servers can run scripts and configs just as a player can, with commands from clients issued by rcon. For more unique functionality, there are numerous server plugins to modify gameplay or provide administrative or stat assistance, the most common being SourceMod and HLStatsX. Instead of running plugins, servers can use logs to interact with third-party match-making programs, such as TF2 Lobbies, which let them see stats out-of-game.
There are a variety of server settings that can change gameplay without running plugins or external programs. These include:
- Respawn times: Respawn times can be changed to either be shorter or effectively removed entirely. These can cause fluctuations in map and class balance, though combat is more steadily provided.
- Damage settings: Servers can disable random Critical hits, random damage spread, and random pellet spread with ConVars. This is most commonly done on competitive servers and those that frequently play arena maps.
- Max players: While TF2 was originally designed for 24 players or fewer, servers can raise the limit to 32 at the cost of performance. This can cause in increase of spam that slows objective progress, but ensures a greater amount of combat in the map.
- Objective specifics: Map objectives can be specified from the server. For example, the CTF game mode can be played to a certain capture count, to a certain time limit, or both. Related options include disabling Crit boosts from First blood or Intelligence capture, changing the map time limit, and using a win difference mercy rule.
- Pure: The sv_pure ConVar dictates what kinds of custom files are allowed on the server. When set to 0, clients can use any custom content they wish. When set to 1, clients are allowed to use any files on the server's whitelist. When set to 2, clients may not use any custom content besides those specifically allowed by Valve.
- SourceTV: Servers can enable SourceTV to allow a large number of spectators to watch the game without risking interference. SourceTV acts like an observer player, taking up a server slot while not playing on either team. Unlike players, SourceTV broadcasts its spectator view from the server's IP address (using a different port).
- Special modes: There are server modes that can be applied to any map regardless of game mode, including highlander and tournament modes. These are more commonly reserved for private events and competitions.
Other common rule areas that vary by server include team size/balance rules, alltalk (cross-team) voice chat, and ping limits.
Configuration
There are a variety of ways to configure the Team Fortress 2 client. The choices players make in setting up TF2 can have impacts on game interaction, performance, and presentation. Most of these methods of customization are not available on console versions of the game, save main menu options.
프로그램 셋업
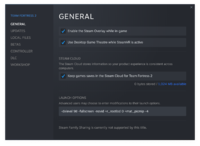
Some aspects of a player's machine, operating system, and Steam settings can affect TF2, and after a long history of updates, Team Fortress 2 has required an increasing amount of system resources to play at optimum frame rates. Additionally, some program features enabled by default may be undesirable for certain players, either due to performance issues or personal preference.
Steam, by default, enables both Steam Cloud synchronization and the Steam Community In-Game Overlay, which can be changed under Steam Settings. Within Steam's interface, players can also change launch options. As the name suggests, launch options are TF2 settings that are applied when the game is launched. Launch options can be accessed by opening the Properties of Team Fortress 2 in the Steam Library and clicking "Set Launch Options...". Launch options are separated by spaces and start with either a dash (if the command is not accessible through console commands]) or a plus sign (if the command is a console command). Launch options can be used to achieve a variety of effects, including...
- Smooth Alt+Tabbing: Players who wish to view other windows and programs while running TF2 can run it in windowed mode with no border. This can be reversed with the full-screen launch option (-full). Example (for 1440x900 resolution): -window -noborder -w 1440 -h 900
- DirectX Level: Due to performance or personal preference, running TF2 in a low DirectX level may be ideal. Example (for DirectX 8.1): -dxlevel 81
- Disabling Extraneous Features: Memory usage and performance drops can be minimized by disabling unused features. Example: -novid -nojoy -noipx -nocrashdialog
In addition to the Steam options, launch options can be specified for individual shortcuts to Team Fortress 2 by adding them to the file "C:\Program Files\Steam\Steam.exe" -applaunch 440 as a shortcut target. For example, this shortcut target would run TF2 full-screen with no intro video:
"C:\Program Files\Steam\Steam.exe" -applaunch 440 -full -novid
Video card and sound card configuration tools can be used to override game settings. For example, some video card utilities can change mat_picmip to values outside the normally-allowed bounds in Team Fortress 2, though this can be considered cheating.
Team Fortress 2 can be subject to operating system influences on mouse control. While this can be mitigated through launch options and registry edits, the easiest method to override this is by enabling Raw input (m_rawinput 1).
꾸미기
The most straightforward way for a player to customize their TF2 experience is the in-game options panels. In essence, the options panels are user-friendly ways to set ConVars, which can otherwise by set manually using the developer console. These panels are...
- Keyboard: Allows for simple key binding (can be done in command console with bind "KEY" "COMMAND"). The advanced options allow for fast weapon switching (change slots without confirming with the attack key) and enabling developer console (an important option for anyone using console commands).
- Mouse: Contains options for mouse and gamepad control. The "Raw input" option gives users more reliable mouse aiming by bypassing operating system mouse settings.
- Audio: Has a variety of sound-related options. Closed captions do not work without custom files.
- Video: Allows for some control of display settings, though some settings found in launch options and FPS configs are missing or disabled. The advanced video options panel has the field of view (fov) slider, which can be increased to grant the player wider vision in-game.
- Voice: Has simple controls for in-game voice chat.
- Multiplayer options: Contains a great variety of gameplay-related options (mostly in advanced options) and content download control.
These settings are stored as ConVars in config.cfg, found in the cfg folder (which is usually found in C:\Program Files\Steam\steamapps\STEAMLOGIN\team fortress 2\tf\). By default, config.cfg is saved to the Steam Cloud.
In addition to the menu panels, ConVars can be changed with more specificity using scripting. Scripting allows for more advanced and uniquely tailored controls, dynamic player settings, and more optimized performance (performance scripts are usually just called "configs"). Script files are located in the cfg folder (usually found in C:\Program Files\Steam\steamapps\STEAMLOGIN\team fortress 2\). The file autoexec.cfg runs on game startup, and the class-named files (such as scout.cfg) each run when first spawning as the appropriate class. Most scripts are made using bind, alias, game commands, and/or ConVars; the wait command may be used to produce automated, chronologically sequenced functions, though a number of servers disable this with sv_allow_wait_command 0.
Many aspects of the TF2 interface can be customized by editing the Heads-up display, or "HUD". Most custom HUDs always work regardless of server settings, unless the HUD uses customized material files, which constitute custom content and are disabled by sv_pure servers (most HUDs only contain /resource/ and /scripts/ files, which are allowed in all pure settings).
도구들
There are a variety of first-party (some in-game and some not) and third-party tools to assist in playing, editing, and analyzing Team Fortress 2. These include:
- Demo Recording and Playback: Players can record demos of gameplay (record FILENAME in console) to watch or share later without using the resources necessary for live video capturing. Demos can be played with the console command playdemo FILENAME and captured to video using the startmovie command. PREC is a common, Valve-approved add-on to TF2 that automates demo recording.
- TF2 Tool Mode: TF2 can be run under a "tool mode" with the launch option -tools. The tool mode allows access to the Commentary editor, Material editor, and perhaps most notably, the Particle editor.
- Source SDK: The Source Engine Software Development Kit, or SDK, is a set of programs that come with all Source engine games and run through Steam, including the Model Viewer (commonly used for posing wiki images) and Hammer editor (used for making maps). The SDK can be accessed in the Tools subsection of the Steam Library, and has its own wiki.
- GCFScape: One can examine and extract the contents of TF2 using GCFScape, a third-party application used by most custom content editors. GCFScape can also be used to validate or defragment game files. In order to view and edit VTF files extracted using GCFScape, VTFEdit is commonly used.
These tools, in addition to modeling and sound editing software, can be used to edit a variety of TF2 gameplay elements, though their actual presence in-game is based on server settings (most notably with the sv_pure command and file whitelists).
User-made content can be submitted to Valve through the contribution page. Content deemed worthy of inclusion becomes official game content, with the author credited and rewarded for their contribution.
See also
External links


