Lava Pit
| “Let's go, let's go, let's go!” This article documents a recent addition. It may contain speculation, broken links or errors. You can help improve it by editing this page to include new information. |
| “You are so small! Is funny to me!” This article is a stub. As such, it is not complete. You can help Team Fortress Wiki by expanding it. Notes: Locations |
| Lava Pit | |
|---|---|

| |
| Basic Information | |
| Variants: | Gravel Pit and Coal Pit |
| Developer(s): | {{{map-developer}}} |
| Map Info | |
| Environment: | Halloween |
| Setting: | Nighttime |
| Map Photos | |
| Map Overview | |
| Map Stamp | |
| Supporters Leaderboard | |
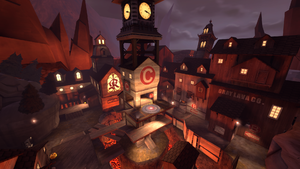
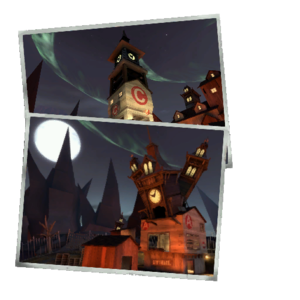
Lava Pit is a community-created Attack/Defend map. It is set in a town with several pits and flowing rivers of lava running through it.
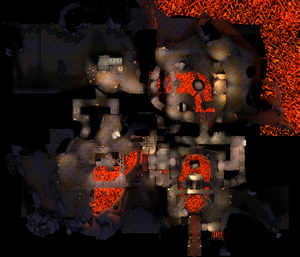
Like all Attack/Defend maps, RED always plays defense and BLU always plays offense, and once the BLU team has captured a control point, it is locked and can never be retaken by RED. The map differs from other Attack/Defend control point maps in that it allows the attackers to capture the first two points (points A and B) in any order before assaulting the final control point (point C). Points A and B are directly accessible from the BLU base, while they must cross through one of them in order to reach point C. RED's base is located near point C.
The objective of Lava Pit is that BLU must attack and capture all three points in order to win the match. A and B must be captured before C can be. The objective for RED is that they must hold out and prevent BLU from capturing the final point C. Time is added to the countdown if BLU captures either points A or B in order to buy more time for Control Point C.
Lava Pit was contributed to the Steam Workshop.
Contents
Locations
Control Point A: The Lava Tower
- The Control Point: Contains several health pack and spellbook spawns, underneath the point is a pit with a medium health pack on it, failing the jump will result in death.
- BLU Spawn: The BLU base has two exits, one leading to point A and the second leading to point B.
- Side Tunnels: Connects the BLU spawn to point A, these tunnels can be accessed by rocket, sticky jumping, or double jumping;
- Paths: On both sides of the area are stone paths which lead to the top of the area and the control point building.
- The Pit: Underneath point A, a correctly timed jump can reward the player with a medium health pack.
Control Point B: The Lava Building
- The Control Point:Control Point B is to the right as the player exits the BLU base. The point is in the large structure in the center of the area.
- B side tunnels: There are two tunnels coming from the BLU base. The Short B is covered by a small house and a fence that partially obscures the BLU tunnel, and exits out next to the A/B connector. The Long B exits out on the far side of the B area. Both require players to rocket/grenade/double jump to access the tunnels from the Control Point side. Two ramps along the back wall give access to Control Point C.
- The B building: Houses the control point, has 3 entrances the main entrance being a set of stairs, the second has planks that must be walked across and the final entrance is a little platform that requires a jump to reach. The roof can be used by Soldiers and Demomen to fire down onto the point or drop down to it.
- Balcony: Directly outside the C entrances is the Balcony. It's a high point which serves as a vantage point for most of the B area. There are two ramps on both sides which lead down to ground level.
- A/B connector: Between the A and B areas is the A/B connector which is a tunnel which connects from BLU's A Tunnel exit to BLU's short B Tunnel exit.
Control Point C: The Clock Tower
- Control Point: Control Point C is past the first two points, and adjacent to the RED base. The tunnels leading to the other Control Points are on a higher level than the ground in this area. The Control Point is located at the top of the central structure.
- RED Spawn Base: Located directly adjacent to Control Point C, on the opposite side of the area from the tunnels to Control Points A and B.
- The Clock Tower: In the center of the area is the clock tower, There are three floors to the tower. The first is accessible from ground level by a ramp, and from two bridges connecting to the catwalks. The second floor is accessible by two sets of ramps of which lead along the outside of the tower and one through it. The third floor is the top which contains the Control Point and a small room behind the point open on three of its sides.
- Catwalks: All along the outside edge of the area are the catwalks. These are the metal walkways which are accessible via four entrances, two from the A/C connector tunnels and two from the B/C connector tunnels, and also accessible from two ramps outside the RED spawn.
- Ground Level: Below the catwalks and surrounding the tower are pits of lava. On the far side is an entrance which leads to the A/C connector tunnels.
Hell
- Entry points: Scattered around the map, they will emit a bright white glow and will remain open for 25 seconds before they close again. They will remain closed for approximately 3 minutes before opening again.
Strategy
 | “Sun Tzu's got nothing on us!” This map's Community strategy page is a stub. As such, it is not complete. You can help the Team Fortress Wiki Community Strategy Project by expanding it. Notes: None added |
Update history
October 9, 2023 Patch #1 (Scream Fortress XV)
- Added Lava Pit to the game.
- Updated the Underworld.
- Spells now spawn one per point, in a random location.
- Removed some exploits.
- Fixed a skybox exploit in the underworld.
Gallery
| ||||||||||||||||||||||||||||||||||||||||||||||||||||||||||||||||


