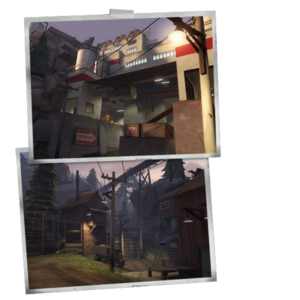
Mountain Lab is a community-created Attack/Defend Control Point map. Mountain Lab was a winner of TF2Maps.net's Art Pass Contest, and was released into the game on October 27, 2010 Patch with the Scream Fortress Update.
Mountain Lab is similar to Gorge in that it is a single-stage linear attack/defend, as opposed to Gravel Pit and Junction in which two control points may be captured by BLU when the round starts. Rather than having 2 linear control points or 3 non-linear control points, Mountain Lab and its Halloween variant, Mann Manor have 3 linear control points.
The objective of the map is for BLU to capture all three control points. RED must defend these points until the time limit is reached.
Locations
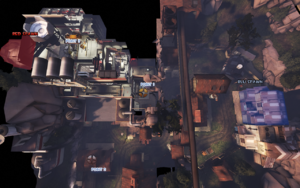
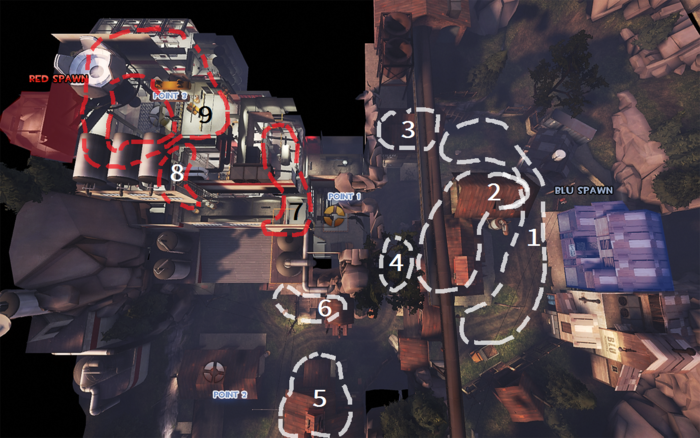
Note: If you are having trouble with finding the locations listed here, see the Helpful overview section to see their exact position marked on the map.
Control Point A
- BLU Spawn: The BLU spawn is a small rectangular room with three exits. Two are to the front of the base through a shutter door, and one is rightwards through a small house into the Yard.
- Control Point: The first control point is nested against the side of the RED facility. Behind it is an elevated platform from which enemies returning to the battle from spawn may appear. Although this control point takes longer to capture than any other on any map, its proximity to the attackers' spawn and distance from the defenders' spawn usually make it very easy for BLU to seize. When the point is captured, the shortcut used by RED team is closed.
- Tunnel: A rock archway to one side provides a medium health kit and a main highway for both teams' travel.
- Shed: The shed across from the tunnel contains a large health kit and ammo crate, making it a popular sentry location.
- Warehouse: The small two-floor building directly across from the point, connects to BLU's spawn yard.
- Yard: The yard outside BLU's spawn, connects to the warehouse and the main chokepoint.
BLU's spawn yard and warehouse entrance
BLU's spawn yard and main chokepoint
Control Point B
- Control Point: The second point is located inside a wood structure overlooked by the main entrance to the RED base. Many corners and edges outside the base make for numerous sentry locations, and long sightlines make it a popular area for Snipers. An elevated outcrop on the far side of the building makes for an excellent Sniper nest, but also an easy entry point into the base by explosive jumping soldiers and Demomen. The defenders in this area tend to stay near the RED base, using it to force the enemies to get close before attacking. However, this sometimes leads to fairly easy captures when attackers are able to slip by.
- Cliffs: The cliff that rest atop the tunnel. Popular sniping spot for attackers. A jump from the cliff can be made to the small house next to the rocky outcrop.
- Small House: The house situated next to the capture point's shack. Its entrance faces opposite the defenders and offers good cover.
- Base Entrance: The base entrance has two sets of stairs on both of its sides. One leads to an overlook of the yard and entrance to the top floor of RED's base, while the other leads to Point A.
Control Point C
- Control Point: The final control point is in the heart of the RED facility, surrounded by a pit on three sides. The large room is accessible from almost every direction, including above - a large hole in the roof allows Soldiers and Demomen to rain explosives down on RED Engineers if the defenders do not control the area. Because the control point is surrounded by a lethal fall, an effective tactic is for defending Pyros to come directly out of the spawn point and airblast foes off of the point - if they don't land in the pit, they will be all the way on the other side of it.
- Lower Entrance Tunnels: From the main entrance are two tunnels. The long way leads directly to the final control point while the other leads to the command room.
- Upper Entrance Tunnels: Above the main entrance is a tunnel that leads to the top floor.
- Top Floor: The top floor leads to the overlook above the point and a hallway containing a series of stairs that lead to the point.
- Command Room: The room at the end of one of the tunnels from the main entrance. One of its walls is a giant window which the point can be observed from.
- RED Spawn: A two-story spawn. The bottom level has two exits to the left and right of Point C, while the top exit has staircases leading down to C or up to the Top Level.
Helpful overview
1.Yard
2.Warehouse
3.House
4.Tunnel
5.Small House
6.Cliffs
7.Lower Entrance Tunnels
8.Upper Entrance Tunnels
9.Top Floor (Surrounding the final control point)
Strategy
Control Point timing
| Control Point A
|
×1
|
|
| ×2
|
|
| ×3
|
|
| ×4
|
|
| ×5
|
|
| Control Point B
|
×1
|
|
| ×2
|
|
| ×3
|
|
| ×4
|
|
| ×5
|
|
| Control Point C
|
×1
|
|
| ×2
|
|
| ×3
|
|
| ×4
|
|
| ×5
|
|
Update history
October 27, 2010 Patch (Scream Fortress Update)
- Added Mountain Lab to the game.
March 1, 2012 Patch
- Fixed several clipping issues.
July 10, 2013 Patch
- Fixed collision issues on the ladders and hill that lead to the first point
- Fixed static prop lighting
August 27, 2013 Patch
- Fixed clip brush exploit above hallway leading toward final cap.
- Fixed exploit where players could be trapped in small space near final cap using Teleporters.
March 5, 2014 Patch
- Fixed exploit on rafters near control point 2.
Bugs
- Players can be killed through spawn room during setup next to the exit on the front left by either explosives or fire when standing right next to the left exit door.
- Players may become stuck on the ladder on the path to the walkway above the archway after point A.
- It is possible to get stuck behind the truck near the first control point. Classes like the Scout and those with explosive jumping can still escape, though.
Trivia
- Behind the BLU spawn, the player can see that the airboat is from "Freeman Airboat Tours". This is a reference to a chapter in Half-Life 2 titled Water Hazard, another Valve published game, in which Gordon Freeman has to use an airboat to get to Black Mesa East to assist Eli Vance. This was also used in Lakeside.
- Outside of BLU spawn is a Sniper Target on the balcony of a building. It falls over when shot by a bullet, shatters if hit with a Sniper Rifle and explodes when hit by an explosive.
- In the shack near capture point B, if the player looks through the holes in the steel door to the left, they'll see a Soldier target from Target.
- Mountain Lab includes many different models created in the Swamp Pack released on TF2Maps.net.
See also
External links


