Difference between revisions of "Granary"
(keep beta stuff separate) |
("multiple" is incorrect. There is only two variants of Granary. Keep it short and simple for the readers. :)) |
||
| Line 4: | Line 4: | ||
|map-image=TF2 Granary Map.jpg | |map-image=TF2 Granary Map.jpg | ||
}} | }} | ||
| − | {{hatnote|'' | + | {{hatnote|Not to be confused with ''[[Granary (Arena]]'', an [[Arena]] variant of this map.}} |
'''Granary''' is a standard control point map. The objective for each team is to capture all five [[cp|Control Points]] to win the round. Each team starts with the two Control points closest to them and one neutral Control point in the middle of the map. | '''Granary''' is a standard control point map. The objective for each team is to capture all five [[cp|Control Points]] to win the round. Each team starts with the two Control points closest to them and one neutral Control point in the middle of the map. | ||
Revision as of 12:40, 6 December 2010
| Granary | |
|---|---|

| |
| Basic Information | |
| Developer(s): | {{{map-developer}}} |
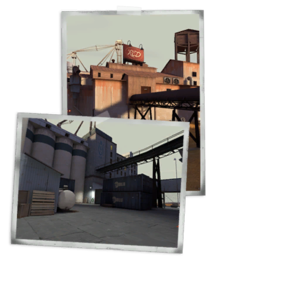
| Map Photos | |
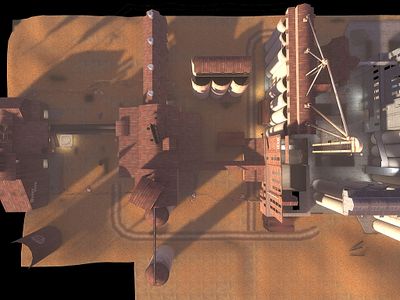
| Map Overview | |
Granary is a standard control point map. The objective for each team is to capture all five Control Points to win the round. Each team starts with the two Control points closest to them and one neutral Control point in the middle of the map.
Keep in mind that like all other Command point maps, such as Well, only the two Control points nearest to each other can be captured by the enemy side. All other Control points have a lock symbol on them in the HUD and cannot be taken by either side.
Contents
Introduction video
Locations
Overview
Control Point 1/5
- Resupply building
The initial respawn and resupply area is a missile silo with two exits either side leading to a yard where the final control point is located; just outside the building. A resupply cabinet is located on the back wall of both exits from the respawn room.
- Cp granary spawn.jpg
RED's main resupply room
- Yard
Located directly outside the resupply building at the back of an open yard area. Behind the control point, a small staircase and ramp connected to a large pipe runs over the yard, referred to as "low pipe" or "catwalk", leading to the second level of the building housing the second/forth control point. A second pipe, referred to as the "high pipe", runs to the right of the low pipe which can be accessed from the second floor of said building or by an explosive jump from the final control point side.
Various obstacles scattered around the yard provide cover and can act as a platform so Scouts to utilize their double jump ability to get onto the low pipe.
- Cp granary cp1a.jpg
Control point 1
Control point 2/4
- Building
These are the only control points on Granary to be enclosed within a building. With seven narrow entrances from all angles this building can potentially get quite congested and become a site of hectic fire-fights. Teams pushing onto the point will mainly opt to use the main entrance from yard to the left of the point as well as utilizing the "z-connector", a small corridor opposite to the main entrance. Right of the z-connector is "garage" which connects the far right of yard and runs right behind the enemy from two levels: firstly along the floor which leads to the area of the room behind the control point, just in front of the right door connecting the final cap yard and, through a small stair case, garage also leads to a second level walkway which overlooks the point from behind the defending team; this level is also the only route, bar explosive jumping, that can access the two rooms leading to the final capture point. The staircase also leads a enclosed chute, to the right when the player reaches the top of the staircase, a small hole is located at the end of this chute which drops players down immediately in front of ramp room.
The first forward respawn room is located near the second control point as well, this is located on the second level in the left of the building with a single entrance leading into yard, the room is only available to the team when a team controls the central control point.
- Cp granary cp2a.jpg
Control point 2 (building)
- Yard
Beyond the second control point is yard, or "forward yard": Left yard boasts two entrances to the middle point through the smaller, shorter corridor to the left and ramp room to the right. A small shack left of yard can be used to establish some height advantage. Right of yard has a small area behind the crate facing ramp room. The two sides of yard can be accessed from both the second point and the middle point side of yard.
- Cp granary cp2b.jpg
Control point 2 (yard)
Control point 3
- Buildings
This building has two entrances leading to control point three, commonly referred to as "mid". The left entrance is a simple through way but the right side has a medium sized room with a ramp leading to a balcony overlooking mid.
- Cp granary cp3b.jpg
Control point 3 (building)
- Yard
Being the halfway point and main focus for most battles, the central point has a slightly raised; large capture point area. This capture area is surrounded by cargo containers stacked two high providing vantage points. There is a medium sized health pack at either end of the yard, two small medpacks on top of the containers and four small ammo boxes on the ground at each side for the yard.
- Cp granary cp3a.jpg
Control point 3 (yard)
Strategy
- The containers located around the central control point (aka Control Point 3) provide a significant height advantage to both attackers and defenders. Access to the containers is easy for Demomen or Soldiers who can Rocket jump (or sticky jump) up to them. Alternatively other classes can use the balcony ramps. Engineers for example can use the upper ramps to access them and place Sentry Guns and Teleporters. Snipers can even use the elevation to their advantage. The top of the container, however, is vulnerable to long range attacks, so too much reliance should not be placed on the "no one looks up" adage.
- The containers also provide ambush opportunities. A Pyro can defend the control point by awaiting any potential attackers from the containers, flaming all who attempt to take it.
- In order to defend Control point 2 from attacks, Engineers should build Sentry Guns on the catwalk observing the Control point. This can be problematic, however, as attackers can traverse the catwalk from the right hand side doorway.
- As with all 5-CP maps, most matches depend on which team controls the central Control Point. If control of CP3 is lost, all efforts should be focused on taking it back as Control point 2 and 1 are difficult to defend.
- The middle Control point 3 should not be neglected by defenders because if left unattended it presents an easy capture opportunity.
- Health packs are widely abundant around the central Control Point. Consider forgoing Medics in favor of other classes if the Control Point is in dispute.
Related Achievements
|
Trivia
- At one point, setup time and gates were added to Granary in the April 29, 2008 Patch. They were later removed in the October 21, 2008 Patch.
Control Point Timing
See also


