Difference between revisions of "2Fort Invasion/ja"
(作成/created) |
(要翻訳/need trans) |
||
| Line 1: | Line 1: | ||
{{trans}} | {{trans}} | ||
| + | {{DISPLAYTITLE:2Fort Invasion}} | ||
{{Map infobox | {{Map infobox | ||
| game-type = Capture the Flag | | game-type = Capture the Flag | ||
| Line 5: | Line 6: | ||
| developer = {{Steamid|76561197996543132|Miguel "BANG!" Melara}}<br />{{Steamid|76561198001342103|Michael "::Egan::" Egan}}<br />{{Steamid|76561198026610207}}<br />{{Steamid|76561198021479728|Martin "Chaofanatic" Ellis}}<br />{{Steamid|76561197991193520|Ryan "Freeflow" Leitao}}<br />{{Steamid|76561198047350168|James "Retro" Wright}}<br />{{Steamid|76561197994150794|Aeon "Void" Bollig}} | | developer = {{Steamid|76561197996543132|Miguel "BANG!" Melara}}<br />{{Steamid|76561198001342103|Michael "::Egan::" Egan}}<br />{{Steamid|76561198026610207}}<br />{{Steamid|76561198021479728|Martin "Chaofanatic" Ellis}}<br />{{Steamid|76561197991193520|Ryan "Freeflow" Leitao}}<br />{{Steamid|76561198047350168|James "Retro" Wright}}<br />{{Steamid|76561197994150794|Aeon "Void" Bollig}} | ||
| map-image = Ctf 2fort invasion.png | | map-image = Ctf 2fort invasion.png | ||
| − | | map-environment = | + | | map-environment = 農場地帯 |
| − | | map-setting = | + | | map-setting = 夜間 |
| − | | map-deep-water = | + | | map-deep-water = あり |
| − | | map-pyrovision = | + | | map-pyrovision = なし |
| map-health-pickups-small = 2 | | map-health-pickups-small = 2 | ||
| map-health-pickups-medium = 4 | | map-health-pickups-medium = 4 | ||
| Line 15: | Line 16: | ||
}} | }} | ||
| − | {{Quotation|Invasionアップデート| | + | {{Quotation|Invasionアップデート|エイリアンが占拠していますがチームはエイリアンの産物で互いを倒すいい方法を考え出そうとするのにとても忙しいです。}} |
| − | |||
{{Map Variant}} | {{Map Variant}} | ||
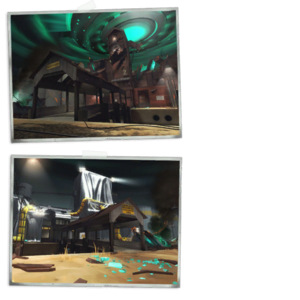
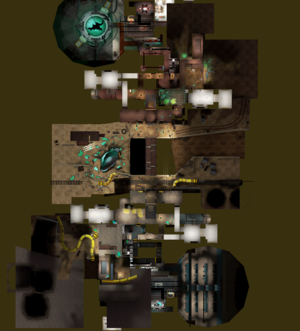
| − | '''2Fort Invasion''は[[Capture the Flag/ja|旗取り]] | + | '''2Fort Invasion'''は[[Capture the Flag/ja|旗取り]]マップです。これは{{update link|Invasion Community Update}}のために作られた[[2Fort/ja|2Fort]]のバージョンです。 |
| − | + | 夜間に設定し、二つの基地はエイリアンのテクノロジーを学ぶ研究ラボに変えられています。REDの基地は墜落した[[Saucers/ja|円盤]]に破壊されていますが、BLUの基地は検疫を受けています。 | |
| − | + | 破壊されたエイリアンはマップのあちこちにあり、ダメージを与えられた後爆発し、[[Pumpkin_bomb/ja|カボチャ爆弾]]に似ています。 | |
| − | == | + | == {{common string|Locations}} == |
| − | === | + | === 外の場所 === |
| − | *'''橋''': | + | *'''橋''': The bridge connecting the two forts. The bridge is covered, allowing [[Scout]]s to double-jump, [[Demomen]] to sticky-jump and [[Soldier]]s to rocket jump from the top of the one battlement, run across the bridge roof and then propel themselves onto the opposing Battlement. The roof also provides cover for advancing players and generally moves the map's action into the bases. Commonly, [[Scout]]s will have no problem jumping onto the bridge, but will sometimes falter on the second jump to the opposing Battlement landing short in front of one of the doors. The very edge of the bridge roof is bugged; if a Scout attempts to jump from the very edge, in terms of game mechanics, they will be "falling" and thus have only one jump to use, rather than two. Jumping a split-second earlier, using the [[Force-A-Nature]] to jump, or using the [[Atomizer]] is enough to remedy this problem. Scouts, Demomen, and Soldiers on the roof of the bridge are susceptible to [[Sniper]] fire, which limits the distance of jumps, providing another obstacle to attacking classes. |
| − | *''' | + | *'''入り口''': After crossing the bridge, there are two ground entrances into the base. The "Entrance" extends from those two doorways into the base a short distance. From here, the layout of the entrance is a T-shape. Turning left brings the player to the stairs that leads down to the sewers, as well as the narrow corridor linking the Battlement Resupply room to both the entrance and the Courtyard (there is a trapdoor in the ceiling allowing players to drop down from the Resupply room). |
| − | *''' | + | *'''入り口の横の部屋''': Turning right from the entrance leads you into a medium-sized room with a door at the opposite end which provides access to the courtyard. This room is heavily trafficked by both teams, as it is the most direct way to reach the courtyard from the main entrance. [[Engineer]]s can set up small camps in here if the enemy is attempting to push through the entrance. In addition, because the room is large, it is often a hiding place for [[Spy|Spies]]. In many other parts of 2Fort, corridors are too narrow to provide much cover for an invisible Spy, but this room is an exception, allowing them to move through it undetected. |
| − | *''' | + | *'''胸壁''': The Battlements are on the front of the second floor of each base and have a center "bunker" section. This section has large glass-less windows and is a roofed structure. The windows allow almost unbroken lines of sight into the area. The battlements are also often referred to as the "balcony," as well as the "Sniper ledge" or "Sniper deck", due to their main purpose as a camping area for [[Sniper]]s. The ledges provide Snipers with an excellent view of most of the exterior of 2Fort, with the exception of the bridge and the water beneath it. The RED side has a ledge placed high enough to cause fall damage if walked off of, while the BLU side's ledge is not tall enough. |
<gallery widths=150px heights=80px> | <gallery widths=150px heights=80px> | ||
| Line 43: | Line 43: | ||
</gallery> | </gallery> | ||
| − | === | + | === 要塞の場所 === |
| − | *''' | + | *'''下水道''': The tunnels under each base, leading from the [[water]] beneath the bridge to the "Entrance", are generally referred to as "The Sewers". They have several sharp turns, creating numerous blind corners around which to fight. The sewers are generally used as a way of entering the enemy base free from the attention of the Snipers above. The narrowness of the sewers and the water makes it difficult for [[Spy|Spies]] to sneak past enemies who are also using the tunnels. |
| − | *''' | + | *'''下水道の部屋''': In each sewer, there is a room recessed into a corner in such a way that it is impossible to see the entire room from inside the tunnels. On the water-side of the room, the tunnel has two 90 degree bends, but on the base-side of the room there is one long unbroken stretch of tunnel. The long tunnel provides a long-range line of sight between the room and the sewer exit. The rooms are often camped by Engineers, who use [[Teleporter exit|Teleporters]] to allow their team to quickly access the enemy base, or [[Sentry Gun]]s to prevent the opposing team from using that location. |
| − | *''' | + | *'''中庭''': The Courtyard is the main means of transition between the ground floor and the second floor in each base. It is an enclosed, roofless space inside each base, next to the main spawn room and on the player's right when they come through the entrance. It is bounded on three sides by high ledges, and there are doors connecting to the spawn room, a staircase leading down to the Intelligence room on the second floor, and a door from the entrance and from the balcony spawn corridor on the ground floor. Two staircases allow access from below to the upper level. [[Engineer]]s often use the space as a major defensive point, as it provides the only means of access to the Intelligence for most classes. By setting up a [[Sentry Gun]], an Engineer can successfully provide effective defense against assaults on the intelligence, particularly if positioned so as to cover the Battlements' doorway. |
| − | *''' | + | *'''格子''': This is the small room with the grated floor right above the entrance of each base. It is connected directly to the upstairs area, and as a result is often used by players to gain quick access to battles in the entrance. [[Demoman|Demomen]], [[Soldier]]s, [[Engineer]]s, [[Scout]]s and [[Pyro]]s can jump up to the second story through this, providing another means of access to the second floor. Classes such as the [[Engineer]] and [[Demoman]] can also camp above the grate, limiting enemy access through the front entrance. Splash damage can be dealt through the grate. |
| − | *''' | + | *'''上り階段''': This is the large room on the second floor, adjacent to the main resupply room. The Upstairs area has an exit to the Battlements, "Grate", "top of the Spiral", and "Courtyard". This room is heavily trafficked as it is a major crossroads in the map, connecting practically every area of the base. It is often used by Scouts who have jumped to the balcony, as it provides a direct route to the Intelligence via the spiral ramp. The Upstairs area is also commonly referred to as the "hay room" or "hayloft" (due to the large piles of hay on the floor,) or simply the "upstairs lobby". |
<gallery widths=150px heights=80px perrow=4> | <gallery widths=150px heights=80px perrow=4> | ||
| Line 61: | Line 61: | ||
</gallery> | </gallery> | ||
| − | === | + | === 主な基地の場所 === |
| − | *''' | + | *'''螺旋''': The Spiral ramp that leads from the Basement up and out of the base is one of only two access points to the Intelligence room. Like the Sewers, the Spiral is a narrow corridor with right-angle turns. This tends to result in close quarters fighting, and due to the confined space it is fairly easy to block enemy access with a [[Dispenser]], [[Sentry Gun]], or [[Heavy]]. At the top, the Spiral connects to the upstairs area via a small room in which there is a small [[Health|Health Pack]] and [[Ammo|Ammo Pack]], as well as two small corners in which [[Spy|Spies]] often hide. A direct line of sight can be drawn from the upstairs area along the top length of the Spiral, allowing [[Sniper]]s to eliminate enemies with the Intelligence as they climb the Spiral. |
| − | *''' | + | *'''階段''': This area contains a long ramp running from the back of the courtyard into the basement. It is the other exit point for a stolen Intelligence. It is often called the "back stairs", "long stairs", "straight stairs", or simply "straight". It is also called the "L-Shaft", because it contained an elevator in previous incarnations of the 2Fort map. |
| − | *''' | + | *'''基地''': This is the space downstairs between the Spiral ramp and the Stairs. It leads to the Intelligence room and a third resupply point exists at the end nearest to the Stairs. However, no player will ever respawn in that room after they die. There is a Health pack and Ammo box in the middle of the Basement. |
| − | *''' | + | *'''機密情報室''': The Intelligence room has two entrances from the Basement. This is the primary defensive point of 2Fort, and as such it is frequently camped, especially by [[Engineer]]s. The Intelligence is on top of a desk in the opposite corner to both entrances. The layout of the room makes it very simple for campers to entrench themselves, and successfully removing them can be almost impossible without an [[ÜberCharge]]. |
<gallery widths=150px heights=80px perrow=4> | <gallery widths=150px heights=80px perrow=4> | ||
| Line 78: | Line 78: | ||
</gallery> | </gallery> | ||
| − | == Strategy == | + | == {{common string|Strategy}} == |
| − | {{main|Community 2Fort strategy}} | + | {{main|Community 2Fort strategy/ja|l1=2Fortの高度な戦術}} |
| − | == Update history == | + | == {{common string|Update history}} == |
| − | '''{{Patch name|10|6|2015}}''' ( | + | '''{{Patch name|10|6|2015}}''' ({{update link|Invasion Community Update}}) |
| − | * {{Undocumented}} | + | * {{Undocumented}} 2Fort Invasionが追加された。 |
'''{{Patch name|10|8|2015}}''' | '''{{Patch name|10|8|2015}}''' | ||
| − | * | + | * 一般的な爆弾のエンティティが ([[Invasion Update/ja|Invasion]]マップで) [[Projectiles/ja#その他の性質の発射物|矢]]を撃った時に味方にダメージを与えていたのを修正した。 |
'''{{Patch name|10|15|2015}}''' | '''{{Patch name|10|15|2015}}''' | ||
| − | * | + | * プレイヤーがマップの外に出た数少ないエリアを修正した。 |
'''{{Patch name|11|13|2015}}''' | '''{{Patch name|11|13|2015}}''' | ||
| − | * {{Undocumented}} | + | * {{Undocumented}} {{update name|Invasion Community Update}}のマップを通常の「今すぐ遊ぶ」リストに追加した。 |
| − | == Gallery == | + | == {{common string|Gallery}} == |
| − | === | + | === 機密情報 === |
<gallery perrow=3> | <gallery perrow=3> | ||
file:Invasion Intel red idle.png|The [[RED]] Intelligence briefcase. | file:Invasion Intel red idle.png|The [[RED]] Intelligence briefcase. | ||
| Line 104: | Line 104: | ||
file:Invasion Intel neutral pickedup.png|The unused neutral Intelligence briefcase (picked up). | file:Invasion Intel neutral pickedup.png|The unused neutral Intelligence briefcase (picked up). | ||
</gallery> | </gallery> | ||
| − | === | + | === ポスター === |
<gallery> | <gallery> | ||
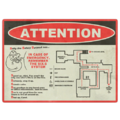
File:2fort invasion poster1.png|Emergency evacuation poster of the basement section. Contains a typo of "who's" instead of "whose". | File:2fort invasion poster1.png|Emergency evacuation poster of the basement section. Contains a typo of "who's" instead of "whose". | ||
| Line 122: | Line 122: | ||
</gallery> | </gallery> | ||
| − | == See also == | + | == {{common string|See also}} == |
| − | * [[2Fort]] | + | * [[2Fort/ja|2Fort]] |
| − | * [[2Fort (Classic)]] | + | * [[2Fort (Classic)/ja|2Fort (クラシック)]] |
{{Invasion Community Update Nav}} | {{Invasion Community Update Nav}} | ||
{{Maps nav}} | {{Maps nav}} | ||
Revision as of 04:12, 3 February 2017
| このページの内容は日本語へ翻訳中です。 もしあなたが日本語話者で編集して頂ける場合は、トークページにその旨を記していただくか(編集履歴のページを参照して)このページを過去に編集した人たちと話してください。 |
| 2Fort Invasion | |
|---|---|
| |
| インフォメーション | |
| Variants: | 2Fort |
| 製作者 | {{{map-developer}}} |
| マップ情報 | |
| 環境 | 農場地帯 |
| 時間帯・天気: | 夜間 |
| マップ画像 | |
| マップ俯瞰図 | |
| 「 | エイリアンが占拠していますがチームはエイリアンの産物で互いを倒すいい方法を考え出そうとするのにとても忙しいです。
— Invasionアップデート
|
」 |
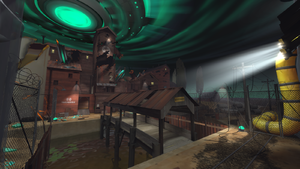
2Fort Invasionは旗取りマップです。これはInvasion コミュニティアップデートのために作られた2Fortのバージョンです。
夜間に設定し、二つの基地はエイリアンのテクノロジーを学ぶ研究ラボに変えられています。REDの基地は墜落した円盤に破壊されていますが、BLUの基地は検疫を受けています。
破壊されたエイリアンはマップのあちこちにあり、ダメージを与えられた後爆発し、カボチャ爆弾に似ています。
場所
外の場所
- 橋: The bridge connecting the two forts. The bridge is covered, allowing Scouts to double-jump, Demomen to sticky-jump and Soldiers to rocket jump from the top of the one battlement, run across the bridge roof and then propel themselves onto the opposing Battlement. The roof also provides cover for advancing players and generally moves the map's action into the bases. Commonly, Scouts will have no problem jumping onto the bridge, but will sometimes falter on the second jump to the opposing Battlement landing short in front of one of the doors. The very edge of the bridge roof is bugged; if a Scout attempts to jump from the very edge, in terms of game mechanics, they will be "falling" and thus have only one jump to use, rather than two. Jumping a split-second earlier, using the Force-A-Nature to jump, or using the Atomizer is enough to remedy this problem. Scouts, Demomen, and Soldiers on the roof of the bridge are susceptible to Sniper fire, which limits the distance of jumps, providing another obstacle to attacking classes.
- 入り口: After crossing the bridge, there are two ground entrances into the base. The "Entrance" extends from those two doorways into the base a short distance. From here, the layout of the entrance is a T-shape. Turning left brings the player to the stairs that leads down to the sewers, as well as the narrow corridor linking the Battlement Resupply room to both the entrance and the Courtyard (there is a trapdoor in the ceiling allowing players to drop down from the Resupply room).
- 入り口の横の部屋: Turning right from the entrance leads you into a medium-sized room with a door at the opposite end which provides access to the courtyard. This room is heavily trafficked by both teams, as it is the most direct way to reach the courtyard from the main entrance. Engineers can set up small camps in here if the enemy is attempting to push through the entrance. In addition, because the room is large, it is often a hiding place for Spies. In many other parts of 2Fort, corridors are too narrow to provide much cover for an invisible Spy, but this room is an exception, allowing them to move through it undetected.
- 胸壁: The Battlements are on the front of the second floor of each base and have a center "bunker" section. This section has large glass-less windows and is a roofed structure. The windows allow almost unbroken lines of sight into the area. The battlements are also often referred to as the "balcony," as well as the "Sniper ledge" or "Sniper deck", due to their main purpose as a camping area for Snipers. The ledges provide Snipers with an excellent view of most of the exterior of 2Fort, with the exception of the bridge and the water beneath it. The RED side has a ledge placed high enough to cause fall damage if walked off of, while the BLU side's ledge is not tall enough.
要塞の場所
- 下水道: The tunnels under each base, leading from the water beneath the bridge to the "Entrance", are generally referred to as "The Sewers". They have several sharp turns, creating numerous blind corners around which to fight. The sewers are generally used as a way of entering the enemy base free from the attention of the Snipers above. The narrowness of the sewers and the water makes it difficult for Spies to sneak past enemies who are also using the tunnels.
- 下水道の部屋: In each sewer, there is a room recessed into a corner in such a way that it is impossible to see the entire room from inside the tunnels. On the water-side of the room, the tunnel has two 90 degree bends, but on the base-side of the room there is one long unbroken stretch of tunnel. The long tunnel provides a long-range line of sight between the room and the sewer exit. The rooms are often camped by Engineers, who use Teleporters to allow their team to quickly access the enemy base, or Sentry Guns to prevent the opposing team from using that location.
- 中庭: The Courtyard is the main means of transition between the ground floor and the second floor in each base. It is an enclosed, roofless space inside each base, next to the main spawn room and on the player's right when they come through the entrance. It is bounded on three sides by high ledges, and there are doors connecting to the spawn room, a staircase leading down to the Intelligence room on the second floor, and a door from the entrance and from the balcony spawn corridor on the ground floor. Two staircases allow access from below to the upper level. Engineers often use the space as a major defensive point, as it provides the only means of access to the Intelligence for most classes. By setting up a Sentry Gun, an Engineer can successfully provide effective defense against assaults on the intelligence, particularly if positioned so as to cover the Battlements' doorway.
- 格子: This is the small room with the grated floor right above the entrance of each base. It is connected directly to the upstairs area, and as a result is often used by players to gain quick access to battles in the entrance. Demomen, Soldiers, Engineers, Scouts and Pyros can jump up to the second story through this, providing another means of access to the second floor. Classes such as the Engineer and Demoman can also camp above the grate, limiting enemy access through the front entrance. Splash damage can be dealt through the grate.
- 上り階段: This is the large room on the second floor, adjacent to the main resupply room. The Upstairs area has an exit to the Battlements, "Grate", "top of the Spiral", and "Courtyard". This room is heavily trafficked as it is a major crossroads in the map, connecting practically every area of the base. It is often used by Scouts who have jumped to the balcony, as it provides a direct route to the Intelligence via the spiral ramp. The Upstairs area is also commonly referred to as the "hay room" or "hayloft" (due to the large piles of hay on the floor,) or simply the "upstairs lobby".
主な基地の場所
- 螺旋: The Spiral ramp that leads from the Basement up and out of the base is one of only two access points to the Intelligence room. Like the Sewers, the Spiral is a narrow corridor with right-angle turns. This tends to result in close quarters fighting, and due to the confined space it is fairly easy to block enemy access with a Dispenser, Sentry Gun, or Heavy. At the top, the Spiral connects to the upstairs area via a small room in which there is a small Health Pack and Ammo Pack, as well as two small corners in which Spies often hide. A direct line of sight can be drawn from the upstairs area along the top length of the Spiral, allowing Snipers to eliminate enemies with the Intelligence as they climb the Spiral.
- 階段: This area contains a long ramp running from the back of the courtyard into the basement. It is the other exit point for a stolen Intelligence. It is often called the "back stairs", "long stairs", "straight stairs", or simply "straight". It is also called the "L-Shaft", because it contained an elevator in previous incarnations of the 2Fort map.
- 基地: This is the space downstairs between the Spiral ramp and the Stairs. It leads to the Intelligence room and a third resupply point exists at the end nearest to the Stairs. However, no player will ever respawn in that room after they die. There is a Health pack and Ammo box in the middle of the Basement.
- 機密情報室: The Intelligence room has two entrances from the Basement. This is the primary defensive point of 2Fort, and as such it is frequently camped, especially by Engineers. The Intelligence is on top of a desk in the opposite corner to both entrances. The layout of the room makes it very simple for campers to entrench themselves, and successfully removing them can be almost impossible without an ÜberCharge.
戦術
もっと詳しく: 2Fortの高度な戦術
アップデート履歴
2015年10月6日 パッチ (Invasion コミュニティアップデート)
- [非公開] 2Fort Invasionが追加された。
- プレイヤーがマップの外に出た数少ないエリアを修正した。
- [非公開] Invasion コミュニティアップデートのマップを通常の「今すぐ遊ぶ」リストに追加した。
ギャラリー
機密情報
ポスター
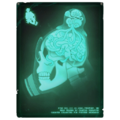
An X-Ray of the Pyro with the Triboniophorus Tyrannus on top.
The movie night poster in BLU base that appeared in the midnight showing teaser.
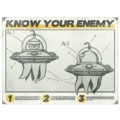
One of the propaganda posters involving an alien listening into a conversation between Scout & Ms. Pauling.
関連項目
| |||||||||||||||||||||||||||||||||||||
