User:Lolimsogreat21/Sandbox1
< User:Lolimsogreat21
Revision as of 12:03, 23 October 2021 by Lolimsogreat21 (talk | contribs) (→Class-specific strategy)
| “Sun Tzu's got nothing on us!” This article is a Community strategy stub. As such, it is not complete. You can help the Team Fortress Wiki Community Strategy Project by expanding it. |
| Lolimsogreat21 | |
|---|---|

| |
| Basic Information | |
| Developer(s): | {{{map-developer}}} |
| Map Info | |
| Environment: | Halloween |
| Setting: | Night |
| Hazards: | Pumpkin bombs, Pitfalls, Skeletons |
| Map Photos | |
| Map Stamp | |
| [[File:Item icon Map Stamp - Template:Dictionary/common strings/map name lolimsogreat21.png|170px|link=Map Stamp]] | |
| Supporters Leaderboard | |
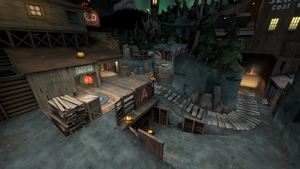
This article is about Community Erebus strategy.
Note: It is recommended to read the main Erebus article first to become familiar with the names of key map locations used in this article.
Contents
General strategy
See also: Community Attack/Defend strategy
See also: Community Skeletons strategy
This Halloween map features pumpkin bombs and Halloween pumpkins; see Community Halloween maps strategy.
Offense
Stage 1
Stage 2
Stage 3
Defense
Stage 1
Stage 2
Stage 3
Class-specific strategy
Scout
Offense
Stage 1
- The Tree Stump area and the Lumber Yard are both relatively open and filled with numerous obstacles, allowing you to freely exercise the Scout's incredible mobility.
- In the Case the traversing through the Sawmill proves to be too hard, you can make use of the two surrounding Mineshafts to wrap around the Reds and surprise them from behind.
- It is also possible to surprise enemies inside the Sawmill by approaching them from the aforementioned Tree Stump.
- With the Scout's increased capture rate, you will be able to secure the control point B in mere seconds. Because of this, simply rushing down the said point can be more successful then trying to fight its defenders.
Stage 2
- By going through the concealed Cave immediately after exiting the Spawn, you will flank around the Cliff, where the majority of Red defenses are commonly located.
- If this doesn't work out well, you can then rush down the Point A by sneaking through the Ravine.
- The Left Flank can be used to discretely approach the Church from its right side, opening up ambush opportunities.
- The central area located in between the Church and the Sniper's Deck is very open and filled with numerous platforms. This makes it an excellent location for dueling your opponents.
Stage 3
Defense
Stage 1
Stage 2
Stage 3
Soldier
Offense
Stage 1
Stage 2
Stage 3
Defense
Stage 1
Stage 2
Stage 3
Pyro
Offense
Stage 1
Stage 2
Stage 3
Defense
Stage 1
Stage 2
Stage 3
Demoman
Offense
Stage 1
Stage 2
Stage 3
Defense
Stage 1
Stage 2
Stage 3
Heavy
Offense
Stage 1
Stage 2
Stage 3
Defense
Stage 1
Stage 2
Stage 3
Engineer
Offense
Stage 1
Stage 2
Stage 3
Defense
Stage 1
Stage 2
Stage 3
Medic
Offense
Stage 1
Stage 2
Stage 3
Defense
Stage 1
Stage 2
Stage 3
Sniper
Offense
Stage 1
Stage 2
Stage 3
Defense
Stage 1
Stage 2
Stage 3
Spy
Offense
Stage 1
Stage 2
Stage 3
Defense
Stage 1
Stage 2
Stage 3
