Difference between revisions of "Community Highpass strategy"
(→{{class link|Engineer}}) |
m (Auto: WordFilter(Sentry Guns/Sentries(?!\s+Gun) → Sentry Guns) (Review RC#2926400)) |
||
| Line 71: | Line 71: | ||
**Inside your team's large house, looking onto the point | **Inside your team's large house, looking onto the point | ||
| − | * The [[Wrangler]] is also a fairly good choice, allowing | + | * The [[Wrangler]] is also a fairly good choice, allowing Sentry Guns placed further back from the action to contribute to keeping the point |
=== {{class link|Medic}} === | === {{class link|Medic}} === | ||
Revision as of 12:30, 28 May 2021
| “Sun Tzu's got nothing on us!” This article is a Community strategy stub. As such, it is not complete. You can help the Team Fortress Wiki Community Strategy Project by expanding it. Notes: Expand the "General Strategy" section to cover map locations in more detail. Potentially look at the class-specific strategies as well. |
| Community Highpass strategy | |
|---|---|

| |
| Basic Information | |
| Developer(s): | {{{map-developer}}} |
| Map Info | |
| Environment: | Industrial, desert |
| Setting: | Daylight, sunny |
| Map Photos | |
This article is about Community Highpass strategy.
Note: It is recommended to read the main Highpass article first to become familiar with the names of key map locations used in this article.
General strategy
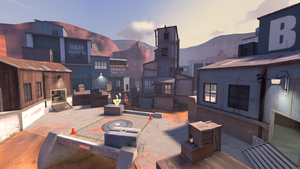
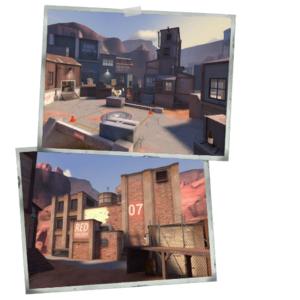
- The map is very open, so maneuverability is a big advantage.
- Keep in mind the medium sized health pack under the control point.
Class-specific strategy
 Scout
Scout
- The Scout is great for this map. His double jump can get him from the bridge to almost anywhere, and the open nature of the capture point enables his trademake "hit and run" attacks.
- The Soda Popper is a great option here, as you can jump most of the way across the map.
 Soldier
- Rocket jumping is great for the Soldier. He can get a bird's eye view of most of the map, and there are very few hiding spots. The Air Strike works wonders here.
 Pyro
Pyro
- A Pyro with a Flare Gun can annoy almost any stationary target in themiddle of the battlefield.
- Flanking can be a bit difficult, but if you go through one of the side cabins, you should be able to get behind the fray without taking too much damage.
- Spies love this map, so you should be constantly checking everyone.
 Demoman
- Demomen don't usually get much love on this map. The Sticky Jumper and the B.A.S.E. Jumper with a melee weapon of choice could do a fair bit of damage.
- Your grenades can be used to clear off the capture point, and to harass enemy Snipers on the balcony.
 Heavy
Heavy
- Can be used as a minor annoyance or a pocket.
- The Tomislav is recommended.
 Engineer
- It is fairly hard for an Engineer to make a nest on this map, due to the open sightlines.
- Mini Sentry Guns, however, are extremely useful with proper placement. Some example placement spots are:
- Under the point, or in the underpass.
- In the house to your team's right, facing the point
- In bushes around the area
- On the point, behind the concrete blocks
- Inside your team's large house, looking onto the point
- The Wrangler is also a fairly good choice, allowing Sentry Guns placed further back from the action to contribute to keeping the point
 Medic
Medic
- Medics should be careful of Snipers and Spies.
 Sniper
- The balcony overlooks most of the battlefield, but you are fairly exposed.
- Bows are recommended.
- The Razorback is probably the best choice for secondary.
 Spy
Spy
- Spies are great on this map, as most people are focused on the capture point, leaving their backs ripe for stabbing.
- The nature of the gameplay is such that you could wait uncloaked outside enemy spawn between the two exit doors and not be noticed. People will figure you out pretty quickly though, so this is not a recommended game plan.
- Get behind the enemy team via the side cabins.
