Difference between revisions of "Community Sunshine strategy"
(Added info, updated to be more consistent with other community map strategies (I based it off of the Hoodoo and 5Gorge ones).) |
m (Fixed my comment that wiped out most of the content.) |
||
| Line 16: | Line 16: | ||
== General (All Classes) == | == General (All Classes) == | ||
| − | *This map has an open sky, so be careful of enemy Demomen [[Jumping#Basic_sticky_jump|sticky jumping]] or enemy Soldiers [[Jumping#Basic_rocket_jump|rocket jumping]] in from above. <!---Note: I don't know how else to describe the fact that there aren't any roofs/ceilings other than with "open sky". Open to changes> | + | *This map has an open sky, so be careful of enemy Demomen [[Jumping#Basic_sticky_jump|sticky jumping]] or enemy Soldiers [[Jumping#Basic_rocket_jump|rocket jumping]] in from above. <!---Note: I don't know how else to describe the fact that there aren't any roofs/ceilings other than with "open sky". Open to changes---> |
*There are many [[Ambushing|flank]] routes on this map, so keep an eye out on all sides rather than just one. | *There are many [[Ambushing|flank]] routes on this map, so keep an eye out on all sides rather than just one. | ||
Revision as of 04:09, 22 February 2017
| “You are so small! Is funny to me!” This article is a stub. As such, it is not complete. You can help Team Fortress Wiki by expanding it. |
This article is for the map Sunshine.
| Community Sunshine strategy | |
|---|---|

| |
| Basic Information | |
| Developer(s): | {{{map-developer}}} |
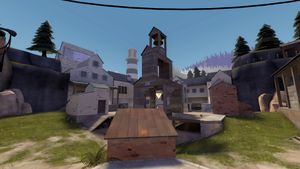
This article is about Community Sunshine strategy.
Contents
General (All Classes)
- This map has an open sky, so be careful of enemy Demomen sticky jumping or enemy Soldiers rocket jumping in from above.
- There are many flank routes on this map, so keep an eye out on all sides rather than just one.
Class-specific strategy
 Scout
Scout
- Make use of the open area and differences in elevation to dodge enemy fire.
 Soldier
- The open area makes your Rocket Launcher bad at long range. Use rocket jumping to close the distance between you and your enemies.
 Pyro
Pyro
- Pyros have an advantage on this map, as there are no available water sources for players to reach. Use the hit-and-run tactic to kill other players by Overtime burning.
 Demoman
- Make use of your Sticky Launcher's splash damage to clear enemies capping the second point, as it's partly enclosed in a small area, and make use of your Stickybombs' arc to fire Stickybombs onto the point from below so that your enemies won't see you first.
 Heavy
Heavy
- Because of the enclosed spaces, Heavy is great for defending the passages between the second and the third points. Spin up your Minigun before turning the corner to catch enemies by surprise.
 Engineer
- As a result of the open area, this map's center and second points are not good places for Engineer nests; your buildings will be easily open to spamming by the enemy team, and they will often be able to see your Sentry before it sees them, thus removing the element of surprise.
 Medic
Medic
- The open area leaves little room for hiding, so be careful of enemy Snipers who may try to headshot you.
 Sniper
- Make use of the open area to shoot enemies from beyond their range, but be careful of enemy Snipers.
 Spy
Spy
- As the map is relatively large and ammo packs are not very plentiful, it is recommended for you to use the Invis Watch. However, the Cloak and Dagger can be more viable for attacking the enemy's last point.