Difference between revisions of "Community Doublefrost strategy"
(→General strategy) |
GrampaSwood (talk | contribs) m |
||
| Line 24: | Line 24: | ||
== General strategy == | == General strategy == | ||
| − | + | {{See also|Community Double Cross Strategy}} | |
| − | * This map is nearly | + | * This map is nearly identical to [[Double Cross]], most of the strategies applicable to that map also apply here. |
* The middle of the map is the only way to get to the other base, consider using knockback from weapons (Such as the [[Force-A-Nature]], [[Airblast]], or explosive knockback) to push people into the pit. This is especially effective against Intelligence carriers as the Intelligence immediately resets. | * The middle of the map is the only way to get to the other base, consider using knockback from weapons (Such as the [[Force-A-Nature]], [[Airblast]], or explosive knockback) to push people into the pit. This is especially effective against Intelligence carriers as the Intelligence immediately resets. | ||
== Class-specific strategy == | == Class-specific strategy == | ||
=== {{class link|Scout}} === | === {{class link|Scout}} === | ||
| − | * At the start of a round, use movement-enhancing items, such as the [[Atomizer]], to jump onto the enemy balcony and get | + | * At the start of a round, use movement-enhancing items, such as the [[Atomizer]], to jump onto the enemy balcony and get to the intelligence quickly. |
=== {{class link|Soldier}} === | === {{class link|Soldier}} === | ||
Revision as of 21:42, 1 January 2023
| “Sun Tzu's got nothing on us!” This article is a Community strategy stub. As such, it is not complete. You can help the Team Fortress Wiki Community Strategy Project by expanding it. |
| Community Doublefrost strategy | |
|---|---|

| |
| Basic Information | |
| Developer(s): | {{{map-developer}}} |
| Map Info | |
| Environment: | Smissmas, industrial |
| Setting: | Daylight, snowy |
| Hazards: | Pitfalls |
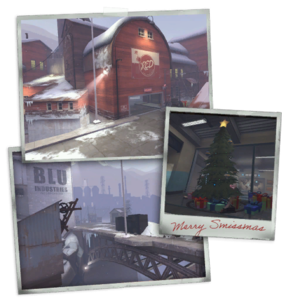
| Map Photos | |
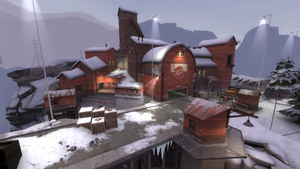
This article is about Community Doublefrost strategy.
Note: It is recommended to read the main Doublefrost article first to become familiar with the names of key map locations used in this article.
Contents
General strategy
See also: Community Double Cross Strategy
- This map is nearly identical to Double Cross, most of the strategies applicable to that map also apply here.
- The middle of the map is the only way to get to the other base, consider using knockback from weapons (Such as the Force-A-Nature, Airblast, or explosive knockback) to push people into the pit. This is especially effective against Intelligence carriers as the Intelligence immediately resets.
Class-specific strategy
 Scout
Scout
- At the start of a round, use movement-enhancing items, such as the Atomizer, to jump onto the enemy balcony and get to the intelligence quickly.
