Community Mannhattan strategy
Revision as of 02:02, 5 March 2014 by Mein Kampfy Couch (talk | contribs) (→{{class link|Engineer}}: Enhanced Strategy for Engineer on Mannhattan.)
| Community Mannhattan strategy | |
|---|---|

| |
| Basic Information | |
| Developer(s): | {{{map-developer}}} |
| Map Info | |
| Environment: | Urban City |
| Setting: | Daylight, Sunny |
| Map Photos | |
| “ | Little metal men try to take gate!
Click to listen
— The Heavy warning his team of the gate being captured.
|
” |
This article is about Community Mannhattan strategy
Contents
General (All Classes)
- All team-mates must work together to make sure the robots don't capture the gates. Once the gates are captured, they cannot be re-taken.
- Keep an eye out for robots with yellow lit up heads, this means they're headed for a nearby gate.
- Tanks do not spawn on this map, so don't put all your money into tank takedown abilities.
- Once the first gate gets captured and the gatebots get stunned, make sure to take out as many as possible so they can't get a head start on capturing the next gate.
- Any class with knockback capabilities should try to push bomb carriers into the grinder near gate A, e.g. Soldier, Pyro, Engineer.
Class-specific strategy
 Scout
Scout
- Since most of your team will be killing every robot once they drop out of their spawn area, try to run up and collect the money the robots drop when killed.
- Use your Sandman's mark for death upgrade to weaken a Giant Robot's defenses. This is especially helpful when all the gates are captured and the 3 bombs are being carried by Giants.
- The Fan-O-War can also help accomplish this.
 Soldier
- As Soldier, it is recommended to use rocket specialist, especially against Giants or clumps of robots.
- Use the rocket specialist to slow down Giants with gatebots hats.
 Pyro
Pyro
- Bonk Scouts can spawn on this map, so make sure to have a fully upgraded Airblast ability.
 Demoman
- Use your stickies to take out large clusters of gatebots that have either been stunned, or are capturing.
 Heavy
Heavy
- Use the rage upgrade's knockback to push the Giant gatebots away from the gate.
- If you have a pocket Medic, stay near the robot spawn. You can easily stop the robots from advancing their spawn by capturing a gate.
 Engineer
Main Gate
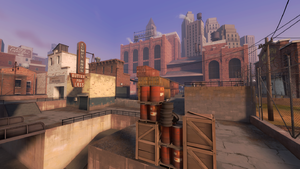
- You can place your Dispenser behind the red oil tank near the main gate to heal your team from robots.
- There are multiple Sentry Gun spots to cover the main gate.
- Placing your Sentry on the crates near the oil tank will allow you to not only attack robots near the oil tank, but also part of the balcony and outside the factory as well. However, this leaves it more open to attack.
- Placing your Sentry on the large oil barrel can easily camp the robots coming out of the main gate. However, this doesn't effectively cover the balcony or behind the sentry, so use caution when using this spot.
- Placing your Sentry on the balcony itself covers both exits, and can provide your team with backup fire.
- Another good spot is on the ramp behind the balcony, as this can catch any robots trying to capture A, while still covering the upper entrance. However, this isn't very useful at attacking the main gate.
- It's not recommended to put your Teleporter in the factory, as robots can easily reach it and destroy it unprotected. Instead, consider placing it in the small cave of shipping containers near A.
Point A
- The large stack of shipping containers makes for a good engineer base, both on top and in the small cave underneath.
- The cave is a good spot for a Dispenser and Teleporter while the main gate is active, but while Gate A is open, robots can run in and destroy them.
- The top of the containers makes for a very good sentry base, as you have coverage over the choke point between A and B.
- If Gatebots are posing a problem to your team, consider putting your sentry facing Gate B.
- Due to the short nature of this point, Giant Scouts can be a problem. Consider having a Scout or Sniper Jarate or Milk them to help your sentry destroy them.
Point B/Bomb Slot
- Hiding your sentry behind the fences at the hatch is a good spot for last resort events.
- If your team can manage to control B, then keep your sentry on the shipping crates if there are no Giant Scouts.
- If there are Giant Scouts, then move your sentry back near the bomb slot.
 Sniper
- Hiding on the railing above the robot spawn is a good way to kill robots that make it past your team's defenses.
- Use the Machina's ability to go through multiple targets to take out large amounts of gatebots.
 Medic
Medic
- Using the shield ability, block giant robots from shooting projectiles at you. The shield can also damage the robots, so use I to take down large targets, like giant gatebots.
- Your Madmilk syringes can help your team regain health when you can't reach them to heal them.
- Reviving your team with the new Reanimator can be good for your defenses, e.g. your team's Heavy dies when he needs to be alive.
 Spy
Spy
- Sappers can provide quick offense against either capturing gatebots or disabled gatebots.
