Difference between revisions of "Community Brimstone strategy"
Danimations (talk | contribs) m (dont link pls) |
|||
| Line 17: | Line 17: | ||
}} | }} | ||
| − | This article is about '''Community | + | This article is about '''Community Brimstone strategy'''. |
== General strategy == | == General strategy == | ||
Revision as of 00:04, 14 April 2021
| Community Brimstone strategy | |
|---|---|

| |
| Basic Information | |
| Developer(s): | {{{map-developer}}} |
| Map Info | |
| Environment: | Halloween |
| Setting: | Nighttime, overcast |
| Hazards: | Lava, Pumpkin bombs, Skeletons, Monoculus, Ghost, Horseless Headless Horseman, Merasmus, Steam |
| Map Photos | |
This article is about Community Brimstone strategy.
Contents
General strategy
See also: Community Skeletons strategy
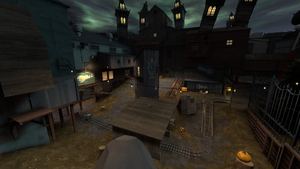
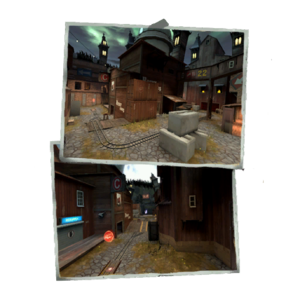
This Halloween map features pumpkin bombs, Halloween pumpkins, magic spells, and Ghosts; see Community Halloween maps strategy.
- General Community Payload strategy applies, but with the added complication of spontaneous monster spawns.
- As disruptive as they are, the monster spawns are, for the most part, a balancing factor, slowing a rapid BLU advance and weakening a strong RED defense.
- Attack only those Skeletons that chase your team; waste no fire on any other monster.
- The only Rare Magic Spells available on the normal level are those dropped by the Skeleton King. Several Rare Magic Spell pickups are available in the Underworld, which are accessible only late in the course of the map, no sooner than Point D.
- When the enemy's Sentry Guns are shooting at Skeletons, the Horsemann, MONOCULUS, or Merasmus, they are not shooting at you; use these momentary distractions to more safely target Engineer nests.
- In the last area, RED team spawns both sides of the Hell Pit and they have multiple ways in and out from the spawn areas. One route actually brings them behind the BLU team trying to make the last push into the Hell Pit. Keep an eye out on those flanking exits as BLU!
Class-specific strategy
 Scout
Scout
- When monsters are active, the BLU Scout has a job of monitoring the cart timer and tapping it as needed to keep it from moving backwards.
- Bonk! Atomic Punch allows a Scout who is IT to lead the Horsemann deeper into the enemy. If you can make it, run past the point where the Horsemann stops chasing you and turns on the enemy.
 Soldier
- Because of the superior effectiveness of your rocket splash damage against Skeletons, it is your job to be the first engage approaching Skeletons at a distance.
 Pyro
Pyro
- Pyro provides excellent clean up of small skeletons.
- There are a couple open Lava pits for airblasting players into.
 Demoman
- Because Skeletons and Horsemann spawns are uncommon (1-in-8), it is a waste of fire to set up carpet traps at the known spawn locations.
- But, if you recognize the spell or catch the beginning of the spawning animation, you do have a couple seconds to set a small trap.
- Charging helps a Demoman who is IT to lead the Horsemann deeper into the enemy.
 Heavy
Heavy
 Engineer
- Sentry Guns have no interaction with ghosts, are an effective defense against skeletons, risk being left undefended when the Horsemann is near, and should not be left anywhere near MONOCULUS or Merasmus.
- Bone breaker: Sentry Guns have a particular advantage against Skeletons and the Horsemann. Sentry Guns are safe from Skeletons and the Horsemann will usually take at most one swing at one. When these monsters are the closest target, Sentry Gun aim is perfect and the fire is rapid.
- When skeletons spawn, drop a Sentry Gun where it can shoot into your team's area, yet be covered from the other team's direct attack.
- Be aware of the Skeleton locations — don't stand between them and your own Sentry Gun!
 Spy
Spy
- As the team's spook, you should be operating within the enemy's position. This puts you in the place to know when and where the enemy has a monster spawned behind them. This might not be readily apparent to the rest of your team; so, inform your team of this situation so they can make an aggressive move while the enemy is disrupted.
- With your Cloak, Disguises, and area of operation, you will also have opportunities to tap the cart as needed.
General Merasmus Strategy
See also: Community Ghost Fort strategy
Given how much time and effort has been put into getting the cart this far, BLU is here only to shove that cart into that Hell Hole. If Merasmus does show up, that only means that the BLU train is running very, very late, and, quite frankly, BLU is probably hoping for Merasmus' help in breaking the RED defense. No truce is called by the map, and the game clock does not stop. So, BLU is not likely to cooperate with RED in defeating Merasmus. If you want to kill Merasmus, son, go to Ghost Fort.
- "Kill everyone like you would normally." Merasmus' attacks and teleports are strong, wide-ranging, and random. Avoid Merasmus, but find every opportunity to attack the enemy past Merasmus and to get around him to control the cart.
- BLU should commit its firepower to flanking through the relative cover of the two side passages, assigning only a Scout or two to zipping in and out to tap or advance the cart at any opportunity created by Merasmus' teleports.
- RED should fire past Merasmus at BLU and avail itself of every opportunity to bypass Merasmus to disrupt the final BLU push that is sure to come.
- Teams of RED Soldiers and Scouts should jump into the flanking entrances of the Warehouse intent on destroying all forward BLU Engineer positions.
- A RED Engineer could leave an inactive teleporter exit hidden on top of something in the Warehouse beforehand to activate if Merasmus appears.
- Merasmus does tend to wander off and attack places outside of the final area; prepare/watch for a BLU push on the cart the moment this happens.
- Merasmus will not spare any Sentry Gun. Mini-Sentry Guns have the advantage here of being rapidly replaceable.
- On the off chance Merasmus is defeated, the Bombinomicon that appears provides a second chance at the Rare Magic Spells in Hell.
General Horseless Headless Horsemann Strategy
See also: Community Mann Manor strategy
- The strategies for accommodating the Horseless Headless Horsemann in your Brimstone battle plans are contrary to most of the strategies for defeating the Horsemann on Mann Manor.
- There is generally no advantage in the Payload game mode to expending fire power on Horsemann.
- Most tactics and match-ups for fighting the Horsemann apply in Brimstone only when the team has agreed to fight the Horsemann instead of the enemy.
- Instead of fighting the Horsemann, assign the IT player to leading the Horsemann as far into the enemy as possible.
- It is better to attempt the Sleepy Holl0WND achievement in Mann Manor.
- The Horsemann will not chase players beyond certain boundaries. With no immediate target within that range, the Horsemann will run towards some specific point on the map; the B-point Horsemann should run towards point C, while the C-point Horsemann should run towards point E.
- If BLU is driven off of the cart by the Horsemann shortly after capturing the second point, the Horsemann's attention will be largely focused on RED.
- Have the IT player lead the Horsemann as far into the enemy area as possible; dying to enemy fire deep in the enemy is almost as an effective way of tagging them as any melee hit.
- Fire on any enemy IT player attempting to lead the Horsemann to your team.
- Wearing a Saxton Hale Mask or Horseless Headless Horsemann's Head will prevent you from getting stunned by the Horsemann's taunt, allowing you to gain ground on him as you lead him into the enemy.
- The Horsemann cannot jump up, so jumping up to a ledge will force the Horsemann to chase you the long way around, ideally through the enemy.
General MONOCULUS Strategy
See also: Community Eyeaduct strategy
- The strategies for accommodating MONOCULUS in your Brimstone battle plans are contrary to most of the strategies for defeating MONOCULUS on Eyeaduct.
- There is generally no advantage in the Payload game mode to expending firepower on MONOCULUS.
- Most tactics and match-ups for fighting MONOCULUS apply in Brimstone only when the team has agreed to fight MONOCULUS instead of the enemy.
- Laying heavy fire on MONOCULUS draws its attention to your team and makes your team vulnerable the enemy.
- Truce is not called on Brimstone; the cart may be pushed and points may be captured while MONOCULUS is active.
- It is better to attempt the Optical Defusion achievement in Eyeaduct.
- Dodge MONOCULUS: build defenses behind its covering fire and launch pushes into enemy groups it disrupts.
- Critical hits anger MONOCULUS, causing it to rapid fire three projectiles with perfect lead.
- Attempting to anger MONOCULUS while it is in the middle of several of the enemy is an exception to the rule of not firing on MONOCULUS.
- Attempt this only when you know your weapon has a Crit Boost and you do not have another priority target.
- Avoid angering MONOCULUS when it is in your team's area.
- Stay away from MONOCULUS when it begins to rapid fire its projectiles. Use cover from buildings if you are close to it when it gets angry.
- Watch for MONOCULUS stuns as opportunities to safely run past it.
- Do not stun MONOCULUS when it is in the middle of your enemy; use the Underworld boost instead to injure the enemy.
