Difference between revisions of "Community Maul strategy"
(Fixed link in note) |
m (added Soldier strategy (for RU page not deleted:(() |
||
| Line 34: | Line 34: | ||
=== {{class link|Soldier}} === | === {{class link|Soldier}} === | ||
| + | * The [[Direct hit]] can be used for strike Hale mid-air so he cant climb for other floors, this will give another mercs some time to prepare | ||
=== {{class link|Pyro}} === | === {{class link|Pyro}} === | ||
Revision as of 19:52, 25 June 2025
| “Sun Tzu's got nothing on us!” This article is a Community strategy stub. As such, it is not complete. You can help the Team Fortress Wiki Community Strategy Project by expanding it. |
| Maul | |
|---|---|

| |
| Basic Information | |
| Map type: | Versus Saxton Hale (Community) |
| File name: | vsh_maul
|
| Released: | December 11, 2024 Patch (Smissmas 2024) |
| Developer(s): | Matthew Scott "MegapiemanPHD" Simmons Brandon "Bonk Nickeltoon" Koller Szabó "Maxxy" Attila Patrick "Zeus" Hennessy Lizard Of Oz Stuffy360 James Jameson Phe Mattie Konig Alex "FGD5" Stewart Maksim "Velly" Streltsov Jason "Yaki" Herman Jesse "Custard1" Budd Joaquim "JPRAS" Silva Samuel "ChargingTurnip" Turner Alex "Lacry" Couto James M. Torkil "TheLazerSofa" Malvik Bidtnes Sky |
| Map Items | |
| Map Photos | |
| Map overview | |
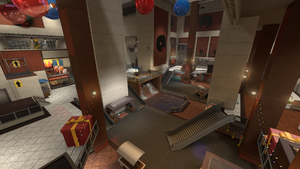
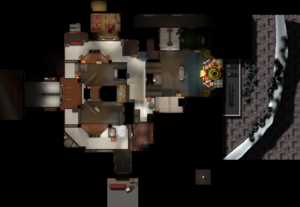
This article is about Community Maul strategy.
Note: It is recommended to read the main Maul article first to become familiar with the names of key map locations used in this article.
General Strategy (All Classes)
See also: Community Versus Saxton Hale strategy
- The Sleepless Sheep store contains a medium and large health and ammo pickup respectively, making it an excellent spot to recover after an encounter with Hale, especially if he is on the First Floor of the Mall.
- Avoid going inside the Sweet Homegoods store if Hale is nearby unless you have a clear escape route or support. Its enclosed nature leaves you cornered against him.
Class-specific strategy
 Scout
Scout
- The Force-A-Nature can be used to push Hale off the Mall's Third Floor, alongside getting yourself up the Third Floor quicker with its self-knockback.
 Soldier
- The Direct hit can be used for strike Hale mid-air so he cant climb for other floors, this will give another mercs some time to prepare
 Pyro
Pyro
- The Neon Annihilator can be used at the water pool at Mall First Floor Area 2 to deal Critical hits to Hale when he jumps into the water.
 Demoman
 Heavy
Heavy
- Maul is quite a large map, so stick with your team and on the higher levels of the Mall.
 Engineer
- The Third Floor of the Maul is a great spot for a Sentry Gun, as its elevated height forces Hale to come all the way up there (wasting time while your team damages him). However, the Third Floor's lack of ammo and health packs can be a problem as you will need to climb down from the area (where Hale could possibly spot and hunt you down) to collect any, making you incredibly reliant on your Dispenser.
- Carmack Computers can be used as a quick fallback nest or an area to hide a Teleporter to the Third Floor of the Mall.
 Medic
Medic
- The Quick-Fix, with the help of a willing Demoman or Soldier, can be used to quickly reach the Third Floor of the Mall.
 Sniper
- The Third Floor of the Mall provides an excellent sightline against Hale if he is on the Second Floor of the Mall, as well as providing a high ground advantage.
 Spy
Spy
- Carmack Computers and the Sleepless Sheep store can be used as flank routes to avoid being spotted by Hale if he is on the Second Floor of the Mall.
 Saxton Hale
- You spawn quite close to the Third Floor area of the Mall. You can use this to get onto that area, should there be any mercenaries stationed there, using the Brave Jump and Sweeping Charge to get onto there.

