Difference between revisions of "Community Mann Manor strategy"
m (→{{class link|spy}}) |
(pop) |
||
| Line 1: | Line 1: | ||
| − | |||
| − | |||
{{Map infobox | {{Map infobox | ||
| game-type = Control Point | | game-type = Control Point | ||
| Line 21: | Line 19: | ||
This article is about '''Community Mann Manor strategy'''. | This article is about '''Community Mann Manor strategy'''. | ||
| − | ==General | + | == General Map Strategy == |
| − | * | + | *This map is a reskin of [[Mountain Lab]], so any [[Community Mountain Lab strategy|strategies]] that apply there will work here. |
| − | * | + | *When [[Halloween mode]] is enabled, the [[Horseless Headless Horsemann]] will spawn. |
| + | **The Horsemann can traverse the entire map except for spawn rooms and a few ledges, such as a rooftop between point A and B which Scouts, Soldiers and Demomen can access. If you are IT, going up here will cause HHH to lose interest and chase someone else. | ||
| + | **Wearing a [[Saxton Hale Mask]] or [[Horseless Headless Horsemann's Head]] will prevent you from getting stunned by the Horsemann. | ||
| + | |||
| + | == General Horseless Headless Horsemann Strategy == | ||
| + | |||
| + | {| class="wikitable grid" cellpadding="0" cellspacing="0" | ||
| + | ! class="header" colspan="3" width="200"| Class | ||
| + | ! class="header" | Strategy | ||
| + | |- | ||
| + | | class="small" align="center" valign="center" style="padding:0.5em" | [[Image:Scout.png|100x100px|link=Scout]]<br>[[Scout]] | ||
| + | | class="xsmall" | vs | ||
| + | | class="small" align="center" valign="center" style="padding:0.5em" | [[Image:HHH.png|100x100px|link=the Horsemann]]<br>[[Horseless Headless Horsemann]] | ||
| + | |{{Info}}Playing as [[Scout]] allows you to evade the Horsemann's attacks more easily than other classes with your jumping and running abilities. | ||
| + | |||
| + | {{Info}}Hit-and-run tactics are a necessity when attacking [[Horseless Headless Horsemann]]. | ||
| + | |||
| + | {{Pro}}[[Bonk! Atomic Punch]] will allow you to survive the Horsemann's melee attack. | ||
| + | |||
| + | {{Pro}}The [[Soda Popper]] is an ineffective weapon to use as the Horsemann does not take damage from mini-crits. | ||
| + | |||
| + | {{Con}}Do not use [[Crit-a-Cola]] against the Horsemann. Your attacks will deal no extra damage and will make it easier for the Horsemann to kill you. | ||
| + | |||
| + | {{Con}}The [[Sandman]] baseball and [[Fan O'War]] are ineffective against the Horsemann as it cannot be [[stun]]ned by baseballs or marked for death, respectively. | ||
| + | |||
| + | |- | ||
| + | | class="small" align="center" valign="center" style="padding:0.5em" | [[Image:Soldier.png|100x100px|link=Soldier]]<br>[[Soldier match-ups|Soldier]] | ||
| + | | class="xsmall" | vs | ||
| + | | class="small" align="center" valign="center" style="padding:0.5em" | [[Image:HHH.png|100x100px|link=the Horsemann]]<br>[[Horseless Headless Horsemann]] | ||
| + | | | ||
| + | {{Info}} [[Jumping#Rocket jump|Rocket jumping]] is a viable method of retreating if the Horsemann is chasing you. Jumping from the different heights around Control Point B will force the Horsemann to take long routes, and may give up chasing you. | ||
| + | |||
| + | {{Pro}} A [[Kritzkrieg]] [[ÜberCharge]] will allow a skilled Soldier to make short work of the Horsemann, as a pack of [[critical hits|critical]] rockets and [[Shotgun]] shells will take a large chunk of its health away. This can be combined with rocket jumping to stay clear of the Horsemann's melee attack. | ||
| + | |||
| + | {{Pro}} The [[Direct Hit]] is probably the Soldier's best primary weapon to use against the Horsemann. The projectiles are fast and do high damage, and the Horsemann is large enough for you not to worry too much about missing it. | ||
| + | |||
| + | {{Pro}} The Shotgun can be effective against the Horsemann as base damage remains the same when attacking it. This will allow you to do more damage from a longer range than normal. | ||
| + | |||
| + | {{Con}}Charging the Horsemann with the [[Equalizer]] at very low health will only be effective if the enemy team is not around and the Horsemann is stunned, as your crits will deal around 300 damage. Otherwise, it's a risky strategy. | ||
| + | |||
| + | {{Con}}The [[Black Box]] does not award health upon hitting the Horsemann and is a considerable drawback when its reduced ammo is taken into account. | ||
| + | |||
| + | {{Con}}The [[Buff Banner]] does not charge from the Horsemann, and mini-crits do not work on him either. | ||
| + | |||
| + | |- | ||
| + | | class="small" align="center" valign="center" style="padding:0.5em" | [[Image:Pyro.png|100x100px|link=Pyro]]<br>[[Pyro match-ups|Pyro]] | ||
| + | | class="xsmall" | vs | ||
| + | | class="small" align="center" valign="center" style="padding:0.5em" | [[Image:HHH.png|100x100px|link=the Horsemann]]<br>[[Horseless Headless Horsemann]] | ||
| + | | | ||
| + | {{Info}}Because the Horsemann does not suffer afterburn damage, using the Pyro against the Horsemann is inadvisable. In addition, the Pyro's short range of effectiveness and the Horsemann's resistance to [[Flamethrower]]s makes attacking head-on a very deadly prospect. | ||
| + | |||
| + | {{Pro}}The [[Backburner]] can be moderately effective if the Horsemann is distracted. | ||
| + | |||
| + | {{Pro}}The Shotgun can be effective against the Horsemann as base damage remains the same when attacking it. This will allow you to do more damage from a longer range than normal. | ||
| + | |||
| + | {{Con}}The Reserve Shooter will not mini-crit against the Horsemann so this is not recommended. | ||
| + | |||
| + | {{Con}}The [[Flare Gun]] and the [[Detonator]] are possibly some of the worst weapons to use against the Horsemann as he cannot catch on fire. Only the minimal flare impact damage will register. | ||
| + | |||
| + | {{Con}}Airblasts will not work on the Horsemann as he cannot be knocked back. | ||
| + | |- | ||
| + | | class="small" align="center" valign="center" style="padding:0.5em" | [[Image:Demoman.png|100x100px|link=Demoman]]<br>[[Demoman match-ups|Demoman]] | ||
| + | | class="xsmall" | vs | ||
| + | | class="small" align="center" valign="center" style="padding:0.5em" | [[Image:HHH.png|100x100px|link=the Horsemann]]<br>[[Horseless Headless Horsemann]] | ||
| + | | | ||
| + | {{Info}}You can try to retreat by charging with the [[Chargin' Targe]] or [[Splendid Screen]] in a single direction across open ground. | ||
| + | |||
| + | {{Pro}}Direct hits with the [[Grenade Launcher]] or [[Loch-n-Load]] will cause large amounts of damage to the Horsemann, so it is advisable to lead your shots slightly to ensure they connect. This strategy is especially effective with a Kritzkrieg ÜberCharge. | ||
| + | |||
| + | {{Pro}}Stickybomb traps are very effective against the Horsemann, as he will not try to avoid them, it just requires having the IT player lure the Horsemann onto the trap. | ||
| + | |||
| + | {{Con}}Playing as a Demoknight is risky as the Horsemann attacks if it feels something is blocking its movement, and a player will be made IT if they are closest when the Horsemann changes target. | ||
| + | |||
| + | |||
| + | |- | ||
| + | | class="small" align="center" valign="center" style="padding:0.5em" | [[Image:Heavy.png|100x100px|link=Heavy]]<br>[[Heavy match-ups|Heavy]] | ||
| + | | class="xsmall" | vs | ||
| + | | class="small" align="center" valign="center" style="padding:0.5em" | [[Image:HHH.png|100x100px|link=the Horsemann]]<br>[[Horseless Headless Horsemann]] | ||
| + | | | ||
| + | {{Info}}The Heavy is one of the best classes to go head-on against the Horsemann. Despite its resistance to Minigun bullets, any Minigun will shred the boss in a matter of seconds at short range, even without crits. | ||
| + | |||
| + | {{Info}}The Heavy is slow thus vulnerable if he does not have a Medic pocketing him ready to pull an Uber if the Horsemann picks either of them as their next target. | ||
| + | |||
| + | {{Con}}The [[Buffalo Steak Sandvich]] is not recommended except to attempt quick getaways. | ||
| + | |||
| + | {{Con}}The Shotgun should rarely be used, as the time between shots and damage spread mean you will always get more damage from your primary weapon. Nonetheless, if you have run out of ammunition for your primary weapon, remember that base damage remains constant while attacking the Horsemann, so you can use the Shotgun effectively from further ranges than normal. | ||
| + | |||
| + | |- | ||
| + | | class="small" align="center" valign="center" style="padding:0.5em" | [[Image:Engineer.png|100x100px|link=Engineer]]<br>[[Engineer match-ups|Engineer]] | ||
| + | | class="xsmall" | vs | ||
| + | | class="small" align="center" valign="center" style="padding:0.5em" | [[Image:HHH.png|100x100px|link=the Horsemann]]<br>[[Horseless Headless Horsemann]] | ||
| + | | | ||
| + | {{Info}}Since the Horsemann is not affected by knock back, the player should never rely on his sentry to keep the monster away. | ||
| + | |||
| + | {{Info}}the Horsemann will attack anything he walks into - this includes players and buildings. | ||
| + | |||
| + | {{Pro}}Sentry Guns will target the Horsemann even when it is outside their normal range. | ||
| − | + | {{Pro}}Because Sentry Guns never deal critical hits (except mini-crits, which do not affect the Horsemann), your Sentry Gun can be an effective way to deal damage to the Horsemann without angering it. Use the Wrangler for maximum damage. | |
| − | |||
| − | |||
| − | + | {{Pro}}The Shotgun and Pistol can both be effective against the Horsemann as their base damage remains the same when attacking it. This will allow you to do more damage from a longer range than normal. | |
| − | + | {{Con}}The [[Widowmaker]] does not return metal for damage done to the Horsemann. | |
| − | + | |- | |
| − | + | | class="small" align="center" valign="center" style="padding:0.5em" | [[Image:Medic.png|100x100px|link=Medic]]<br>[[Medic match-ups|Medic]] | |
| − | + | | class="xsmall" | vs | |
| + | | class="small" align="center" valign="center" style="padding:0.5em" | [[Image:HHH.png|100x100px|link=the Horsemann]]<br>[[Horseless Headless Horsemann]] | ||
| + | | | ||
| + | {{Info}}If you do not have an ÜberCharge ready, it is best advised to stay away and build one up, as the Horsemann attacks in order of whoever is closest. | ||
| − | + | {{Info}}Most of the Medic's weapons are relatively ineffective, so the Medic should be reserved to a support role. Use your ÜberCharge on a teammate so they can attack the Horsemann. | |
| − | |||
| − | |||
| − | + | {{Con}}It is risky to use the [[Quick-Fix]] or the [[Kritzkrieg]] against the Horsemann, as The Horsemann's melee attack is a 1-Hit KO except against Ubered players and Dead Ringer spies. | |
| − | |||
| − | === | + | |- |
| − | + | | class="small" align="center" valign="center" style="padding:0.5em" | [[Image:Sniper.png|100x100px|link=Sniper]]<br>[[Sniper match-ups|Sniper]] | |
| − | + | | class="xsmall" | vs | |
| + | | class="small" align="center" valign="center" style="padding:0.5em" | [[Image:HHH.png|100x100px|link=the Horsemann]]<br>[[Horseless Headless Horsemann]] | ||
| + | | | ||
| + | {{Info}}The basic [[Sniper Rifle]] has medium effectiveness against the Horsemann, as headshots do not deal extra damage. However, charging shots is still worthwhile as the damage will properly scale against the Horsemann. The [[Machina]] will deal slightly more damage in this regard. | ||
| − | + | {{Pro}}The [[Sydney Sleeper]]'s faster charge rate makes it more useful than the standard Sniper Rifle, since the Sniper Rifle can not score headshots on the Horsemann. | |
| − | |||
| − | |||
| − | |||
| − | |||
| − | |||
| − | |||
| − | + | {{Pro}}Additionally, the [[Huntsman]] is the only Sniper weapon that can cause critical hits upon headshotting the Horsemann. | |
| − | |||
| − | === | + | {{Con}}[[Jarate]] does not affect the Horsemann. |
| − | + | |- | |
| + | | class="small" align="center" valign="center" style="padding:0.5em" | [[Image:Spy_RED.png|100x100px|link=Spy]]<br>[[Spy match-ups|Spy]] | ||
| + | | class="xsmall" | vs | ||
| + | | class="small" align="center" valign="center" style="padding:0.5em" | [[Image:HHH.png|100x100px|link=the Horsemann]]<br>[[Horseless Headless Horsemann]] | ||
| + | | | ||
| + | {{Info}}The [[Dead Ringer]]'s feign death ability will allow you to survive one hit, however the Horsemann will continue to follow you even when cloaked. | ||
| − | + | {{Pro}}The [[Revolver]] and the [[Enforcer]] are the most viable weapons to use, although it should only be used against the Horsemann if it is focused on another player. | |
| − | + | {{Con}}The [[Spy]] is rather ineffective against the Horsemann as a [[Backstab]] only does normal knife damage, rendering its primary function useless. | |
| − | + | {{Con}}The [[Ambassador]] cannot score headshots against the Horsemann. | |
| − | + | {{Con}}As with any other on-hit effect weapons, [[Your Eternal Reward]], [[Conniver's Kunai]] and the [[Big Earner]] will not grant you a bonus upon getting the last hit on the Horsemann and should be avoided. | |
| − | |||
| − | + | |} | |
{{Map strategy}} | {{Map strategy}} | ||
Revision as of 23:36, 25 February 2012
| Community Mann Manor strategy | |
|---|---|

| |
| Basic Information | |
| Developer(s): | Unknown |
| Map Info | |
| Environment: | Halloween |
| Setting: | Nighttime |
| Hazards: | Pumpkin bombs, Horseless Headless Horsemann, Pit |
| Map Photos | |
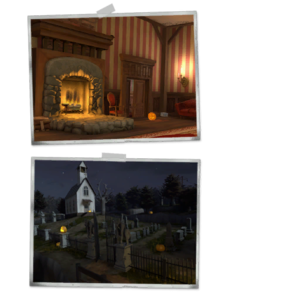
This article is about Community Mann Manor strategy.
General Map Strategy
- This map is a reskin of Mountain Lab, so any strategies that apply there will work here.
- When Halloween mode is enabled, the Horseless Headless Horsemann will spawn.
- The Horsemann can traverse the entire map except for spawn rooms and a few ledges, such as a rooftop between point A and B which Scouts, Soldiers and Demomen can access. If you are IT, going up here will cause HHH to lose interest and chase someone else.
- Wearing a Saxton Hale Mask or Horseless Headless Horsemann's Head will prevent you from getting stunned by the Horsemann.
General Horseless Headless Horsemann Strategy
| Class | Strategy | ||
|---|---|---|---|
 Scout |
vs | 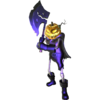 Horseless Headless Horsemann |
|
 Soldier |
vs |  Horseless Headless Horsemann |
|
 Pyro |
vs |  Horseless Headless Horsemann |
|
 Demoman |
vs |  Horseless Headless Horsemann |
|
 Heavy |
vs |  Horseless Headless Horsemann |
|
 Engineer |
vs |  Horseless Headless Horsemann |
|
 Medic |
vs |  Horseless Headless Horsemann |
|
 Sniper |
vs |  Horseless Headless Horsemann |
|
 Spy |
vs |  Horseless Headless Horsemann |
|
