Difference between revisions of "Yukon"
m (Applied filters to Yukon (Requested on User:WindBOT/PageRequests)) |
TerminalGear (talk | contribs) (added image gallery) |
||
| Line 6: | Line 6: | ||
}} | }} | ||
| + | {{stub}} | ||
'''Yukon''' is a standard five point control point map. It is one of the community maps chosen by [[Valve]] and was included in ''[[The Classless Update]]'' as an honorary official map due to its outstanding quality. | '''Yukon''' is a standard five point control point map. It is one of the community maps chosen by [[Valve]] and was included in ''[[The Classless Update]]'' as an honorary official map due to its outstanding quality. | ||
| Line 21: | Line 22: | ||
== Locations == | == Locations == | ||
The BLU and RED spawn rooms are at the far end respectively but change as the [[control points]] are captured. The winning team spawns at the control point before the nearest active one but the nearest a team can respawn is at the middle point. | The BLU and RED spawn rooms are at the far end respectively but change as the [[control points]] are captured. The winning team spawns at the control point before the nearest active one but the nearest a team can respawn is at the middle point. | ||
| + | <gallery> | ||
| + | Image:yukon_cp_01.jpg|Middle Point | ||
| + | Image:yukon_cp_02.jpg|Second Point | ||
| + | Image:yukon_cp_03.jpg|Final Point | ||
| + | </gallery> | ||
== Common strategies == | == Common strategies == | ||
Revision as of 23:10, 21 October 2010
| Yukon | |
|---|---|
| 300px | |
| Basic Information | |
| Developer(s): | Unknown |
| Map Photos | |
| Map Overview | |
| “You are so small! Is funny to me!” This article is a stub. As such, it is not complete. You can help Team Fortress Wiki by expanding it. |
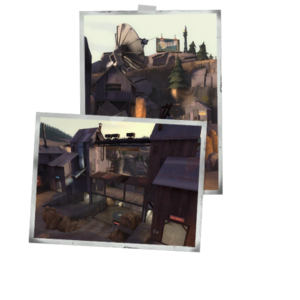
Yukon is a standard five point control point map. It is one of the community maps chosen by Valve and was included in The Classless Update as an honorary official map due to its outstanding quality.
Overview
| “ | This abandoned mountaintop coalmine was repurposed by shadowy operatives into a top secret surveillance outpost—one which also, so nobody gets wise, insidiously continues to mine coal. There is also a log hanging in the center of the map—possibly as an example to other logs. Logs that said too much.
Five control points promise a lot of momentum swings in this compact outdoor map, with plenty of tunnels and rocky outcroppings. Plenty of alternate routes ensure that if you can’t get past a well-placed Engineer through one tunnel, you might be able to sneak up behind them through another.
|
” |
Goal
Your team must capture and control all five control points.
Locations
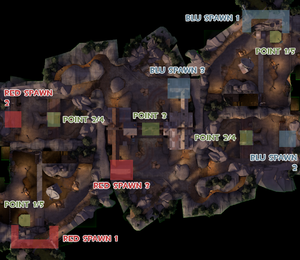
The BLU and RED spawn rooms are at the far end respectively but change as the control points are captured. The winning team spawns at the control point before the nearest active one but the nearest a team can respawn is at the middle point.
- Yukon cp 01.jpg
Middle Point
- Yukon cp 02.jpg
Second Point
- Yukon cp 03.jpg
Final Point
Common strategies
- Engineers can build at the edge of the bridge above central point, helping cement a capture.
- For Scouts, Spies, Pyros and Heavies it is preferable to take the route under the middle point to attack the enemy from behind.
Control Point Timing
| Control Point | Multiplier | Seconds | ||
|---|---|---|---|---|
| Control Point 1 and 5 | ×1 |
| ||
| ×2 |
| |||
| ×3 |
| |||
| ×4 |
| |||
| Control Point 2 and 4 | ×1 |
| ||
| ×2 |
| |||
| ×3 |
| |||
| ×4 |
| |||
| Control Point 3 | ×1 |
| ||
| ×2 |
| |||
| ×3 |
| |||
| ×4 |
|

