Well (Capture the Flag)
| Well (Capture the Flag) | |
|---|---|

| |
| Basic Information | |
| Map type: | Capture the Flag |
| File name: | ctf_well
|
| Released: | January 25, 2008 Patch |
| Variants: | Arena and Control Point |
| Developer(s): | Valve |
| Map Info | |
| Environment: | Industrial |
| Setting: | Daylight, sunny |
| Hazards: | Train, drowning |
| Deep Water: | Yes |
| Map Items | |
 Health Kits: |
 ×4 •  ×8 |
 Ammo Boxes: |
 ×8 •  ×10 |
| Map Photos | |
 | |
| Map overview | |
 | |
| “ | ...gonna take down to the pain train station in train town...
— The Demoman drunkenly trying to remember to catch a train
|
” |
Well is a Capture the Flag map added in the January 25, 2008 Patch, and was the first official map added after the game's initial release.
The map is set inside a train yard, with the middle of the map having two railway tracks with constantly passing trains
Introduction video
Locations
- Rocket Exhaust: The Intelligence lies in the heart of the team's bases. It sits on a small cart in the center of a circular launch platform. The platform is accessible through two sets of stairs on either side of the platform from the front and another two sets of stairs from the back. Above the Intelligence is a massive rocket. When the round ends, the rocket in the winning team's base starts releasing exhaust, as if it is about to launch.
- Rocker Room: This area can be accessed through two hallways that connect the Rocket Room to the Lobby. Above said hallways are another two entrances which emerge from out of the Command Room. Lining the walls of the Rocket Room are elevated catwalks that overlook the area, they begin at the Command Room and lead all the way around to an area behind and above the point.
- Spawn: The spawn for both teams is located in a room just behind the Intelligence.
- Command Room: On the other side of the Rocket Room, opposite the Spawn, is a room filled with consoles and computers which overlooks the Rocket Room through a glass window.
- Lobby: The main room of each team's base. Two wide corridors leading to large roll-up doors are situated at each end of the room. A small room sits between the corridors, with a staircase to the Battlements and a one-way hatch leading to the canal outside the base. The spawn rooms are at either end of the Lobby. The right spawn room faces the door at the end of the corridor, while the left spawn room is set perpendicular to the door. Catwalks run the perimeter of the rear portion of the Lobby, leading to the Battlements through side hallways on the left and right.
- Doors: There are two large garage doors located on the ground floor which serve as the only entrances/exits to each team's main base. They lead to the Lobby.
- Pipe Room: Entering each base, there is a hallway immediately to the side that connects the two entrances. There is a staircase that leads to a side hallway on the second floor, and a one-way dropdown that leads to the canal in the Yard.
- Battlements: A long, windowed corridor that runs the width of each team's base and overlooks the Yard outside. The other team's Battlements is visible from each team's base.
- Third Floor: The third floor of each team's base. A wooden floor runs the perimeter of the room, leading to a brickwork corridor to the Battlements on one side, and an open doorway to the Command Room overlooking the Rocket Room on the other. The center of the room opens up to the Lobby. Medium health packs and ammo pack lie on both sides of the room.
- Yard: The area between RED and BLU's bases. Outside each base is a deep canal, spanned by a bridge from each entrance. The canal is accessible from the Yard, or jumping in through the one-way hatch inside the Pipe Room. Two bridges outside each roll-up door cross the moat, leading to the central area of the yard. Many parked trains and boxcars provide cover, and the middle boxcar has a pile of crates and pallets that allow players to jump on top of the cars.
- Middle: The middle of the yard features a small, long shed, with a single active train running through it periodically. Two medium health packs and two small ammo crates lie on the tracks, on either side of the shed. Players hit by the train will be killed and buildings hit by the train will be destroyed, without any residual metal dropping.

The Middle.

The trainhouse in the center.

The BLU team's intel room.
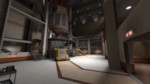
The RED team's intel room.


Strategy
Main article: Community Well (Capture the Flag) strategy
 | “Sun Tzu's got nothing on us!” This map's Community strategy page is a stub. As such, it is not complete. You can help the Team Fortress Wiki Community Strategy Project by expanding it. Notes: N/A |
Update history
January 25, 2008 Patch
- Added new capture the flag map
CTF_Well
- Fixed trains not starting on map spawn.
- Removed cap association from red spawns that were spamming console.
- Added
ctf_wellto the defaultmapcycle.txtfile. - Added
ctf_wellto the defaultmotd.txtfile.
- Updated
ctf_wellwith several exploit fixes.
June 19, 2008 Patch (Pyro Update)
- Added a route from the forward central foyer up to the battlements.
- Removed central building, reduced overall map length.
- Redistributed health and ammunition throughout the bases.
- Fixed players jumping out of the map.
- Added
ctf_wellto Casual Mode.
Gallery

A dove that could be seen atop a RED boxcar around the Middle after the June 8, 2011 Patch.
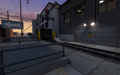
A dove that could be seen on the railings near the BLU team's Yard.
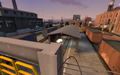
A dove that could be seen atop a train gate near the Middle.


