| Junction
|

|
| Basic Information
|
| Developer(s): |
{{{map-developer}}}
|
| Map Photos
|
|
|
| Map Overview
|
|
|
Junction is an Attack/Defend style control point map. It was included with The Scout Update as an official community developed map due to its outstanding quality. Its design is similar to Gravel Pit.
"A Gravel Pit style map. Junction is a sharp contrast to Watchtower. It’s full of tight spaces and short sight lines, which create combat opportunities dominated by ambushes and explosive weaponry."[1]
Goal
BLU is attacking and must capture all three points in order to win the match. A and B must be captured before C can be. For RED to win, they must hold out and prevent BLU from capturing the final point C. Time is added to the countdown if BLU captures either points A or B in order to buy more time for capture point C.
Locations
Overview
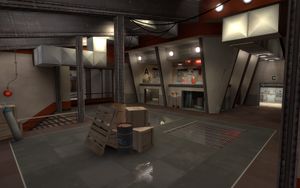
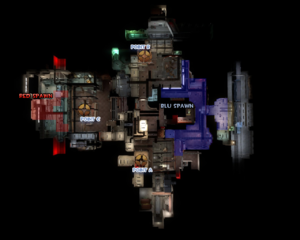
Junction is a tight, enclosed map with lots of hallways and passages leading to the three main control points. Make use of the Demoman and Soldier classes here for optimal results defensively and offensively.
In this map, BLU's objectives are first to capture point A and B (not consecutively), and C after the first two are captured.
Control Point A is located in a small room; it lies on an elevated platform with two sets of stairs leading up to it. The stairways are underneath the point itself, one in front facing BLU's spawn and one on the side.
Control Point B is located in a larger room with a balcony that covers two walls within it. B is in the corner where the two balconies meet, and it is only accessible through two side doorways. The point itself is covered by an indestructible window, preventing enemy fire directly on the point. Two stairways border and lead up to the point.
Control Point C is located on a platform that rests on an elevated area that is, again, only accessible by stairs. The point itself has a small balcony surrounding it's front side and two side doors. Stairs lead from the point down to the elevated area. The elevated area also has stairs leading down to ground level. There are three entrances to C, two from A and one from B. The entrance from B is at the bottom of a flight of stairs, and the two from A are small doorways.
Common Strategies
- Engineers are most useful when placing Sentry Guns directly on or near the control points. Control Point A provides a nice balcony to cover the BLU spawn entrance. Control Point B holds two balconies that are great for covering the control point and the two entrances three entrances leading to the room. Control Point C wields a balcony directly outside the point that is perfect for covering all angles of the point.
- Spies are great for offense on this map because of the many different routes and connections between all of the control points. It is possible to fool the RED team without even cloaking behind their front lines. Use your Cloak only for getting behind Control Point C will heed great results.
- Junction features low ceilings and relatively enclosed points, leaving players with less room to maneuver than on other maps. This makes Demomen a great choice for both attacking and defending. The encapsulated control points at B and C allow Demomen on defense to place sticky bombs where they cannot be destroyed without entering the control point itself.
Control Point Timing
| Control Point A
|
×1
|
|
| ×2
|
|
| ×3
|
|
| ×4
|
|
| Control Point B
|
×1
|
|
| ×2
|
|
| ×3
|
|
| ×4
|
|
| Control Point C
|
×1
|
|
| ×2
|
|
| ×3
|
|
| ×4
|
|
Trivia
- Junction's Control Points have the same name as the Control Points from Gravel Pit (i.e. Point C is still called "The Laser Gun")
External links


