Difference between revisions of "Example"
m (population=mission) |
(Updating images to PNG instead of JPG. Also added small note about previous SDK installations.) |
||
| Line 15: | Line 15: | ||
== Install instructions == | == Install instructions == | ||
| − | # Install the Source SDK, | + | # Install the Source SDK (if you have already installed it, make sure to refresh content within the SDK itself). |
# Copy the BSP and NAV files from "%program files%\Steam\steamapps\%steamname%\sourcesdk_content\tf\mvm" to your TF2 maps folder. | # Copy the BSP and NAV files from "%program files%\Steam\steamapps\%steamname%\sourcesdk_content\tf\mvm" to your TF2 maps folder. | ||
# Copy the .pop to "%program files%\Steam\steamapps\%steamname%\team fortress 2\tf\scripts\population". You will likely need to create the population folder. | # Copy the .pop to "%program files%\Steam\steamapps\%steamname%\team fortress 2\tf\scripts\population". You will likely need to create the population folder. | ||
| Line 21: | Line 21: | ||
== Gallery == | == Gallery == | ||
<gallery widths=150px heights=90px> | <gallery widths=150px heights=90px> | ||
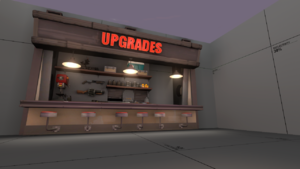
| − | File:Example1. | + | File:Example1.png | The defenders' spawn. |
| − | File:Example2. | + | File:Example2.png | The bot spawns. |
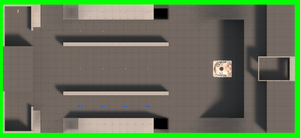
| − | File:Example3. | + | File:Example3.png | An overview of the whole map. |
| − | File:Example4. | + | File:Example4.png | Ditto. |
</gallery> | </gallery> | ||
Revision as of 19:24, 2 September 2012
| “You are so small! Is funny to me!” This article is a stub. As such, it is not complete. You can help Team Fortress Wiki by expanding it. |
| Example | |
|---|---|

| |
| Basic Information | |
| Developer(s): | {{{map-developer}}} |
| Map Info | |
| Environment: | Dev Textures |
| Setting: | Day |
| Map Items | |
| None | |
| Map Overview | |
Example is an example map that comes with the source SDK. It shows the minimum needed entity setup for a functioning Mann vs. Machine map as well as including a mission that showcases all features in the mission file format in a decently sane manner. The provided mission file starts all players with 20,000 credits to spend on upgrades.
The map is one long field with the floor split into three trenches, separated by low walls. The middle trench is twice as wide as the other trenches and the side trenches has raised flanking areas on their outsides. The spawn room sits on top of a cliff overlooking the bomb hatch and has ramps on the sides. There are dead end closets in the cliff, intended as spawn areas for Spy bots. The bots spawn from a cliff on the opposite side of the map and the cliff has two tunnels where tanks spawn.
Install instructions
- Install the Source SDK (if you have already installed it, make sure to refresh content within the SDK itself).
- Copy the BSP and NAV files from "%program files%\Steam\steamapps\%steamname%\sourcesdk_content\tf\mvm" to your TF2 maps folder.
- Copy the .pop to "%program files%\Steam\steamapps\%steamname%\team fortress 2\tf\scripts\population". You will likely need to create the population folder.
Gallery
| ||||||||||||||||||||||||||||||||||||||


