Difference between revisions of "Brimstone (map)"
m (Auto: WordFilter(==+ ?See also ?==+ → == See also ==), infoboxIndentFilter (Review RC#2263635)) |
|||
| Line 1: | Line 1: | ||
| − | + | {{hatnote|For the [[Classes|all class]] cosmetic item, see [[Brimstone]].}} | |
{{hatnote|For the [[Demoman]] cosmetic item, see [[A Whiff of the Old Brimstone]].}} | {{hatnote|For the [[Demoman]] cosmetic item, see [[A Whiff of the Old Brimstone]].}} | ||
{{Map infobox | {{Map infobox | ||
| Line 18: | Line 18: | ||
| map-ammo-pickups-large = 7 | | map-ammo-pickups-large = 7 | ||
}} | }} | ||
| − | {{Quotation|'''Brimstone's spooky workshop description'''|It's | + | {{Quotation|'''Brimstone's spooky workshop description'''|It's friday night of the living dead! Let's lose our minds, here we go for Halloween! |
| + | <br />Welcome to (fire and) Brimstone! The long awaited (well not really) cousin of Hellstone! Redmond Mann has risen from the depths of Hell and you must return him to that ghastly awful place! Do it, if you dare!}} | ||
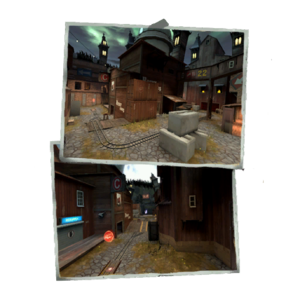
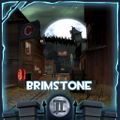
'''Brimstone''' is a [[Steam Workshop|community-created]] [[Payload]] map added in the [[Scream Fortress 2016]] update. Brimstone was [https://steamcommunity.com/sharedfiles/filedetails/?id=764966851 contributed] to the Steam Workshop, and is a [[Halloween map|Halloween version]]<!-- the workshop link is preserved in the Fifthcurve article --> of [[Fifthcurve]]. | '''Brimstone''' is a [[Steam Workshop|community-created]] [[Payload]] map added in the [[Scream Fortress 2016]] update. Brimstone was [https://steamcommunity.com/sharedfiles/filedetails/?id=764966851 contributed] to the Steam Workshop, and is a [[Halloween map|Halloween version]]<!-- the workshop link is preserved in the Fifthcurve article --> of [[Fifthcurve]]. | ||
| − | With the exception of the two buildings housing [[BLU]] Base and BLU's forward spawn, all | + | With the exception of the two buildings housing the [[BLU]] Base and BLU's forward spawn, all buildings are marked for [[RED]], with a number of interiors decorated as [[Non-player characters#Blutarch and Redmond Mann|Redmond Mann's]] personal quarters or offices. The battle portrays BLU pushing the risen Redmond in the Payload cart to deliver him back to Hell; Blutarch and [[Hellstone|Veikko]] are already there, [[:File:Brimstone Blutarch's Grave 01.png|waiting]]. |
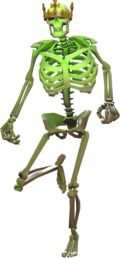
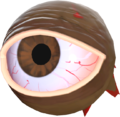
The map features the voice of [[Merasmus]], who casts spells on players for their suffering. The [[Horseless Headless Horsemann]], the [[Skeletons|Skeleton King]] and his minions, and [[MONOCULUS]] may appear. Merasmus himself may even appear if too much time is taken in the last area. | The map features the voice of [[Merasmus]], who casts spells on players for their suffering. The [[Horseless Headless Horsemann]], the [[Skeletons|Skeleton King]] and his minions, and [[MONOCULUS]] may appear. Merasmus himself may even appear if too much time is taken in the last area. | ||
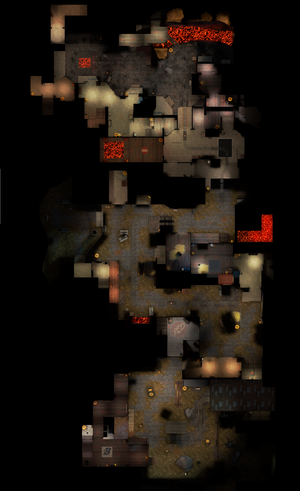
| − | Comparing this map with the previous year's [[Hellstone]] map, both are single-stage, five-point Payload maps having about the same distance to cover. But, | + | Comparing this map with the previous year's [[Hellstone]] map, both are single-stage, five-point Payload maps having about the same distance to cover. But, whereas Hellstone is close and tight, Brimstone is more open with long sight lines and a series of defensive upper-story sniping positions. Progressively stronger bosses can spawn ahead of the cart as it is pushed through both maps. Instead of monsters spawning at guaranteed predictable events, this map's monsters spawn with some spontaneity. Maybe the Horsemann or MONOCULUS will show up when the cart gets far enough, maybe not. Maybe [[Merasmus]] will show up soon after the 4th point is captured, maybe only as the cart is on the edge of the Pit, or maybe not at all. |
[[File:Brimstone Hell portal open.png|150px|thumb|left|Go into the light!]] | [[File:Brimstone Hell portal open.png|150px|thumb|left|Go into the light!]] | ||
| Line 35: | Line 36: | ||
''Note: The map's 5 control points are named after [[Spellbook Page|spellbook page]]s.'' | ''Note: The map's 5 control points are named after [[Spellbook Page|spellbook page]]s.'' | ||
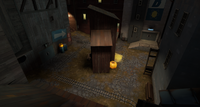
| − | * '''Lumber Mill''': The map opens on fairly simple, large open yard of a {{botignore|lumber mill}}. Even though the tracks run through low ground, some cover is provided by map structures until the cart reaches a long inclined slope. | + | * '''Lumber Mill''': The map opens on a fairly simple, large open yard of a {{botignore|lumber mill}}. Even though the tracks run through low ground, some cover is provided by map structures until the cart reaches a long inclined slope. |
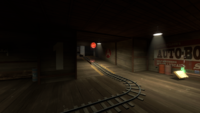
| − | * '''Garage''': After the inclined slope, the track turns into the long interior of the Garage; this track has a straight line of sight from BLU | + | * '''Garage''': After the inclined slope, the track turns into the long interior of the Garage; this track has a straight line of sight from the BLU base. However, just before the capture point, the track turns into the capture point between two inclined slopes that are exposed to a range of RED fire. |
[[File:Brimstone Capture Point A.png|200px|thumb|Capture point A from inside the Garage.]] | [[File:Brimstone Capture Point A.png|200px|thumb|Capture point A from inside the Garage.]] | ||
| − | * '''Tumidum (A)''': Capture of the first point causes the opening of the shortcut between BLU Base and Gratanter (B). Capture of the first point also causes the arrival of Merasmus (voice only) | + | * '''Tumidum (A)''': Capture of the first point causes the opening of the shortcut between BLU Base and Gratanter (B). Capture of the first point also causes the arrival of Merasmus (voice only), who shortly after begins casting spells on the players. |
[[File:Brimstone alternate tracks.png|200px|thumb|Alternate track routes around Wet Paint!]] | [[File:Brimstone alternate tracks.png|200px|thumb|Alternate track routes around Wet Paint!]] | ||
* '''Wet Paint!''': Shortly after the first point, the track has two alternate courses around the tower in the middle of the square. Selection of the path taken is random, complicating RED's defense of this section. | * '''Wet Paint!''': Shortly after the first point, the track has two alternate courses around the tower in the middle of the square. Selection of the path taken is random, complicating RED's defense of this section. | ||
| − | * '''BLU's advanced spawn''': In the corner behind Wet Paint!, the advanced spawn for BLU has two alternate sets of doors; the first set of doors open on the side of Gratanter (B), the second set of doors open on the side of Audere (C). | + | * '''BLU's advanced spawn''': In the corner behind Wet Paint!, the advanced spawn for BLU has two alternate sets of doors; the first set of doors open on the side of Gratanter (B), while the second set of doors open on the side of Audere (C). |
[[File:Brimstone Capture Point B and C.png|200px|thumb|Capture points B and C; Library to the right. The Horsemann spawns near the autumn leaves.]] | [[File:Brimstone Capture Point B and C.png|200px|thumb|Capture points B and C; Library to the right. The Horsemann spawns near the autumn leaves.]] | ||
[[File:Brimstone Capture Point D.png|200px|thumb|Warehouse: interior hall and capture point D.]] | [[File:Brimstone Capture Point D.png|200px|thumb|Warehouse: interior hall and capture point D.]] | ||
| − | * '''Gratanter (B)''': Capture of the second point opens | + | * '''Gratanter (B)''': Capture of the second point opens BLU's advanced spawn doors on that side. This capture also switches RED to its second spawn. |
| − | * '''Satellite Dish/Library/Dump Truck''': The two-story Library has a commanding view of Gratanter (B) and the Dump Truck choke point. | + | * '''Satellite Dish/Library/Dump Truck''': The two-story Library has a commanding view of Gratanter (B) and the Dump Truck choke point. If he spawns, the Horseless Headless Horsemann spawns between the Library and the concrete blocks (behind the bunch of autumn leaves). |
* '''First RED Spawn''': The Skeleton King's spawn point is inside the alcove to the right of the RED spawn. | * '''First RED Spawn''': The Skeleton King's spawn point is inside the alcove to the right of the RED spawn. | ||
| − | * '''Audere (C)''': Capture of the third point switches | + | * '''Audere (C)''': Capture of the third point switches BLU's advanced spawn doors to this side, and switches RED spawning to the final RED Base. |
| − | * '''Sniper Nest''': The Sniper Nest commands the approach to Congeriae (D). Decently supplied with Ammo, it has good communication with the second RED spawn in the Warehouse and, given proper support, is difficult to take with a frontal assault. | + | * '''Sniper Nest''': The Sniper Nest commands the approach to Congeriae (D). Decently supplied with Ammo, it has good communication with the second RED spawn in the Warehouse and, given proper support, is difficult to take with a frontal assault.<!-- should this be here? sounds more like strategy than a desc of a location--> |
* '''Warehouse''': The Warehouse sets up a battle over the long hall with opposing balconies, which are secure to either side. | * '''Warehouse''': The Warehouse sets up a battle over the long hall with opposing balconies, which are secure to either side. | ||
| − | * '''Congeriae (D)''': Some time after capture of the 4th point, as | + | * '''Congeriae (D)''': Some time after the capture of the 4th point, as the game progresses, several coffins in the final area open white portals to the island in Hell. |
[[File:Brimstone Capture Point E.png|200px|thumb|Final point E; cart dump into the Hell Pit.]] | [[File:Brimstone Capture Point E.png|200px|thumb|Final point E; cart dump into the Hell Pit.]] | ||
* '''Veteris (E)''': Capturing this point returns Redmond to Hell. The blast unleashes the fires and bats out of Hell. The Gibus-wearing Ghost that has been following the action is seen flying away. | * '''Veteris (E)''': Capturing this point returns Redmond to Hell. The blast unleashes the fires and bats out of Hell. The Gibus-wearing Ghost that has been following the action is seen flying away. | ||
| − | * '''Hell Island''': The Underworld of this map has an island surrounded by [[Environmental Death#Lava|infernal lava]]. Players on the island suffer the [[Environmental Death#Health drain|Underworld health drain]] that increases in damage | + | * '''Hell Island''': The Underworld of this map has an island surrounded by [[Environmental Death#Lava|infernal lava]]. Players on the island suffer the [[Environmental Death#Health drain|Underworld health drain]] that increases in damage over time. Hell Island has two sections, and at the distant end of each section is a glowing white portal exit back to the map. Three Rare Magic Spells pickups are available in each section. Several Skeletons spawn near the exits and chase down any players. |
** [[File:Brimstone Purgatory.png|200px|thumb|Purgatory.]]One section, Purgatory, is reached by jumping through the purple portals left by teleporting MONOCULUS. | ** [[File:Brimstone Purgatory.png|200px|thumb|Purgatory.]]One section, Purgatory, is reached by jumping through the purple portals left by teleporting MONOCULUS. | ||
*** Arriving at Purgatory, players are restored to full health. | *** Arriving at Purgatory, players are restored to full health. | ||
*** Stepping into the Purgatory exit portal instantly teleports the player back into the main map, and grants [[Invulnerability]], a 200% [[overheal]], a speed boost, and a [[Critical hits|crit boost]] for a limited time.[[File:Brimstone Hell 01.png|200px|thumb|Hell Island.]] | *** Stepping into the Purgatory exit portal instantly teleports the player back into the main map, and grants [[Invulnerability]], a 200% [[overheal]], a speed boost, and a [[Critical hits|crit boost]] for a limited time.[[File:Brimstone Hell 01.png|200px|thumb|Hell Island.]] | ||
| − | ** The other section is reached by entering the coffins while the white portals are open, by jumping into the portal opened when MONOCULUS is killed, | + | ** The other section is reached by entering the coffins while the white portals are open, by jumping into the portal opened when MONOCULUS is killed, the Bombinomicon that appears if Merasmus is defeated, or the portal that opens over the exploded pit at the end of the round. |
*** Players receive a few seconds of Invulnerability upon arrival. | *** Players receive a few seconds of Invulnerability upon arrival. | ||
*** Heath is ''not'' restored on either arrival or departure. | *** Heath is ''not'' restored on either arrival or departure. | ||
| Line 80: | Line 81: | ||
Several of the spells that Merasmus casts have effects similar to those experienced on [[Ghost Fort]] or [[Moonshine Event]]; however, many spells he casts have no effect other than a sound cue. Spells that have notable effects on players include: | Several of the spells that Merasmus casts have effects similar to those experienced on [[Ghost Fort]] or [[Moonshine Event]]; however, many spells he casts have no effect other than a sound cue. Spells that have notable effects on players include: | ||
| − | * '''Tiny Melee Curse''': All players are shrunk and | + | * '''Tiny Melee Curse''': All players are shrunk and restricted to melee weapons. The "Day of Defeat" anthem adapted for [[DeGroot Keep]] plays through to the end of the curse. Players that are on uneven ground or are too close to a wall or some other object at the end of the curse suffer a [[Environmental death#Crushing|crushing]] death. |
| − | * '''Crit | + | * '''Crit Boosting''': All players are granted 100% critical hits. |
* '''Super Speed''': All players run faster. | * '''Super Speed''': All players run faster. | ||
| Line 88: | Line 89: | ||
* '''Skeleton Summons''': The Skeleton King and some [[Skeletons]] are summoned. | * '''Skeleton Summons''': The Skeleton King and some [[Skeletons]] are summoned. | ||
| − | * '''Jarate | + | * '''Jarate Curse''': All players suffer the effects of [[Jarate]]. |
* '''Shake Yer Boo-ty''': Random [[Environmental death#Shake|earthquakes]] occur between Tumidum (A) and Congeriae (D), [[Environmental death#Shake|jostling]] players and releasing hellish clouds of [[Environmental death#Steam|deadly steam]]. | * '''Shake Yer Boo-ty''': Random [[Environmental death#Shake|earthquakes]] occur between Tumidum (A) and Congeriae (D), [[Environmental death#Shake|jostling]] players and releasing hellish clouds of [[Environmental death#Steam|deadly steam]]. | ||
| Line 95: | Line 96: | ||
==Halloween monsters== | ==Halloween monsters== | ||
[[File:Zepheniah Ghost.png|120px|thumb|Ghost]] | [[File:Zepheniah Ghost.png|120px|thumb|Ghost]] | ||
| − | [[File:Skeleton King.png|120px|thumb|The Skeleton King | + | [[File:Skeleton King.png|120px|thumb|The Skeleton King]] |
The Halloween enemies have randomized chances of spawning at various times or capture points. | The Halloween enemies have randomized chances of spawning at various times or capture points. | ||
| Line 102: | Line 103: | ||
** When the Tumidum (A) point is captured, a second hatless ghost spawns in the rear area of the RED team. This Ghost's paths tend to follow the tracks, occasionally interfering with BLU's push. | ** When the Tumidum (A) point is captured, a second hatless ghost spawns in the rear area of the RED team. This Ghost's paths tend to follow the tracks, occasionally interfering with BLU's push. | ||
* At any time between the captures of Tumidum (A) and Congeriae (D), the Skeleton King and several skeletons may be summoned by one of Merasmus' random spells. | * At any time between the captures of Tumidum (A) and Congeriae (D), the Skeleton King and several skeletons may be summoned by one of Merasmus' random spells. | ||
| − | * At any capture of either Gratanter (B) or Audere (C), there is a one-in-eight<ref>[[User talk:Mikado282#OneInEight|ICS]]</ref> chance of the [[Horseless Headless Horsemann]] appearing. | + | * At any capture of either Gratanter (B) or Audere (C), there is a one-in-eight<ref name="ics">[[User talk:Mikado282#OneInEight|ICS]]</ref> chance of the [[Horseless Headless Horsemann]] appearing. |
| − | ** Horsemann (B) should center on Audere and will not chase players much further than either Wet Paint! or Congeriae. | + | ** The Horsemann (B) should center on Audere and will not chase players much further than either Wet Paint! or Congeriae. |
| − | ** Horsemann (C) should work its way towards Veteris and once near there will not chase players much further back than Congeriae. | + | ** The Horsemann (C) should work its way towards Veteris and once near there will not chase players much further back than Congeriae. |
| − | * At any capture of Congeriae (D), there is a one-in-eight chance of [[MONOCULUS]] appearing, spawning over the open [[Environmental death#Lava| | + | * At any capture of Congeriae (D), there is a one-in-eight chance of [[MONOCULUS]] appearing, spawning over the open [[Environmental death#Lava|lava pit]] in direct view of the capture point.<ref name="ics" /> |
| − | * If play continues for more than 6. | + | * If play continues for more than 6.67 minutes (400 seconds) after capture of Congeriae (D), [[Merasmus]] will appear some time in the next 20 seconds, should the game continue that long.<ref>[[User talk:Mikado282#666|ICS]]</ref> |
<gallery> | <gallery> | ||
File:HHH.png|The Horseless Headless Horsemann. | File:HHH.png|The Horseless Headless Horsemann. | ||
| Line 119: | Line 120: | ||
<!-- These are very general strategies, anything more detailed should go into the Community strategy --> | <!-- These are very general strategies, anything more detailed should go into the Community strategy --> | ||
'''"Go on, pretend Merasmus isn't even here."''' (see [[Community Brimstone strategy#General Merasmus Strategy|General Merasmus Strategy]]) General mechanics for dealing with or exploiting the monsters on other maps apply here as well. However, even if there may be various tactical reasons to attack certain monsters, in general no objectives or achievements are to be gained by attacking the monsters in any form. The monsters are there only as distractions and disruptions, adding chaos and spontaneity to the holiday theme. Player's interaction with the monsters should be avoiding monster damage to their own team while encouraging as much monster damage as possible to the other team. | '''"Go on, pretend Merasmus isn't even here."''' (see [[Community Brimstone strategy#General Merasmus Strategy|General Merasmus Strategy]]) General mechanics for dealing with or exploiting the monsters on other maps apply here as well. However, even if there may be various tactical reasons to attack certain monsters, in general no objectives or achievements are to be gained by attacking the monsters in any form. The monsters are there only as distractions and disruptions, adding chaos and spontaneity to the holiday theme. Player's interaction with the monsters should be avoiding monster damage to their own team while encouraging as much monster damage as possible to the other team. | ||
| − | * Neither team can have any reliance on the relatively unlikely appearance of the Horsemann or MONOCULUS. However, Skeletons can be expected to appear at least once in any round, | + | * Neither team can have any reliance on the relatively unlikely appearance of the Horsemann or MONOCULUS. However, Skeletons can be expected to appear at least once in any round, Ghosts are a continuous presence around the cart, and Merasmus is almost certain to disrupt any effective RED defense. |
* '''"This never gets old!."''': The better RED's defense is, the more spells Merasmus casts. BLU should rapidly assess any spell effect for any opportunity to break a strong RED position. Likewise, RED can see a late Skeletons spawn as a chance to force BLU to give up ground. | * '''"This never gets old!."''': The better RED's defense is, the more spells Merasmus casts. BLU should rapidly assess any spell effect for any opportunity to break a strong RED position. Likewise, RED can see a late Skeletons spawn as a chance to force BLU to give up ground. | ||
| − | * '''"It's so beautiful!"''':<ref>''[[w:A Bug's Life|A Bug's Life]]''</ref> RED should take some care jumping "into the light" at the last point; on the one hand, leaving the underworld to BLU grants them access to powerful spells that can blast through the final defense, but on the other hand, rushing into the light ''[[wikt:en masse|en masse]]'' effectively abandons the final defensive position. | + | * '''"It's so beautiful!"''':<ref>''[[w:A Bug's Life|A Bug's Life]]''</ref> RED should take some care jumping "into the light" at the last point; on the one hand, leaving the underworld to BLU grants them access to powerful spells that can blast through the final defense, but on the other hand, rushing into the light ''[[wikt:en masse|en masse]]'' effectively abandons the final defensive position. BLU should judge if any large number of RED players rushing into the light is an opportunity to advance the cart or to wipe out under-protected Sentry Guns and Dispensers. |
* '''"What goes around comes around."''':<ref>''[[w:The Year of Living Dangerously|The Year of Living Dangerously]]''</ref> Earlier Horsemann or Skeleton spawns tend to disrupt RED's defense while later spawns tend to attack BLU from behind. | * '''"What goes around comes around."''':<ref>''[[w:The Year of Living Dangerously|The Year of Living Dangerously]]''</ref> Earlier Horsemann or Skeleton spawns tend to disrupt RED's defense while later spawns tend to attack BLU from behind. | ||
* '''"How are we for time?"''':<ref>Great Prophet Zarquon, [https://books.google.com/books?id=mO-62VxpLe0C&q ''The Hitchhiker's Guide to the Galaxy'' (search inside, end of chapter 18)].</ref> The late appearance of Merasmus is particularly disruptive to the RED defense and Merasmus will spare no Sentry Guns. | * '''"How are we for time?"''':<ref>Great Prophet Zarquon, [https://books.google.com/books?id=mO-62VxpLe0C&q ''The Hitchhiker's Guide to the Galaxy'' (search inside, end of chapter 18)].</ref> The late appearance of Merasmus is particularly disruptive to the RED defense and Merasmus will spare no Sentry Guns. | ||
| − | * '''"Biggy Wiggy"''':<ref>The Inspector, episode | + | * '''"Biggy Wiggy"''':<ref>The Inspector, episode [https://youtu.be/UrdwVfrAHWU?t=187 ''Transylvania Mania''].</ref> As time runs out on the Tiny Melee Curse, the player should stay away from walls, carts, objects, and uneven ground to avoid the crushing death at the end of the spell. |
==Gallery== | ==Gallery== | ||
| Line 130: | Line 131: | ||
File:brimstoneeventworkshopImage.jpeg| Brimstone's workshop map icon. | File:brimstoneeventworkshopImage.jpeg| Brimstone's workshop map icon. | ||
File:Secretskullisland.jpeg| The hidden island in Hell. | File:Secretskullisland.jpeg| The hidden island in Hell. | ||
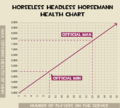
| − | File:Horseless Headless Horseman HP Chart.png| Damage graph showing the number of players vs. the | + | File:Horseless Headless Horseman HP Chart.png| Damage graph showing the number of players vs. the Horsemann's health. |
File:Brimstone Blutarch's Grave 01.png|Blutarch Mann's Grave on Hell Island. | File:Brimstone Blutarch's Grave 01.png|Blutarch Mann's Grave on Hell Island. | ||
| − | File:Brimstone Blutarch 01.png|Blutarch's | + | File:Brimstone Blutarch 01.png|Blutarch's minecart model used to show the tombstone. |
File:Brimstone Hidden Ghost models.png|Models for the Ghost animations, hidden in the Grey Gravel building. | File:Brimstone Hidden Ghost models.png|Models for the Ghost animations, hidden in the Grey Gravel building. | ||
</gallery> | </gallery> | ||
| Line 160: | Line 161: | ||
== See also == | == See also == | ||
* [[Helltower]], Redmond is taken to Hell. | * [[Helltower]], Redmond is taken to Hell. | ||
| − | * [[Gorge Event]], Redmond has escaped from Hell with his coffin; BLU assaults his mansion to send him back | + | * [[Gorge Event]], Redmond has escaped from Hell with his coffin; BLU assaults his mansion to send him back. |
==References== | ==References== | ||
Revision as of 18:21, 7 October 2017
| Brimstone (map) | |
|---|---|
| |
| Basic Information | |
| Developer(s): | {{{map-developer}}} |
| Map Info | |
| Environment: | Halloween |
| Setting: | Nighttime, overcast |
| Hazards: | Lava, Pumpkin bombs, Skeletons, Monoculus, Ghost, Horseless Headless Horseman, Merasmus, Steam |
| Map Photos | |
| Map Overview | |
| “ | It's friday night of the living dead! Let's lose our minds, here we go for Halloween!
Welcome to (fire and) Brimstone! The long awaited (well not really) cousin of Hellstone! Redmond Mann has risen from the depths of Hell and you must return him to that ghastly awful place! Do it, if you dare! — Brimstone's spooky workshop description
|
” |
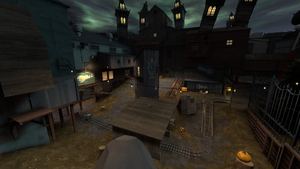
Brimstone is a community-created Payload map added in the Scream Fortress 2016 update. Brimstone was contributed to the Steam Workshop, and is a Halloween version of Fifthcurve.
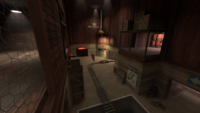
With the exception of the two buildings housing the BLU Base and BLU's forward spawn, all buildings are marked for RED, with a number of interiors decorated as Redmond Mann's personal quarters or offices. The battle portrays BLU pushing the risen Redmond in the Payload cart to deliver him back to Hell; Blutarch and Veikko are already there, waiting.
The map features the voice of Merasmus, who casts spells on players for their suffering. The Horseless Headless Horsemann, the Skeleton King and his minions, and MONOCULUS may appear. Merasmus himself may even appear if too much time is taken in the last area.
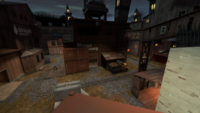
Comparing this map with the previous year's Hellstone map, both are single-stage, five-point Payload maps having about the same distance to cover. But, whereas Hellstone is close and tight, Brimstone is more open with long sight lines and a series of defensive upper-story sniping positions. Progressively stronger bosses can spawn ahead of the cart as it is pushed through both maps. Instead of monsters spawning at guaranteed predictable events, this map's monsters spawn with some spontaneity. Maybe the Horsemann or MONOCULUS will show up when the cart gets far enough, maybe not. Maybe Merasmus will show up soon after the 4th point is captured, maybe only as the cart is on the edge of the Pit, or maybe not at all.
In the spaces between the last two capture points lie a number of scattered coffins showing a white light within. Sometime after the 4th point is captured, the lids of these coffins disappear and a hidden haunted calliope winds up and plays "Misfortune Teller". Players who "go into the light" are transported to a Hell populated with rare Magic Spells, Skeletons, and, usually, other players shooting at them.
Contents
Locations
Note: The map's 5 control points are named after spellbook pages.
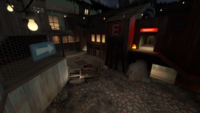
- Lumber Mill: The map opens on a fairly simple, large open yard of a lumber mill. Even though the tracks run through low ground, some cover is provided by map structures until the cart reaches a long inclined slope.
- Garage: After the inclined slope, the track turns into the long interior of the Garage; this track has a straight line of sight from the BLU base. However, just before the capture point, the track turns into the capture point between two inclined slopes that are exposed to a range of RED fire.
- Tumidum (A): Capture of the first point causes the opening of the shortcut between BLU Base and Gratanter (B). Capture of the first point also causes the arrival of Merasmus (voice only), who shortly after begins casting spells on the players.
- Wet Paint!: Shortly after the first point, the track has two alternate courses around the tower in the middle of the square. Selection of the path taken is random, complicating RED's defense of this section.
- BLU's advanced spawn: In the corner behind Wet Paint!, the advanced spawn for BLU has two alternate sets of doors; the first set of doors open on the side of Gratanter (B), while the second set of doors open on the side of Audere (C).
- Gratanter (B): Capture of the second point opens BLU's advanced spawn doors on that side. This capture also switches RED to its second spawn.
- Satellite Dish/Library/Dump Truck: The two-story Library has a commanding view of Gratanter (B) and the Dump Truck choke point. If he spawns, the Horseless Headless Horsemann spawns between the Library and the concrete blocks (behind the bunch of autumn leaves).
- First RED Spawn: The Skeleton King's spawn point is inside the alcove to the right of the RED spawn.
- Audere (C): Capture of the third point switches BLU's advanced spawn doors to this side, and switches RED spawning to the final RED Base.
- Sniper Nest: The Sniper Nest commands the approach to Congeriae (D). Decently supplied with Ammo, it has good communication with the second RED spawn in the Warehouse and, given proper support, is difficult to take with a frontal assault.
- Warehouse: The Warehouse sets up a battle over the long hall with opposing balconies, which are secure to either side.
- Congeriae (D): Some time after the capture of the 4th point, as the game progresses, several coffins in the final area open white portals to the island in Hell.
- Veteris (E): Capturing this point returns Redmond to Hell. The blast unleashes the fires and bats out of Hell. The Gibus-wearing Ghost that has been following the action is seen flying away.
- Hell Island: The Underworld of this map has an island surrounded by infernal lava. Players on the island suffer the Underworld health drain that increases in damage over time. Hell Island has two sections, and at the distant end of each section is a glowing white portal exit back to the map. Three Rare Magic Spells pickups are available in each section. Several Skeletons spawn near the exits and chase down any players.
- One section, Purgatory, is reached by jumping through the purple portals left by teleporting MONOCULUS.
- Arriving at Purgatory, players are restored to full health.
- Stepping into the Purgatory exit portal instantly teleports the player back into the main map, and grants Invulnerability, a 200% overheal, a speed boost, and a crit boost for a limited time.
- The other section is reached by entering the coffins while the white portals are open, by jumping into the portal opened when MONOCULUS is killed, the Bombinomicon that appears if Merasmus is defeated, or the portal that opens over the exploded pit at the end of the round.
- Players receive a few seconds of Invulnerability upon arrival.
- Heath is not restored on either arrival or departure.
- Teleporters and other buildings cannot be placed in the Underworld.
- One section, Purgatory, is reached by jumping through the purple portals left by teleporting MONOCULUS.
Merasmus spells
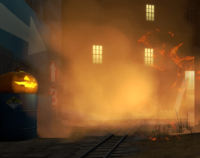
Several of the spells that Merasmus casts have effects similar to those experienced on Ghost Fort or Moonshine Event; however, many spells he casts have no effect other than a sound cue. Spells that have notable effects on players include:
- Tiny Melee Curse: All players are shrunk and restricted to melee weapons. The "Day of Defeat" anthem adapted for DeGroot Keep plays through to the end of the curse. Players that are on uneven ground or are too close to a wall or some other object at the end of the curse suffer a crushing death.
- Crit Boosting: All players are granted 100% critical hits.
- Super Speed: All players run faster.
- Skeleton Summons: The Skeleton King and some Skeletons are summoned.
- Jarate Curse: All players suffer the effects of Jarate.
- Shake Yer Boo-ty: Random earthquakes occur between Tumidum (A) and Congeriae (D), jostling players and releasing hellish clouds of deadly steam.
Halloween monsters
The Halloween enemies have randomized chances of spawning at various times or capture points.
- Two Ghosts spawn at random times and places, taking randomly selected fixed courses. These Ghosts continue to haunt the action around the cart as it moves through the map.
- The Gibus-wearing Ghost spawns from the beginning of the round and takes course generally supportive of BLU (entering openings from BLU's direction).
- When the Tumidum (A) point is captured, a second hatless ghost spawns in the rear area of the RED team. This Ghost's paths tend to follow the tracks, occasionally interfering with BLU's push.
- At any time between the captures of Tumidum (A) and Congeriae (D), the Skeleton King and several skeletons may be summoned by one of Merasmus' random spells.
- At any capture of either Gratanter (B) or Audere (C), there is a one-in-eight[1] chance of the Horseless Headless Horsemann appearing.
- The Horsemann (B) should center on Audere and will not chase players much further than either Wet Paint! or Congeriae.
- The Horsemann (C) should work its way towards Veteris and once near there will not chase players much further back than Congeriae.
- At any capture of Congeriae (D), there is a one-in-eight chance of MONOCULUS appearing, spawning over the open lava pit in direct view of the capture point.[1]
- If play continues for more than 6.67 minutes (400 seconds) after capture of Congeriae (D), Merasmus will appear some time in the next 20 seconds, should the game continue that long.[2]
Strategy
"Go on, pretend Merasmus isn't even here." (see General Merasmus Strategy) General mechanics for dealing with or exploiting the monsters on other maps apply here as well. However, even if there may be various tactical reasons to attack certain monsters, in general no objectives or achievements are to be gained by attacking the monsters in any form. The monsters are there only as distractions and disruptions, adding chaos and spontaneity to the holiday theme. Player's interaction with the monsters should be avoiding monster damage to their own team while encouraging as much monster damage as possible to the other team.
- Neither team can have any reliance on the relatively unlikely appearance of the Horsemann or MONOCULUS. However, Skeletons can be expected to appear at least once in any round, Ghosts are a continuous presence around the cart, and Merasmus is almost certain to disrupt any effective RED defense.
- "This never gets old!.": The better RED's defense is, the more spells Merasmus casts. BLU should rapidly assess any spell effect for any opportunity to break a strong RED position. Likewise, RED can see a late Skeletons spawn as a chance to force BLU to give up ground.
- "It's so beautiful!":[3] RED should take some care jumping "into the light" at the last point; on the one hand, leaving the underworld to BLU grants them access to powerful spells that can blast through the final defense, but on the other hand, rushing into the light en masse effectively abandons the final defensive position. BLU should judge if any large number of RED players rushing into the light is an opportunity to advance the cart or to wipe out under-protected Sentry Guns and Dispensers.
- "What goes around comes around.":[4] Earlier Horsemann or Skeleton spawns tend to disrupt RED's defense while later spawns tend to attack BLU from behind.
- "How are we for time?":[5] The late appearance of Merasmus is particularly disruptive to the RED defense and Merasmus will spare no Sentry Guns.
- "Biggy Wiggy":[6] As time runs out on the Tiny Melee Curse, the player should stay away from walls, carts, objects, and uneven ground to avoid the crushing death at the end of the spell.
Gallery
Update history
- Brimstone was added to the game.
- Fixed RED players getting inside BLU's 2nd forward spawn.
- Fixed skull's teeth in hell being non-solid.
- Fixed hell's coffin tune and tiny spell song sometimes playing to the next round from previous round.
- Fixed some players dropping into hell's lava in rare cases.
- Fixed big pumpkin in RED 2nd base being non-solid.
- Fixed exploit where players could get under the map near BLU starting area.
- Fixed exploit where players could get out of the map near graveyard.
- Fixed exploit where players could enter RED base as BLU.
- Fixed some skeletons running into lava when there are no enemies in Hell.
- Fixed medieval tiny spell & other Merasmus voice spells lasting too long for some players.
- Fixed big ghost getting stuck when map ends.
- Fixed a spot where players could get stuck if entering it under the Minify spell.
- Fixed another case of non-solid pumpkin.
- Tuned respawn time for RED team at last area.
See also
- Helltower, Redmond is taken to Hell.
- Gorge Event, Redmond has escaped from Hell with his coffin; BLU assaults his mansion to send him back.
References
- ↑ a b ICS
- ↑ ICS
- ↑ A Bug's Life
- ↑ The Year of Living Dangerously
- ↑ Great Prophet Zarquon, The Hitchhiker's Guide to the Galaxy (search inside, end of chapter 18).
- ↑ The Inspector, episode Transylvania Mania.
| ||||||||||||||||||||||||||||||||||||||||||||||||||||||||||||||||
