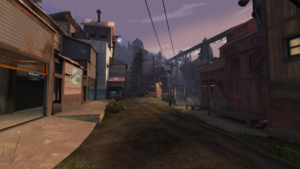
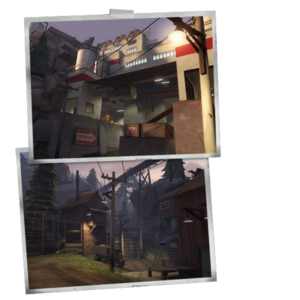
Mountain Lab is a community-created Attack/Defend Control Point map. Mountain Lab was a winner of TF2Maps.net's Art Pass Contest, and was released into the game on October 27, 2010 Patch with the Scream Fortress Update.
Mountain Lab is similar to Gorge in that it is a single-stage linear attack/defend, as opposed to Gravel Pit and Junction in which two control points may be captured by BLU when the round starts. Rather than having 2 linear control points or 3 non-linear control points, Mountain Lab and its Halloween variant, Mann Manor have 3 linear control points.
The setup timer is 1 minute and 15 seconds.
Locations
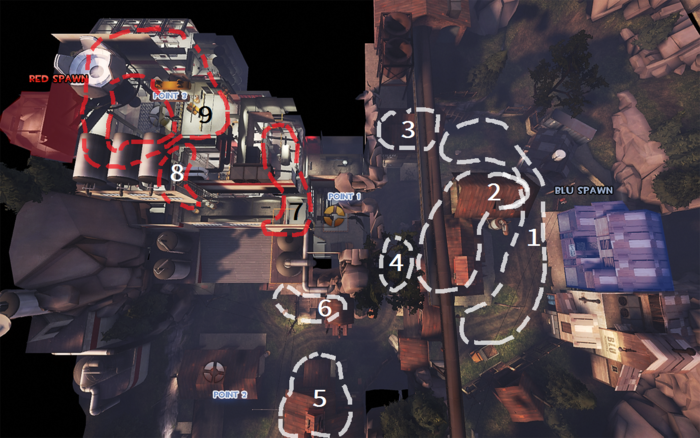
Note: If you are having trouble with finding the locations listed here, see the Helpful overview section to see their exact position marked on the map.
 The following locations are described from the BLU perspective.
Point A
- BLU Spawn: The BLU spawn is a small rectangular room with three exits. Two are to the front of the base through a shutter door, and one is rightwards through a small house into the Yard.
- Yard: The yard outside BLU's spawn, connects to the warehouse and the main chokepoint. A medium health and ammo pack can be found here.
- Warehouse: The small two-floor building directly across from the point, connects to BLU's spawn yard. It has a small balcony that overlooks the first point.
- Shed: The two-story shed across from the the Warehouse contains a large health and ammo pack. It has a main entrance facing the Tunnel and an alternative entrance through an open window in its second floor.
- Tunnel: A rock archway to one side provides a medium health kit and a main highway for both teams' travel. It connects the areas of Points A and B.
- Control Point A: The first control point is nested against the side of the RED facility. Behind it is an elevated platform that has a small health and ammo kit and is connected to a small office on the control point's right side.
- Shortcut: Located further behind the control point is an opening in the wall that allows the RED team to quickly access this area from their spawn. When the point is captured, the Shortcut is closed.
BLU's spawn yard and Warehouse entrance.
BLU's spawn yard and main chokepoint; Shed on the right.
Office spaces near Point A.
Point B
- Cliffs: The cliff that rest atop the Tunnel. A jump from the Cliff can be made to the roof of the Small House next to the rocky outcrop. The Cliff connects to the Crane House
- Small House: The house situated in front of the capture point's shack. Its entrance faces towards the Tunnel, away from the defending side, and offers good cover.
- Crane House: A narrow wooden structure that hugs the Cliffs. Located in between the Small and Crane Houses is a dirt road leading to the second point.
- Control Point B: The second point is located inside a wooden shack tucked into a corner and overlooked by the main entrance to the RED base. It has an elevated outcrop on the far side that offers good high ground advantage and a hole in the middle of its roof that overseers Point B. The shack contains a single small health pack.
- Base Entrance: The entrance to the RED base has two sets of stairs on both of its sides. One leads to an overlook of the yard and entrance to the Top Floor of RED's base, while the other leads to the Shortcut to Point A.
Small House, the shutter is innaccessible.
Yard in front of Tunnel and the Crane House.
Inside the Point B shack.
The entrances to RED's base.
Point C
- Lower Entrance Tunnels: The main entrance to the base is through a wide chokepoint that diverges into two tunnels.
- Left Tunnel: The long way leads directly to the final control point. Found along the way are a small health and ammo pack.
- Right Tunnel: The other path leads to the Command Room.
- Command Room: The room at the end of the Right Tunnel. It has a medium health and ammo pack. One of its walls is a giant window from which the point can be observed.
- Upper Entrance Tunnel: Above the main entrance, accessible via an outdoors stairway, is a tunnel that leads to the Top Floor.
- Top Floor: The Top Floor of the Base is a medium-sized room with a medium health and ammo pack. It has two exits: one leads to the Catwalks and the other to a stairwell that connects to the Server Room.
- Catwalks: High above the point is a series of flimsy catwalks that line the walls of the base. They connect the Top Floor to RED's spawn.
- Server Room: Located on Point C's right side is a cramped room leading to the Top Floor.
- Control Point: The final control point is in the heart of the RED facility, directly in front RED Spawn, surrounded by a lethal pit on three sides.
- RED Spawn: A two-story spawn. The bottom level has two exits to the left and right of Point C, while the top exit has staircases leading down to C or up to the Catwalks. Just outside the RED spawn is a medium health pack and ammo pack pair.
The Catwalks above the final point.
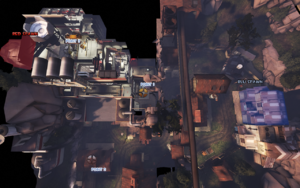
Helpful overview
1.Yard
2.Warehouse
3.House
4.Tunnel
5.Small House
6.Cliffs
7.Lower Entrance Tunnels
8.Upper Entrance Tunnels
9.Top Floor (Surrounding the final control point)
Strategy
Control Point timing
| Control Point A
|
×1
|
|
| ×2
|
|
| ×3
|
|
| ×4
|
|
| ×5
|
|
| Control Point B
|
×1
|
|
| ×2
|
|
| ×3
|
|
| ×4
|
|
| ×5
|
|
| Control Point C
|
×1
|
|
| ×2
|
|
| ×3
|
|
| ×4
|
|
| ×5
|
|
Update history
October 27, 2010 Patch (Scream Fortress Update)
- Added Mountain Lab to the game.
March 1, 2012 Patch
- Fixed several clipping issues.
July 10, 2013 Patch
- Fixed collision issues on the ladders and hill that lead to the first point
- Fixed static prop lighting
August 27, 2013 Patch
- Fixed clip brush exploit above hallway leading toward final cap.
- Fixed exploit where players could be trapped in small space near final cap using Teleporters.
March 5, 2014 Patch
- Fixed exploit on rafters near control point 2.
Bugs
- Players can be killed through spawn room during setup next to the exit on the front left by either explosives or fire when standing right next to the left exit door.
- Players may become stuck on the ladder on the path to the walkway above the archway after point A.
- It is possible to get stuck behind the truck near the first control point. Classes like the Scout and those with explosive jumping can still escape, though.
Trivia
- Outside of BLU spawn is a Sniper cut-out on the balcony of an out-of-bounds building. It falls over when shot by a bullet, shatters if hit with a Sniper Rifle and explodes when hit by an explosive.
- In the Small House near capture point B, if the player looks through the holes in the steel door to the left, they'll see a Soldier cut-out. It is destructible, but cannot be accessed by normal means.
Gallery
The building with the Sniper cut-out in the distance.
The Sniper cut-out up close.
External links

![]() The following locations are described from the BLU perspective.
The following locations are described from the BLU perspective.


